3D printer calibration
Sometimes the owner of a 3D printer has to do this. I will tell the habra-community about my method. Please note that the manual is detailed, but it leads to excellent results - the model sticks perfectly and is not peeled off during printing.
For a start, I note that I honed my skills on the SmartCore Aluminum printer, acquired here .
')
The heating (or non-heating, depending on the printer) platform must first be set in height. For this, there is a limit switch for the Z axis.
From Wikipedia:

With the help of long and clamping bolts, this limit switch can be adjusted in height.
It is necessary to expose it so that the surface of the platform clearly touches the extruder nozzle.
For further calibration, we will use Pronterface from the Printrun software package .
The advantage of this package is visual and convenient control of the nozzle and the printer platform, but if it is more convenient for someone to use Repsnapper , it will also work. Cura is not suitable for calibration, for lack of the necessary functionality.
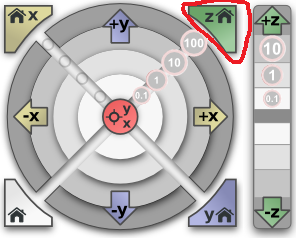
To continue, let's make sure that when you click on the “Calibration” button (“Home”, a white house is depicted), the platform rises and rests closely, but does not try to move further towards the nozzle.
So, as on my printer firmware was taken directly from the SmartCore Aluminum repository (albeit not directly from Marlin ), the nozzle travels to the middle of the platform. If you have it wrong, and the nozzle remains in the corner along the zero coordinates - that's okay, for further calibration it does not matter.
The following actions should be carried out alternately on the center, in the corners and in the control circle:
After we have completed the calibration at all five points and have checked them so that we don’t have to change anything, we can proceed to check the calibration result.
For verification, I use a simple model drawn in FreeCAD and generated by gcode in Cura. Plastic is the more accurate the diameter, the better - I take here because of the stated accuracy and variety of colors. However, for the test we will use the natural color of ABS plastic.
The meaning of a simple small test model is probably clear - saving money and time.
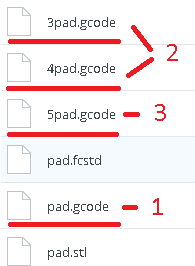
It is in this sequence that it makes sense to check. However, if you are confident in your calibration, you can immediately start from step 2. Well, if you already have experience and you are absolutely confident in your calibration, you can immediately proceed to step 3 - print 5pad.gcode.
The difference in the number and location of products.
I will describe the verification of the first step, since the others are similar.
Suppose one side of the platform is too high calibrated. It is very easy to detect as a result of:
View from above:
And what is more important now for us is the bottom view:
 - This is what the Cura rim rim looks like if the nozzle is too high to the platform. Plastic drops are not accurate, sometimes clinging to adjacent lines.
Consider the opposite situation - if the nozzle is too pressed to the platform:
As you can see, here, too, everything is not smooth, plastic, trying to fill the available space, clings to adjacent lines, and on the next layer the nozzle re-clings, is wiped again over the available space. However, it should be noted that in this case the model sticks very well, and the calibration defect is not visible on the next layers. Moreover, it may not even be noticeable at all if you choose a substrate in Cura for the model to stick to the table.
Finally, the desired and correct result:
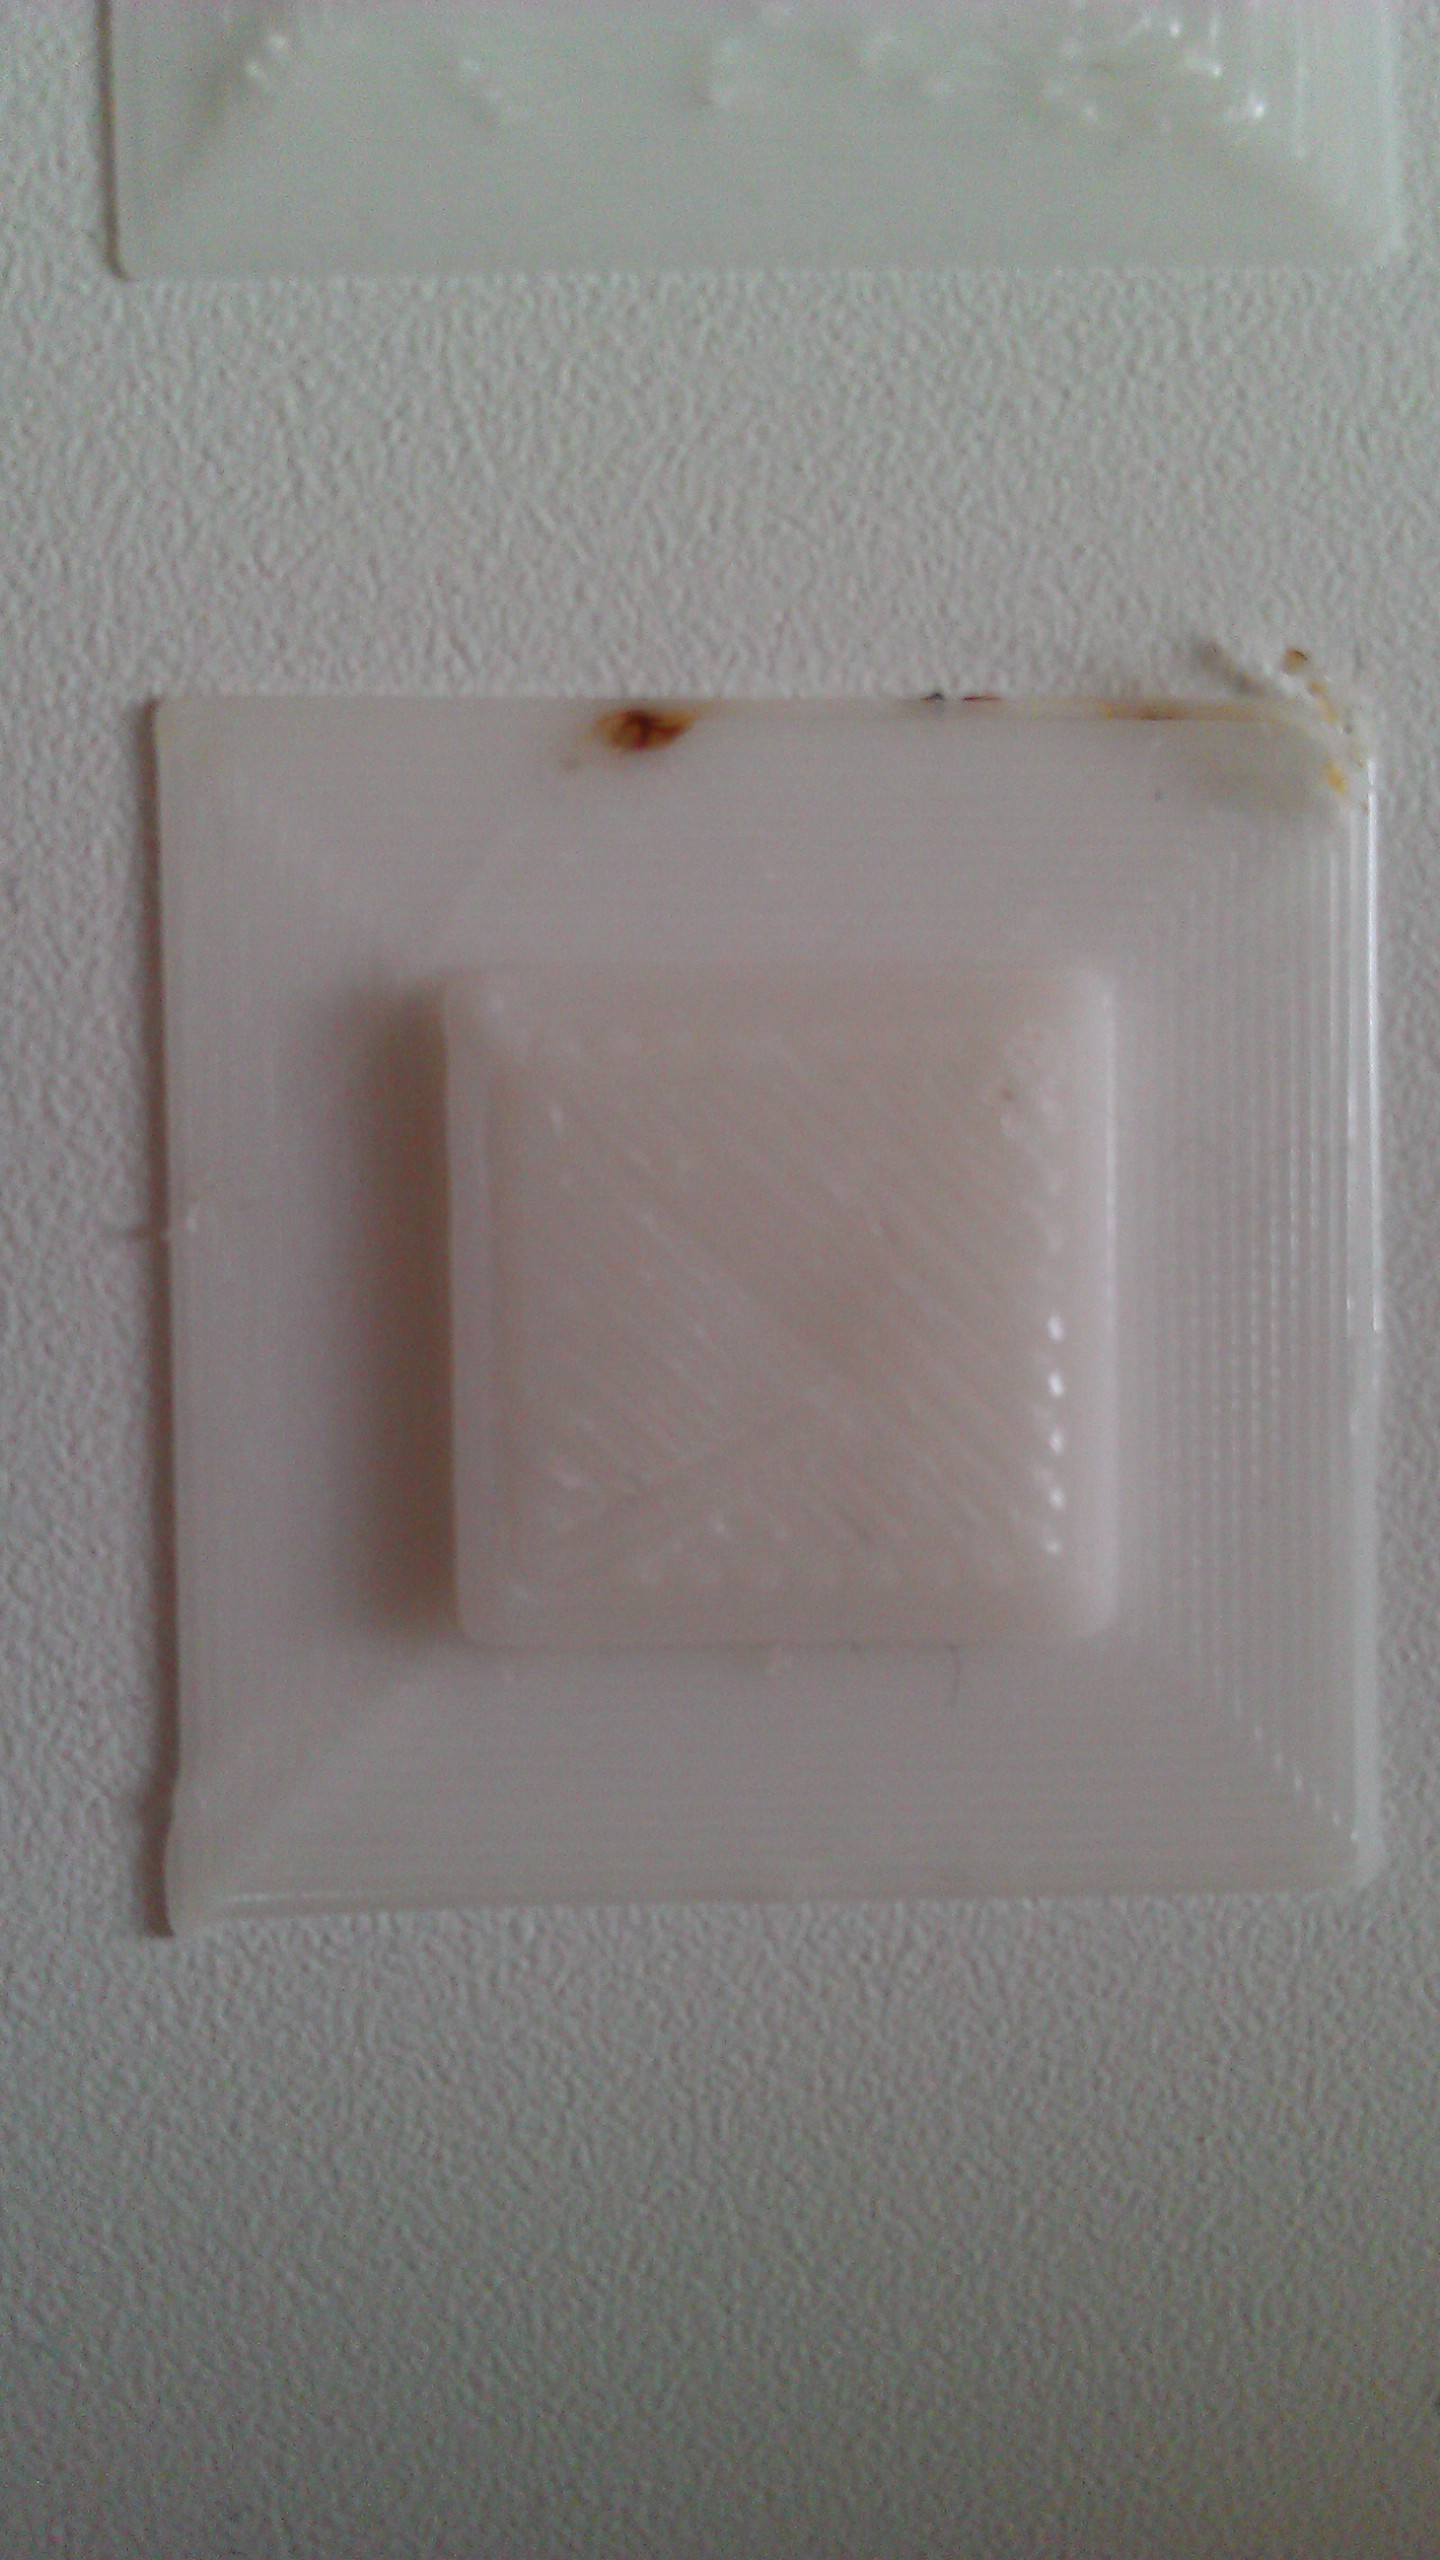
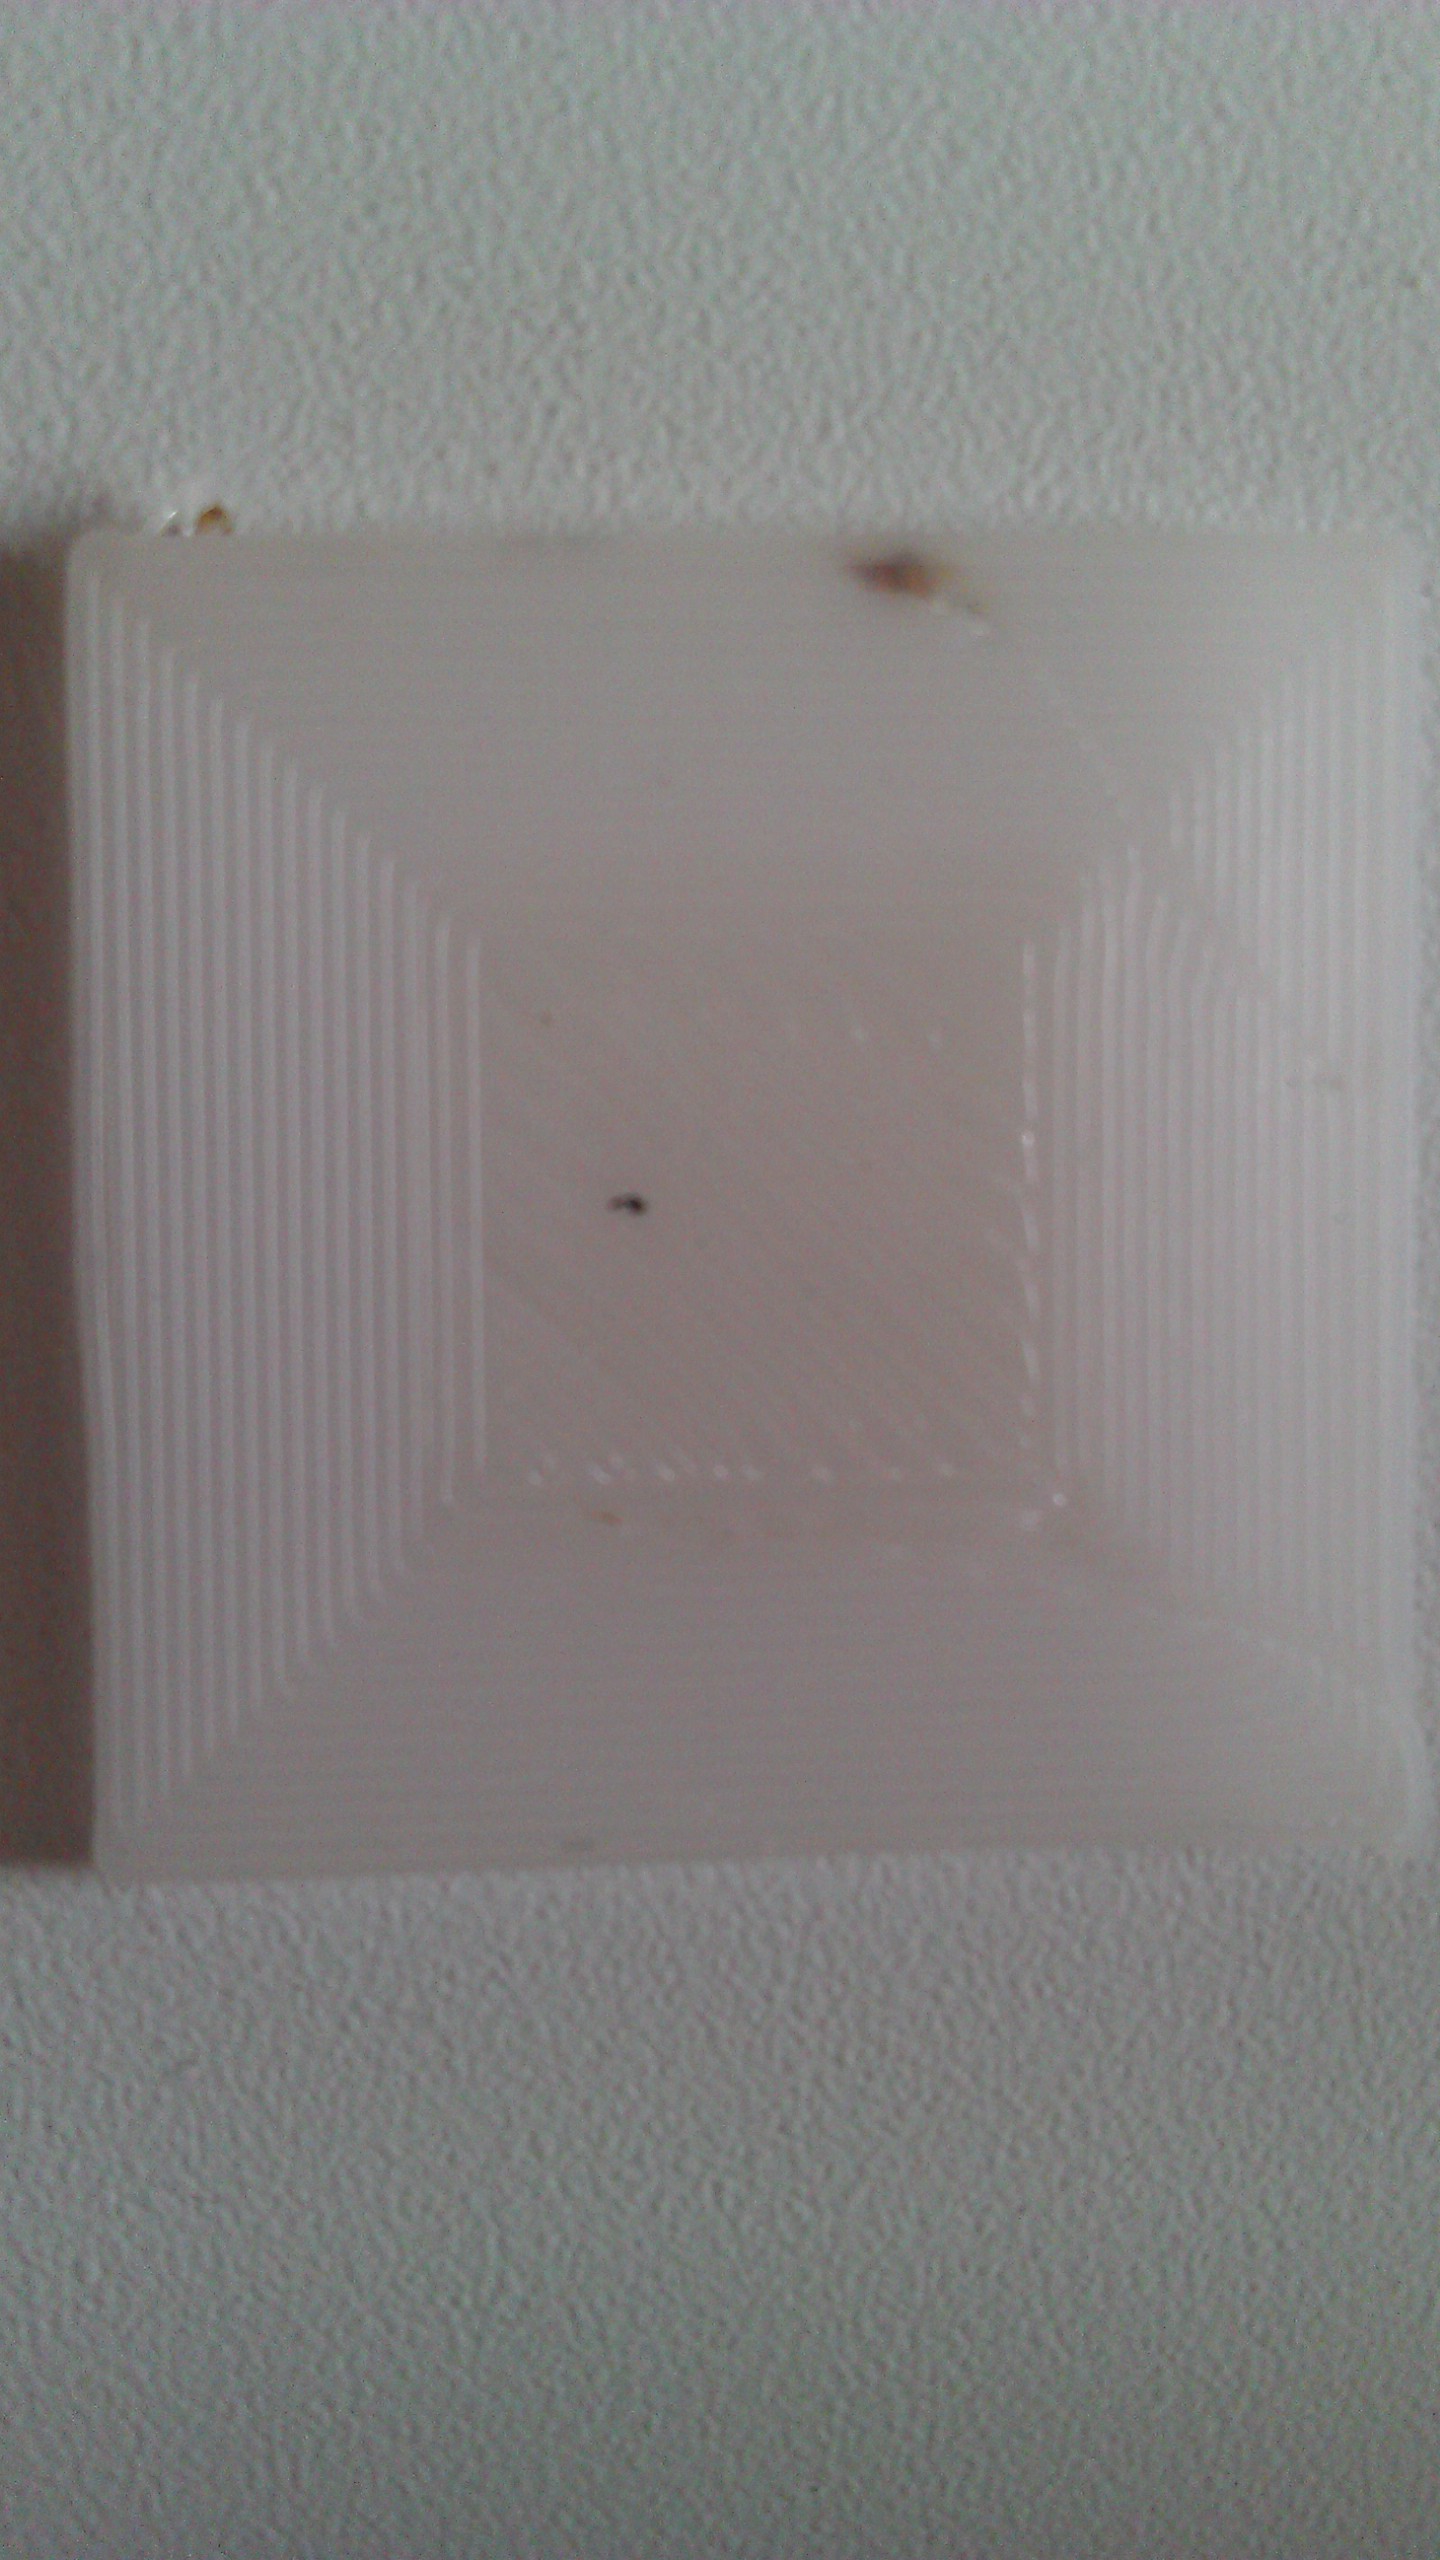
Here you see a slight burnout, but it is connected with an untidy piece of thread, which can be clearly seen in the photo from the bottom. Such burns are more inherent in the previous case, when the nozzle is too tight. And the rest - smooth lines, tightly packed. It should be so. Congratulations - the calibration of the center point means successful.
The normal situation, if such a result is obtained on glass at a temperature of 100 degrees. At the same time, if the glass is degreased and even, then after the calibration is completed, there will be no sticking during the printing process. You can try to peel the part from the heated platform after printing. Until it cools down to 90-80 degrees, you can, even fail, without damaging the glass. Also, it may be important the absence of a draft, which affects the equally important uniform heating of the platform surface.
Here are common photos for easy comparison:
View from above:
Bottom view:
Further verification is similar in its essence, but 4pad.gcode should be printed - it covers a slightly larger central area. And 5pad.gcode will show the quality of the calibration in the corners.
Good luck to all!
At the end of the entertainment video, which displays the enjoyment of the result:
As you can see, I'm not typing on glass, but more on that in the next article.
For a start, I note that I honed my skills on the SmartCore Aluminum printer, acquired here .
Installation of a heating platform
')
The heating (or non-heating, depending on the printer) platform must first be set in height. For this, there is a limit switch for the Z axis.
From Wikipedia:
A limit switch is an electrical device used in control systems as a sensor that generates a signal when a certain event occurs, as a rule, by mechanical contact of a pair of moving mechanisms.
With the help of long and clamping bolts, this limit switch can be adjusted in height.
It is necessary to expose it so that the surface of the platform clearly touches the extruder nozzle.
For further calibration, we will use Pronterface from the Printrun software package .
The advantage of this package is visual and convenient control of the nozzle and the printer platform, but if it is more convenient for someone to use Repsnapper , it will also work. Cura is not suitable for calibration, for lack of the necessary functionality.
To continue, let's make sure that when you click on the “Calibration” button (“Home”, a white house is depicted), the platform rises and rests closely, but does not try to move further towards the nozzle.
So, as on my printer firmware was taken directly from the SmartCore Aluminum repository (albeit not directly from Marlin ), the nozzle travels to the middle of the platform. If you have it wrong, and the nozzle remains in the corner along the zero coordinates - that's okay, for further calibration it does not matter.
Calibration
The following actions should be carried out alternately on the center, in the corners and in the control circle:
- Click on Z axis calibration
- If the angle rests on the nozzle (the center must abut, as we have achieved by adjusting the height of the trailer during preparation), then we slightly squeeze the platform bolt on this corner until the minimum clearance appears.
- Eliminate the minimum clearance, but no more. Ideally, we should have a nozzle clearly positioned at all angles and center when clicking on the calibration of the Z axis. This is the result we need to achieve for quality printing, on monitoring the result later.
- Now you need to make sure that when you click on
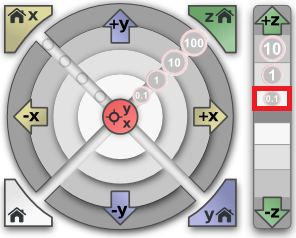 a lumen will appear . If this does not happen, you can slightly release the bolt that presses this angle and, successively pressing either the green house or the “0.1” button, repeat until you get the desired result.
After we have completed the calibration at all five points and have checked them so that we don’t have to change anything, we can proceed to check the calibration result.
Check
For verification, I use a simple model drawn in FreeCAD and generated by gcode in Cura. Plastic is the more accurate the diameter, the better - I take here because of the stated accuracy and variety of colors. However, for the test we will use the natural color of ABS plastic.
The meaning of a simple small test model is probably clear - saving money and time.
It is in this sequence that it makes sense to check. However, if you are confident in your calibration, you can immediately start from step 2. Well, if you already have experience and you are absolutely confident in your calibration, you can immediately proceed to step 3 - print 5pad.gcode.
The difference in the number and location of products.
I will describe the verification of the first step, since the others are similar.
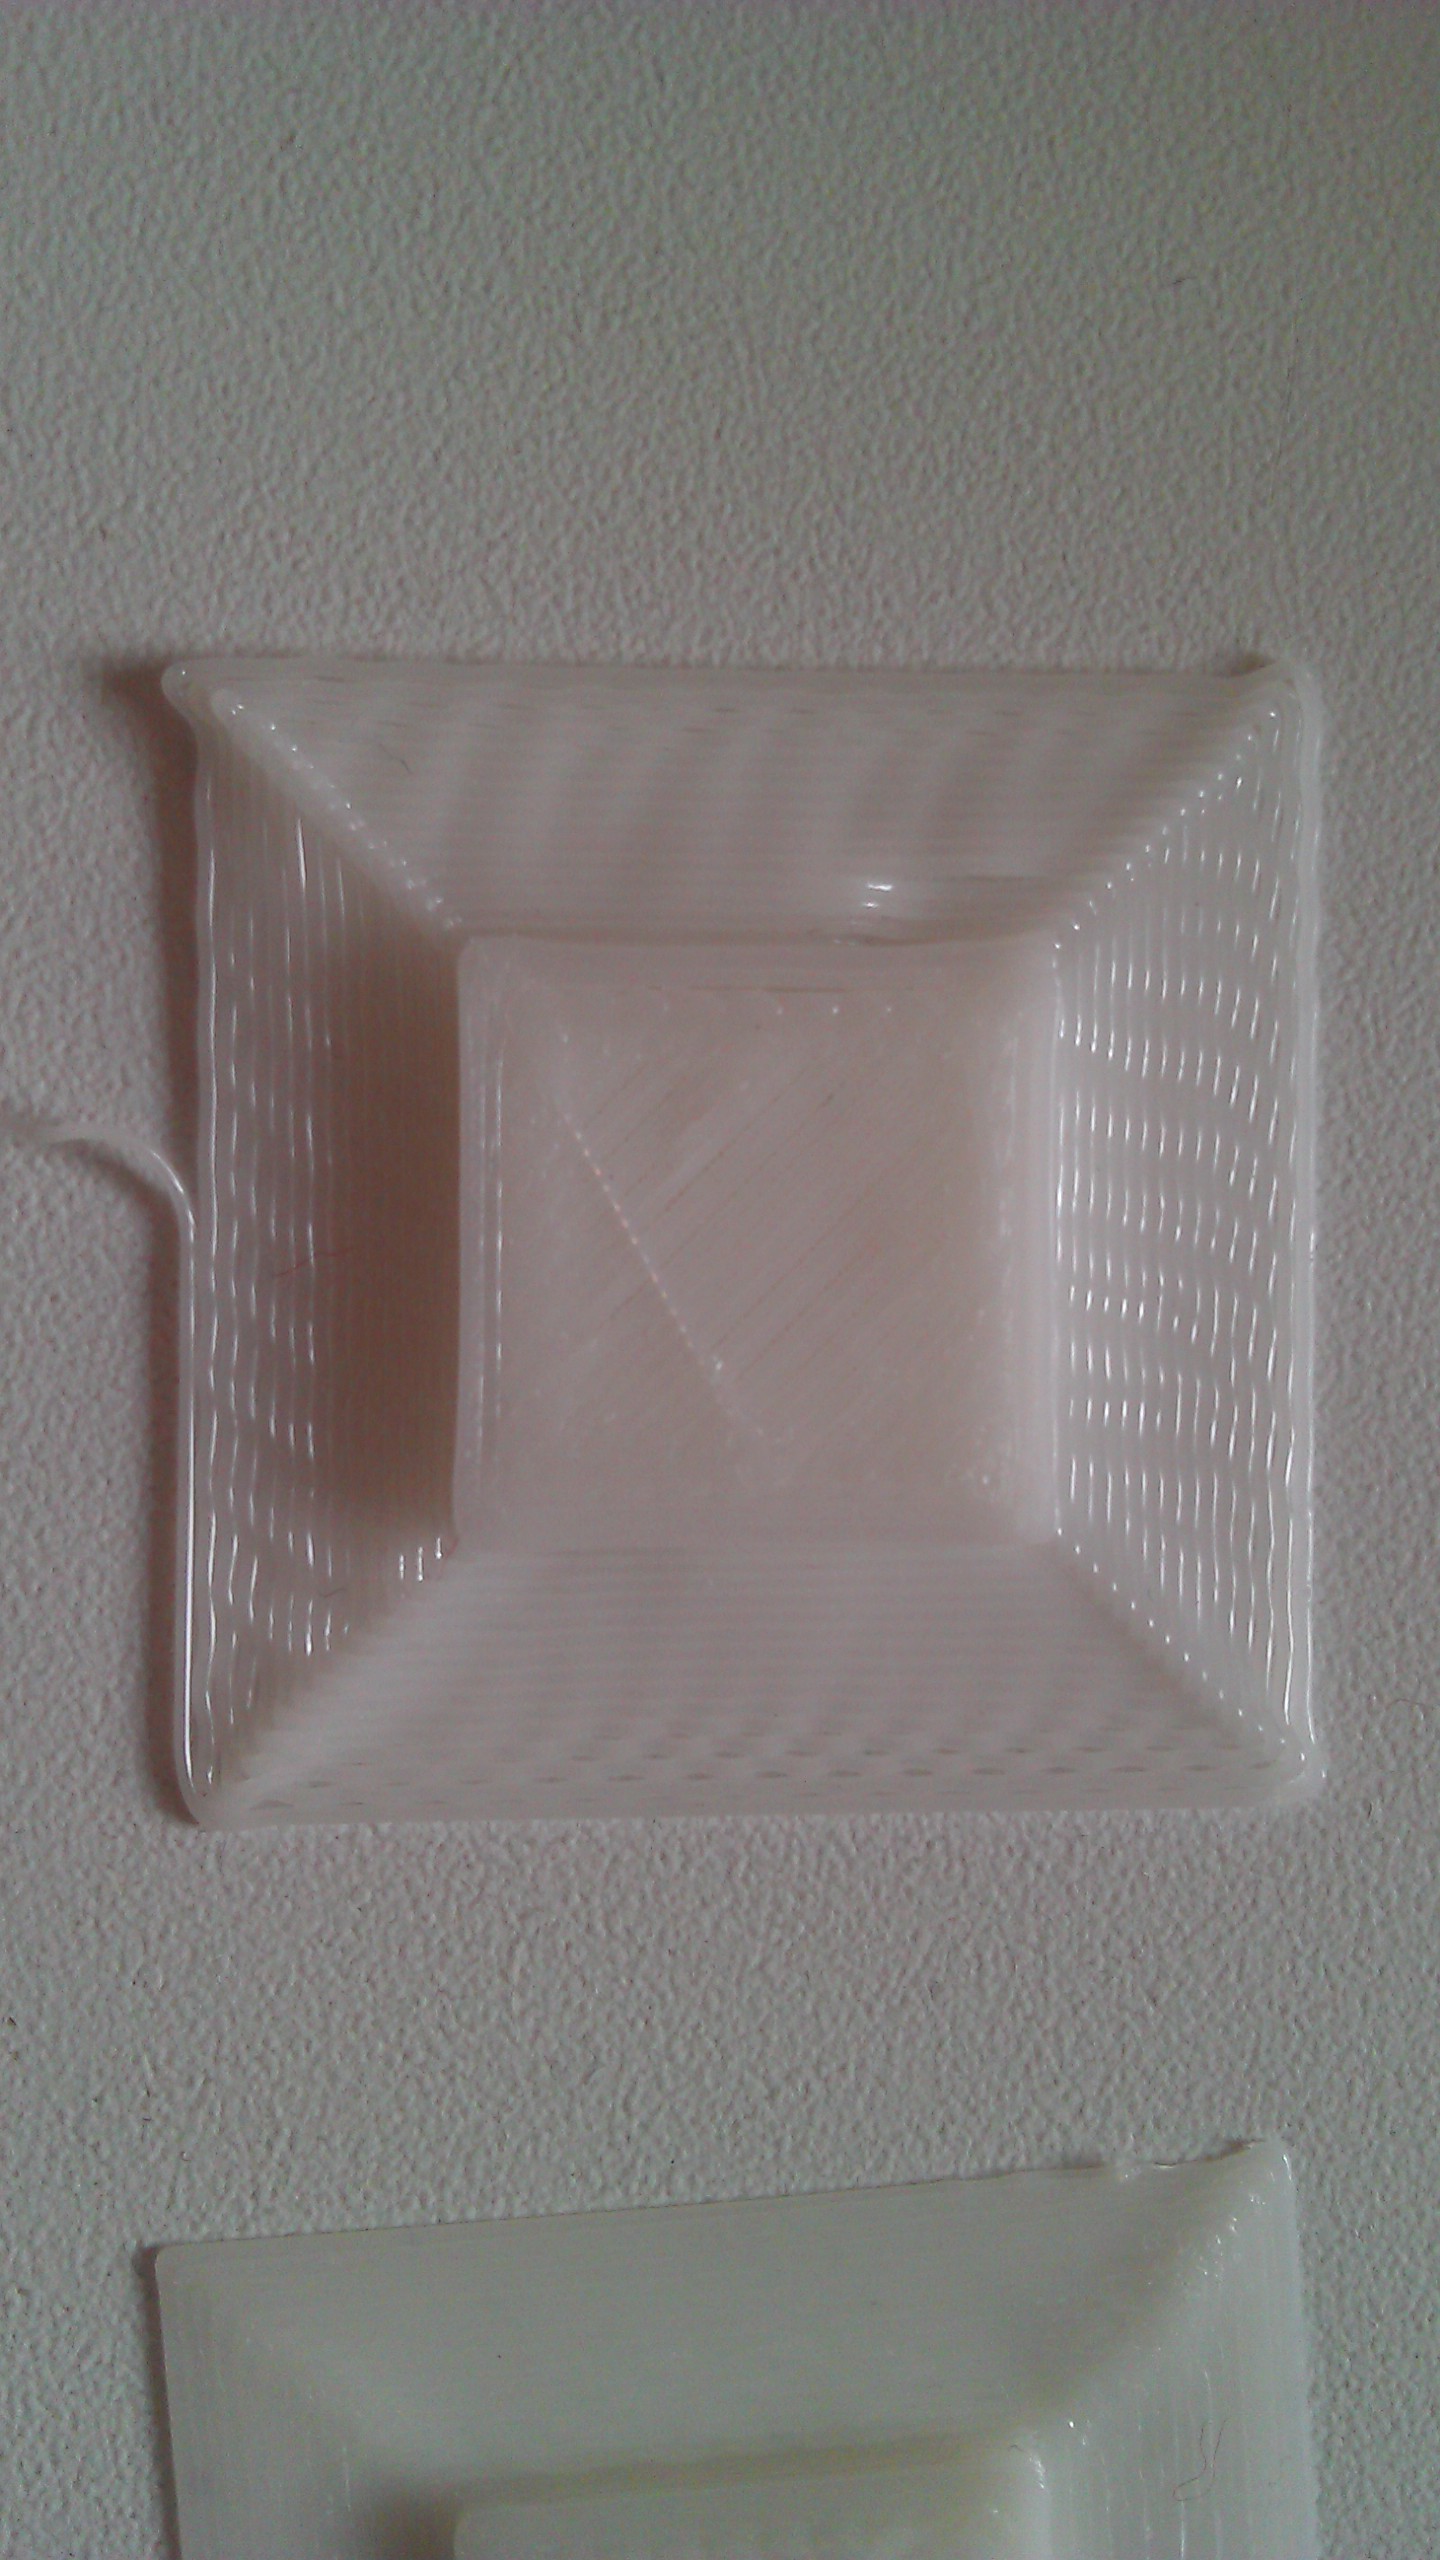
Suppose one side of the platform is too high calibrated. It is very easy to detect as a result of:
View from above:
And what is more important now for us is the bottom view:
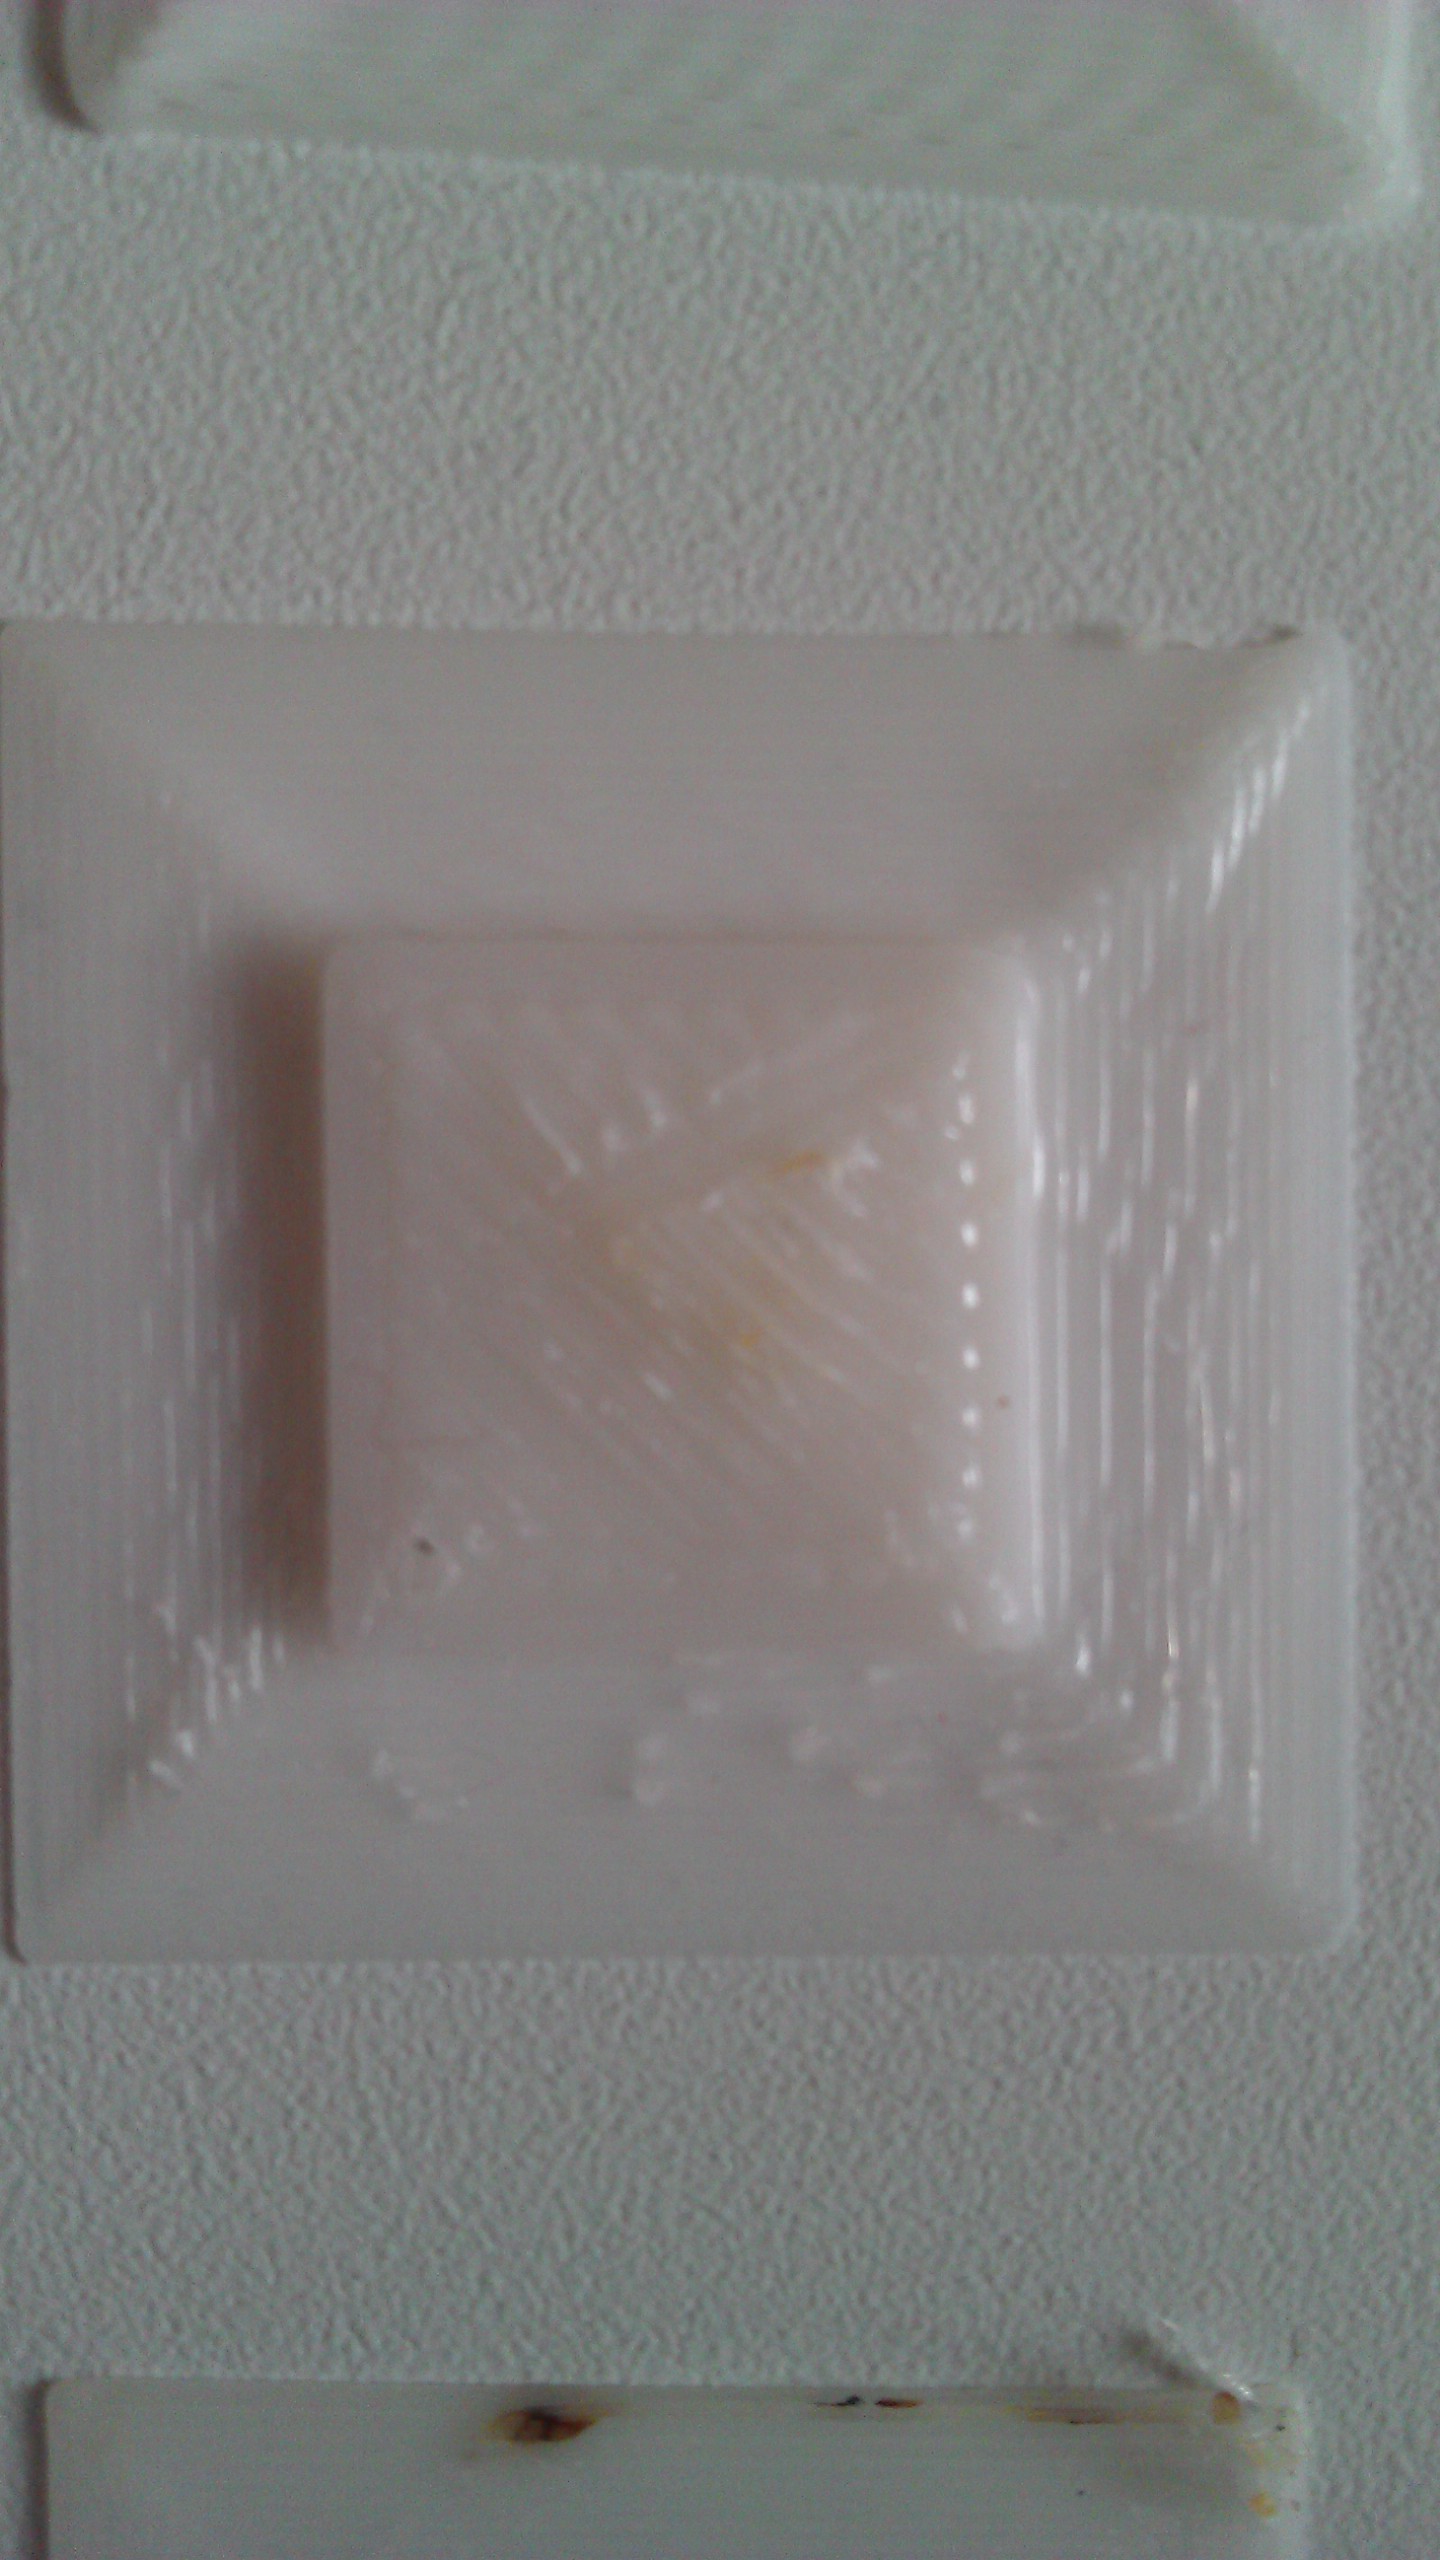
- This is what the Cura rim rim looks like if the nozzle is too high to the platform. Plastic drops are not accurate, sometimes clinging to adjacent lines.Consider the opposite situation - if the nozzle is too pressed to the platform:
As you can see, here, too, everything is not smooth, plastic, trying to fill the available space, clings to adjacent lines, and on the next layer the nozzle re-clings, is wiped again over the available space. However, it should be noted that in this case the model sticks very well, and the calibration defect is not visible on the next layers. Moreover, it may not even be noticeable at all if you choose a substrate in Cura for the model to stick to the table.
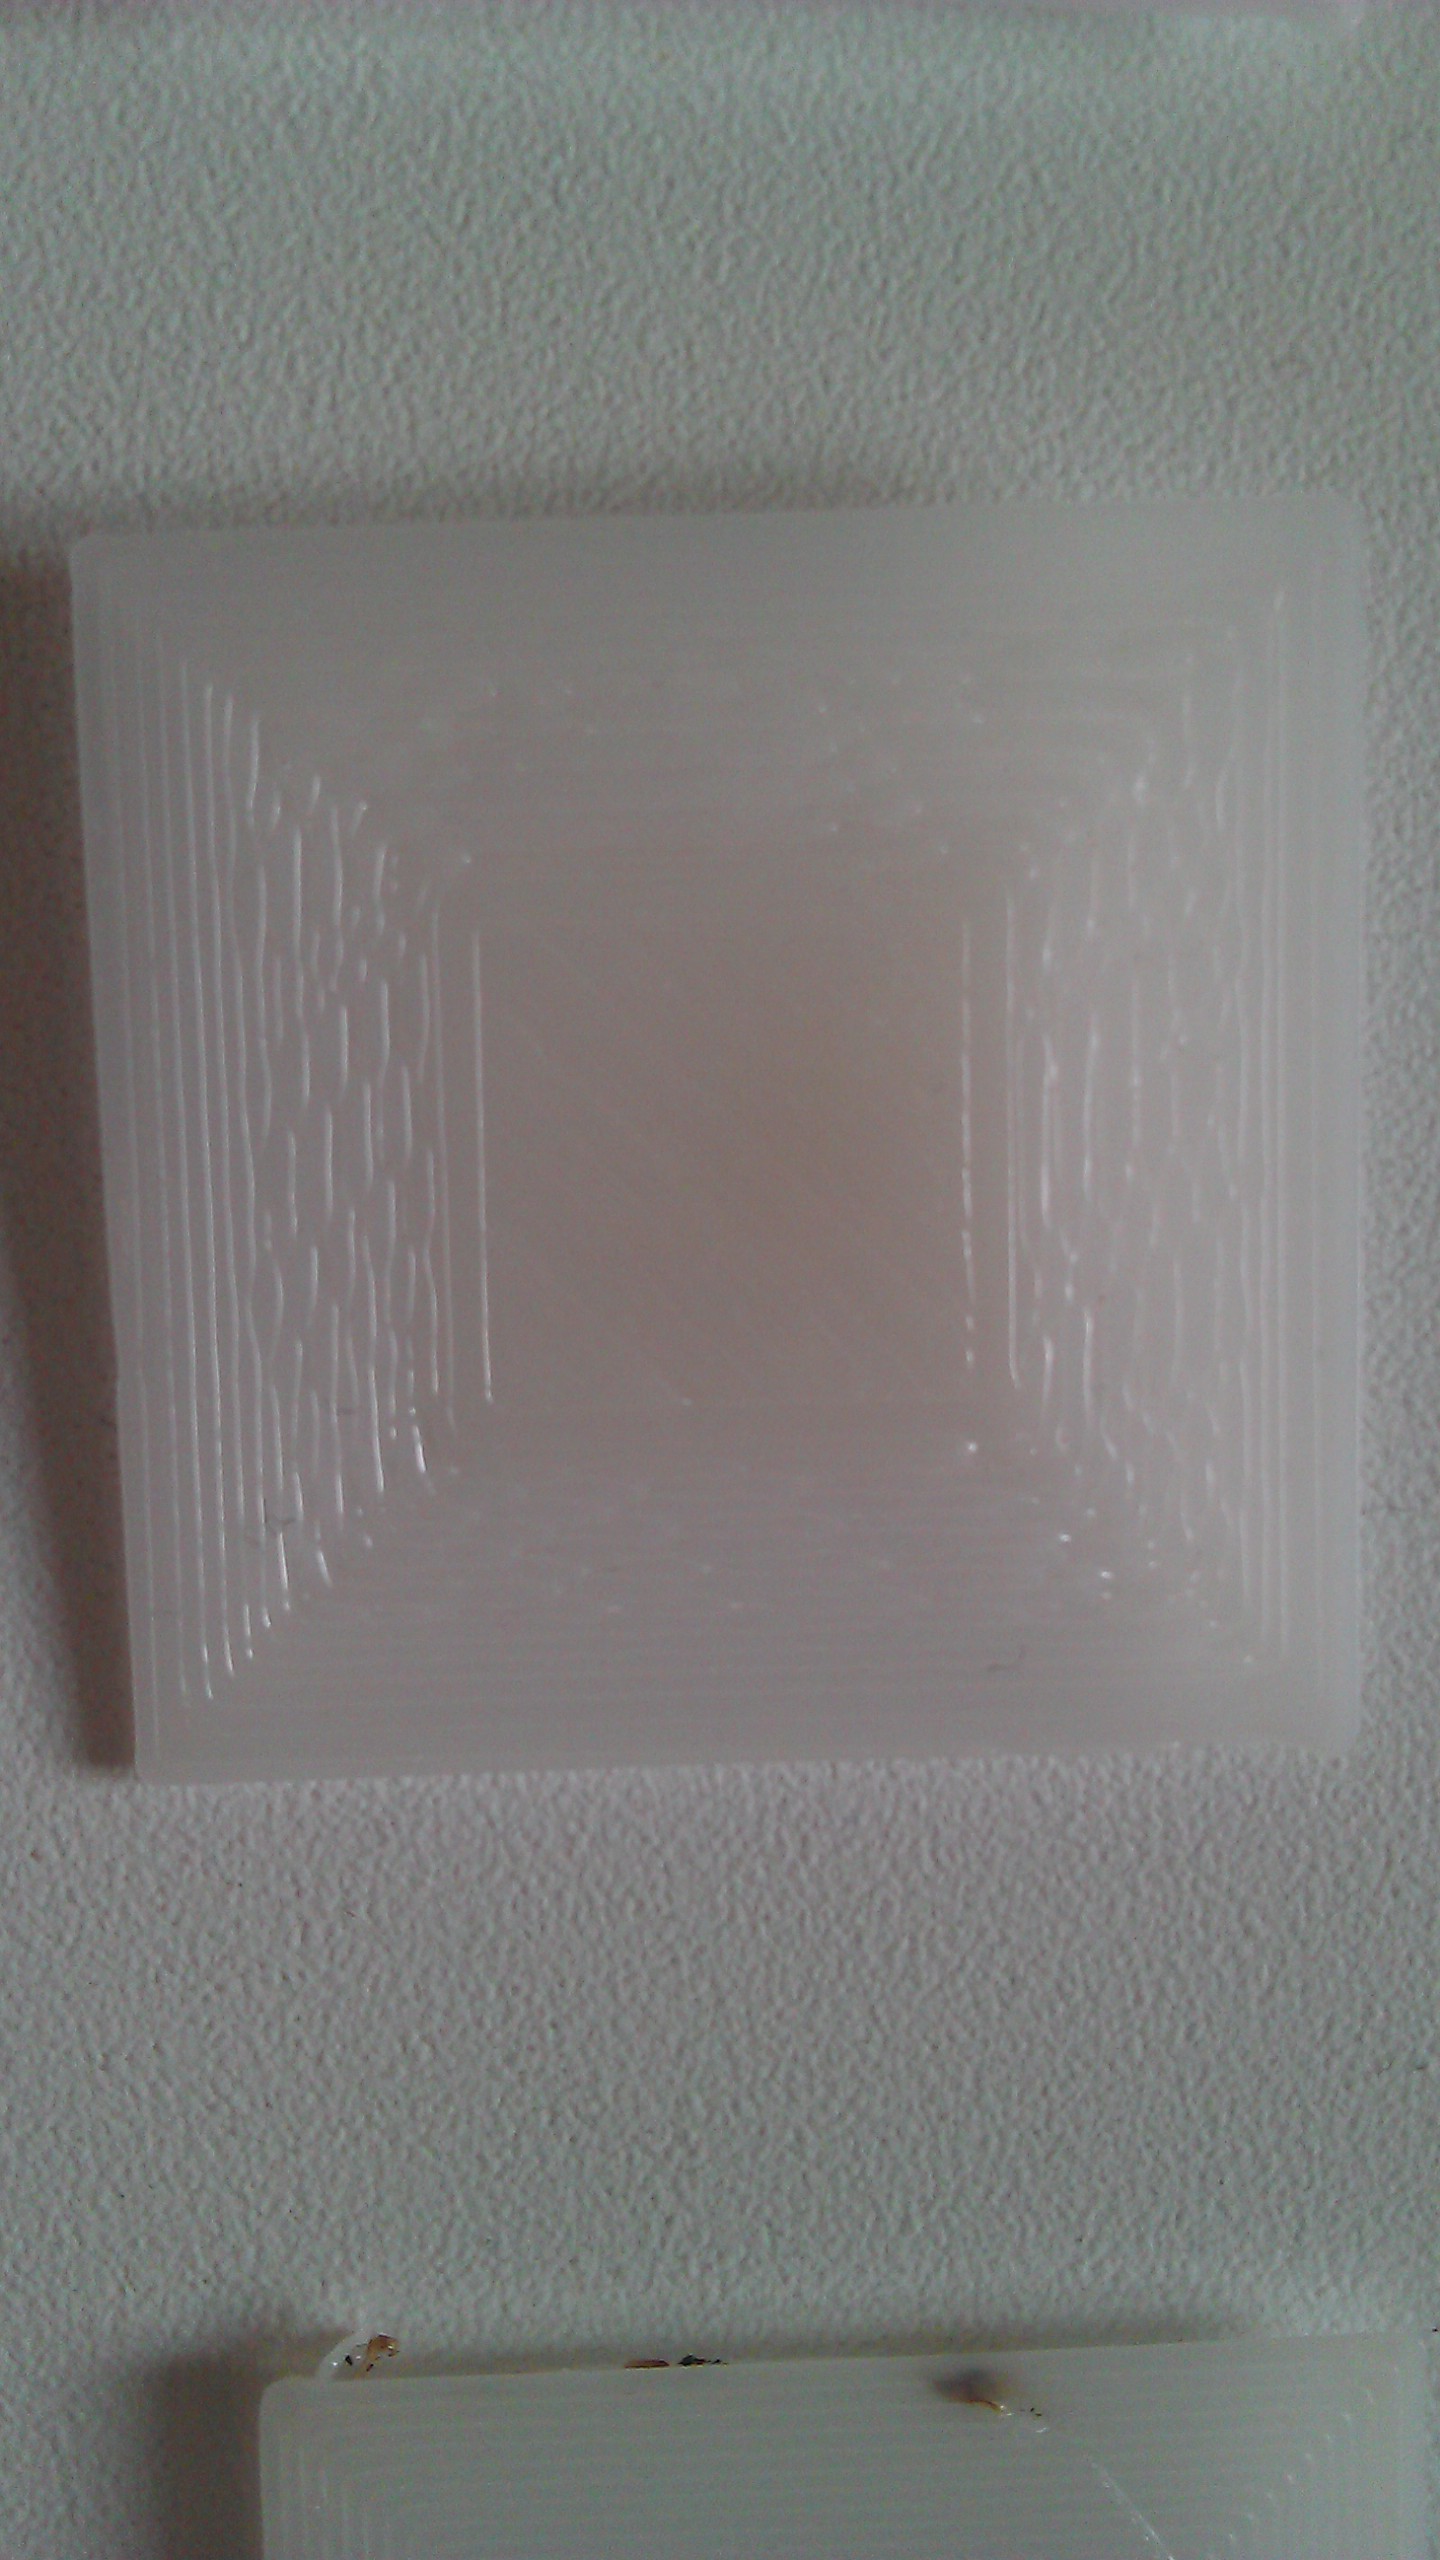
Finally, the desired and correct result:
Here you see a slight burnout, but it is connected with an untidy piece of thread, which can be clearly seen in the photo from the bottom. Such burns are more inherent in the previous case, when the nozzle is too tight. And the rest - smooth lines, tightly packed. It should be so. Congratulations - the calibration of the center point means successful.
The normal situation, if such a result is obtained on glass at a temperature of 100 degrees. At the same time, if the glass is degreased and even, then after the calibration is completed, there will be no sticking during the printing process. You can try to peel the part from the heated platform after printing. Until it cools down to 90-80 degrees, you can, even fail, without damaging the glass. Also, it may be important the absence of a draft, which affects the equally important uniform heating of the platform surface.
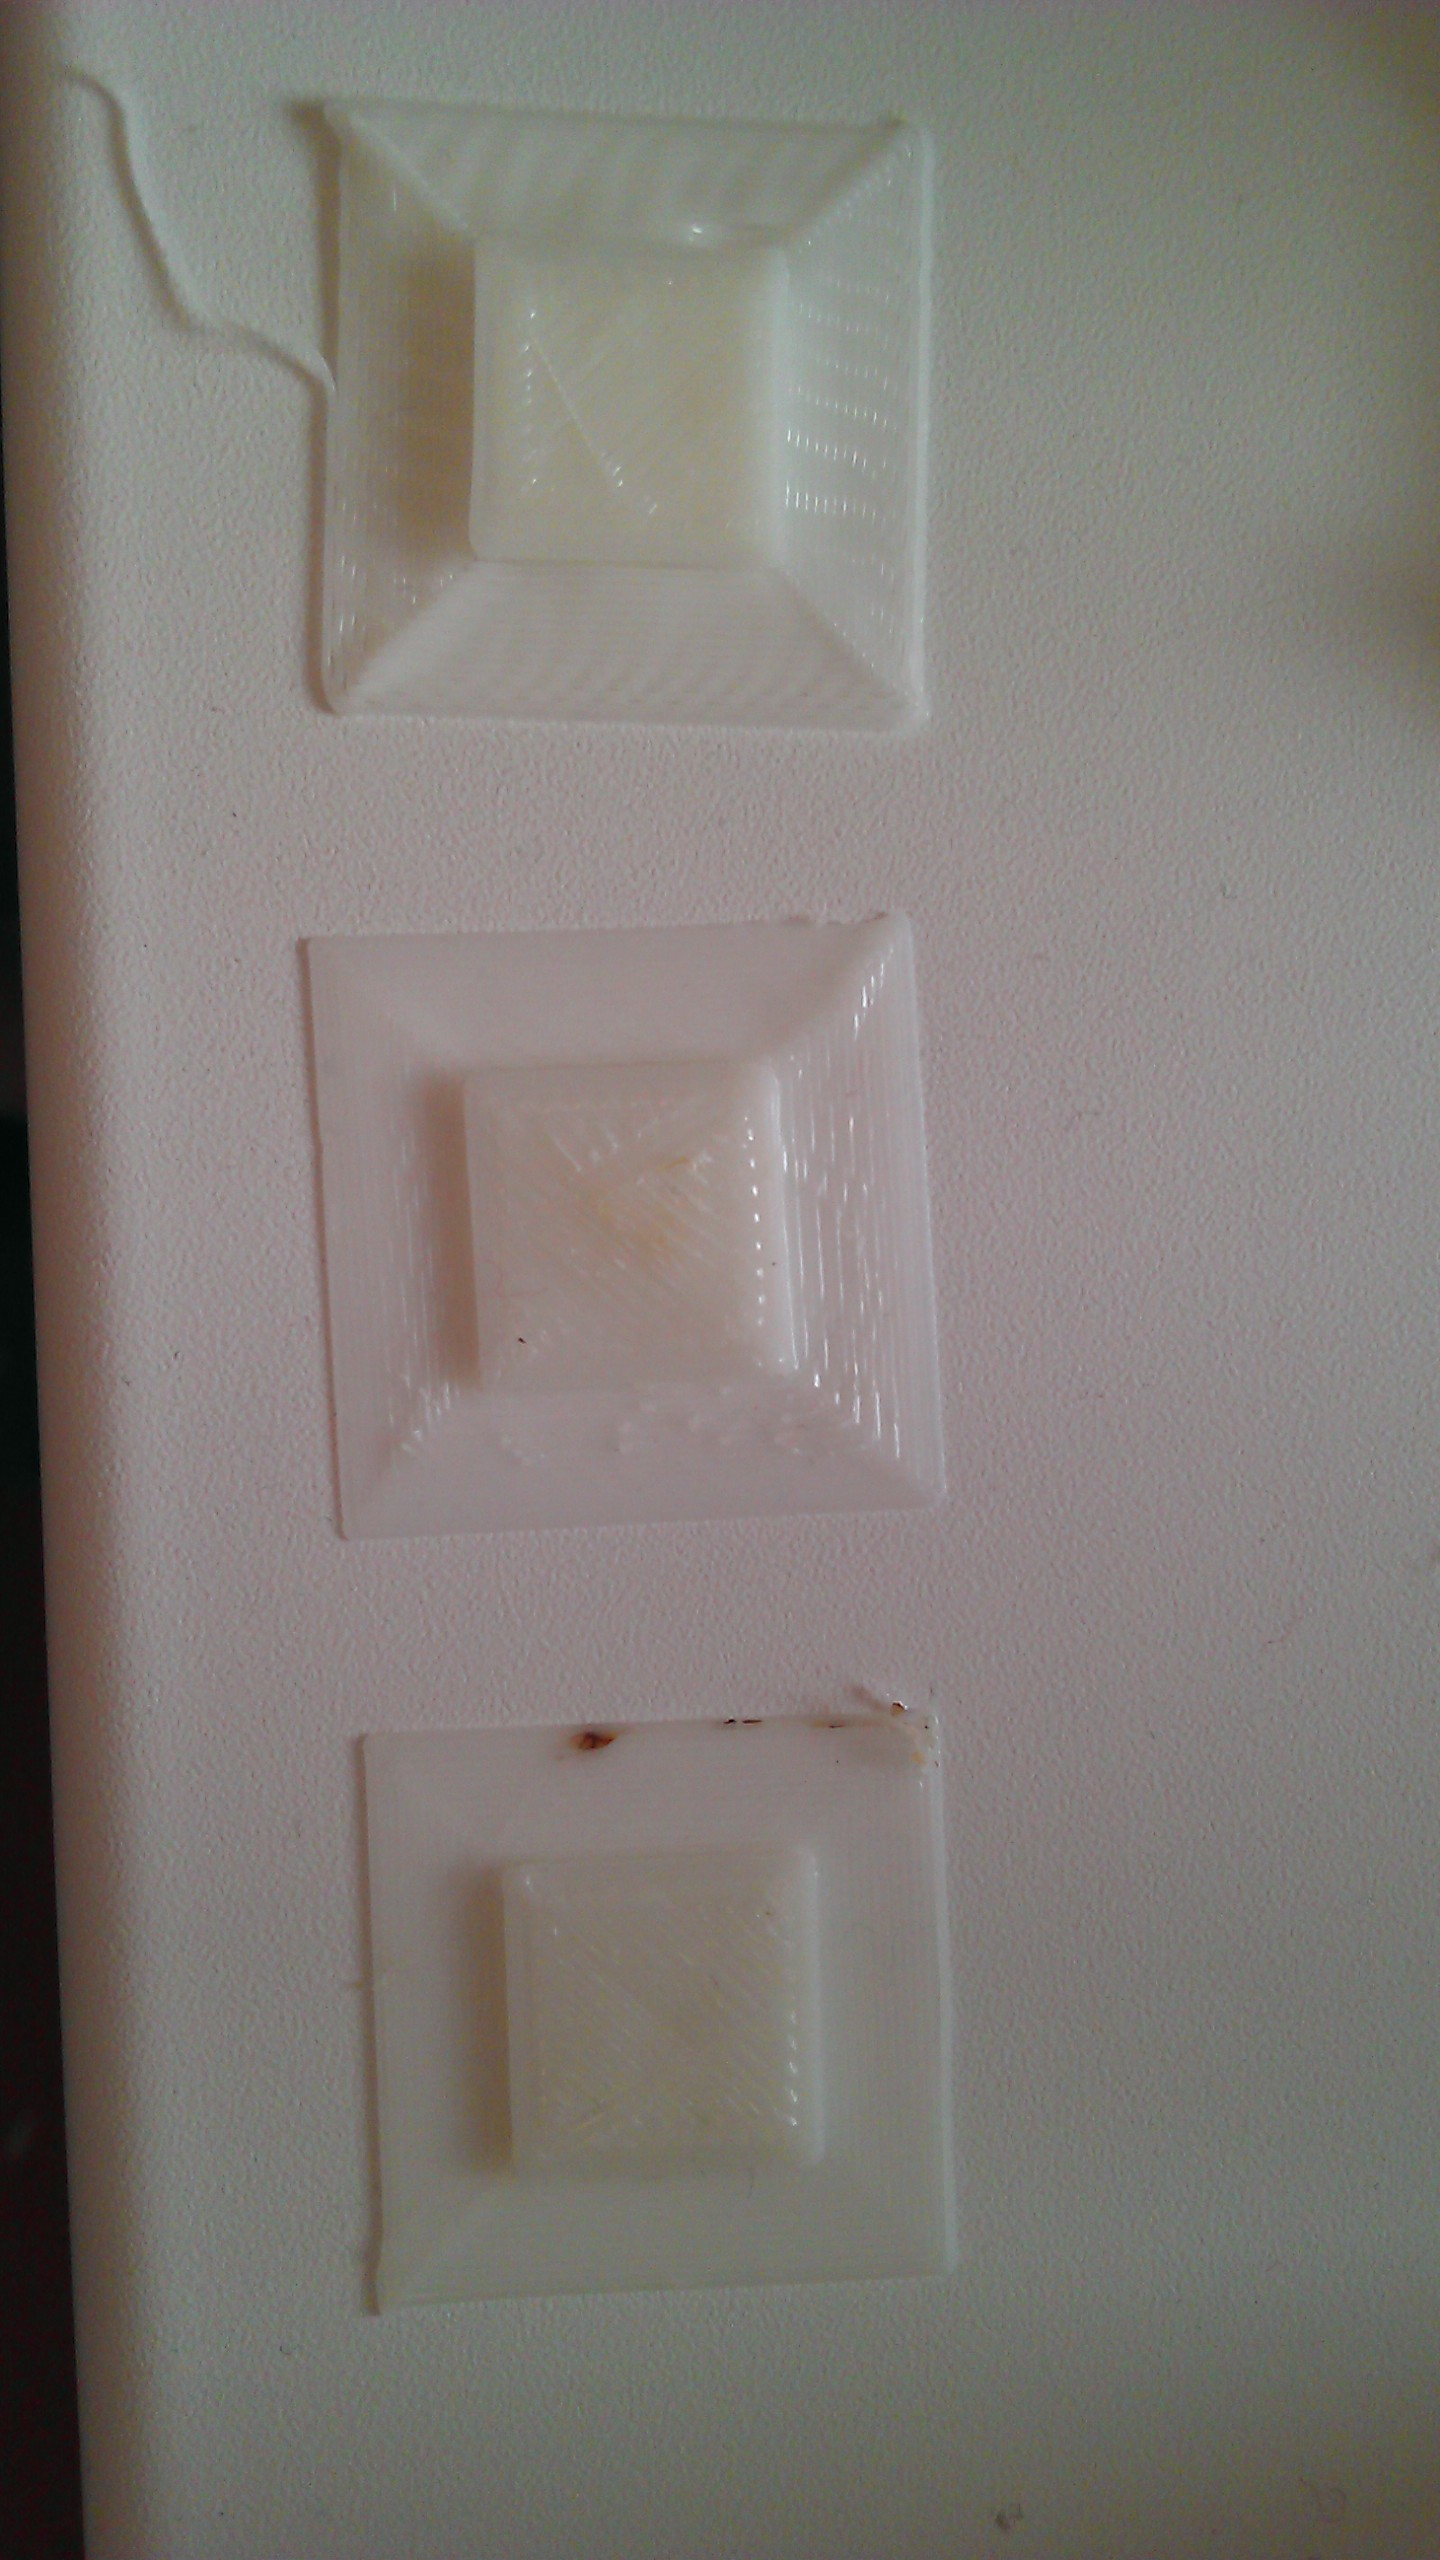
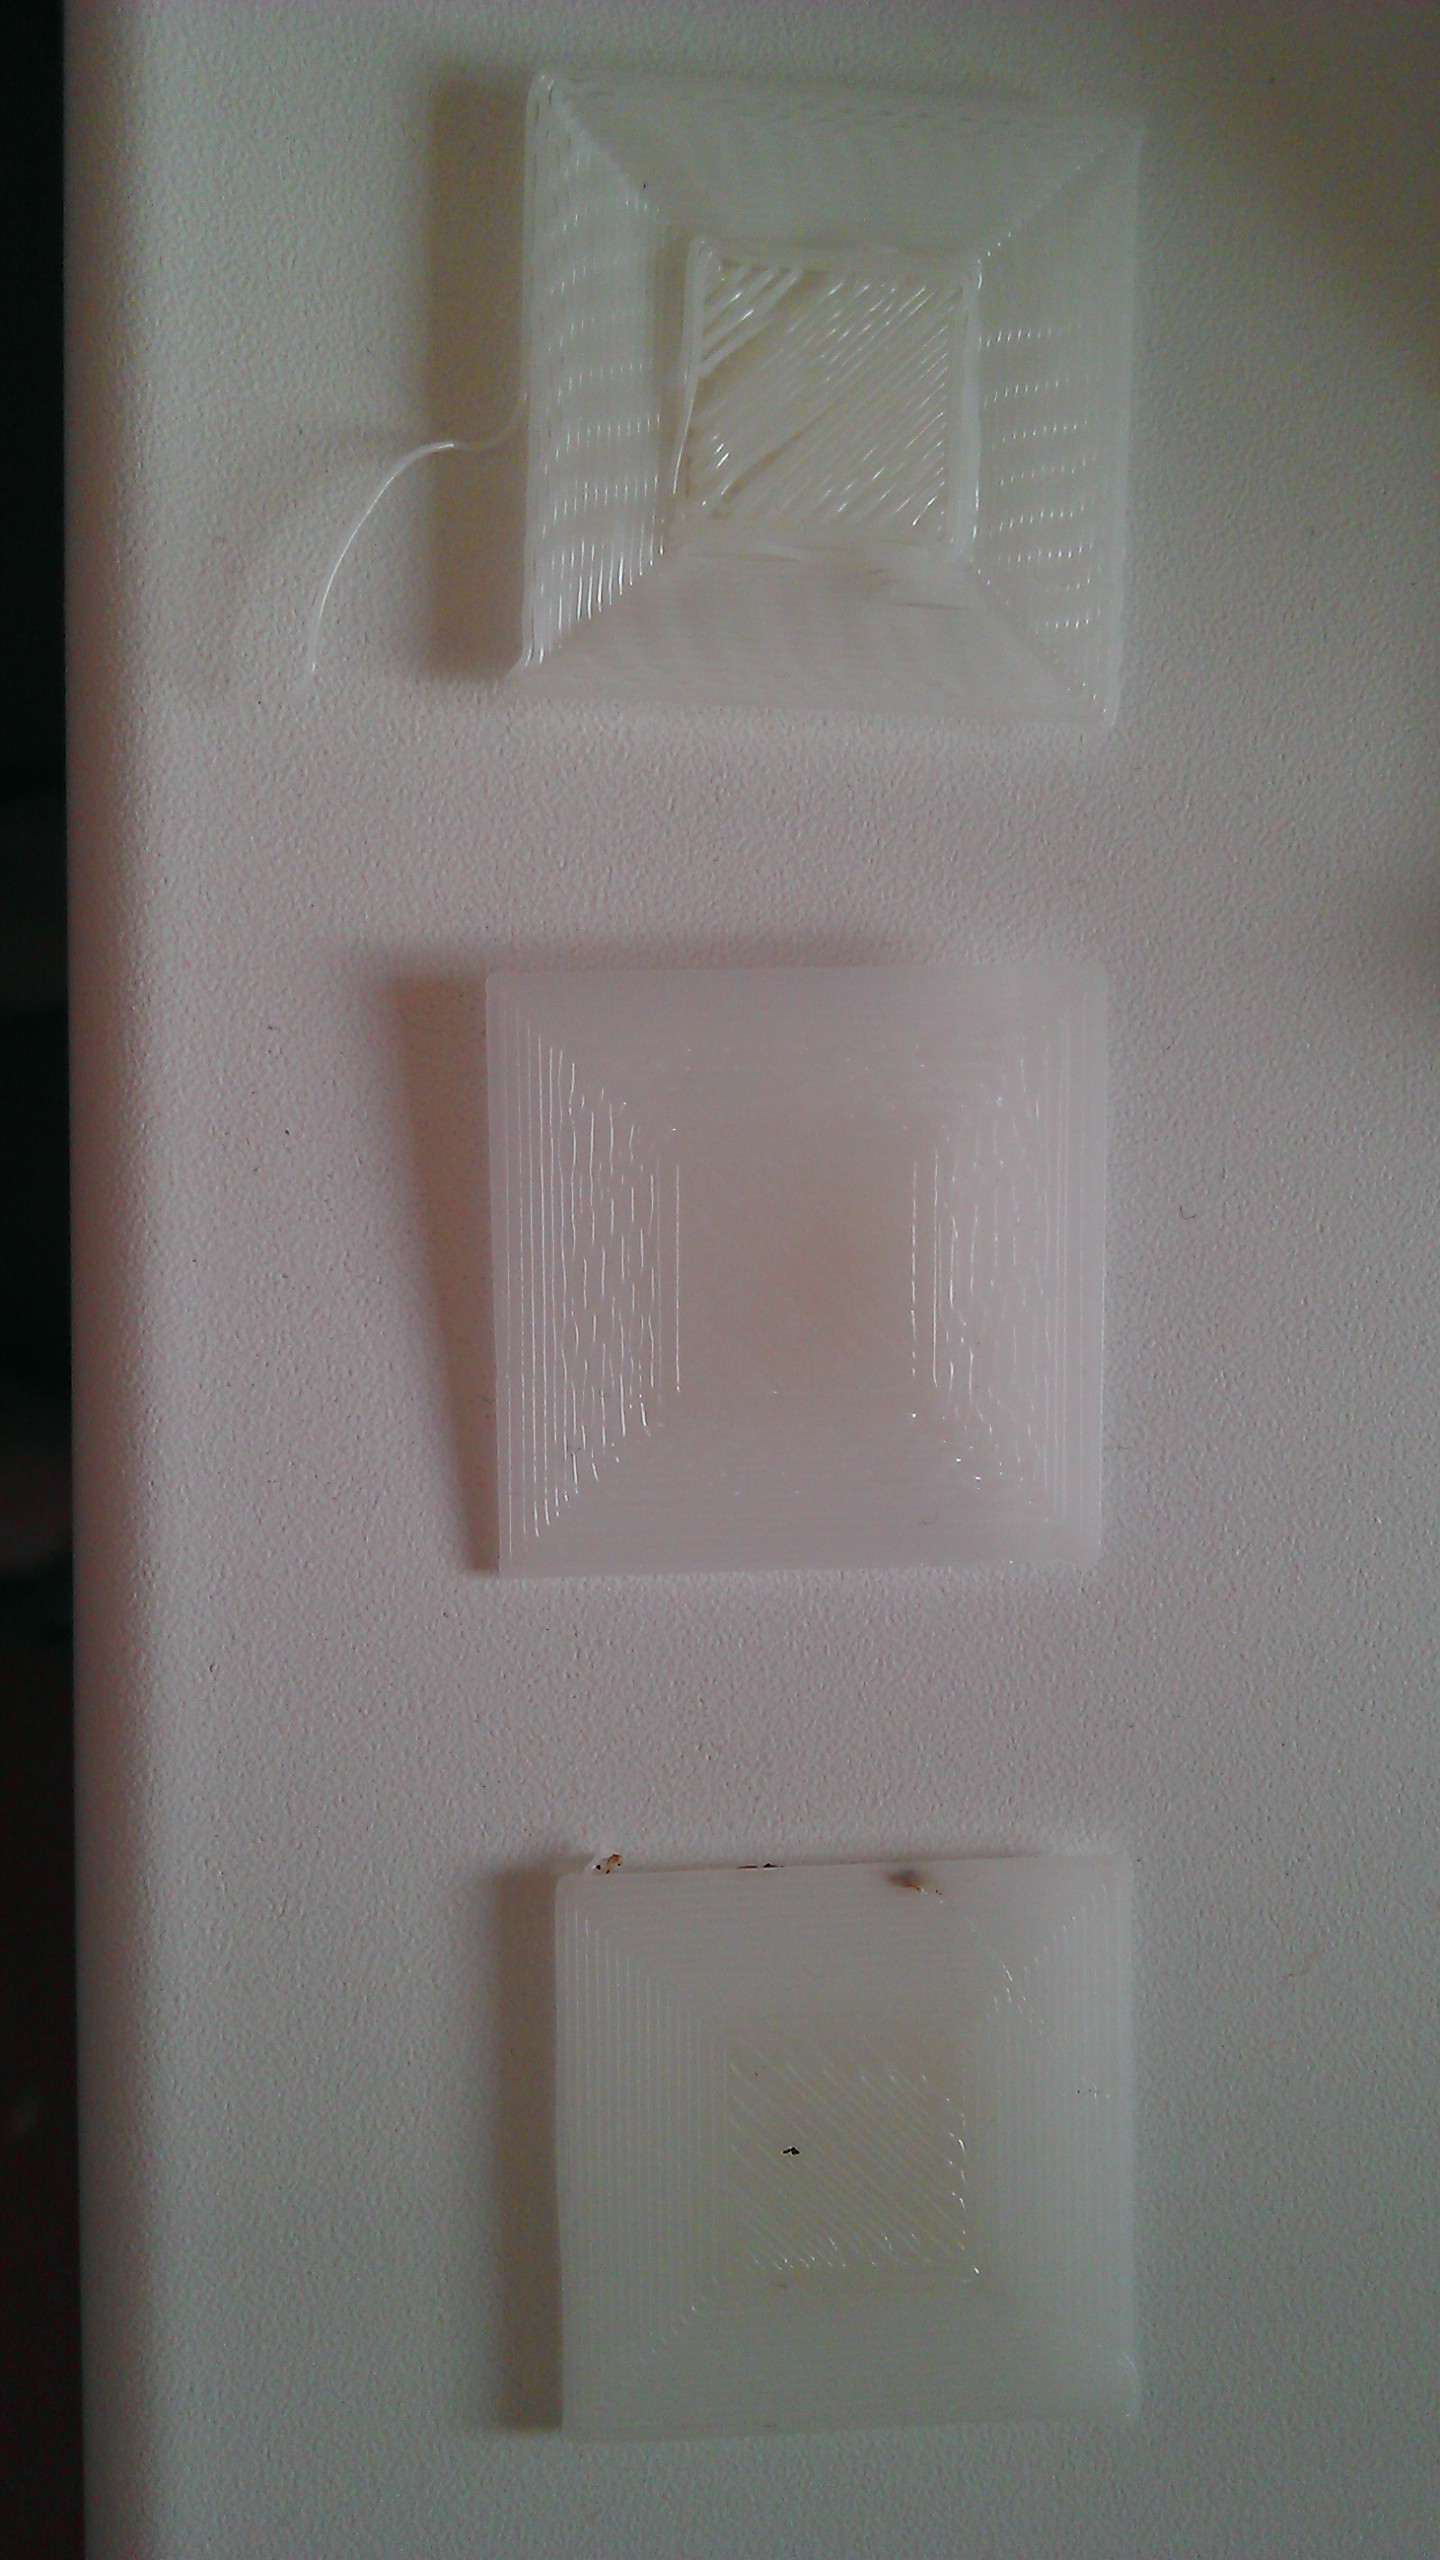
Here are common photos for easy comparison:
View from above:
Bottom view:
Further verification is similar in its essence, but 4pad.gcode should be printed - it covers a slightly larger central area. And 5pad.gcode will show the quality of the calibration in the corners.
Good luck to all!
At the end of the entertainment video, which displays the enjoyment of the result:
As you can see, I'm not typing on glass, but more on that in the next article.
Source: https://habr.com/ru/post/282183/
All Articles