Django development for Windows using Docker-machine
In this article I will tell you how I solved the problem of setting up an environment for developing on Django under Windows.
The following combination is used:
1) Docker-machine
2) PyCharm
In the Docker-machine:
1) PostgreSQL
2) Data container for PostgreSQL
3) Redis
4) And the actual application on Django.
')
First we need to install the Docker-machine in the system. To do this, download from the official website docs.docker.com/engine/installation/windows . We also need VirtulaBox.
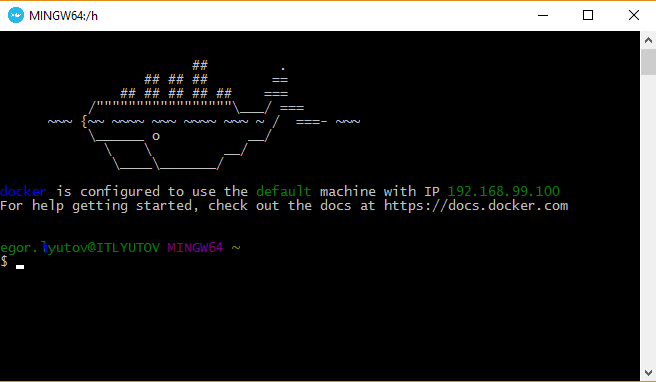
After installation, the Docker Quickstart Terminal system will appear. It is necessary to start it and it will launch the docker-machine, with which in the future it will go through all the interaction.
After the docker-machine is started, we will be able to execute docker commands through this terminal.
To start PostgreSQL and Redis, and to further automatically start these containers when you start docker-machine, create the file docker-compose.yml:
postgres: restart: always image: postgres:latest volumes_from: - data ports: - "5432:5432" data: restart: always image: postgres:latest volumes: - /var/lib/postgresql command: "true" redis: restart: always image: redis:latest ports: - "6379:6379" Through the terminal, you need to go to the directory with this file and run the command docker-compose up -d .
After the containers have started, you can check them with the docker ps command . This command should show approximately the following result:

Now from a computer you can, for example, use pgadmin to connect to PostgreSQL at 192.168.99.100:5432.
We will launch the Django application itself using PyCharm. But first, in the root of the created project, create the file: Dockerfile with the contents:
FROM django:onbuild Also, the requirements.txt file should be at the root of the project, if of course any external dependencies are used.
Example file requirements.txt:
Django==1.9.4 psycopg2==2.6.1 gunicorn==19.4.5 redis==2.10.5 django-celery==3.1.17 In the terminal, execute the docker build -t container_name path_do_docker_file command .
The first launch will take quite a long time, since the base image will be downloaded and all dependencies from the requirements.txt file will be installed.
After the image with the application is created, you need a project in PyCharm and set up a remote interpreter. To configure you need to go to settings -> Project: project_name -> Project interpreter. In the interpreter selection line select add remote .

Next, you need to confirm all changes if you need to restart PyCharm if the IDE does not see the packets.
And you can run the project. By default, it will be launched at: 192.168.99.100 : 8000
If necessary, you can run a remote manage.py from PyCharm, or go through the docker into the container and execute the necessary commands from there.
Source: https://habr.com/ru/post/282099/
All Articles