Droplet of reflection for C ++. Part Two: Posting on GitHub

IMPORTANT UPDATE. READ BEFORE READING ARTICLE
It was my fault that there were some misunderstandings about these publications. So I decided to add this warning.
In this series of articles, I wanted to put more emphasis on the development history of a certain open source library, regardless of the specific cpprt. A story from writing source codes (with an emphasis on some interesting things that people find interesting to read in general, regardless of the library itself), to the formation of a repository (with a CMake lesson) and library promotion (where part of the promotion implies publishing this series of articles). Such a training demo project for people who were thinking of posting their open source, but were either afraid or did not know how.
')
Of course, I would not mind if the library somehow came to life and there is a minimal amount of library advertising in the articles (I tried to hide it under spoilers). But still, the objectives of this cycle I considered more educational and, I hope, applicable in general, without regard to my library.
Please take this into account when reading a series of articles.
This article is the second in a series on cpprt, intended to add and use minimal meta-information about C ++ classes.
Unlike the first article, there’s almost nothing about the cpprt library itself. I tried in detail and abstracting from my library as much as possible the history of the library's design for its civilized publication on GitHub.
The article addresses licensing issues, the structure of the project and a lot of attention is paid to CMake .
Links to all articles of the cycle
0. Introduction
To delay the need to say some introductory words, I will present the structure of this publication:
Section number 0 . This section. Description of the structure of the publication and introductory words.
Section number 1 . A little bit about licensing.
Section number 2 . A little bit about creating a separate git repository of the subproject from the git repository of the main project.
Section number 3 . Thoughts on the project structure in general and attempts to analyze the structure of several existing repositories.
Section number 4 . CMake lessons based on the cmake configuration development chronicle for the cpprt project.
Section number 5 . A few words and a lot of links about the documentation.
Section number 6 . A brief section with thoughts about the promotion of the library.
Section number 7 . Conclusion and captions.
So. The structure is there and you still need to start somewhere ... Well, let's do it.
Purpose of the article: To tell about how I prepared the library for publication on GitHub.
I worked on the article, in parallel exploring some aspects of the world of open source software. In my opinion, thanks to this article can be valuable to people who are only at the beginning of the path: they will not have to climb the entire network in search of material, I tried to keep here to the maximum links to sites that I had to go through to build a repository.
I am well aware that the repository, like the article, is far from ideal. Write in a personal, write comments, see the library, commit to the library - I will not forget to mention the author of the suggestions made in the credits to the article. Your every edit will help people who will go to the world of open source software in your footsteps!
A lot of pathos caught up ... Well, now a little history. In the first article of the series, I mentioned that the classes and macros of the cpprt library were used as part of my larger project. They were not isolated separately and lived simply as part of the source code. But at some point I noticed that these classes have almost no dependencies on the main project, and their functionality is self-sufficient and applicable for some typical tasks.
And then I decided to allocate part of the project into a separate subproject and realize a long-held dream: publish an open source library.
Before you read further, you will probably be interested in reading the following thoughts (if you have not read the first article): recognition in the true insidious motives of these publications ( link ).
And two more warnings to the reader:
Disclaimer about laziness
This article almost does not contain my thoughts. This is some compilation of various sources. The fact is that if the first article of the cycle was directly related to development (the creative process), then it tells about some accepted standards and techniques that should be clearly regulated and, preferably, have as little independent activity as possible. From here a small amount of own thoughts and an abundance of links.
A note about terminological chaos
I also want to immediately recognize some terminological chaos that reigns in the article. “Solutions,” “search paths for headers,” “assembly targets,” and others ... I tried to understand how it is customary to call all these concepts in Russian, but I did not find an acceptable naming system. Write in a personal, or in the comments, I will explain if any term is not clear and will make changes to the naming, if you tell me some generally accepted terminology.
If I never managed to discourage your desire to read this opus - let's go!
1. License selection

Gratitude
- This section has been somewhat reworked and supplemented in connection with the commentary of the user Cheater . Thanks to him for pointing out some inaccuracies and nuances.
- I thank the user Gorthauer87 , who in the comments pointed out a number of inaccuracies about this license.
- I thank the user Gorthauer87 , who in the comments pointed out a number of inaccuracies about this license.
There is one thing that, regardless of the quality of the code, makes the source more significant in my eyes. It may seem ridiculous to someone, but for me this is a cap indicating the license. I look: there is a hat - it means the project is really advanced. No caps - not so cool. It somehow automatically works on the subconscious.
So when I decided to publish the library, the first thing was itching to include the licensing information in the source code. And for this, in turn, it was necessary to choose a license.
I began researching the issue of licensing with caution. Always afraid of this topic. I thought: I would choose some kind of wrong license - and now I’m obliged to maintain the code free of charge until the end of my days, without having any rights, including voting rights.
In practice, everything was not so scary - in any case, if we talk about licenses for open source software (I have not yet figured out with proprietary licenses). The only thing that is important to remember when choosing is the fact that such licenses can be divided into two groups: open source and free software . It sounds similar, but between them there are, as they say in Odessa, two big differences. We will understand in more detail:
Open source . Be careful, open source "open" is no accident! Open source turns into open source any code that uses it - and at the same time, the source code of any open source code should be open on demand.
Here, for example, you use a library in your project under some open source license. Use a year, use two ... And suddenly they ask you to show all your code . And you have no right to refuse! Forced IT Communism. "From each according to the source code, to each according to the source code". If you are afraid of such a prospect - watch for licenses of projects that you connect.
The set of methods that allow to ensure the openness of code within the open source license family has its own name: copyleft . The main license, which includes copyleft, is the GPL (General Public License) license and its related license (quoted from the GPL 3 licenses for copyleft: “The license is a free copyright license” ) .
Under the GPL, with quotes from the license itself
I dealt with the GPL 3.0 license, reading this one of its translation and, in incomprehensible moments, referring to the original .
The licensed virality of the license is implemented using clause 5, which requires that a modified version of the product distributed under the GPL license also go along with the GPL license indicating that the product is a “modification” of the original product and indicating the exact date of the change.
If you read the definitions (point 0 of the license), then the term modification of the source code means both a change to the original code and its use in your code. Quote:
“To“ modify ”a work is a licensed product] for work under a license. The “work” is based on the “previous work. ”
Thus, any file within which library functions are called under the GPL license is a modification of the libraries and itself becomes such that it is distributed under the GPL. The same will happen with all the files that use it and, since, as a rule, all the code is connected in the sense of the function call tree, all your code will become GPL.
I think, given the ideology of the GPL , namely, the paragraph about “the freedom to modify the program to fit your needs,” it is quite obvious why the GPL license is “viral”. If a license would impose requirements to spread openly only code that directly interacts with the library's API, it would be possible to easily bypass it by creating a layer of its functions that call library functions through itself and open, for example, only code directly using the library code, the user would open only this layer of functions, which has no independent value.
Requirements to open the source code upon delivery of the compiled program are guaranteed by clause 6 of the license and, moreover, this clause requires the author of the modification to assist in setting up the assembly of the source code and providing scripts or other build systems for this.
Interesting things found in the search process:
1. "You can set or not set the price for each copy that you gave, and you can offer support or warranty for a fee." Here is the answer in the FAQ on gnu.org about this. That is, you can sell the code support for money and even sell the code for money, but at the same time, the one who receives a copy of your program can also distribute it in any way that is acceptable to him and you will not be eligible for any claims on this matter ( link FAQ gnu.org on this issue).
2. Generalization of the concept “product” under the GPL license:
Time: “The Program” refers to any copyrightable work licensed under this License
Two: “The“ source code ”for the transition to it. “Object code” means any non-source form of work
Due to this generalization, a license can be applied to products other than the source code.
3. “Compiling a licensed work with other individual and independent works that are not in nature extensions of the licensed work and are not connected to it in order to form a large program on storage media is called“ aggregation ”if the compilation and its final copyright is not used in order to restrict access or legal rights of the user compilation relative to the original work. The inclusion of a licensed work in an aggregation does not extend the validity of this license to other parts of the aggregation. ” That is, if you have an isolated part of the code within the program that is not related to any code call under the GPL-license, then you are not obliged to open the source code for this part of the code (I can hardly imagine such a situation, but the point is there is).
Advantages: Full openness of the code allows improving its quality at the expense of a wider audience of readers and speeding up its development at the expense of a wider audience of writers. And, of course, another advantage - you feel that you bring good to the world. Make open source, not war!
Disadvantages: The possibility of using products under the GPL-license in a proprietary code and / or in a code containing a trade secret is limited. What is this secret, if you need to tell about it on demand?
Free software . Free software licenses allow the user to do anything with the code without any restrictions, sometimes with some purely conditional requirements (for example, with the obligation to indicate the author of the original library). One such license is, for example, the MIT license . This also includes the BSD family of licenses .
Benefits: Additional quality commits from generous commercial companies.
Disadvantages: Greedy companies can drag off the code themselves, fork into the corporate repository and quietly develop it only for themselves, without sharing with the community.
Lesser public license .
The stand-alone licenses for open source code is the LGPL (Lesser General Public License) and its related ones. This type of license includes features of both open source and free software.
The LGPL is allowed to freely use code compiled into a binary representation (executable file or dynamic library) anywhere, including in your commercial projects without restrictions and without the requirement to open your code.
But if you want to staticly link the source of the project under the LGPL license with the code of your project - the open source world will require its own. The good news is that the license does not require publication of source codes. Bad - it requires the publication of object files into which these sources are compiled, so that others can re-create them and thus fully respect their right to modify software, dictated by the open source ideology.
An example of a project using the LGPL is Qt. Due to LGPL-licensing, its dynamic libraries can be used in proprietary software without restrictions (a discussion of this on the official Qt forum and a similar discussion on the qtcentre website).
Under the LGPL, with quotes from the license itself
I did not find an intelligible Russian translation of this license (I found only translations in which its points were mixed directly into the GPL points, which does not correspond to its original formulation). Here is a link to the original license on gnu.org
This license is based on the GPL license, but specifies a number of its provisions and introduces a number of new terms, the main one being “Library” (the Library is the name of the product under the license, what the GPL was called Work) and “Combined Work ”(Combined Work - what is obtained by using or linking new code and the Library):
“The Library” refers to the workplace as defined below.
“A“ Combined Work ”. This was the “Linked Version”.
Most of the essence of the license is expressed in its fourth paragraph, which, in addition to the standard library license distribution requirements along with the Annex, states that the author of the Application must either link the Library dynamically or provide object files that his code compiles to rebuild its application by making its object files with changes.
More interesting things:
1. This license should be referred to together with the GPL as a set of additional exemptions to the GPL and, where the GPL was used as a separate file, the LGPL should be described as an additional file with clarifications.
2. The second item of the license ( Conveying Modified Versions ) says that if any changes are made to the source code of the library itself under the LGPL license (in this case, it is clarified that these changes, in addition to passing the arguments to the library functions), the author The published changes should either ensure the operability of the modified library, or change the licensing on the GPL without the exemptions that the LGPL license gives.
3. The third point of the license indicates the possibility of compiling library header files into the application's binary code, which uses the Library (without the requirement to publish the source code of the Application, but with the requirement to distribute the Application along with the LGPL license).
Advantages: Indirect interest in the quality of the code of commercial organizations (they also want the code of the assembled library to work well) and, at the same time, a ban on the development of the LGPL project "quietly", as is possible with free sofrware licenses.
Disadvantages: In order to use the library under the LGPL license in proprietary software, you will have to either link your product with the library compiled in dll (or in .so), which will require some small, but still effort, or upload in open access the object files in which Your code using the LGPL is collected.
If you know about any other interesting licenses - you can write about them in the comments. I think it will be interesting to all.
After examining the existing licenses, I chose the MIT license as one of the most liberal licenses. Among other benefits, the MIT license is very laconic - which is understandable, it does not need to include complex rules for protecting the rights to openness of derivative products.
Among these links at the end of this section there are several MIT licenses. There it is told well enough, I would rather not retell so as not to distort the essence.
At the end of the section I want to briefly describe how I added licensing information to my project (one of the design options):
1. I put the file licence.txt (or LICENCE.txt, so that it was more noticeable) in the root of the repository with the text of the license, which I copied from this site.
2. In all the source code files added a header of the following form:
Sample license cap
////////////////////////////////////////////////// //////////////////////////////
//
// <file name>
//
// Copyright © <license year> <author name> (<optional, author mail>)
//
// Distributed under <license name> (See accompanying file LICENSE.txt or copy at
// <path to the license site>)
//
Note: I have encountered several repositories, within which the full text of licenses was added to the headings for the source code. Perhaps this is how you protect the code more reliably, but you will annoy a user who will scroll through this long licensed entry for each file he deals with.
//
// <file name>
//
// Copyright © <license year> <author name> (<optional, author mail>)
//
// Distributed under <license name> (See accompanying file LICENSE.txt or copy at
// <path to the license site>)
//
Note: I have encountered several repositories, within which the full text of licenses was added to the headings for the source code. Perhaps this is how you protect the code more reliably, but you will annoy a user who will scroll through this long licensed entry for each file he deals with.
Regarding licensing, you can also read gnu.org. They thoroughly talk about the principles of registration of the license rights to the source code using the GPL and its related ones. I think their proposed method is applicable for any license.
I will finish the section, as promised, with a list of additional links to interesting materials:
useful links
1. This is the first article I read. 2002, yeah, the article is incredibly old, but, like, more or less relevant, and in the article itself there is a convenient comparative tablet for six different open source and free software licenses. If such a label is small - you can look more powerful tablet on Wikipedia .
2. About the main open source license in one picture .
3. About open source software licenses a little more .
4. About open source license in great detail . Information about the MIT license under the same article.
5. More in detail about the MIT license, with historical excursions.
6. Detailed article about the MIT license. In addition, some interesting ideas about open source software in general.
7. A very detailed article with the philosophy of the GNU community on the difference between free software and open source.
8. An interesting article that is not so simple in the world of open source software.
9. An article with a bold and interesting idea: to create a license that requires you to open not the source code, but the tests and the results of the tests.
10. The question I once asked on a toaster (it was fun to read it now, in March of 2016). In this question, a user with the nickname @littleguga advised me to the MIT license, which I eventually took advantage of.
2. Detaching the code from the main project

It so happens that the code that you want to turn into a library is not isolated into a separate repository. He can live from the beginning of work on the project within the framework of some folder of the main repository and, it seems, the history of editing these sources is tightly linked to the history of the main project and there are no chances to unhook it.
Fortunately, everything is not so sad. In such cases, you can use the git subtree split mechanism. I learned this trick here (it’s still mentioned here , but the story about the alternative method, filter-branch). If it is interesting, I can somehow tell you more about what adventures I experienced with this stone hammer in my hands, splitting monolithic repositories into submodules and gluing different things together using a submodule. Here I will only briefly describe how you can move the editing history of a separate folder of the main repository to a separate repository:
1. cd {main-repo-path}
First you need to go to the root of the main repository (the repository from which we will unlink the folder).
2. git subtree split -P {submodule-relative-path} -b {submodule-branch}
{submodule-relative-path} - path, relative to the root of the repository, to the folder that will be isolated in the branch.
{submodule-branch} - a branch to which the entire history of working with the sources of the folder located on the {submodule-relative-path} path is copied.
After calling this command, the {submodule-branch} branch is added to the local repository, which contains all commits related to changes in the {submodule-relative-path} folder. Calling this command will only create a new branch and copy commits into it, nothing else will be changed.
Note: It is worth noting that commit messages associated with copied commits will remain unchanged. They can save extra information for the folder editing history (in case there were changes in the folder and out of it in some commits). I do not know how to avoid it and do not think that it is possible to somehow avoid it at all.
3. git push {submodule-repo-URL} {submodule-branch}: {master}
Push for a new branch to another repository.
{submodule-repo-URL} - URL of the remout repository, in which we want to locate the change history of the folder.
{master} - the name that the {submodule-branch} branch will receive in the {submodule-repo-URL} remout repository. If this is the first branch added to the repository, then, obeying the ancient tradition of naming the main git branches, it is best to call it “master”.
After calling this command, a new branch named {master} will be added to the repository located at the URL {submodule-repo-URL}, containing the change history of the {submodule-relative-path} folder.
4. git branch -D {submodule-branch}
If you no longer need a branch with the history of editing the folder {submodule-relative-path} - you should delete this branch. -D-large means that we force the removal of a branch. If you delete a branch through -d, then git will swear: they say, we didn’t push this branch before deleting (git doesn’t shoot something, that we actually push it into another repository).
Well, that's all. Having done the described steps for my main project, I isolated the history of editing the source code of the future cpprt library, thus obtaining a very rough repository and preserving the entire history of changes to its files (albeit with some garbage in commitments).
The repository was ready ... But before the publication was still far away. Another was supposed to bring the repository to the appropriate form. For this, the source code and the license were not enough.It was necessary to attend to the creation of a heap of accompanying materials: tests, examples, to think over the assembly mechanism of everything that can assemble, create all sorts of read me files, documentation, etc ... For all this, it was necessary to think through the structure of the repository. The next section of the article is devoted to the project structure.
Useful links:
1. The question I asked once, choosing between submodule and subtree. There is a fairly long discussion and many links (some of them I have already used above). Perhaps, those who are interested in the topic of modular organization of the project may be interested in reading the discussion and clicking on the links. By the way, I want to take this opportunity to thank user Andy_U for the active discussion in discussing this issue - despite the fact that I finally chose a submodule.
2. Another question in which I described the difficulties I encountered when trying to work with a subtree ... By the way, maybe someone can explain what I did wrong?
3. Thoughts on repository structure
So, the repository structure ... In my opinion, this is something from the category of architecture. The code architecture sets the principles for the interaction of its elements with each other. Architecture - it is a structure - the repository of your project sets the principles for interaction with other projects with it. The term “other projects” I understand here is not only a code base, assembly systems or business processes. I mean also people who will use your code and make changes to it.
I tried, by virtue of my understanding, to formulate the requirements for the project from the point of view of the user and from the point of view of the contributor.
A view from a library user’s perspective
Enumeration of requirements in the order of their occurrence when meeting with the library:
1. I want to understand what I am dealing with. Some kind of readmick with a brief description of what it’s at the root of the project, and so that it is displayed on the project page in GitHub. And, of course, documentation. It is desirable with pictures.
2. I want to see how to work with the code. Tests, examples of the use of code, and so that it was clear how it is going.
3. About the project itself ... I want to spend a minimum of nerves and time to build, configure and integrate. It would be cool if there was a folder with headers and a compiled library for my compiler and my platform. I will connect, link - and in production and I do not want to understand this build system of yours.
Note:Hereinafter we are talking about C ++ specific things. For other languages, everything is somewhat simpler ... Probably.
4. I have a platform independent project! I want to be able to build the library myself and without the need to adapt to your build system. If we talk differently, I need CMake (if it is not clear what CMake is, that's okay, it will be discussed further )!
Additional requirements:
5. So, your library contains too many features. Can I have any supplies in the delivery? And it is desirable that immediately collected.
6. I have been using your project for a long time. I heard it has been updated recently? I want to know what has changed.
Total, taking into account the requirements presented, the following structure is obtained:
File recording notation
:
file_in_root
, . . file_in_root. /, , , .
/folder_in_root
, .
-file_in_folder
, . , , . . , - , , , .
-/folder_in_folder
, , .
file_in_root
, . . file_in_root. /, , , .
/folder_in_root
, .
-file_in_folder
, . , , . . , - , , , .
-/folder_in_folder
, , .
1. What is the library?
README.txt - a short description of the project.
/ doc - there are files that describe the project and its API in detail.
2. Tests and examples.
/ tests - test projects that are as easy as possible to run.
/ examples are examples that should also run as easily as possible.
3. I would quickly connect ...
/ include - an interface to access the API of the compiled library.
/ lib - build source in a static library.
/ bin - build the source code into a dynamic library.
Note: The lib and bin folders should preferably contain builds of the main compilers and platforms.
4. I want to collect myself!
/ src - project source codes.
cmake_readme.txt - optional information on how to work with cmake files to generate project configurations.
CMakeLists.txt - build configuration file.
5. Tools? Let's go here:
/ tools - tools that make working with the library easier. Either collected or in source form.
6. Updates
change_list.txt - information about the latest changes in the project.
View from the perspective of the library contributor
Enumeration of requirements in the order of their occurrence when meeting with the library:
0. Most likely, at the first stage of acquaintance with the library I am not a contributor - I am a user. Therefore, at a minimum, my requirements include the above user requirements.
1. I like your project, and I want to develop it. I would like to read some ridmik about how to join the friendly family of contributors.
2. I want to understand how the library is designed from the inside. I need in-depth documentation for developers. Ideally, documentation is also needed for the project build system.
3. I do not want to climb the whole project when working with the build system. If the assembly requires some abundance of configuration files, or additional programs - let it lie in a separate folder ... In general, there should be order in everything, the files should be grouped by purpose.
Additional requirements:
4. User tools are, of course, good ... But the project is really big. We need some tools for developers.
In summary, taking into account the requirements, the following refinements are made to the structure of an ideal project:
1. Introduction:
contributors_README.txt - a brief description of the project for those who want to invest in its development.
2. Documentation:
/ doc
- / developer_doc - documentation with details of the project.
Note: With this structure, user documentation should also be set aside in a separate folder within the doc folder (in some user_doc). Such an organization of documentation, according to my idea, besides structural ordering, would curious reader to intrigue the docks to glance: “what is there inside the docks for initiates?” - and thus make the reader a likely contributor.
3. Order in the project:
/ build
Folder with build system. It is desirable that outside this folder on the project a minimum of build-system files dangles.
4. Development Tools:
/ tools
- / developer_tools
Similar to documentation, build tools for their intended use: user-specific, development separately.
The requirements listed here relate subjectively to my perception. If you have any thoughts about it, share it.
While analyzing projects with GitHub, I noticed that they often mention files for working with the CMake utility. Moreover, judging by some materials, it was CMake that influenced the formation of the classical repository structure of open cross-platform software in C ++. There was a feeling that he could not get around. It was coming ...
4. The path to the knowledge of CMake

Acknowledgments: Thanks to Stanislav Makarov (Nipheris), communication with which was the impetus for me to learn CMake.
CMake is a utility that allows you to generate configuration files of specific make-systems (and / or projects of some IDEs) for building C / C ++ projects based on a universal, abstract configuration ( list of supported build / IDE systems). After generating, the configuration and / or project files that are received at the output from CMake are used by specific assembly mechanisms; only as a result of their work, the collected product is obtained.
We can say that CMake is a meta-make tool, an abstraction over build systems of C / C ++ projects.
I admit, while forming the repository structure for the cpprt library, I avoided using CMake in every possible way. Typical procrastination ... I invented various excuses, I composed my build systems on python, batch files, and I also know what it is, there are some fragile designs on submodules. The apotheosis of all this madness has become a whole theory that justifies my rejection of CMake. They say, since the cpprt library is very small (only two files), to integrate it, it is enough to insert the source code of the “library” directly into the user's project as a submodule . And the source codes of examples and tools also need to be categorized by submodules - so that the user can pull them into the library turnips at will.
Moreover, since the examples and tools have dependencies on the cpprt library, the library itself (attention!) Must also be built into these sub repositories as a submodule. After all, examples should show how it is necessary to build a library into projects ...
Thus, based on such a heretical theory, I made the repository, like the monster of Frankenstein, from several mini-repositories, connected together by the git mechanism. It was a real trash (you can admire here ). And all this was done, if we discard the excuses, for the sole purpose - just not to learn CMake .
But the conscience is not a TV, you can’t turn off the sound. Bumping into random materials in the free search process, I gradually became aware of: CMake is one of the pillars of the modern world of open cross-platform C ++ software. Doing a similar project without using CMake is complete nonsense. This is completely wrong, and telling people about this decision in the article, among other things, means teaching people to evil.
Therefore, on Tuesday, the twelfth day of April, I sat down to study CMake. By the evening of the next day, I already had a working CMake configuration of the project and laughed at my fears. It turned out to be easier than I expected and very convenient.
I present further the chronicle of my immersion in CMake. Hope this helps someone.
Learn more about why you need CMake.
, CMake. , , , , . – .
, ++ , (Java, C#, Python, ..)? , ++ ( = ). , , , , .
, , ( = + + + - ) . , C++ , IDE. , ? .
. , , , , .
, Visual Studio. , , , – , , -- .
– MinGW, Eclipse IDE . , — , . MinGW+Eclipse , , . , , Eclipse IDE, … NMake . … IDE. – .
, — , — IDE. , .
, , CMake! CMakeLists.txt, CMake – , CMake.exe, ( IDE), -/IDE . , !
CMake. .
PS: , CMake , CMakeLists.txt. . , : ( IDE). CMake .
— . .
Honey is how much, honey, without a single tar molecule ... But there are also disadvantages, of course, and we will talk about them in practice.
I think now that you know what CMake is, why CMake and how good CMake is - it's time to get to know it. So, the chronicle ...
, ++ , (Java, C#, Python, ..)? , ++ ( = ). , , , , .
, , ( = + + + - ) . , C++ , IDE. , ? .
. , , , , .
, Visual Studio. , , , – , , -- .
– MinGW, Eclipse IDE . , — , . MinGW+Eclipse , , . , , Eclipse IDE, … NMake . … IDE. – .
, — , — IDE. , .
, , CMake! CMakeLists.txt, CMake – , CMake.exe, ( IDE), -/IDE . , !
CMake. .
PS: , CMake , CMakeLists.txt. . , : ( IDE). CMake .
— . .
After my acquaintance with CMake, it turned out that I myself and some of my acquaintances — and some very experienced with C ++ experience for five years — we all incorrectly use most of the open source libraries. Almost all cross-platform libraries provide a simple and convenient CMake build feature, and we are looking for either a compiled library or, at the very least, ready-made project files for our IDE — instead of generating CMake projects for your IDE in ten seconds, even with the possibility of fine-tuning what we want to build (the library itself, tests, examples, tools, some other accompanying projects, and so on and so forth).
This story of the spreading of nails with microscopes reminded me of a famous sad bike about a peasant who invented long sachets of sugar so that it was more convenient to pour tea into a cup, but no one used these teabags correctly and the peasant committed suicide.
Remember, every time you ignore the possibility of using CMake in open source software for C ++, one author in the world cries in the world. Use the tools correctly.
About why 14 standards + 1 new is not about CMake
In connection with CMake, the reader will probably recall the well-known picture about the fourteen standards and the fifteenth, which appears when you try to link them into one. But in this case, this picture will be out of place. The fact is that CMake does not need to be embedded as something foreign in the build infrastructure of your project. It is enough to run CMake alone to get configuration files (or projects for IDE) that are convenient for the assembly infrastructure of the main project, after which you can easily embed these files (or projects) as something corresponding to the existing organization of your project and the target platform.
CMake is not a build system. CMake over build systems. He rules them.

CMake is not a build system. CMake over build systems. He rules them.
Honey is how much, honey, without a single tar molecule ... But there are also disadvantages, of course, and we will talk about them in practice.
I think now that you know what CMake is, why CMake and how good CMake is - it's time to get to know it. So, the chronicle ...
All the events outlined below actually took place on April 12, 2016, on Tuesday. Restored by the page request history in my browser.
(0:35) Primary search for materials

I downloaded and installed CMake ( from here ), and then began to look for lessons on it.
For the " cmake tutorial " request, the first link led to the official dock . I basically understood it. Since cpprt is still a very small project, the understanding of the first five steps of the docks was enough to describe the configuration of all possible library assembly targets (including assembly tools and examples).
For the query " CMake habrahabr " on the first page of Google there were three articles conceived as educational. I liked this article most of all (by the way, it also rolls out the second by the request “cmake tutorial”). A good tutorial article that looks a bit like translation docks — but more concise. It is divided into sections, each of which tells about the possibilities of CMake and gives simple examples of the case, without unnecessary husk. I used this article as an additional training material.
Other links found
1. Another CMake tutorial. I liked the beginning very much - there even was very clearly and beautifully written about the structure of the project. But after the first small and understandable example, the author began to dramatically complicate the examples, I got confused and decided to continue using the article mentioned above.
2. A small parse of the CMZ-assembly of the LZ4 library (relatively small project with GitHub). It is possible that for those who have had experience with CMake, analysis is quite good - but, as a very, very beginner in this matter, he scared away a small amount of comments with a large amount of code and an abundance of some LZ4-specific variables.
3. A good introductory lesson .
Of the links that I found already during surfing on the Habr, I am very amused by this uporoy article: the analogue clock on CMake . From the code did not understand anything - but cool to the same extent that it is strange.
(2:00) Build the first CMake configuration

By CMake, I returned to two in the morning. Briefly got acquainted with the lessons and decided to practice on some test, the most simple project. I created a folder (even if it is called {cmake_test} ) with the following contents:
main.cpp
The test file for which assembly we will generate configurations.
File contents
#include <iostream> int main() { std::cout << "Hello from CMake!" << std::endl; return 0; } CMakeLists.txt
A file with a description of the source assembly configuration main.cpp. Here and on to each new CMake team, I give a detailed comment.
File contents
cmake_minimum_required (VERSION 2.8.8)
# In this case, we set the project name to test_project
project (test_project)
# In this case, we add one source to the assembly - main.cpp
add_executable (test_executable main.cpp)
# Comment on the cmake_minimum_required command and a few words about the command arguments in CMake
Official documentation for the cmake_minimum_required team
This command sets the minimum version of CMake that can build this configuration. Used to immediately tell the user to update CMake if his version is too old.
Since this is the first CMake team we are meeting with, I’ll draw attention to how it is customary to pass arguments. The separators between the arguments are whitespaces (spaces, tabs, newline characters). In this case, CMake has named arguments. For example, in the presented call “VERSION 2.8.8” is the transfer of the value 2.8.8 for the argument of the named argument VERSION of the command cmake_minimum_required. In the call to the next command (project), the argument is passed without a name.
Honestly, I didn’t quite understand the principle by which CMake knows whether the value passed in is an argument or this value is an argument . I did not understand this even after reading the official docks about the command call syntax ... However, it seems to me that in 95% of cases you can live without it.
cmake_minimum_required (VERSION 2.8.8)
# Commentary to the project team
Official documentation for the project team
This command sets information about the CMake project. This is not what is commonly called an IDE project. This refers to what is in the project hierarchy to a higher level. In Visual Studio, this is called a solution , and in Eclipse, it is called a workspace .
Within the CMake project, configurations can be made for building several libraries and executable files, as well as rules for linking them to each other.
# In this case, we set the project name to test_project
project (test_project)
# Comment to add_executable command
Official documentation for the add_executable command
Adds a target to the assembly to build the executable file. Executable files and libraries can be the targets for building (build target) in CMake (in more detail about what a goal for building is - at the beginning of the section docks about the CMake build system).
The first argument is the name of the assembly target, after which the paths to the source code files from which the executable file will be built are listed.
For more fine-tuning, there are a number of additional arguments, you can read more about this on the official dock. For a simple project, this configuration is sufficient.
# In this case, we add one source to the assembly - main.cpp
add_executable (test_executable main.cpp)
After creating all these test files, I opened the console and did the following:
cd {cmake_test}
mkdir build
cd build
Moved to the folder with the test build.
I created a folder in it, in which we will generate configuration files using the CMake command.
Moved to the created folder.
cmake -G "MinGW Makefiles" ../
Call to generate build configuration files via MinGW toolchain.
-G "MinGW Makefiles" - select the generator for creating configuration files. Generator - a program that generates configuration files for a specific toolchain (or IDE) from an abstract CMake configuration.
In this case, I wanted to get a makefile for the MinGW32-make tool supplied with the MinGW toolchain.
../ - path to the folder where CMakeLists.txt is located with a description of the configuration.
After calling the described command, the configuration files for the project should have appeared in the folder from which the call is made. In this case, the expected configuration of the assembly of a single executable file from the source main.cpp.
Alternative option
@SilentBob suggested a useful attribute that can be used when generating configuration files. Due to this, it is possible not to call mkdir for the folder into which we perform the generation of assembly configurations.
The -B {build-folder} attribute. The {build-folder} is the folder in which CMake will generate the configurations. It does not need to be created, it will be created by CMake itself within the folder for which this call is being made. CMake will perform an action similar to mkdir.
This command allows you to do less body movements during the build. For example, to generate configs for our example, being in any folder on the computer, and at the same time configs neatly laid down in the build folder located in this folder, you can call the following command:
cmake {cmake_test} -Bbuild -G "MinGW Makefiles"
At the same time, the build folder will be created and CMake will place the created configs into it.
I made this call at 2:25 at night. Time is restored based on the history of requests, namely, based on the time of the first request regarding the following problems that have arisen.
(2:25) Problems
Nothing gathered. CMake gave the following error (I leave only that part of the message that concerns the error, and I hide my ways):
CMake Error at {my cmake_path} /share/cmake-2.8/Modules/CMakeMinGWFindMake.cmake:20 (MESSAGE): sh.exe was found in your PATH, here: {some path}
Run cmake in your PATH.
I googled about and found just such information. In a nutshell: if sh.exe is available in the system paths, then the generator for MinGW will not work. Why - I didn’t understand until the end, and I didn’t really want to understand at half past two that night, especially considering that in my case it was possible to fix this problem without much difficulty.
I temporarily removed the system path from which sh.exe was added (in my case it was git), started CMake again and ... got an error again, but already another. The new error looked much more depressing (I leave only that part of the message that concerns the error):
Building C object CMakeFiles / cmTC_ebbab.dir / testCCompiler.c.obj
C: \ MinGW \ bin \ gcc.exe -o CMakeFiles \ cmTC_ebbab.dir \ testCCompiler.c.obj -c C: \ Users \ test \ Desktop \ W \ cpprt_FINAL \ current \ github \ build \ CMakeFiles \ CMakeTmp \ testCCompiler.c
gcc.exe: error: C: \ Users \ test \ Desktop \ S \ R \ \ cpprt_FINAL \ current \ github \ build \ CMakeFiles \ CMakeTmp \ testCCompiler.c: No such file or directory
Again, reading different sources, I realized that this error occurred directly for the following reasons. Before generating configuration files for a specific toolchain, CMake checks for the presence of components of this toolchain (compiler, linker, etc.), and also checks whether these components work correctly. To do this, it creates the testCCompiler.c source in the temporary folder and tries to build it using the compiler. And in my case, CMake for some reason did not create such a file.
Alas, I can not give a specific link about this, here are some echoes of this mechanism.
In general, the error itself, of course, arose for the reasons stated above. But it was clear that this is a consequence, not a cause. To find the cause, I googled for about forty minutes, before the start of the fourth night. It was a typical hangover in the spirit of "a man": to make this fucking code work, finally, and then go to bed ... It won me over. I gave up first. Here is one of the most reasonable links that I managed to dig up by half past three.
Solution of the problem : What was the matter turned out, already in the process of writing this article. The fact is that the path to the folder in which the assembly was performed contained Russian characters. It was worth it to build the folder, the path to which did not have a similar flaw, as the assembly of the make-file for MinGW was successful.
Conclusion: Beware of unicode paths! If something does not work and you do not know why - see if there is any Unicode in your paths and try to make ways without Unicode!
(10:38) Build for Visual Studio

I woke up with the certainty that I no longer wish to play with the MinGW assembly. I had Visual Studio installed, so why not try to collect configs for it at the beginning (more precisely, in the case of a studio, collect the solution and projects ), and then test the generation of configs for other toolchains.
I opened the console, went to the {cmake_test} / build folder and called CMake, specifying another generator:
cmake -G Visual Studio 14 2015 ../
Oh miracle! In the build folder, a test_project.sln solution was formed, several projects (here I was a little surprised - why several) and another pile of all auxiliary files needed for, as I understood, so that CMake could update the settings of the solution and the project in case of configuration changes, without need to regenerate configs every time.
I opened the solution. Yes, it did not seem to me. In addition to the expected project test_executable.vcxproj for building main.cpp into an executable file, there were two other left projects in the solution: ALL_BUILD.vcxproj and ZERO_CHECK.vcxproj. I googled about. Found this answer on stack overflow. From it, I realized that these are the very projects with the help of which CMake updates the project files before each build in the event that the CMakeLists.txt file from which these project files were originated has changed. In general, everything is correct, they should have been created.
How to get rid of ZERO_CHECK
During the final formation of the cpprt repository, it became necessary to generate CMake configurations for the studio without CMake dependencies (without the ZERO_CHECK and BUILD_ALL projects) - so that users without CMake can run these projects. The decision how to get rid of ZERO_CHECK was found here . People said, of course, that this largely breaks the very idea of CMake (breaks the update of configurations with changes), but still told that to generate a solution for a studio without ZERO_CHECK, it is enough to set the CMAKE_SUPPRESS_REGENERATION option to TRUE (you can set it up like this: -DCMAKE_SUPPRESS_REGENERATION = TRUE, - if you configure generation of the solution through the command line). When setting this option, BUILD_ALL and other accompanying files and CMake folders will still be created, but they can be deleted without harming the project.
Why get rid of ZERO_CHECK was not enough
This is the first sensitive misunderstanding with CMake ... The fact is that, as I understand it, CMake does not know how to generate configs with relative paths. What is meant?
For example, if you in the project describe include paths via CMake, it will build an absolute path to the transferred folder, even if you specified a relative path in the CMake configuration. And this applies to all paths for all build configurations, including the paths to the folders in which build output directort is written!
Because of the described path generation features, it becomes impossible to save CMake-generated configurations and project files for the IDE in repositories, because absolute paths set the binding to specific paths of a single user.
I have not yet found how to solve this problem. I found the CMAKE_USE_RELATIVE_PATHS option, but in the official dock there is an addition “May not work!” And, damn it, as usual the official dock does not lie. It's not work!
This old discussion says that the ability to use relative paths is not typical for CMake, and therefore it is not and is not expected, and in a slightly more recent discussion on the ogre3d game engine forum, this answer offers one-to-one the same solution as I tried to use and that to me, that forum users with ogre3d.
I will say that I am surprised at how poorly this problem is highlighted on the Internet. In my opinion, this is a very sensitive problem. The option of generating configurations that are not dependent on cmake via cmake, in my opinion, is similar to the import option of the repository for version control systems. She must be.
Maybe I was just looking bad, or was I looking somehow wrong? If you have somehow solved this problem for yourself, tell us in the comments exactly how you did it. I will redo these spoilers in a separate section of this article, and I will indicate you as the author of this section.
In Visual Studio, I selected the test_executable project as a startup project and pressed ctrl + f5. The console printed: "Hello from CMake!". Urashechki cheers!

BONUS: Universal assembly via CMake
@SilentBob, thanks to him, suggested a very useful command that allows you to abstract the start of an assembly for a specific build configuration created via CMake:
cmake --build {build-path} --config {build-type}
{build-path} - the path to the folder with the build configuration generated by CMake.
{build-type} - build type: DEBUG or RELEASE.
Due to this command, you can build configs for any particular toolchain or IDE. In my opinion, a very useful feature, especially for automation, when writing any kind of cross-platform build scripts.
About one hour has passed since the beginning of work.
(11:24) Preparing a repository for building via CMake
Now you could try to connect CMake to the main project. Before CMake, as I have already said, my project had a hellish organization on sub-modules. Taking into account the prospects that were opened thanks to CMake, the use of sub-modules could be abandoned. I made a separate clone of the repository, took the source of all the submodules and started thinking about how I would customize the build using CMake.
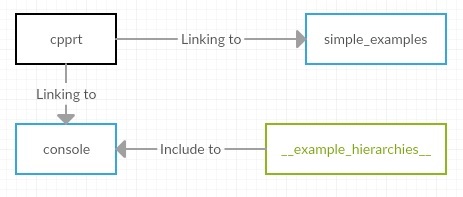
I slightly rebuilt the repository, which made it look human, like the “adult” repositories I had seen. Here is part of the project structure, which relates directly to working with CMake:
/ build is the empty folder in which the source code is supposed to be built.
/ include - folder with headers to access library API.
/ src - folder with the source code of the library.
/ examples - source folder of various examples.
- / __ example_hierarchies__ - folder with test class hierarchies (see below).
- / simple_examples - source folder of a small test case.
/ tools - folder with tools for working with the project.
- / console - at the moment there is only one tool, and its name is console.
CMakeLists.txt - CMake-file, with which you can collect different elements of the project.
Current library repository
What is stated in this article is true for commit e9c34bb .
More about __example_hierarchies__
The __example_hierarchies__ folder contains several class hierarchies registered using cpprt macros. These classes have no fields, they only do that they are inherited from each other, and virtual, also empty methods are needed only to demonstrate the work of cpprt with abstract classes . These hierarchies were needed because a lot of attention was paid to metadata about class inheritance in the cpprt library, and the inheritance hierarchy from __example_hierarchies__ could be used in various tests and examples.
I decided that the following items could be collected as part of the library delivery:
Black color for the library.
Blue color for executable files.
Green color for source folders, hardened between build targets.
library
1. cpprt - actually, the library itself. It is assembled from the source code, which is located in the / src folders and from the interface, which lies in the / include folder.
It is going to a static library, has no dependencies.
example
2. simple_examples is a small example consisting of a single file that describes the classical class of animals for acquaintance with OOP and uses the library API based on this hierarchy.
It is going to an executable file, depending on the cpprt library.
tool
3. console - at the moment it is, in fact, also an example of demonstrating the capabilities of the library, but the plans are to turn it into an independent tool.
Through the console, you can view information about the inheritance trees of the registered classes, as well as create and delete class objects using the string names of both objects and classes.
It is assembled into an executable file, it depends on the cpprt library and on the test class hierarchy, for example of which you can see the console operation.
The structure was ready. It remained "just nothing" - to describe the configuration for the assembly of these artifacts using CMake.
(11:30) Build the cpprt library

Despite the fact that the cpprt library contained only two files, I decided to work for the future and immediately find out how to connect all the files contained in a folder recursively (I won’t list dozens of paths to the source when there are more). Googled and found this link, which described the use of the file command with the argument GLOB_RECURSE.
I caught a glimpse of the CMake configuration of a small Project-OSRM project and wrote the following configuration code using the information found:
CMakeLists.txt
set (CPPRT_ROOT_PATH.)
# Set the root folder value for library sources.
set (CPPRT_SOURCES_PATH $ {CPPRT_ROOT_PATH} / src)
# Set the root folder value for the library interface.
set (CPPRT_INCLUDE_PATH $ {CPPRT_ROOT_PATH} / include)
#
# . CPPRT_SOURCES
# .
file(GLOB_RECURSE CPPRT_SOURCES
${CPPRT_SOURCES_PATH}/*.h
${CPPRT_SOURCES_PATH}/*.cpp
)
# , .
# CPPRT_HEADERS.
file(GLOB_RECURSE CPPRT_HEADERS
${CPPRT_INCLUDE_PATH}/*.h
)
# cpprt.
add_library(cpprt STATIC ${CPPRT_SOURCES} ${CPPRT_HEADERS})
# Set command comment
Official documentation about set
This command is intended for setting or updating the values of variables. The first argument is the variable name. Then its value is given. In this case, we pass the path ".", Which, as usual, means the current folder - that is, the folder in which CMakeLists.txt is located (in this case, the root of the repository).
Note: Is it possible to transmit variables via the command line during a CMake call? You can, if you set a variable with CACHE transfer ( here is the answer from stack overflow about). It looks cumbersome - therefore, in my opinion, it is better to transfer flags from the command line through the option command (it will be discussed later).
set (CPPRT_ROOT_PATH.)
# Set the root folder value for library sources.
# About variable references
Official documentation on variable link syntax
CMake uses a common access mechanism for variable values. As stated in the dock, CMake substitutes the value of the variable directly to the place where the reference to the variable is mentioned (or inserts an empty string if a variable with that name has not been defined). Due to this, you can use similar inserts in text variables ( Quoted Argument ) and even in other variable references. Example from docks:
$ {outer _ $ {inner_variable} _variable}
As I understand it, here the value of the variable inner_variable is a part of the name of another variable. Miracles, before and only.
set (CPPRT_SOURCES_PATH $ {CPPRT_ROOT_PATH} / src)
# Set the root folder value for the library interface.
set (CPPRT_INCLUDE_PATH $ {CPPRT_ROOT_PATH} / include)
# Comment to the file command
Official documentation for the file command
I’ll only tell you about using the file command with the argument GLOB_RECURSE. This command performs a recursive search for file and folder paths that obey the search rules specified in the command call. The rules are specified by arguments that follow the variable name, in which the list of found paths is written.
Probably, there are still tricky rules - but for my purposes the rule defining the principle of search by file extension was enough. , , , , (, ).
file GLOB_RECURSE, GLOB. , .
№1: , CMake . file GLOB_RECURSE (, , ) . ( ).
№2: , CMake file GLOB, file GLOB_RECURSE. . ( IDE) CMake / .
, – .
I’ll only tell you about using the file command with the argument GLOB_RECURSE. This command performs a recursive search for file and folder paths that obey the search rules specified in the command call. The rules are specified by arguments that follow the variable name, in which the list of found paths is written.
Probably, there are still tricky rules - but for my purposes the rule defining the principle of search by file extension was enough. , , , , (, ).
file GLOB_RECURSE, GLOB. , .
№1: , CMake . file GLOB_RECURSE (, , ) . ( ).
№2: , CMake file GLOB, file GLOB_RECURSE. . ( IDE) CMake / .
file GLOB
, , , CMake ( IDE) () CMakeLists.txt, . — CMakeLists.txt.
, , CMake file GLOB GLOB_RECURSE. , CMakeLists.txt () . .
, , CMake file GLOB GLOB_RECURSE. , CMakeLists.txt () . .
, – .
#
# . CPPRT_SOURCES
# .
file(GLOB_RECURSE CPPRT_SOURCES
${CPPRT_SOURCES_PATH}/*.h
${CPPRT_SOURCES_PATH}/*.cpp
)
# , .
# CPPRT_HEADERS.
file(GLOB_RECURSE CPPRT_HEADERS
${CPPRT_INCLUDE_PATH}/*.h
)
# add_library
# cpprt.
add_library(cpprt STATIC ${CPPRT_SOURCES} ${CPPRT_HEADERS})
After the file was ready, I went to the / build folder and collected the configuration files:
cmake -G "Visual Studio 14 2015" ../
Everything came together right away: a solution appeared with the project cpprt.vcxproj. I opened the solution and ran the build through the studio ... Yes. The library was assembled without any problems.
It happened at 12:41 pm, what can I talk about based on the time of time when I opened the link to facebook.
After Facebook, I temporarily switched to other tasks.
(16:09) Build an example simple_examples
I returned to the cmake setup in two and a half hours. Now it was necessary to make possible the generation of configs for building an example to the library. To do this, it was necessary to deal with the organization of dependencies between projects - after all, the project simple_examples was statically linked with the cpprt library: The
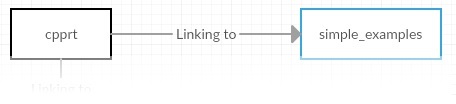
commands for linking the static library were mentioned in the CMake tutorials (the second example). After reading these lessons and a few more sources, I wrote the following configuration code:
CMakeLists.txt
#===============================================================
# Head
#
cmake_minimum_required(VERSION 2.8.8)
# , ,
#
option(BUILD_EXAMPLES «Build cpprt examples» OFF)
#-----------------------------------------------------------------------------------------------
# cpprt. .
project(cpprt_projects)
set(CPPRT_ROOT_PATH .)
set(CPPRT_SOURCES_PATH ${CPPRT_ROOT_PATH}/src)
set(CPPRT_INCLUDE_PATH ${CPPRT_ROOT_PATH}/include)
file(GLOB_RECURSE CPPRT_SOURCES
${CPPRT_SOURCES_PATH}/*.h
${CPPRT_SOURCES_PATH}/*.cpp
)
file(GLOB_RECURSE CPPRT_HEADERS
${CPPRT_INCLUDE_PATH}/*.h
)
include_directories(${CPPRT_INCLUDE_PATH})
add_library(cpprt STATIC ${CPPRT_SOURCES} ${CPPRT_HEADERS})
#-----------------------------------------------------------------------------------------------
###- Examples
#
include_directories(${CPPRT_INCLUDE_PATH})
# BUILD_EXAMPLES
# ON – .
if(BUILD_EXAMPLES)
#- — - — - — - — - — - — - — - — - — - — - — - — - — - — - — - — - — - — - — - — - — - — - -
### — Simple examples
# .
set(SIMPLE_EXAMPLE_ROOT ${CPPRT_ROOT_PATH}/examples/simple_examples)
# .
# .
add_executable(simple_examples
${SIMPLE_EXAMPLE_ROOT}/SimpleExamples.cpp
${CPPRT_SOURCES}
)
target_link_libraries(simple_examples cpprt)
endif(BUILD_EXAMPLES)
#========================================================
# Head
#
cmake_minimum_required(VERSION 2.8.8)
# option
option
-.
– , .
— , . , - CMakeLists.txt , , CMake , .
– . .
, ( cmake -G .. ) ( ). :
-D< >=ON/OFF
: set , CACHE-. , , option .
-.
– , .
— , . , - CMakeLists.txt , , CMake , .
– . .
, ( cmake -G .. ) ( ). :
-D< >=ON/OFF
: set , CACHE-. , , option .
# , ,
#
option(BUILD_EXAMPLES «Build cpprt examples» OFF)
#-----------------------------------------------------------------------------------------------
# cpprt. .
project(cpprt_projects)
set(CPPRT_ROOT_PATH .)
set(CPPRT_SOURCES_PATH ${CPPRT_ROOT_PATH}/src)
set(CPPRT_INCLUDE_PATH ${CPPRT_ROOT_PATH}/include)
file(GLOB_RECURSE CPPRT_SOURCES
${CPPRT_SOURCES_PATH}/*.h
${CPPRT_SOURCES_PATH}/*.cpp
)
file(GLOB_RECURSE CPPRT_HEADERS
${CPPRT_INCLUDE_PATH}/*.h
)
include_directories(${CPPRT_INCLUDE_PATH})
add_library(cpprt STATIC ${CPPRT_SOURCES} ${CPPRT_HEADERS})
#-----------------------------------------------------------------------------------------------
###- Examples
#
# include_directories
include_directories
( inlcude paths) CMakeLists.txt.
, – , . – , BEFORE AFTER .
: , . , , target_include_directories , . .
( inlcude paths) CMakeLists.txt.
, – , . – , BEFORE AFTER .
: , . , , target_include_directories , . .
include_directories(${CPPRT_INCLUDE_PATH})
# if
if
– . , .
: else() endif(), , ( : «Note that the expression in the else and endif clause is optional» ), , , , . , #endif .
– . , .
: else() endif(), , ( : «Note that the expression in the else and endif clause is optional» ), , , , . , #endif .
# BUILD_EXAMPLES
# ON – .
if(BUILD_EXAMPLES)
#- — - — - — - — - — - — - — - — - — - — - — - — - — - — - — - — - — - — - — - — - — - — - -
### — Simple examples
# .
set(SIMPLE_EXAMPLE_ROOT ${CPPRT_ROOT_PATH}/examples/simple_examples)
# .
# .
add_executable(simple_examples
${SIMPLE_EXAMPLE_ROOT}/SimpleExamples.cpp
${CPPRT_SOURCES}
)
# target_link_libraries
target_link_libraries
. , , . . – target_link_libraries ( : «Repeated calls for the same {target} append items in the order called» ).
: , , CMake. . , .
. , , . . – target_link_libraries ( : «Repeated calls for the same {target} append items in the order called» ).
: , , CMake. . , .
target_link_libraries(simple_examples cpprt)
endif(BUILD_EXAMPLES)
#========================================================
I tried to generate a studio solution from CMake configs: first with the transfer of the option to build the examples, then without it. For example, what team generated a solution for the studio along with the example project:
cmake -G "Visual Studio 14 2015" -DBUILD_EXAMPLES = ON ../
When the generation with the example passed, I opened the solution and wanted to run the example - but I received a message saying that there is no assembled executable file for the project. There was not a single error.
Fortunately, everything was quite simple - I forgot to set the example project as a startup project (CMake after assembly defaults to BUILD_ALL, within which no executable file is being built). After I set everything up, everything on the screen was printed for the test.
It happened, as I was able to recover from the history, by 5:14 pm - judging by the time I opened the FastDelegate project (this is one good microbliotech for working with callbacks in pros). I used it for my main project and I wanted to see how the build system was made there. It turned out that nothing ... However, perhaps, correctly.
(17:14) Build an example example console
It remained to collect the console. In principle, I already knew all the commands needed for this build. Recall the project structure:
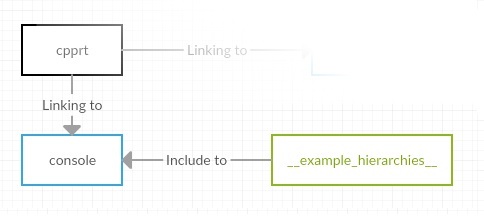
The console can be assembled with test class hierarchies. Here, the concept of “going with class hierarchies” means including sources from the repository / examples / __ example_hierarchies__ folder in the list of sources from which the console is built (not as the header search paths, but as another source of sources).
Configuration with console build description. I cite configurations without the configurations described above for building examples so as not to litter the code:
CMakeLists.txt
#==========================================================
# Head
#
cmake_minimum_required(VERSION 2.8.8)
# -
# console :
# .
option(BUILD_TOOLS «Build cpprt tools» OFF)
#
#
option(CONSOLE_WITH_EXAMPLE «Add examples to console» ON)
#-----------------------------------------------------------------------------------------------
### — cpprt code
#
project(cpprt_projects)
set(CPPRT_ROOT_PATH .)
set(CPPRT_SOURCES_PATH ${CPPRT_ROOT_PATH}/src)
set(CPPRT_INCLUDE_PATH ${CPPRT_ROOT_PATH}/include)
file(GLOB_RECURSE CPPRT_SOURCES
${CPPRT_SOURCES_PATH}/*.h
${CPPRT_SOURCES_PATH}/*.cpp
)
file(GLOB_RECURSE CPPRT_HEADERS
${CPPRT_INCLUDE_PATH}/*.h
)
include_directories(${CPPRT_INCLUDE_PATH})
add_library(cpprt STATIC ${CPPRT_SOURCES} ${CPPRT_HEADERS})
#- — - — - — - — - — - — - — - — - — - — - — - — - — - — - — - — - — - — - — - — - — - — - — - -
# ,
# __example_hierarchies__. , , .
set(EXAMPLE_HIERARCHIES_ROOT
${CPPRT_ROOT_PATH}/examples/__example_hierarchies__
)
file(GLOB_RECURSE EXAMPLE_HIERARCHY_PATHES
${EXAMPLE_HIERARCHIES_ROOT}/*.h
${EXAMPLE_HIERARCHIES_ROOT}/*.cpp
)
#-----------------------------------------------------------------------------------------------
###
if(BUILD_TOOLS)
# – ,
# .
set(TOOLS_ROOT ${CPPRT_ROOT_PATH}/tools)
#- — - — - — - — - — - — - — - — - — - — - — - — - — - — - — - — - — - — - — - — - — - — - -
#
set(CONSOLE_ROOT ${TOOLS_ROOT}/console)
# , :
if (CONSOLE_WITH_EXAMPLE)
#
add_executable(cpprt_console
${CONSOLE_ROOT}/CPPRTConsole.cpp
${EXAMPLE_HIERARCHY_PATHES}
)
# –
# (include path).
#
# ,
# , target_include_directories
# ( , )
target_include_directories(cpprt
PUBLIC
${EXAMPLE_HIERARCHIES_ROOT}
)
# cpprt
target_link_libraries(cpprt_console cpprt)
else(CONSOLE_WITH_EXAMPLE)
# -
# simple_example
add_executable(cpprt_console
${CONSOLE_ROOT}/CPPRTConsole.cpp
)
target_link_libraries(cpprt_console cpprt)
endif(CONSOLE_WITH_EXAMPLE)
endif(BUILD_TOOLS)
The console is assembled and earned immediately. Everything was ready.
By that time it was (19:23) - judging by the time in which I googled " mint tea soothes ."
The result of all the work: the config, such as is now used in the project:
CMakeLists.txt
#============================================================
# Head
#
cmake_minimum_required(VERSION 2.8.8)
option(BUILD_ALL «Build cpprt tools» OFF)
# . .
#
# .
#
# ,
# .
option(BUILD_TOOLS «Build cpprt tools» ${BUILD_ALL})
option(CONSOLE_WITH_EXAMPLE «Add examples to console» ON)
option(BUILD_EXAMPLES «Build cpprt examples» ${BUILD_ALL})
#-----------------------------------------------------------------------------------------------
### — cpprt code
#
project(cpprt_projects)
set(CPPRT_ROOT_PATH .)
set(CPPRT_SOURCES_PATH ${CPPRT_ROOT_PATH}/src)
set(CPPRT_INCLUDE_PATH ${CPPRT_ROOT_PATH}/include)
file(GLOB_RECURSE CPPRT_SOURCES
${CPPRT_SOURCES_PATH}/*.h
${CPPRT_SOURCES_PATH}/*.cpp
)
file(GLOB_RECURSE CPPRT_HEADERS
${CPPRT_INCLUDE_PATH}/*.h
)
include_directories(${CPPRT_INCLUDE_PATH})
add_library(cpprt STATIC ${CPPRT_SOURCES} ${CPPRT_HEADERS})
#- — - — - — - — - — - — - — - — - — - — - — - — - — - — - — - — - — - — - — - — - — - — - — - — # Global examples setup
#
set(EXAMPLE_HIERARCHIES_ROOT ${CPPRT_ROOT_PATH}/examples/__example_hierarchies__)
file(GLOB_RECURSE EXAMPLE_HIERARCHY_PATHES
${EXAMPLE_HIERARCHIES_ROOT}/*.h
${EXAMPLE_HIERARCHIES_ROOT}/*.cpp
)
#-----------------------------------------------------------------------------------------------
### — Tools
#
if(BUILD_TOOLS)
set(TOOLS_ROOT ${CPPRT_ROOT_PATH}/tools)
#- — - — - — - — - — - — - — - — - — - — - — - — - — - — - — - — - — - — - — - — - — - — - — ### — Console project
set(CONSOLE_ROOT ${TOOLS_ROOT}/console)
if (CONSOLE_WITH_EXAMPLE)
add_executable(cpprt_console
${CONSOLE_ROOT}/CPPRTConsole.cpp
${EXAMPLE_HIERARCHY_PATHES}
)
target_include_directories(cpprt_console
PUBLIC
${EXAMPLE_HIERARCHIES_ROOT}
)
target_link_libraries(cpprt_console cpprt)
else(CONSOLE_WITH_EXAMPLE)
add_executable(cpprt_console
${CONSOLE_ROOT}/CPPRTConsole.cpp
)
target_link_libraries(cpprt_console cpprt)
endif(CONSOLE_WITH_EXAMPLE)
endif(BUILD_TOOLS)
#-----------------------------------------------------------------------------------------------
###- Examples
#
if(BUILD_EXAMPLES)
#- — - — - — - — - — - — - — - — - — - — - — - — - — - — - — - — - — - — - — - — - — - — - — ### — Simple examples
set(SIMPLE_EXAMPLE_ROOT examples/simple_examples)
include_directories(${CPPRT_INCLUDE_PATH})
add_executable(simple_examples
${SIMPLE_EXAMPLE_ROOT}/SimpleExamples.cpp
${CPPRT_SOURCES}
)
target_link_libraries(simple_examples cpprt)
endif(BUILD_EXAMPLES)
#============================================================
Thus, I easily and without special nerves, in four hours of pure time, figured out at a working basic level with the CMake utility. In my opinion, initiation to the powerful knowledge of CMake costs four hours of time.
Finishing, I will express about CMake:
What I liked:
Powerful utility. It really removes the need to bathe with the configuration under a bunch of platforms and compilers. I felt it when after the studio I generated a CMing make file for mingw32-make + Eclipse IDE and compiled the source code through it as easily as I collected the same thing through Visual Studio before.
What I did not like:
Very strange language design. Arguments with whitespace as delimiters, a strange principle of using named arguments, not always a transparent mechanism for configuring project properties and assembly goals (sometimes properties are set globally for all assembly goals, sometimes locally for a specific one), a strange policy for using commands (for example, the file command on In fact, it combines all operations with the file system, and the specific operation is passed using the command argument).
At some moments it seemed to me that the language for CMake was written by aliens: very clever, but thinking a little in our opinion.
5. About the documentation
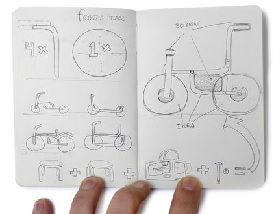
I will say right away - I didn’t have the heart to compile English documentation for the cpprt library. Now all the documentation is reduced to sending to read this series of articles, which, perhaps, means the lack of documentation. I will try to correct this shortcoming as soon as I take a breath after a four-week marathon, which resulted in the writing of this series of articles.
Despite the fact that in practice I didn’t write to the doc, I did some theoretical research on the basis of what is best to do the documentation. I give here the information that I managed to find. Information was mainly taken from this article and comments to it:
Google docs
.
Benefits:
— .
— , , .
— ( ).
— .
— ( ).
— doc, pdf html.
Disadvantages:
— goolge. sistemshik : « google».
— . , , . googledocs?
Benefits:
— .
— , , .
— ( ).
— .
— ( ).
— doc, pdf html.
Disadvantages:
— goolge. sistemshik : « google».
— . , , . googledocs?
Doxygen
Plain text
Yes. – , .
: « . <...> . , plaintext. ». , Plain text .
Benefits:
— , . — .
— .
Disadvantages:
— . Plain text , , .
— .
: « . <...> . , plaintext. ». , Plain text .
Benefits:
— , . — .
— .
Disadvantages:
— . Plain text , , .
— .
As you probably understood, after this initial familiarization with the topic of documenting open source software, Doxygen turned out to be a favorite. This is probably due to the fact that I am a programmer who loves to write code and does not like to pore over all boring documents.
However, as for me, good documentation alone will not do with Doxygen. This is a good solution for getting acquainted with the API and, possibly, for displaying some simple diagrams. But often we need more detailed articles describing the behavior of the code in detail, with large and complex pictures and illustrations in addition to UML. You still have to do it yourself, with pens, you cannot do without some comments on the source code.
As for the documentation, I have nothing more to say. Write - add.
6. About library promotion
Here I still have no experience other than this series of articles. This is an experimental attempt to advance the library. Tell people about your experience. Let's see how good this approach is.
If there is a positive reaction from readers to this publication and the library itself, I will adapt this cycle of articles for an English-speaking audience and try to publish them somewhere (I know there is a reddit ... maybe someone else knows some good resources?) And then we'll see ...
As for the progress, I probably have nothing more to say for now.
7. Conclusion
I hope my research, the mistakes made and, most importantly, the wonderful comments of other people and the corrections made by them will allow you, dear reader, to go this way sooner than I did.
The idea of collective creativity
, .
Source: https://habr.com/ru/post/281995/
All Articles