Develop HTML5 games in Intel XDK. Part 5. Increase the length of the snake and manage it

Part 1 » Part 2 » Part 3 » Part 4 » Part 5 » Part 6 » Part 7 // End)
Today we will deal with the fact that we will increase the length of the body of the snake and create a system to control its movement.

Create a snake body in the form of a chain of fragments
The snake consists of many parts. This allows you to increase its length, but makes the task of moving a game object difficult. After all, we need to move the essence, consisting of many parts, as a whole. Let's do it in a few steps. First of all, let's create a snake that can move as a whole.
')
1. In the SnakeLayer layer code, replace the
snakeHead variable with snakeParts .2. Code
snakeHead: null change to this: snakeParts: null, // 3. Replace the
ctor method ctor one below: ctor: function () { /* */ var winSize = cc.view.getDesignResolutionSize(); /* */ this._super(); // /* snakeParts */ this.snakeParts = []; /* */ var snakeHead = new SnakePart(asset.SnakeHead_png); /* */ snakeHead.x = winSize.width / 2; snakeHead.y = winSize.height / 2; /* snakeParts */ this.addChild(snakeHead); // this.snakeParts.push(snakeHead); /* */ this.scheduleUpdate(); }, Here we have added to the code the ability to work with the body of a snake, consisting of separate fragments. This was done with the help of an array, we used to consider the snake's head as a separate object. However, this has not yet solved the problem of organizing the parts of a snake into a “single organism”. In order to do this, we will assign the previous positions of the parts of the snake to those parts that follow them.
4.
SnakeParts code as shown below: var SnakePart = cc.Sprite.extend({ // prevX: this.x, prevY: this.y, ctor: function(sprite) { /* , */ this._super(sprite); }, move: function(posX, posY) { // /* */ this.prevX = this.x; this.prevY = this.y; /* */ this.x = posX; this.y = posY; }, }); 5. Add the following method to the
SnakeLayer code: addPart: function() { var newPart = new SnakePart(asset.SnakeBody_png), size = this.snakeParts.length, tail = this.snakeParts[size - 1]; /* */ newPart.x = tail.x; newPart.y = tail.y; /* */ this.addChild(newPart); this.snakeParts.push(newPart); }, The default sprite position is (0, 0). This means that the
SnakePart object, before moving, will appear in the lower left corner of the screen. We solve this problem by placing a new sprite in the tail of the snake.6. Change the
moveSnake method in moveSnake code to use the new member of the snakeParts class and use it to move all parts of the snake: moveSnake: function(dir) { /* , */ var up = 1, down = -1, left = -2, right = 2, step = 20; /* snakeHead */ var snakeHead = this.snakeParts[0]; /* */ var dirMap = {}; dirMap[up] = function() {snakeHead.move(snakeHead.x, snakeHead.y + step);}; dirMap[down] = function() {snakeHead.move(snakeHead.x, snakeHead.y - step);}; dirMap[left] = function() {snakeHead.move(snakeHead.x - step, snakeHead.y);}; dirMap[right] = function() {snakeHead.move(snakeHead.x + step, snakeHead.y);}; /* */ if (dirMap[dir] !== undefined) { dirMap[dir](); } // /* */ var prevX = snakeHead.prevX; var prevY = snakeHead.prevY; /* */ for (var part = 1; part < this.snakeParts.length; part++) { var curPart = this.snakeParts[part]; /* , */ curPart.move(prevX, prevY); prevX = curPart.prevX; prevY = curPart.prevY; } }, 7. Add the following code to the
SnakeLayer constructor. This code is temporary , it is needed only to check whether everything is done at this stage of development: ctor: function () { ... for (var parts = 0; parts < 10; parts++) { this.addPart(); } }, 8. Run the emulator. If everything is done correctly, you will see a snake, which slowly creeps upwards, and as it moves, it lengthens, and then it goes beyond the limits of the screen.
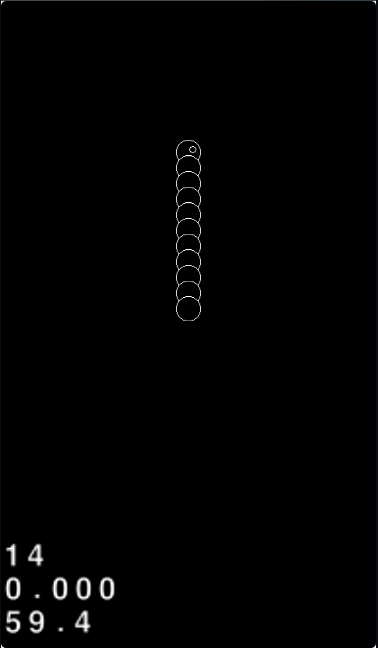
Moving snake on the game screen
Now it's time to control this snake.
Developments
Cocos2d-JS's standard data entry system is event based. There is a centralized event manager ( Event Manager ), which performs the processing of all events in the engine. Event Manager allows you to register callback functions that will be triggered in response to certain events.
The following construction is used to register the callback function:
cc.eventManager.addListener({ event: cc.EventListener.LISTENER, // onEventType: callBackFunction // }, this); And here is a real example of the implementation of this design:
cc.eventManager.addListener({ event: cc.EventListener.KEYBOARD, onKeyDown: callBackFunction1, onKeyUp: callBackFunction2 }, this); Callback function
The callback function that was passed when setting up the listener is called in a different scope. This means that we cannot use the keyword "this" in it. Fortunately, Cocos2d-JS provides some help mechanisms to get around this. This is done using the event object.
By creating a callback function, you can specify several arguments for it. The second argument is always an event object. It allows you to know the type of event that represents, and what is the purpose of the event. This gives us access to the node that is associated with the event.
The first argument of the callback function depends on the type of event. For example, if we are talking about handling keyboard events, the first argument will be the key code involved in the event. In the touch event of the touch screen, it will be a touch object that carries information about the coordinates of the touch. Knowing all this will help us to establish a snake control system.
1. Add the following code to
SnakeLayer : curDir: 0, /* , */ 2. Change the “up” parameter that was used in
moveSnake to “this.curDir” in the update method. Bring him to this form: this.moveSnake(this.curDir); Now the variable curDir is used to change the direction of the snake.
3. Add code to interact with the event manager in the
ctor method of the ctor layer: /* */ cc.eventManager.addListener({ event: cc.EventListener.KEYBOARD, onKeyPressed: function(keyCode, event) { var targ = event.getCurrentTarget(); /* , */ var up = 1, down = -1, left = -2, right = 2; /* , */ var keyMap = {}; keyMap[87] = up; // w keyMap[83] = down; // s keyMap[65] = left; // a keyMap[68] = right; // d /* */ if (keyMap[keyCode] !== undefined) { targ.curDir = keyMap[keyCode]; } } }, this); This code is pretty simple. When it
curDir out that one of the keys of interest is pressed, we change the value of the curDir variable to one that corresponds to the desired direction. At the next iteration of the game cycle, the snake will begin to move in the chosen direction until one of the directional keys is pressed. All this is good, but on a mobile device with a touch screen will not work. Therefore, we add touch control to the project.Add the following code to the
ctor method so that the snake can control the touch screen: /* */ cc.eventManager.addListener({ event: cc.EventListener.TOUCH_ONE_BY_ONE, onTouchBegan: function() { /* onTouchMoved, true */ return true; }, onTouchMoved: function(touch, event) { var targ = event.getCurrentTarget(); var up = 1, down = -1, left = -2, right = 2; /* */ var delta = touch.getDelta(); /* */ if (delta.x !== 0 && delta.y !== 0) { if (Math.abs(delta.x) > Math.abs(delta.y)) { /* , */ targ.curDir = Math.sign(delta.x) * right; } else if (Math.abs(delta.x) < Math.abs(delta.y)) { /* , */ targ.curDir = Math.sign(delta.y) * up; } } /* , , */ } }, this); Unfortunately, Cocos2d-JS does not have built-in support for events triggered by a touch gesture with pulling, so we needed to write our own implementation of such a mechanism. We look at the start and end points of the touch gesture, and, if, for example, the distance to move up is greater than to other sides, we execute the command to move up. The same is done for moving right, left, and down.
Now you can control the snake! However, there is one problem. A player can suddenly lose (taking into account the logic that we are still implementing), if, for example, the snake moves up, and he presses the "down" key. With this we can handle it.
findings
Let's sum up the today's occupation:
- The parts of the snake's body move synchronously, since when moving, each of them conveys to the next its previous position.
- When implementing a game object control, an event system is involved.
Having mastered today's material, you could do the following:
- Create a snake body and adjust its length.
- Create a management system.
The snake moves around the screen, responds to keystrokes on the keyboard and touches the touch screen. But while in her movements there is no special meaning. Therefore, next time we will add a treat for it to the game and talk about the recognition and handling of collisions.
Part 1 » Part 2 » Part 3 » Part 4 » Part 5 » Part 6 » Part 7 // End)
Source: https://habr.com/ru/post/281639/
All Articles