HoloLens, Xbox One Dev Mode and developer opportunities from the conference // Build
Hello dear readers!
This year, at the Microsoft // Build conference, not only many technological announcements and innovations were presented, but also quite a few interesting opportunities at the event itself.
HoloLens and Holographic Academy, Xbox One Developer Mode and the details of interesting technology projects from the final of the Imagine Cup USA - I want to tell you about this in this article.
')
Microsoft, together with NASA, presented a joint project to explore Mars through the use of a HoloLens device called: “Destination: MARS”.
The conference was attended by a large stand with a demonstration of a landing on Mars, where every visitor who received a ticket for the demo could feel himself in the guise of a Mars explorer.

Getting into the room about 25 square meters. m., all participants are located around the room and, after a short introduction, fall on the 3d model of the surface of Mars. The demonstration makes you feel, and what is on the "red planet" when you stand on its land.
You can walk, examine all the objects around, see the Curiosity rover itself.
Parallel to this, there appear 3d models of NASA employees, who explain and tell what is happening around and the entire history of the project as a whole.
Due to the powerful processor for HoloLens, you can use models of any degree of quality, the model will be displayed in the helmet exactly the way it was created.
Last year, the // Build 2015 was first introduced to the Academy of Development under HoloLens - Holographic Academy. This is 4.5 hours of interesting learning how to create holograms for Microsoft HoloLens from scratch.
For all 3 days of all visitors in 2015 only ~ 180 people could get on it, and luck also smiled at me.
At the academy, step by step, they were taught how to design holograms, and the experience of using “personal holograms” was explored: each person develops his personal hologram and interacts with it, which can in no way affect the hologram of another person.
Before the start of the academy, everyone was asked to sign a permission to use photo and video materials, since on the academy there were cameras in every corner. We handed over all the devices to the safes and passed through the metal detector frame to additionally scan whether there was something left in the pockets.

Then there is an important process - the measurement of the distance between the eyes and the visual range, because Each HoloLens device is programmed individually for a person.
The Academy included the following stages:
After each stage, we were given “achievement” for the work done, which brought even more positive to the development training process.
One video from the academy:
During the academy, each participant (with his consent) was interviewed, asked about feelings, which projects I would like to develop for HoloLens and many other questions. And you could subscribe to participate in further research on HoloLens.
At the end of the academy, all participants receive the status of “Holographic Developer”.
Holographic Academy was also held on // Build 2016, but only for the press and those who pre-ordered the HoloLens Development Edition . So far, the pre-order program is available only to developers from the USA and Canada, the cost of the device itself is $ 3000.

If last year the main topic was “personal holograms”, this time - “general holograms”, i.e. available for interaction simultaneously to all participants. Everyone sees a single hologram and interacts with it.
Here, step by step, Microsoft taught participants how to create holograms and interact with them for ~ 4 hours.
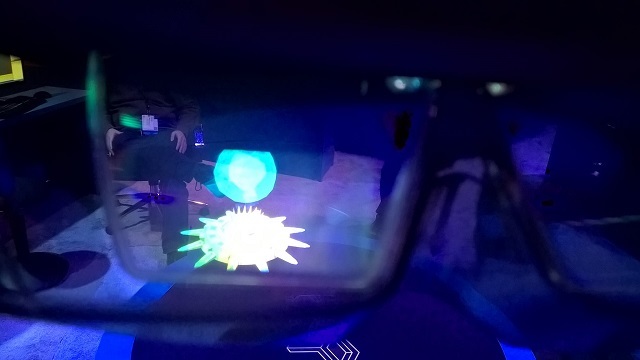
In the end, it was a game in which all the participants, being in a single world, destroy enemies through fireballs, all interact with the same hologram and with each other.
Like last time, this is not only another unique experience, but also useful research for Microsoft.
In conclusion of the Holographic Academy theme, I highly recommend you to configure everything, try to create your own holograms and watch them on the emulator. And also go through some similar way of the academy at this link .
As you know, Microsoft finally introduced the Xbox One Developer Mode, which allows you to test UWP applications / games on the Xbox One.
This feature is in the Preview stage. To install, you need to download a special application Dev Mode Activation.

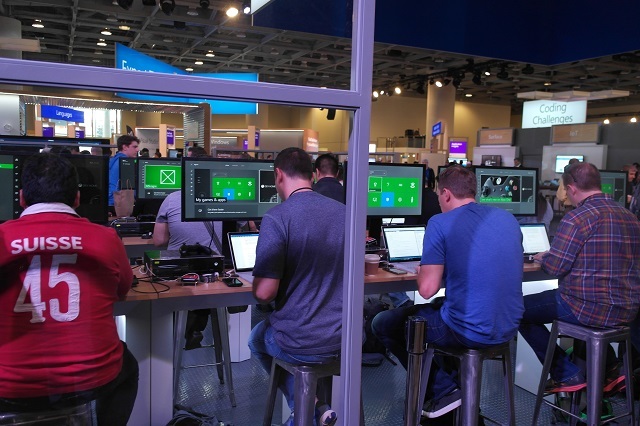
At the conference // Build 2016 there was a whole booth of The Garage, on which it was possible to try out consoles, which were converted to DevKit in this way.
What the Developer Preview provides:
At the same time, you get full-fledged capabilities for developing and testing your UWP applications / games on Xbox One. But there is one feature: in order to release the game on Xbox One or use all the power of the console, you will still need to register with the ID @ Xbox program.
Before activation, you first need to make sure that you have a console in Retail mode. Unfortunately, you cannot participate in two preview programs at the same time.
If you are in the Xbox One Preview program, then through the Xbox Preview Dashboard -> Registration application you need to exit the Preview program.
This process can be delayed, because The preview update should go to the Release stage, after that you will be switched to the Retail mode.
Now let's get into Dev Mode :
After entering the code, your Xbox One will start the activation process and after that the console will start installing the necessary software.
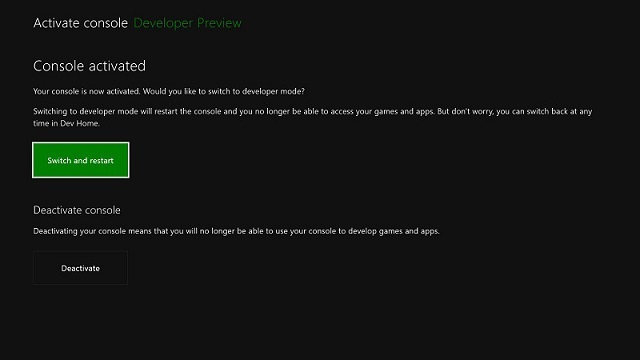
It remains to click on "Switch and Restart".
On the PC, you need to install:
This year the American finals of the Imagine Cup technology competition for students were held at the conference . Prior to that, regional finals were held in the cities of the United States, from which selected projects went into the American finals.
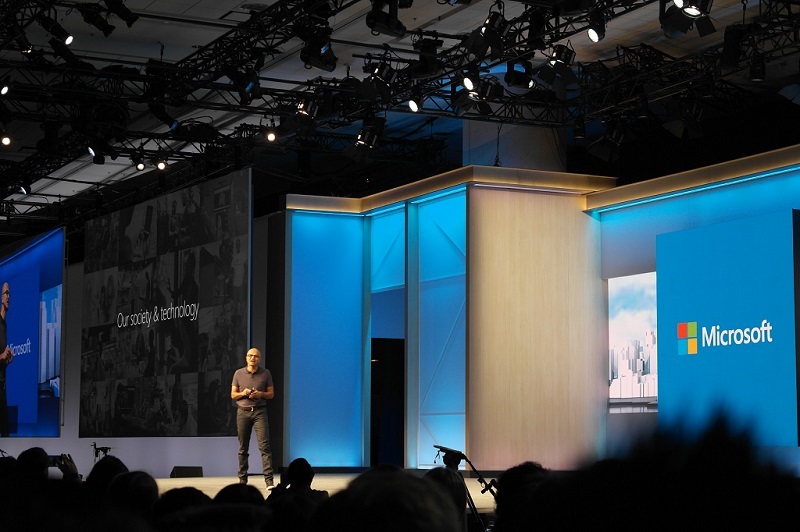
The participants had a very rich program, starting with a greeting at a rented restaurant on the evening of April 29, a meeting with Satya Nandella and cool speakers master classes on other days; ending with a show of projects in the very “heart” // Build, pitches and award ceremony.
I managed to study several Imagine Cup projects during their exhibition at the conference.
The entire last day was a presentation of projects before the judges - representatives of the industry. At the end of the day there was an award ceremony, in which not only the winners were named, but the winners once again spoke fully about their project and showed it in action.

Winners
With HealthX, technology is a complete solution for ophthalmology clinics and their patients aimed at diagnosing and treating amblyopia, commonly known as the “lazy eye.” Amblyopia is the most common cause of vision loss among children.
Each winning team received as a prize $ 4,000 and passed to the international semifinal, where one project from each country will be determined, which will go to the international final of the Imagine Cup.
It should be noted that the Russian final of the Imagine Cup will be held on April 23 in Moscow in Digital October.
Thanks for attention!
If you have any questions or want to know something in more detail, be sure to write, always answer. See you again!
This year, at the Microsoft // Build conference, not only many technological announcements and innovations were presented, but also quite a few interesting opportunities at the event itself.
HoloLens and Holographic Academy, Xbox One Developer Mode and the details of interesting technology projects from the final of the Imagine Cup USA - I want to tell you about this in this article.
')
HoloLens and NASA
Microsoft, together with NASA, presented a joint project to explore Mars through the use of a HoloLens device called: “Destination: MARS”.
The conference was attended by a large stand with a demonstration of a landing on Mars, where every visitor who received a ticket for the demo could feel himself in the guise of a Mars explorer.
A bit of background
With its roots, the project goes far back to 2012, when the Curiosity rover successfully landed on Mars and began researching the “red planet”.

Several years have passed, and NASA has a lot of different data, images, analyzes of the surface and atmosphere of Mars.
All material obtained from curiosity and its predecessors was used to recreate the exact surface of Mars. It is on her that you get during the demonstration of “Destination: MARS”.
At NASA itself, all the capabilities and tools of HoloLens are used to study Mars and plan the route and activities of Curiosity on the “red planet”. These are the same development tools that each developer can now install on his computer and start working in the emulator to create holograms.
Getting into the room about 25 square meters. m., all participants are located around the room and, after a short introduction, fall on the 3d model of the surface of Mars. The demonstration makes you feel, and what is on the "red planet" when you stand on its land.
You can walk, examine all the objects around, see the Curiosity rover itself.
Parallel to this, there appear 3d models of NASA employees, who explain and tell what is happening around and the entire history of the project as a whole.
Due to the powerful processor for HoloLens, you can use models of any degree of quality, the model will be displayed in the helmet exactly the way it was created.
Technical characteristics of HoloLens
The site contains a more detailed picture of the visualization of all the parts that make up HoloLens.
- 2 processors: Microsoft Holographic Processing Unit (HPU) and Intel 32 bit processor
- RAM: 2 gb
- Flash-memory: 64 gb
- Support bluetooth (included Bluetooth Clicker ), Micro USB connector
- Inertial measurement unit (inertial measurement unit), ambient light sensor and 4 matched cameras. Depth measurement camera (for HoloLens perception of space).
- 2 megapixel HD camera for recording video and taking photos.
- 4 microphones inside the device, allowing you to record voice commands user.
- Weight: not more than 579 g
- Battery life: 2-3 hours of active use, 2 weeks standby
The site contains a more detailed picture of the visualization of all the parts that make up HoloLens.
Holographic Academy - the evolution of hologram development training
Last year, the // Build 2015 was first introduced to the Academy of Development under HoloLens - Holographic Academy. This is 4.5 hours of interesting learning how to create holograms for Microsoft HoloLens from scratch.
For all 3 days of all visitors in 2015 only ~ 180 people could get on it, and luck also smiled at me.
At the academy, step by step, they were taught how to design holograms, and the experience of using “personal holograms” was explored: each person develops his personal hologram and interacts with it, which can in no way affect the hologram of another person.
Before the start of the academy, everyone was asked to sign a permission to use photo and video materials, since on the academy there were cameras in every corner. We handed over all the devices to the safes and passed through the metal detector frame to additionally scan whether there was something left in the pockets.
Then there is an important process - the measurement of the distance between the eyes and the visual range, because Each HoloLens device is programmed individually for a person.
The Academy included the following stages:
- Short course of development for Unity and environment configuration
To create HoloLens holograms, the Unity game engine is used. To turn an ordinary scene into a scene suitable for creating holograms, it is necessary in a certain way to change the camera and light settings.
Development under HoloLens is extremely simple, the implementation of each function takes literally a few lines in C #.
Already, you can start developing for HoloLens by installing development tools .
There is no special HoloLens SDK, all tools for working with holograms are already built into the Visual Studio 2015 Update 2 & Windows 10 SDK (version 1511 and higher).
What you need:
The next step is to configure the Unity project for HoloLens.ConfigurationScene configuration:- In the Hierarchy, select Main Camera.
- In the Inspector panel, set the value of the transform position to 0, 0, 0, so the location of the user's head will be at the beginning of the Unity level
- Change Clear Flags to Solid Color
- Change the background color to RGBA 0,0,0,0. Note: black color is rendered as transparent in HoloLens.
- Change Clipping Planes - the value of Near is recommended to put 0.85 (meters) for HoloLens.
Project Configuration:- In Player Settings> Windows Store> Publishing Settings> Capabilities, you need to select the correct Capabilities to activate the APIs you need:
Capabilities API Webcam PhotoCapture and VideoCapture SpatialPerception SurfaceObserver and SpatialAnchor Microphone VideoCapture, DictationRecognizer, GrammarRecognizer, and KeywordRecognizer picturesLibrary / videosLibrary / musicLibrary PhotoCapture and VideoCapture - You need to set the Unity project export as Universal Windows Platform app
- Choose File> Build Settings ...
- Select Windows Store in the list of platforms.
- Set the SDK value to Universal 10
- Set Build Type to XAML
- In HoloLens, performance is very important, so you need to set the quality settings to "high performance"
- Choose Edit> Project Settings> Quality
- Select the drop-down menu near the Windows Store logo and select Fastest.
- It is necessary that the application uses a holographic view, not a 2D view.
- From the Build Settings ... window, open Player Settings ...
- Choose Settings for the Windows Store tab.
- Expand the Other Settings group
- In the Rendering section, check the Virtual Reality Supported checkbox to add a new Virtual Reality Devices list and make sure that “Windows Holographic” is in the list of supported devices.
- Introduction to hologram interaction gestures
In 2015, HoloLens did not include the included Bluetooth Clicker , with which you can make “click” and other gestures at the touch of a button.
HoloLens definitely has several standard gestures that allow you to interact with holograms:- Press \ release (Press \ Release)This gesture is essential for activating interaction or selecting holograms.
To make it necessary: raise your hand in front of you with your palm forward, squeeze your hand into a fist, raise your index finger. Then you need to lower it (Press) and lift it again (Release) - the same way you tap on the tablet, only in the air. - Bloom (Bloom)Special system gesture that allows you to return to the start menu (equivalent to pressing the "Start" button on the keyboard or the Xbox button on the joystick)
To do it, you need to: stretch your hand palm up, squeeze all your fingers together (you can fist) and completely unclench them back.
It is worth noting that you can not program the reaction to this gesture in your application, because it is systemic.
Combinations of movements and standard gestures can give the following more complex gestures:- Hold (Hold)If you hold the Press gesture (Press) (do not let go), then such a gesture is perceived by the system as Hold. It can be used for minor actions, for example, to lift an object.
- Manipulation (Manipulation)Pressing with the subsequent movement of the hand in the 3D world.
These gestures can be used to move, scale and rotate holograms when you want a 1: 1 reaction with respect to the movements of your hand. - NavigationTo use this gesture, you must: make a “Pressing” gesture and then move your hand inside a normalized 3D cube centered near the point of depression.
These gestures are like a virtual joystick, and can be used to navigate UI widgets, such as radial menus.
- Creation of the first hologram on Unity (“Origami”)
At the current stage, there was only the placement of the necessary objects and a camera connection. It is worth noting here that even a bundle of a newspaper (the ball on the right in the screenshot) looks like a real object. You can see it, see every letter, every number in the newspaper.
Microsoft has already published the resources of last year, you can download and try to recreate the project yourself using an emulator. - Add cursor and gestures
To make it easier to understand what subject you are looking at at the moment, Microsoft has developed a special cursor. The cursor is placed with the help of a special asset, and for its operation it is necessary to prescribe in the code the cast of the ray from the “head” of the person (along the line from the main camera of the “player”).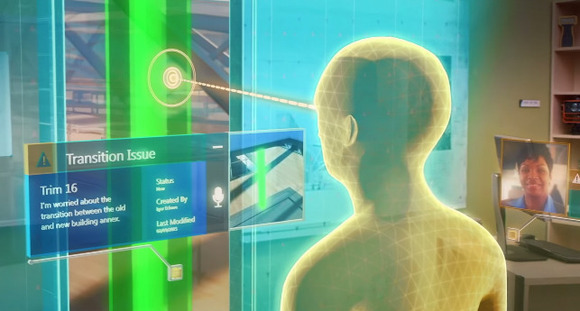
Unity provides both low-level access (pure information about coordinates and speed) and a high-level gesture recognizer that provides more complex gesture events (for example, tap, double tap, hold, manipulation and navigation).
Gesture Input
Namespace: UnityEngine.VR.WSA.Input
Types: GestureRecognizer, GestureSettings, InteractionSourceKind
High-level gestures are generated using input sources. Each Gesture event provides a SourceKind for input, including the positioning of the head beam (which was mentioned above) during the activation of the event. Some events provide additional contextual information.
It takes only a few steps to capture gestures using Gesture Recognizer:- Creating a new Gesture RecognizerTo use GestureRecognizer, you need to create a GestureRecognizer:
GestureRecognizer recognizer = new GestureRecognizer(); - Indication of what gestures to observeSpecify the gesture you are interested in using SetRecognizableGestures ():
recognizer.SetRecognizableGestures(GestureSettings.Tap | GestureSettings.Hold); - Subscribe to events for these gesturesBe sure to subscribe to events for these gestures.
recognizer.TappedEvent += MyTapEventHandler; recognizer.HoldEvent += MyHoldEventHandler; - Start Gesture CaptureBy default, GestureRecognizer does not observe input until it is called StartCapturingGestures (). There is a possibility that a gesture event may be generated after calling StopCapturingGestures (), if the input was made was up to the StopCapturingGestures () processing frame. That is why it is always preferable to start and stop monitoring gestures depending on the object that the player is currently looking at.
recognizer.StartCapturingGestures(); - Stop gesture capture
recognizer.StopCapturingGestures(); - DeletionRemember to unsubscribe from signed events before deleting the GestureRecognizer object.
void OnDestroy() { recognizer.TappedEvent -= MyTapEventHandler; recognizer.HoldEvent -= MyHoldEventHandler; }
Interaction Input
Namespace: UnityEngine.VR.WSA.Input
Types: InteractionManager, SourceState, Source, InteractionSourceProperties, InteractionSourceKind, InteractionSourceLocation
As previously mentioned, low-level input provides an opportunity to get more information about the input object, such as position coordinates and speed in the world.- How to start processing an interaction eventIt is necessary:
- Subscribe to the InteractionManager input event
InteractionManager.SourcePressed += InteractionManager_SourcePressed; - Event handling
void InteractionManager_SourcePressed(SourceState state) { // state has information about: // targeting head ray at the time when the event was triggered // whether the source is pressed or not // properties like position, velocity, source loss risk // source id (which hand id for example) and source kind like hand, voice, controller or other }
- Subscribe to the InteractionManager input event
- How to stop processing an interaction eventIt is necessary:
InteractionManager.SourcePressed -= InteractionManager_SourcePressed; - Input Source Change Events
- detected - detected (became active)
- lost - lost (became inactive)
- updates - changed (moves or changes state)
- is pressed - pressed (tap, button click, or start selection)
- is released - released (end of tap, release of button, or end of selection)
- Example
using UnityEngine.VR.WSA.Input; void Start () { InteractionManager.SourceDetected += InteractionManager_SourceDetected; InteractionManager.SourceUpdated += InteractionManager_SourceUpdated; InteractionManager.SourceLost += InteractionManager_SourceLost; InteractionManager.SourcePressed += InteractionManager_SourcePressed; InteractionManager.SourceReleased += InteractionManager_SourceReleased; } void OnDestroy() { InteractionManager.SourceDetected -= InteractionManager_SourceDetected; InteractionManager.SourceUpdated -= InteractionManager_SourceUpdated; InteractionManager.SourceLost -= InteractionManager_SourceLost; InteractionManager.SourcePressed -= InteractionManager_SourcePressed; InteractionManager.SourceReleased -= InteractionManager_SourceReleased; } void InteractionManager_SourceDetected(SourceState state) { // Source was detected // state has the current state of the source including id, position, kind, etc. } void InteractionManager_SourceLost(SourceState state) { // Source was lost. This will be after a SourceDetected event and no other events for this source id will occur until it is Detected again // state has the current state of the source including id, position, kind, etc. } void InteractionManager_SourceUpdated(SourceState state) { // Source was updated. The source would have been detected before this point // state has the current state of the source including id, position, kind, etc. } void InteractionManager_SourcePressed(SourceState state) { // Source was pressed. This will be after the source was detected and before it is released or lost // state has the current state of the source including id, position, kind, etc. } void InteractionManager_SourceReleased(SourceState state) { // Source was released. The source would have been detected and pressed before this point. This event will not fire if the source is lost // state has the current state of the source including id, position, kind, etc. }
Also, with the help of a small code, we added interaction with the convolution of the newspaper and the product of origami. If you look at the object and then “click” on it, the following happens:
The object fell on a virtual paper airplane, rolled over it onto a real table, rolled along this table and fell onto a real floor and continued to roll further taking into account all the physics of motion! And also at the end of the object can hit on your foot, if you block the object path. - Adding sound and music
HoloLens has built-in vibration stereo headphones with which you can hear full 3D sound. This fact opens up unlimited possibilities for recreating the sounds of a plausible medium.
After all, when objects are outside our zone of visibility, one of the ways we can perceive what is happening around us is sound. For the best mixed reality experience, the HoloLens audio engine provides sound by simulating 3D sound using direction, distance, and environment modeling.
How to add spatial sound to your project:- Enabling spatial audio in UnityIn Unity, spatial sound is turned on using a special audio plugin (Spatializer). The plug-in files are already embedded in Unity, so all you have to do is go to Edit> Audio> Spatializer and enable Microsoft HRTF.
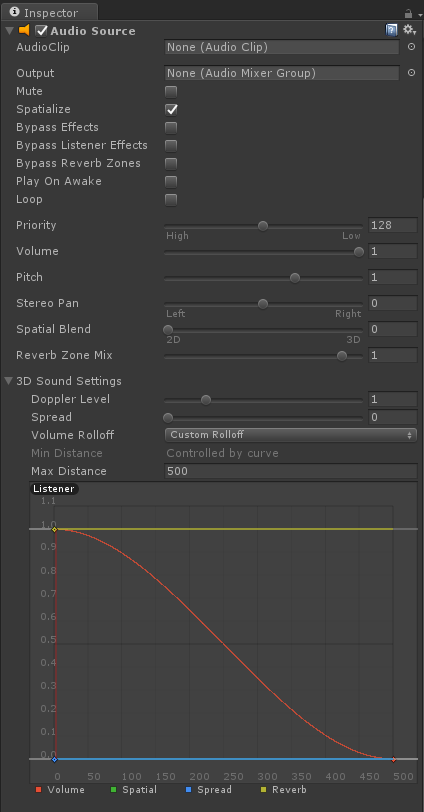
And that's it, your Unity project can now use Spatial Sound. - Spatial Sound Usage in UnityThe following steps will help you configure your Audio Source component for Spatial Sound.
- In the Hierarchy panel, select the game object to which the Audio Source is attached.
- In the inspector, under the Audio Source component:
- Check the box for the Spatialize option.
- Set the Spatial Blend value to 3D (numeric value 1).
- For best results, open 3D Sound Settings and set Volume Rolloff to Custom Rolloff.
And that's all, your Unity project can now use Spartial Sound. - Spatial Audio SetupMicrosoft Spatial Sound plugin provides a number of additional parameters that can be set on each Audio Source base to activate additional audio simulation settings.
Minimum gain
The minimum gain is applicable (from -96 to +12 dB) for any distance. Initial value: -96 decibels.
Maximum gain
The maximum gain is applicable (from -96 to +12 dB) at any distance. Initial value: +12 decibels.
Unity gain distance (Unity gain distance)
The distance, in meters (from 0.05 to infinity), in which the gain is 0 dB. Initial value: 1 meter.
Room Size
The size of the room that can be simulated using the plugin. The approximate size of the rooms: small (from the office room to a small conference room), medium (large conference room) and large (audience). You can also set the value to none to simulate the external environment (outside the building). By default, the room is small.
ExampleThe HoloToolkit for Unity provides a static class that makes setting the Spatial Sound settings easy. This class can be found in the HoloToolkit\SpatialSound folder and can be called from any script in your project. It is recommended that you set these parameters on each Audio Source component in your project. The following example shows selecting the medium room size for an attached Audio Source. AudioSource audioSource = gameObject.GetComponent<AudioSource>() if (audioSource != null) { SpatialSoundSettings.SetRoomSize(audioSource, SpatialMappingRoomSizes.Medium); } </source lang> <b> Unity</b> . SetHRTF.cs, HRTF AudioSource. . <source lang="cs"> using UnityEngine; using System.Collections; public class SetHRTF : MonoBehaviour { public enum ROOMSIZE { Small, Medium, Large, None }; public ROOMSIZE room = ROOMSIZE.Small; // Small is regarded as the "most average" // defaults and docs from MSDN // https://msdn.microsoft.com/en-us/library/windows/desktop/mt186602(v=vs.85).aspx public float mingain = -96f; // The minimum gain limit applied at any distance, from -96 to + 12 public float maxgain = 12f; // The maximum gain applied at any distance, from -96 to + 12 public float unityGainDistance = 1; // The distance at which the gain applied is 0dB, from 0.05 to infinity public float bypassCurves = 1; // if > 0, will bypass Unity's volume attenuation and make a more accurate volume simulation automatically in the plugin AudioSource audiosource; void Awake() { audiosource = this.gameObject.GetComponent<AudioSource>(); if (audiosource == null) { print("SetHRTFParams needs an audio source to do anything."); return; } audiosource.spread = 0; // we dont want to reduce our angle of hearing audiosource.spatialBlend = 1; // we do want to hear spatialized audio audiosource.SetSpatializerFloat(1, (float)room); // 1 is the roomsize param audiosource.SetSpatializerFloat(2, mingain); // 2 is the mingain param audiosource.SetSpatializerFloat(3, maxgain); // 3 is the maxgain param audiosource.SetSpatializerFloat(4, unityGainDistance); // 4 is the unitygain param audiosource.SetSpatializerFloat(5, bypassCurves ); // 5 is bypassCurves, which is usually a good idea } }
- Add voice control capability
Voice is one of the three input methods in HoloLens. In HoloLens you can use all the features of Cortana, full voice control. You just look at the hologram and say the command - this is the main principle.
There are several voice input options:- Select commandEven if you have not added voice control support to your application, users can activate your holograms using the “select” command. This command is available at any time using HoloLens and consumes minimal energy.
- CortanaYou can use Cortana with special commands for HoloLens (the command speaks after the words "Hey, Cortana"):
- Go home - to call the start menu
- Launch -app-
- Take a picture
- Start recording
- Stop recording
- Increase the brightness
- Decrease the brightness
- Increase the volume
- Decrease the volume
- Shut down the device
- Restart the device
- Reboot the device
- Go to sleep
- What time is it?
- What is my IP address?
- Am I connected to the network?
- Are you listening?
- How much battery do I have left?
- Call -contact- (requires HoloSkype)
- Web search
- DictationFor text input, dictation can be much more efficient than tapas over the air. When the holographic keyboard is active, you can switch to dictation mode by pressing the microphone icon.
To do this, it is enough to register a few lines so that HoloLens would expect any sound from you, and enter in English, which command you need to respond to, and what will be the reaction.
Let us analyze in order how to implement voice input:- Unity configuration for microphone activationTo enable head input, you need to declare the "Microphone" feature for your application:
- In the Unity editor, go to the “Edit> Project Settings> Player” page.
- Click the Windows Store tab.
- In "Publishing Settings> Capabilities", check the box on the Microphone
- Phrase RecognitionThere are two ways to recognize phrases: KeywordRecognizer and GrammarRecognizer. You need to choose which phrases in which way to listen, handle the OnPhraseRecognized event and add actions for the phrases.
- KeywordRecognizer
We connectusing UnityEngine.Windows.Speech; using System.Collections.Generic; using System.Linq;
Then add some fields to your class to store the recognizer and the keyword-> action dictionary:KeywordRecognizer keywordRecognizer; Dictionary<string, System.Action> keywords = new Dictionary<string, System.Action>();
Now add a keyword to the dictionary (for example, inside the Start () method). In this example, we will add the “activate” keyword:// keywords.Add("activate", () => { // , });
Create a KeywordRecognizer and ask it what we want to recognize:keywordRecognizer = new KeywordRecognizer(keywords.Keys.ToArray());
Subscribe to the OnPhraseRecognized event:keywordRecognizer.OnPhraseRecognized += KeywordRecognizer_OnPhraseRecognized;
Example:private void KeywordRecognizer_OnPhraseRecognized(PhraseRecognizedEventArgs args) { System.Action keywordAction; // , keywordAction. if (keywords.TryGetValue(args.text, out keywordAction)) { keywordAction.Invoke(); } }
Finally, run the recognition:keywordRecognizer.Start(); - GrammarRecognizer
GrammarRecognizer is intended for those cases when you specify your own recognition grammar through SRGS .
After creating your SRGS grammar, and placing it in a project in the StreamingAssets folder:<PROJECT_ROOT>/Assets/StreamingAssets/SRGS/myGrammar.xml
Create the GrammarRecognizer and skip our SRGS file through it:private GrammarRecognizer grammarRecognizer; grammarRecognizer = new GrammarRecognizer(Application.streamingDataPath + "/SRGS/myGrammar.xml");
Subscribe to the OnPhraseRecognized event:grammarRecognizer.OnPhraseRecognized += grammarRecognizer_OnPhraseRecognized;
You will receive information in accordance with your SRGS grammar, which you can easily process. Most of the necessary information will be provided in an array of semanticMeanings.private void Grammar_OnPhraseRecognized(PhraseRecognizedEventArgs args) { SemanticMeaning[] meanings = args.semanticMeanings; // - }
Run the recognition:grammarRecognizer.Start();
- KeywordRecognizer
- DictationWhen using DictationRecognizer, your application can expect any word and convert it into text with subsequent actions.
It takes only a couple of steps to implement DictationRecognizer:- Create DictationRecognizer
dictationRecognizer = new DictationRecognizer(); - Handling Dictation Events
In total there are 4 dictation events to which you can subscribe and process for further actions:- Dictationresult
This event is activated when the user pauses speech, for example at the end of a sentence. Here we get a fully recognized string.
First, subscribe to the DictationResult event:dictationRecognizer.DictationResult += DictationRecognizer_DictationResult;
Then we process the DictationResult call:private void DictationRecognizer_DictationResult(string text, ConfidenceLevel confidence) { // } - DictationHypothesis
This event is active throughout the user's entire speech. Since the recognizer listens to speech, it returns the text of what he heard.
First, subscribe to the DictationHypothesis event:dictationRecognizer.DictationHypothesis += DictationRecognizer_DictationHypothesis;
Then we process the DictationHypothesis call:private void DictationRecognizer_DictationHypothesis(string text) { // } - Dictationcomplete
This event is activated when the recognizer stops, for example, from a call to the Stop () method, timeout, or other error.
First, subscribe to the DictationComplete event:dictationRecognizer.DictationComplete += DictationRecognizer_DictationComplete;
Then we process the DictationComplete call:private void DictationRecognizer_DictationComplete(DictationCompletionCause cause) { // } - Dictationerror
This event is activated when an error occurs.
First, subscribe to the DictationError event:dictationRecognizer.DictationError += DictationRecognizer_DictationError;
Then we process the DictationError call:private void DictationRecognizer_DictationError(string error, int hresult) { // }
- Dictationresult
- Starting DictationRecognizer
dictationRecognizer.Start();
To shut down the recognizer, you need to unsubscribe from the events and use the Dispose () method:dictationRecognizer.DictationResult -= DictationRecognizer_DictationResult; dictationRecognizer.DictationComplete -= DictationRecognizer_DictationComplete ; dictationRecognizer.DictationHypothesis -= DictationRecognizer_DictationHypothesis ; dictationRecognizer.DictationError -= DictationRecognizer_DictationError ; dictationRecognizer.Dispose();
- Create DictationRecognizer
In this case, we have programmed the academy so that after the words “Drop it” the subject you are looking at falls on the surface. (for example, a newspaper bundle). In the example above, this word was “Activate.” - “Immersion in the matrix” or the inclusion of Wireframe mode
Probably, after all that was done, I would like to know, but what does HoloLens see? How does he help to interact with the world?
At this stage, we turned on Wireframe mode and just donned HoloLens. No more words were required - it all looked very inspiring.
Imagine, he builds a grid of the world, each object (by the value of its angle of view) instantly, in just milliseconds! This is very enchanting!
Then we made it possible to transfer the table from origami to any surface, even to the other end of the academy hall. - “And if the other world becomes a reality?”
The end was no less interesting, we were told to place a special asset on the floor, a large black hole. On launch, it fell through, and a passage formed to another world: with flying airplanes, trees, water, land, and a fabulous atmosphere.
It is so real that I wanted to touch this world, but alas, the real floor prevents you from doing so.
Then they offered to put this asset on someone's head. After that, the whole world that we saw in the hole goes into our real world. Already looking around you, paper airplanes fly past you, water splashes around the trees, and you can interact with the whole world.
After each stage, we were given “achievement” for the work done, which brought even more positive to the development training process.
One video from the academy:
During the academy, each participant (with his consent) was interviewed, asked about feelings, which projects I would like to develop for HoloLens and many other questions. And you could subscribe to participate in further research on HoloLens.
At the end of the academy, all participants receive the status of “Holographic Developer”.
What is this year?
Holographic Academy was also held on // Build 2016, but only for the press and those who pre-ordered the HoloLens Development Edition . So far, the pre-order program is available only to developers from the USA and Canada, the cost of the device itself is $ 3000.
If last year the main topic was “personal holograms”, this time - “general holograms”, i.e. available for interaction simultaneously to all participants. Everyone sees a single hologram and interacts with it.
Here, step by step, Microsoft taught participants how to create holograms and interact with them for ~ 4 hours.
In the end, it was a game in which all the participants, being in a single world, destroy enemies through fireballs, all interact with the same hologram and with each other.
Like last time, this is not only another unique experience, but also useful research for Microsoft.
In conclusion of the Holographic Academy theme, I highly recommend you to configure everything, try to create your own holograms and watch them on the emulator. And also go through some similar way of the academy at this link .
Xbox one developer mode
As you know, Microsoft finally introduced the Xbox One Developer Mode, which allows you to test UWP applications / games on the Xbox One.
This feature is in the Preview stage. To install, you need to download a special application Dev Mode Activation.
At the conference // Build 2016 there was a whole booth of The Garage, on which it was possible to try out consoles, which were converted to DevKit in this way.
What the Developer Preview provides:
- Access to 448 MB of RAM (out of 8 GB of Xbox One memory). After exiting the preview, developers will have access to 1 GB of RAM
- Access to 2 CPU cores at 1.75 GHz. After exiting Preview, developers will have access to 4 CPU cores.
- Access to 45% GPU. After exiting the preview this figure will not change.
- Currently, UWP on Xbox One only supports DirectX 11 Feature Level 10. DirectX 12 is not yet supported.
At the same time, you get full-fledged capabilities for developing and testing your UWP applications / games on Xbox One. But there is one feature: in order to release the game on Xbox One or use all the power of the console, you will still need to register with the ID @ Xbox program.
How to activate Dev Mode
Before activation, you first need to make sure that you have a console in Retail mode. Unfortunately, you cannot participate in two preview programs at the same time.
If you are in the Xbox One Preview program, then through the Xbox Preview Dashboard -> Registration application you need to exit the Preview program.
This process can be delayed, because The preview update should go to the Release stage, after that you will be switched to the Retail mode.
Now let's get into Dev Mode :
- Open the Xbox One Store and find the Dev Mode Activation app.
- Download the app and go to it.
- Next, carefully read the entire instructions and, if ready, click Next and Next again
- You will see a special code:

Go to developer.microsoft.com/xboxactivate and log in to your Dev Center account. - Enter the received code from the console on this page and click on "Agree and activate". It is worth noting that you have the opportunity to register only a few consoles in Dev mode.

After entering the code, your Xbox One will start the activation process and after that the console will start installing the necessary software.
It remains to click on "Switch and Restart".
On the PC, you need to install:
- Visual Studio 2015 Update 2 . Do not forget to tick the box Universal Windows App Development Tools.
- Windows 10 SDK preview build 14295 and higher. You can get it using the Windows Insider Program.
Final Imagine Cup United States
This year the American finals of the Imagine Cup technology competition for students were held at the conference . Prior to that, regional finals were held in the cities of the United States, from which selected projects went into the American finals.
The participants had a very rich program, starting with a greeting at a rented restaurant on the evening of April 29, a meeting with Satya Nandella and cool speakers master classes on other days; ending with a show of projects in the very “heart” // Build, pitches and award ceremony.
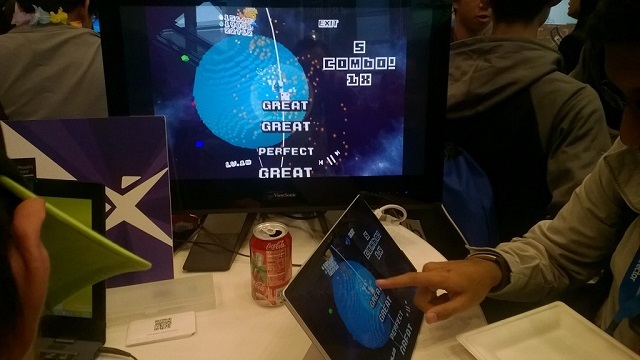
I managed to study several Imagine Cup projects during their exhibition at the conference.
Category “Games”:
- “Nova” Nova – , . , .
. : Fire, Water, Wood, Number, Capacity.
C Unity Windows . - “Spire of the Sullen” Spite — 2.5D . . : , , .

Trine, . , .
C Unity Windows . - “Sundown” Mild Beast Games — , . – , , (.. ).

, . , .
C Unity Windows . - “Gibraltar” “Grim Goblin” – , . , , . , .

“Advance Wars”. , .
C Unity Windows . - Microsoft Student Partners //Build . 2 : SnakEscape — , ! ;
Lost Story: The last days of Earth — - Half-Life, , Half-Life Half-Life 2.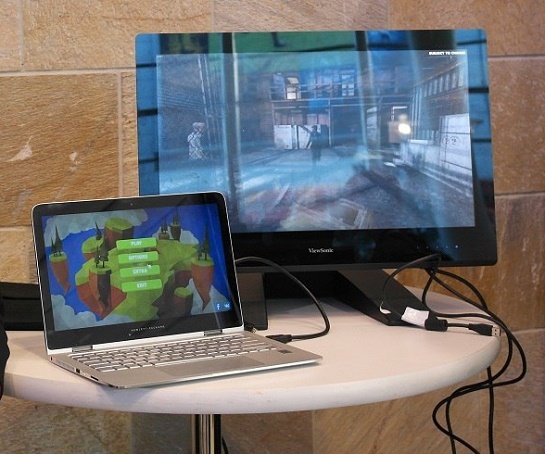
“ ”:

“”:
- “Tactile” “Tactile” – . : '' .
, Computer Vision API Microsoft Project Oxford. API , Python.
Arduino, Arduino , .
, . , .
'' .
– , //Build , . , . - “REST” “No_Sleep”
REST — Restoring Ecosystems Services Tool. , , . , .
The entire last day was a presentation of projects before the judges - representatives of the industry. At the end of the day there was an award ceremony, in which not only the winners were named, but the winners once again spoke fully about their project and showed it in action.
Winners
| Category | Team | Project |
| Social projects | Bolovr | BEST Police Training simulator |
| Games | Mild Beast Games | Sundown |
| Innovation | Healthx | Healthx |
With HealthX, technology is a complete solution for ophthalmology clinics and their patients aimed at diagnosing and treating amblyopia, commonly known as the “lazy eye.” Amblyopia is the most common cause of vision loss among children.
Each winning team received as a prize $ 4,000 and passed to the international semifinal, where one project from each country will be determined, which will go to the international final of the Imagine Cup.
It should be noted that the Russian final of the Imagine Cup will be held on April 23 in Moscow in Digital October.
Thanks for attention!
If you have any questions or want to know something in more detail, be sure to write, always answer. See you again!
Source: https://habr.com/ru/post/281539/
All Articles