Plugins in your pocket or penknife in the program
This article focuses on plugins - software modules that can be easily installed in the main application to extend its functionality. More precisely, not about the plugins themselves, but about how to implement the "Application - Plugin" interaction system in their program.
On the network, you can easily find quite complex and, at times, confusing algorithms for integrating a similar system into your program code, but since we will use the Python programming language, everything will be simple and very clear for us.
However, before you show the reader all the tools of your plug-in system - a kind of penknife, which in my opinion should be in every self-respecting pocket, sorry, program - a bit of background ...
Once for my project I needed one single, well, very important function, which, unfortunately, I did not provide for at the development stage. The project was big and rather old, so I had to tinker around for a week looking for the necessary classes and procedures in its code in order to hang the cherished button in the program menu that implements the missing functionality. And, I confess, there is little joy in rewriting, if not everything, but some part of the application.
After that, I firmly decided to review the architecture of my projects and, in order not to step on the same rake, I set myself the task: the expansion of the capabilities of my programs should be done in one click! Said - done.
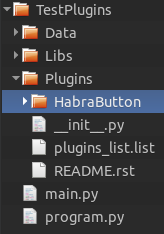
So, we get a brand new skeleton of the future application out of the closet, which looks like this:
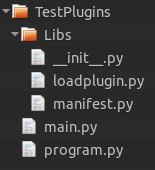
And count his bones:
The Libs folder is intended for libraries and modules of the future project. At the moment, there are modules for initializing and connecting plugins:
loadplugin.py - loads program plugins from the Plugins folder (will be created automatically) of the project root directory;
manifest.py - a class that describes the manifest of the plugin being loaded;
In the root directory of the project:
program.py is the main application code located in the Program class;
main.py - runs the program.py program code and connects the plug-ins, if any;
Further, I will describe only the key points of the implementation of the plug-in system, omitting the creation of the simplest interface of the application to demonstrate the operation of the plug-in. You can download a small archive with an example from the link at the end of the article.
main.py:
#! /usr/bin/python2.7 # -*- coding: utf-8 -*- import traceback __version__ = "0.0.1" def main(): try: from Libs.loadplugin import loadplugin # from program import Program # app = Program() loadplugin(app) # app.run() # except Exception as exc: print traceback.format_exc() traceback.print_exc(file=open("error.log", "w")) # . if __name__ "__main__": main() The algorithm of the main.py module :
- Create an instance of the app class Program and pass it to the function of loading plugins (this instance will be available to all plug-ins, giving them access to variables and functions implemented in the main program code of the Program class).
- Load the plugins.
- Run the application.
- Display a window with the text of the error, if any, occurred when the program was started.
loadplugin.py:
# -*- coding: utf-8 -*- import os import traceback def loadplugin(app): """ . :type app: <class 'program.Program'>; :param app: Program; """ # . plugins_path = \ "{}/Plugins".format(os.path.split(os.path.abspath(sys.argv[0]))[0]) # . plugin_list = \ eval(open("{}/plugins_list.list".format(plugins_path)).read()) for name in os.listdir(plugins_path): if name.startswith("__init__."): continue path = os.path.join(plugins_path, name) if not os.path.isdir(path): continue try: if name in plugin_list: execfile(os.path.join(path, '__init__.py'), {"app": app, "path": path}) except Exception: raise Exception(traceback.format_exc()) Algorithm of the loadplugin.py module :
- We scan the Plugins directory (package) for the presence of plug-in packages (any python package in the Plugins folder will be considered a plug-in).
- We initialize the list of plugins from the file plugins_list.list , which is located in the Plugins directory.
- If the found plugin is mentioned in this list, connect it, otherwise look for the next plugin.
For greater clarity, I removed from the loadplugin.py module the reconfiguration of the plug-ins and various checks for the absence of the Plugins directory, the plugins_list.list file, etc.
As you noticed, the plugin is executed by the execfile function:
execfile(os.path.join(path, '__init__.py'), {"app": app, "path": path}) which executes the code of the init file of the plugin's package and sends to the global namespace of init .py an instance of the app's main class.
Further, through the app , the plugin gets access to all functions and variables of the application code. Pretty simple.
Now let's move from words to deeds and run a test case ( main.py ) from the TestPlugin folder.
Here it is worth saying that I am writing, using mainly the Kivy framework, so to run the test cases it is assumed that all the necessary libraries are installed on your workstation.
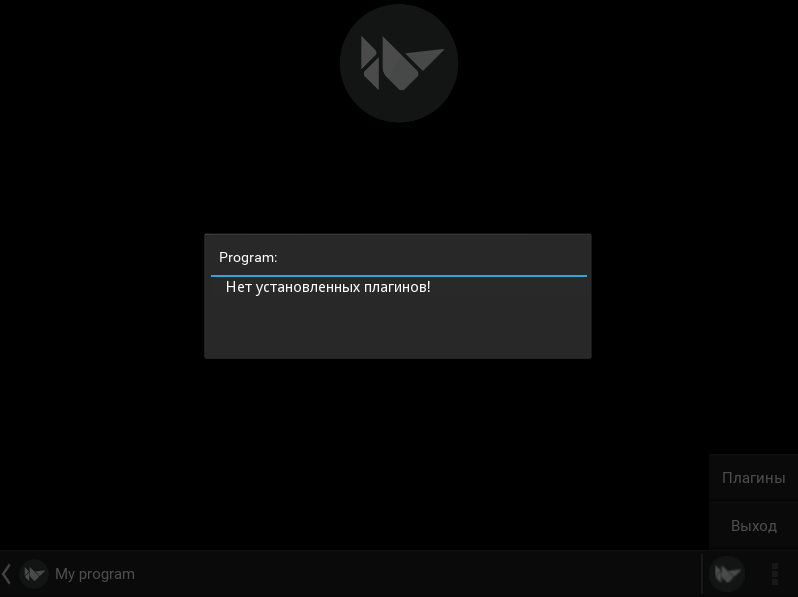
So, running the example, we see a simple interface with the actionbar at the bottom of the screen. Select the button in the lower right corner, open a drop-down list of two items, click on the "Plugins" item and read the message "There are no plugins installed."
Indeed, looking into the project folder, we find the new Plugins directory.
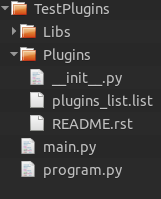
In addition to the files already known to us, the directory for plug-ins is empty. Well! It's time to install them. Let's expand the toolkit of our penknife with the help of the plugin and add a new button with the Habr logo to the actionbar.
In the archive with a test example, in addition to the project TestPlugins , there is a folder Plugins . Open it and copy the HabraButton plugin into the project in the Plugins directory.
Now we run our test application again and select the "Plugins" item.

Hooray! Our penknife just got a new tool, as promised, in one click.
The item with the name of a fresh plug-in is lit in yellow, which means that the application has recognized it, but has not connected it to use. We fix this by clicking on the button with the found plugin.
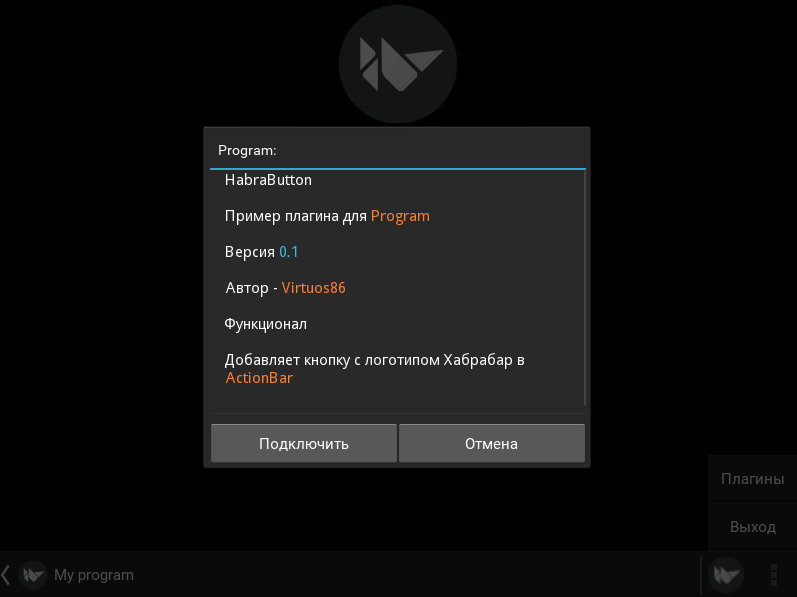
We connect the plugin, read the message that "The plugin is connected and will be imported into the project after the next launch."
If you again select the "Plugins" item in the drop-down list, you will see that, indeed, the plug-in has been successfully disabled, as indicated by the button, which is already lit in blue.

Actually, what happened when we chose the item "Connect"? The name of the plug-in has been added to the list of allowed for use in the plugins_list.list file in the Plugins directory. Now loadplugin.py plugin loading module will be able to import this plugin.
Let's check it out and run the test case again.

There was a new button with the Habr logo in the actionbar . Click it and enjoy the message "Hello, plugin"!
That's all.
I do not consider in this article the code of the plugin itself (it is quite simple). You can open the init .py file of the HabraButton package and see how the plugin accesses the objects of the Program class code in the app instance. Also overboard, I left the plug-in verification. I need it to track compatibility and visualize information about plugins. All this is in the test example.
Hope could be useful!
Test example - 40.65 Kb.
')
Source: https://habr.com/ru/post/281332/
All Articles