IoT solution for 1.5 hours
Or how we lit a light bulb from a smartphone through a cloud service in front of the amazed students of the NSU.
We give the full technical description of the solution below, and begin with the lyric-philosophical prologue.
Almost all of our employees received higher education, and very many at the Novosibirsk State University. Someone just recently, someone - 10-20 years ago, and all were faced with the choice of a future profession. In the last courses by students, we chose a department where we specialized and defended diplomas. And there was such a wonderful tradition as Open Doors in institutes, laboratories and companies, where employees told them what they were doing, what issues are now facing science and technology and how to participate in this.
What is the most interesting thing about student open days? To walk, ask questions, look at real people who are engaged in the real business, which someone needs.
According to one of our employees, for him, as a future specialist who had never seen the practical application of his knowledge in the framework of the Open Doors, it was very interesting to see the live docking simulator for Mir station, the telephone call interception system, the CHP management system, the virtual studio, talk to people all have already implemented. And it was precisely such meetings that helped decide where the diploma would be written and in which of the areas I would like to develop professionally.
')
Today, Open Days have changed Career Days. But we wanted to keep the spirit of this event in our presentation.
We set a goal - to do everything according to the good old and proven traditions on the one hand, and on the other, to show students that there are fundamental principles and the world is a rather complicated thing, but this is good. This is a challenge and an opportunity to realize yourself in a professional IT society.
It was with such thoughts that we began preparing for Career Days at NSU - the leading personnel forge among Novosibirsk universities for any self-respecting IT company in Novosibirsk and many other cities and countries.
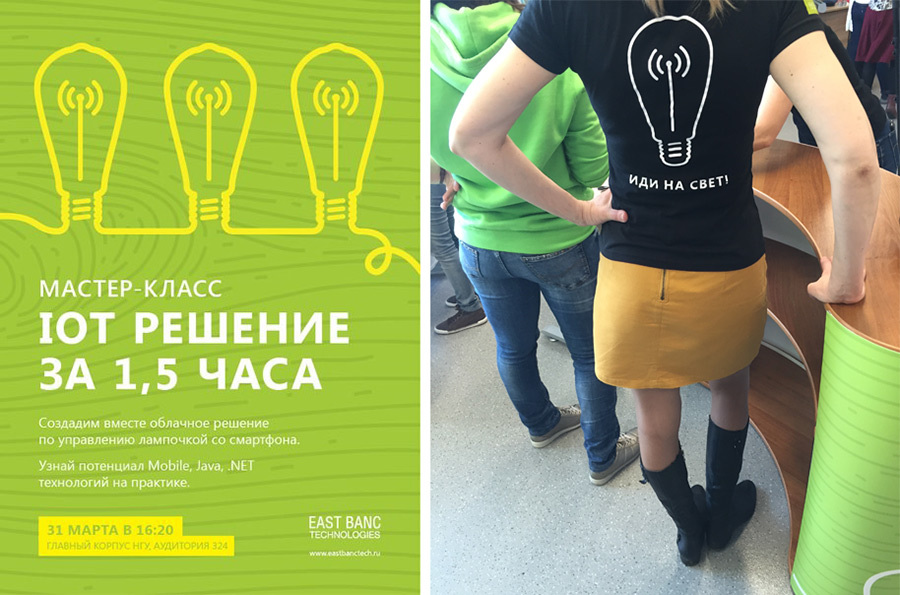
Therefore, we organized a poster session and a master class, which was attended by project managers and leading developers participating in interesting combat projects for our clients. To put it simply - we were not limited to girls from HR, but put up the current “IT Special Forces” with a chic theme.
We decided to knit a few fashionable IT themes and experience from a real project:
And they invented to control the lights from a smartphone. Yes, it’s so simple and clear to show how in one and a half hours you can write code and get a working complete solution.
But let's order.
If we talk in general about the Internet of things, we would highlight 2 directions in the development of solutions.
Of course, future IoT class solutions will not choose one of two directions, but combine them. However, the 2nd option seems so far somewhat difficult to conduct a master class, i.e. writing it online in an hour and a half.
As for the first, on the basis of experience in developing such solutions, we were quite able to demonstrate it. Having somewhat simplified one of our projects, we decided to build the following.
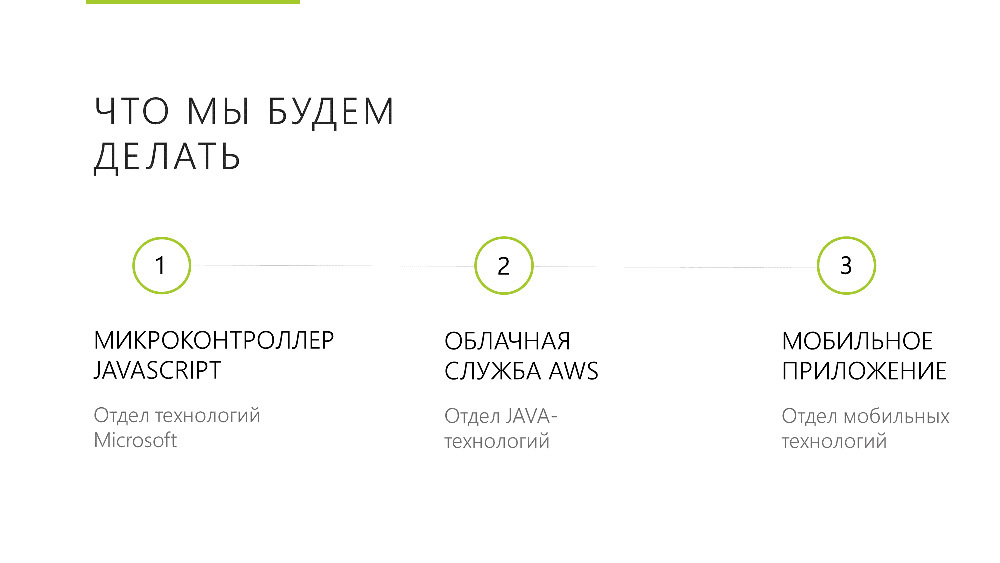
The guys from .NET took over the programming of the microcontroller, the guys from Java - the cloud service on Amazon, and our "mobile" colleagues - the Android application.
In the presentation for the students, it sounded like this:
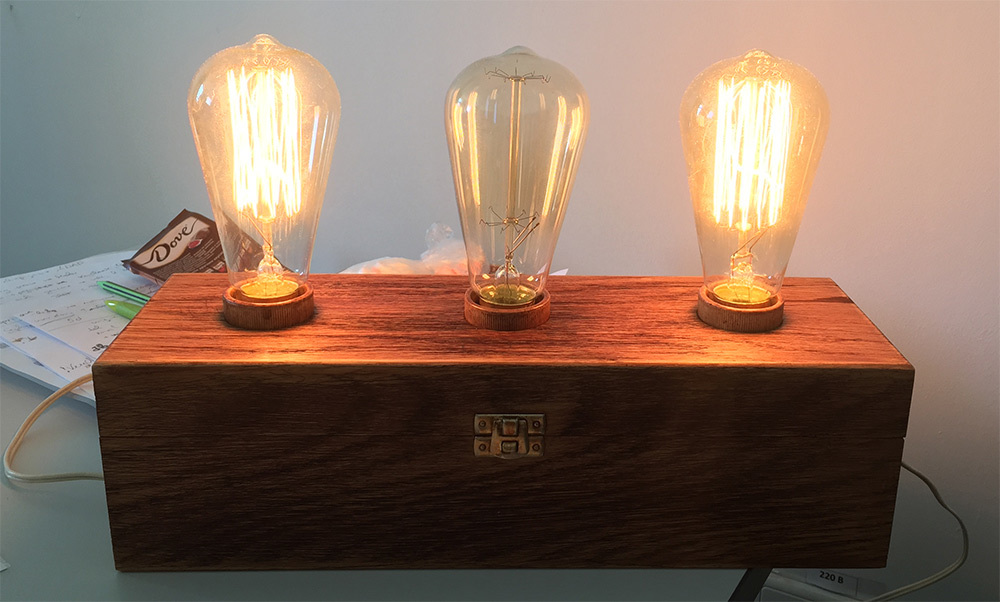
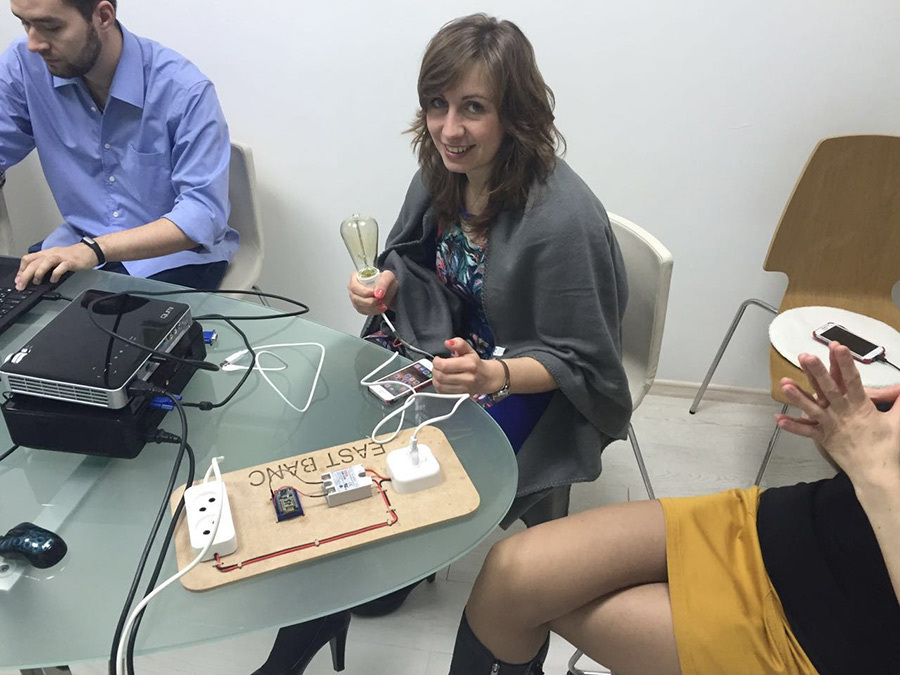
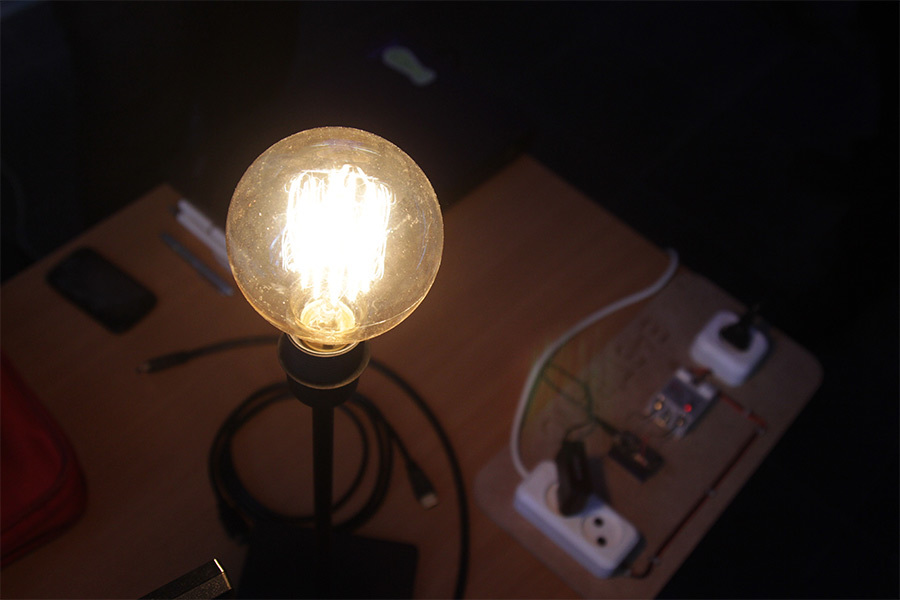
To demonstrate at the poster session, we decided to make a separate device. We were not too lazy and made it cool in steampunk style - we aged a wooden box and found vintage lamps.
A couple of weekends and evenings - and the solution was ready, the stylish device was assembled and worked.
A couple of working days from the top and we have cool designs for posters, booklets, stand and t-shirts.
As responsible people, we decided to rehearse our master class. We prepared a presentation, gathered all the technical specialists and arranged the run. The program of the master class was the following: we consistently show how we program the controller, write the service, write the application, and at the end of each part we light a light bulb.
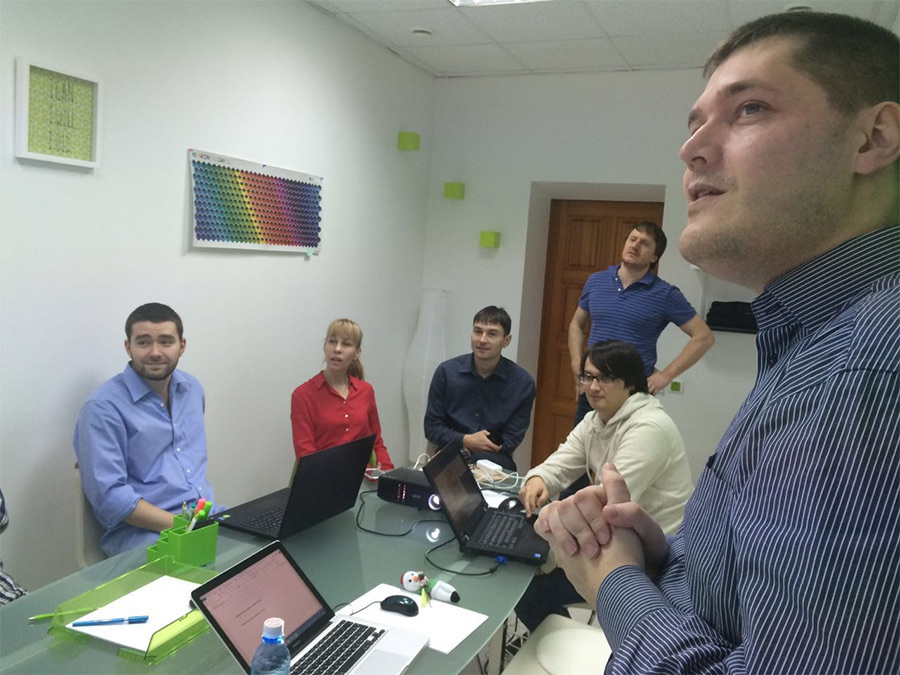
Over the course of three runs, we learned to fit in the allotted timing, polished the code and text, and prepared a couple of tricky questions for the students.
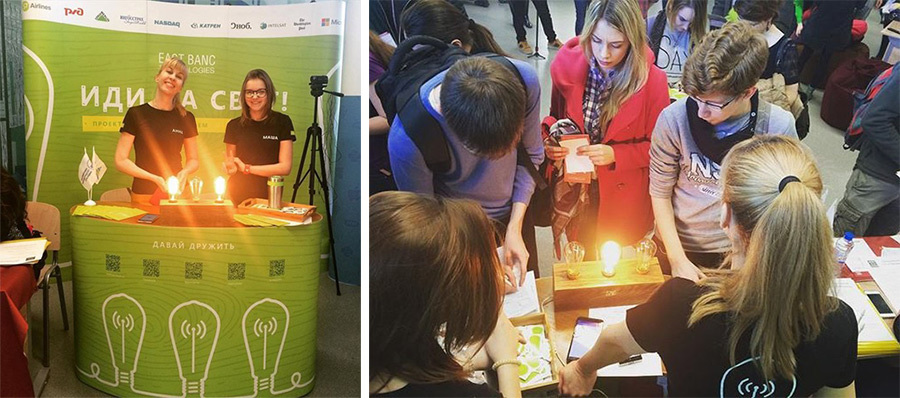
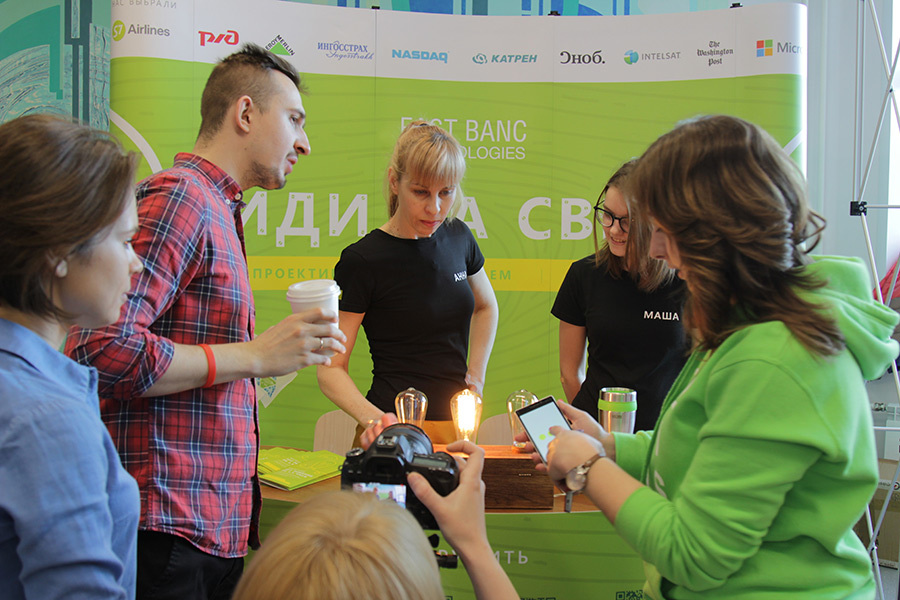
In the morning we were one of the first to appear at NSU, we set up a stand, removed the dull standard table, put our branded cabinet and installed our device on it right in the center. He enjoyed tremendous success. Everyone came to watch and photograph everything - students, teachers, photographers, competitors and even security guards. Our booklets and device worked perfectly - we gathered a full audience the next day!
And then came the day of the master class. We arrived at the NSU and realized that how not to get ready, and in such events will not do without gags.
The full audience of students, and we don’t have Macs connected to the projector, doesn’t allow some devices to Wi-Fi, and even Amazon’s clouds tried to get into position and not stop our proven services. But it’s not for nothing that we set up the dream, everything was resolved “on the fly”, not falling out of the general timing and structure of the presentation.
We gave a general introduction to our company, the Internet of things and how we will light a light bulb. Then all the programming stages of the complex solution went through the steps, handing out souvenirs and branded circles to the most active, clever and cunning students. Sly, because some of them tried to hack us, and the approach was pretty good, for which the hackers were awarded separately :).
Yes, it was very reminiscent of a textbook cinematic disastrous meeting, on which everything goes wrong, but the final, as it should be in the genre, was happy. The software has been created, the services are deployed in the cloud, the mobile application has fallen on the phones and the light has been lit at the strictly time allotted for this. The students saw our “soul”;) and told us “yes”, stayed after the end of the presentation to discuss projects, solutions and technologies with our children.
And now to the most interesting thing for hack readers - to the code.
So, we remind that our solution should consist of 3 components.

The heart of our device is the NodeMCU based on the ESP8266 controller.
From the entire list of features of this board, we are interested in the support of wireless networks Wi-Fi and GPIO - general purpose inputs / outputs. Also, despite the fact that there is no OS for this board in its usual sense, various firmware versions support the execution of programs in C / C ++, Lua, JavaScript and MicroPython.
We stopped at SMART.JS firmware, programs for which are written in JavaScript. Of the possibilities of this firmware, we will use only the http-client.

We are interested in the output number 5 (GPIO5). This is a digital output. It means that it can have a logical “0” or a logical “1” at the output. With a logical 0, the relay will be turned off, with a logical 1 it will be turned on, and the light will be on.
Prerequisites:
1. SMART.JS Documentation: docs.cesanta.com/smartjs/latest
2. SMART.JS firmware: github.com/cesanta/smart.js
3. FNC (utility to download firmware and programs in JavaScript): github.com/cesanta/fnc
4. Virtual COM port drivers: www.silabs.com/products/mcu/Pages/USBtoUARTBridgeVCPDrivers.aspx
5. Test service: a test service that on a GET request issues JSON in the format:
So, to the point.
To begin with, we flash on our board with SMART.JS firmware using the FNC program. After that, our device starts working in the access point mode and the SMARTJS network appears ???? (for example, SMARTJS_FA352), the password can be peeped in the FNC console.
Connect to the access point and open the address 192.168.4.1. We have a configuration page where we enter the SSID and password for our network. We save changes, the device is overloaded, and we are ready to write our application.

We take your favorite text editor and create the file app.js. To begin with, we will output some welcome message to our console and define the output to which the relay is connected and the name of the resource associated with the light bulb:
Initialize our output and set the logical 0 to the output:
Install the callback function on the connection state changes:
The function accepts the numeric status of the connection. For now, just output it to the console along with a textual representation of this status:
Having launched the application, we see that the status “got ip” corresponds to code 2. Now let’s send a request to the service upon successful connection to the network:
We receive an answer in the form of a string: {“light01”: false}. We transform it into a JS object and set the state on our output in accordance with what we received from the service:
Well, and so that our device periodically polls the service, we put the second call to mainFunc via setTimeout in the service response handling function and in the request timeout handling function:
Now our device is ready to work.

Elastic Beanstalk is one of the useful AWS services for quickly deploying and scaling web applications. Its use frees us from the need to create and customize the environment. The service of choice provides several pre-configured. All that is required of us is to choose the right environment and load the assembled application using an intuitive UI. The rest will be done by the Beanstalk service. At the output we get the URL to which the application will be accessible via HTTP.
Select the Tomcat environment (servlet container) and the following configuration:
The same actions in the pictures:

In addition, Beanstalk provides the ability to:
Let's proceed to the creation of our web application.
The goal is to implement a small and simple application that could store the state of the light bulbs (off / on) and change this state. Clients are completely different (microcontroller and mobile application), so it makes sense to use the REST architecture.
As a result, our application will provide the following standard REST API:
We will write the code in Java, collect the results of our work using Maven, and use the resteasy library to write the code.
Using Maven, we connect the necessary dependencies
[ github.com/EBTRussia/nsucareerdays2016/edit/master/cloud/sample-web-app-rest ] easy / pom.xml]:
resteasy-jaxrs - to work with jaxrs
resteasy-servlet-initializer - for integration with Tomcate
resteasy-jackson2-provider - to work with json
Why resteasy. In the Java world, there are many tools that allow you to create rest-applications (Jersey, Spring, Spark, etc.). We simply chose one of them, which, by the way, is included in the standard delivery of the WildFly application server.
[ github.com/EBTRussia/nsucareerdays2016/blob/master/cloud/sample-web-app-resteasy/src/main/java/ru/ebt/LightAppController.java ]
GET , PUT , POST , DELETE - Annotations from JAX-RS, which show what http methods to contact our api.
Path ("/ {resource}") & @PathParam ("resource") show which URL to access api and which part of the URL we want to process as a parameter in the application logic. In our case, the resource is the name / id for the bulb.
To store the state of our lamps, we use the ConcurrentHashMap [ docs.oracle.com/javase/8/docs/api/java/util/concurrent/ConcurrentHashMap.html ], a thread-safe dictionary of keys and values.
Now we will turn our usual class into real rest-service. To do this, create the BaseApplication configuration class, which we will inherit from javax.ws.rs.core.Application. Inside the getSingletons () method, we list all the classes that will be REST services.
Putting the application. Go to the root directory of our application and execute the command:
After we go to the target folder created by maven and pick up the * .war file, deploy it to Tomcat using the BeansTalk service.
Just press the button, everything should fly up:
We check that everything works:

Step 0. Preparatory
To create Android applications, the Gradle automated build system is used. In his build.gradle script, we will include several dependencies that will simplify our coding and life:
The Butterknife library will help us more easily set up a graphical interface, and Retrofit is ideal as an HTTP client if you plan to interact with a REST service.
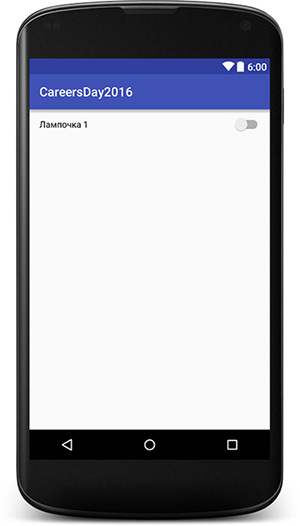
Step 1. Graphical Interface
Add a Switch component to an empty screen (activity), which, like no one else, is well suited for controlling a light bulb, almost like a real switch:
We gave our component the unique name light_switch and wrote the text that will be visible to the user.
Now add a switch to the code of our activity:
We used two annotations from the ButterKnife library: Bind and OnClick . The first connects our switch, declared in the xml-markup with the switch that is declared in the code. The second sets the onLightSwitchClicked () method as a click handler on our switch.
Step 2. HTTP client
Creating an http client is not at all difficult if you resort to using the retrofit library. It is only necessary to create an interface and describe in it all requests to the server as its methods, and then feed this interface to retrofit, which will independently create a suitable implementation of our interface.
In our interface, only 2 methods:
Here we specify the base url to the retrofit library, we inform you that the requests and responses will be in JSON format and we specify the interface we have just written, after which the HTTP client is ready for work.
Step 3. We are on friendly terms with UI and HTTP client
First, you need to get and display the current state of the light bulb. Make a GET request and look for a lightbulb named “light01” in the returned dictionary:
Secondly, when switching light bulbs on the client, you need to notify the server about it. We have already written a click handler for the switch in the previous step, now we will add an HTTP request to it:
And-and-and, the light is on!
The complete solution code can be found at: github.com/EBTRussia/nsucareerdays2016
We wanted to show a master class and this example - you can do cool and interesting things in a short time and with a minimum of effort. Need an idea. Dare! It is from simple and necessary things that entire industries are born, such as the Internet of things.
And come to work with us :) We have a truly unique team and very interesting projects.
See you!
We give the full technical description of the solution below, and begin with the lyric-philosophical prologue.
Chapter 1. Lyric
Almost all of our employees received higher education, and very many at the Novosibirsk State University. Someone just recently, someone - 10-20 years ago, and all were faced with the choice of a future profession. In the last courses by students, we chose a department where we specialized and defended diplomas. And there was such a wonderful tradition as Open Doors in institutes, laboratories and companies, where employees told them what they were doing, what issues are now facing science and technology and how to participate in this.
What is the most interesting thing about student open days? To walk, ask questions, look at real people who are engaged in the real business, which someone needs.
According to one of our employees, for him, as a future specialist who had never seen the practical application of his knowledge in the framework of the Open Doors, it was very interesting to see the live docking simulator for Mir station, the telephone call interception system, the CHP management system, the virtual studio, talk to people all have already implemented. And it was precisely such meetings that helped decide where the diploma would be written and in which of the areas I would like to develop professionally.
')
Today, Open Days have changed Career Days. But we wanted to keep the spirit of this event in our presentation.
We set a goal - to do everything according to the good old and proven traditions on the one hand, and on the other, to show students that there are fundamental principles and the world is a rather complicated thing, but this is good. This is a challenge and an opportunity to realize yourself in a professional IT society.
It was with such thoughts that we began preparing for Career Days at NSU - the leading personnel forge among Novosibirsk universities for any self-respecting IT company in Novosibirsk and many other cities and countries.
Therefore, we organized a poster session and a master class, which was attended by project managers and leading developers participating in interesting combat projects for our clients. To put it simply - we were not limited to girls from HR, but put up the current “IT Special Forces” with a chic theme.
We decided to knit a few fashionable IT themes and experience from a real project:
- Internet of things
- Microcontroller Programming
- Cloud Services
- Mobile technology
And they invented to control the lights from a smartphone. Yes, it’s so simple and clear to show how in one and a half hours you can write code and get a working complete solution.
But let's order.
Chapter 2. Introduction. The philosophy of the Internet of things
If we talk in general about the Internet of things, we would highlight 2 directions in the development of solutions.
- Remote control “things”. For example, opening / closing doors, turning on / off security systems or, in our case, lighting.
- Data collection from remote sensors, analysis of these data, as well as prediction of the functioning of the studied systems, with the possible use of machine learning technologies.
Of course, future IoT class solutions will not choose one of two directions, but combine them. However, the 2nd option seems so far somewhat difficult to conduct a master class, i.e. writing it online in an hour and a half.
As for the first, on the basis of experience in developing such solutions, we were quite able to demonstrate it. Having somewhat simplified one of our projects, we decided to build the following.
- There is a table lamp. The lamp is connected to the controller, which periodically polls the service to see if it should be lit or not.
- There is a service that “lives” in AWS (Amazon Web Services). The service keeps an “on / off” state and also provides an API for getting or changing this state.
- There is a mobile application that allows you to manage this state.
The guys from .NET took over the programming of the microcontroller, the guys from Java - the cloud service on Amazon, and our "mobile" colleagues - the Android application.
In the presentation for the students, it sounded like this:
Chapter 3. Preparatory. A few days before the day D.
To demonstrate at the poster session, we decided to make a separate device. We were not too lazy and made it cool in steampunk style - we aged a wooden box and found vintage lamps.
A couple of weekends and evenings - and the solution was ready, the stylish device was assembled and worked.
A couple of working days from the top and we have cool designs for posters, booklets, stand and t-shirts.
As responsible people, we decided to rehearse our master class. We prepared a presentation, gathered all the technical specialists and arranged the run. The program of the master class was the following: we consistently show how we program the controller, write the service, write the application, and at the end of each part we light a light bulb.
Over the course of three runs, we learned to fit in the allotted timing, polished the code and text, and prepared a couple of tricky questions for the students.
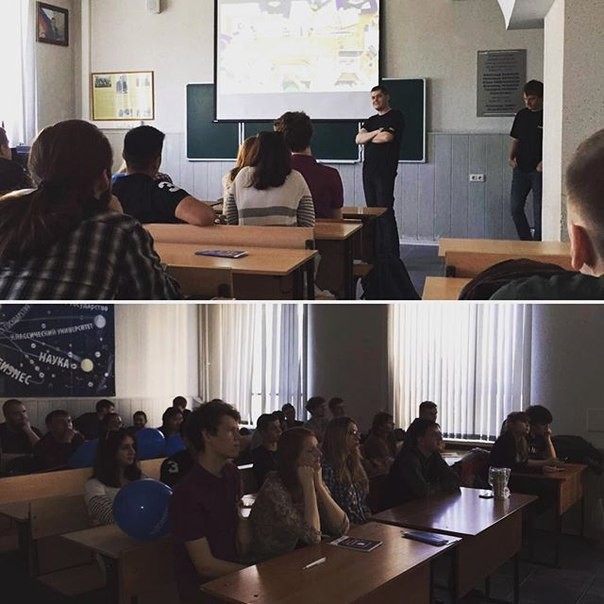
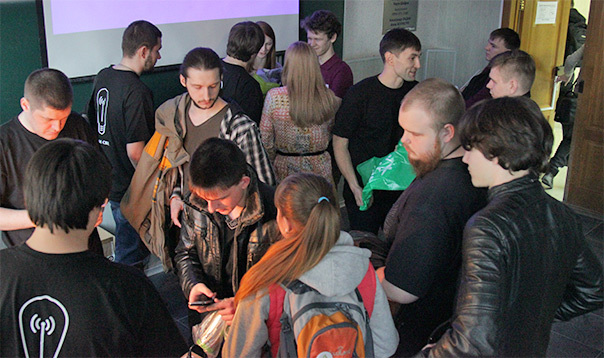
Chapter 4. Convict. Day D. Poster Session
In the morning we were one of the first to appear at NSU, we set up a stand, removed the dull standard table, put our branded cabinet and installed our device on it right in the center. He enjoyed tremendous success. Everyone came to watch and photograph everything - students, teachers, photographers, competitors and even security guards. Our booklets and device worked perfectly - we gathered a full audience the next day!
Chapter 5. Heroic. D + 1 day. Master Class.
And then came the day of the master class. We arrived at the NSU and realized that how not to get ready, and in such events will not do without gags.
The full audience of students, and we don’t have Macs connected to the projector, doesn’t allow some devices to Wi-Fi, and even Amazon’s clouds tried to get into position and not stop our proven services. But it’s not for nothing that we set up the dream, everything was resolved “on the fly”, not falling out of the general timing and structure of the presentation.
We gave a general introduction to our company, the Internet of things and how we will light a light bulb. Then all the programming stages of the complex solution went through the steps, handing out souvenirs and branded circles to the most active, clever and cunning students. Sly, because some of them tried to hack us, and the approach was pretty good, for which the hackers were awarded separately :).
Yes, it was very reminiscent of a textbook cinematic disastrous meeting, on which everything goes wrong, but the final, as it should be in the genre, was happy. The software has been created, the services are deployed in the cloud, the mobile application has fallen on the phones and the light has been lit at the strictly time allotted for this. The students saw our “soul”;) and told us “yes”, stayed after the end of the presentation to discuss projects, solutions and technologies with our children.
And now to the most interesting thing for hack readers - to the code.
Chapter 6. Technical
So, we remind that our solution should consist of 3 components.
- A microcontroller that turns on / off a light bulb. This microcontroller periodically requests the status of the light from the service. Here the attentive reader may ask why we have not used certain technologies that allow implementing Push from the server, and will be right. In a real project, a connection using WebSocket was used. However, in order to keep within such a short time, we decided to simplify the system as much as possible.
- RESTfull Service, which is “hosted” by AWS, as well as a test page that allows them to be managed.
- Mobile application that also allows you to manage the status of the light bulb.
6.1. We program the microcontroller.
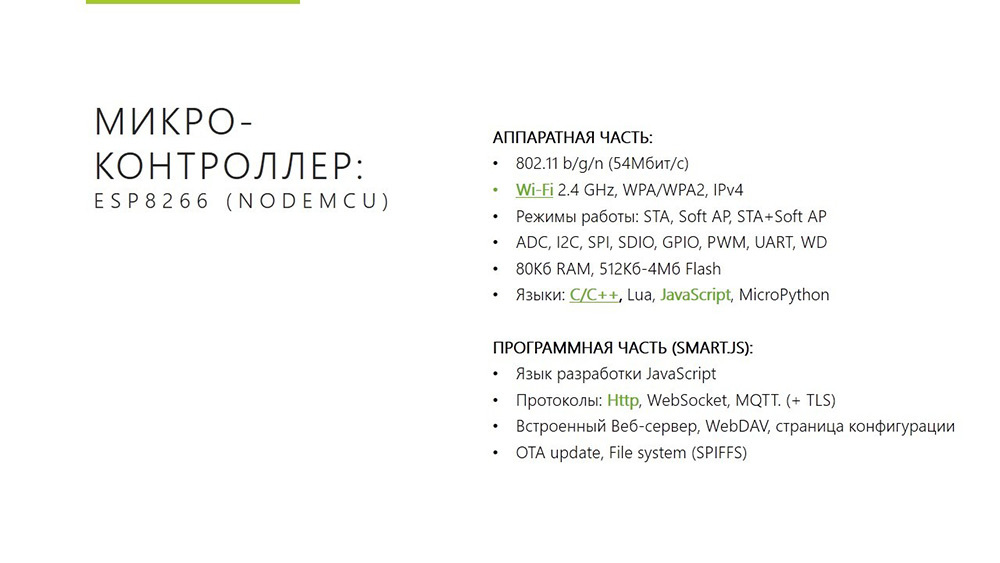
The heart of our device is the NodeMCU based on the ESP8266 controller.
From the entire list of features of this board, we are interested in the support of wireless networks Wi-Fi and GPIO - general purpose inputs / outputs. Also, despite the fact that there is no OS for this board in its usual sense, various firmware versions support the execution of programs in C / C ++, Lua, JavaScript and MicroPython.
We stopped at SMART.JS firmware, programs for which are written in JavaScript. Of the possibilities of this firmware, we will use only the http-client.
We are interested in the output number 5 (GPIO5). This is a digital output. It means that it can have a logical “0” or a logical “1” at the output. With a logical 0, the relay will be turned off, with a logical 1 it will be turned on, and the light will be on.
Prerequisites:
1. SMART.JS Documentation: docs.cesanta.com/smartjs/latest
2. SMART.JS firmware: github.com/cesanta/smart.js
3. FNC (utility to download firmware and programs in JavaScript): github.com/cesanta/fnc
4. Virtual COM port drivers: www.silabs.com/products/mcu/Pages/USBtoUARTBridgeVCPDrivers.aspx
5. Test service: a test service that on a GET request issues JSON in the format:
{ “resource_name”: true/false … } So, to the point.
To begin with, we flash on our board with SMART.JS firmware using the FNC program. After that, our device starts working in the access point mode and the SMARTJS network appears ???? (for example, SMARTJS_FA352), the password can be peeped in the FNC console.
Connect to the access point and open the address 192.168.4.1. We have a configuration page where we enter the SSID and password for our network. We save changes, the device is overloaded, and we are ready to write our application.
We take your favorite text editor and create the file app.js. To begin with, we will output some welcome message to our console and define the output to which the relay is connected and the name of the resource associated with the light bulb:
console.log('device started.'); var pin = 5; var resource = 'light01'; Initialize our output and set the logical 0 to the output:
GPIO.setmode(pin, 0, 0); GPIO.write(pin, false); Install the callback function on the connection state changes:
Wifi.changed(changedFunc); The function accepts the numeric status of the connection. For now, just output it to the console along with a textual representation of this status:
function changedFunc(state) { console.log('Wifi state: ', state, Wifi.status()); } Having launched the application, we see that the status “got ip” corresponds to code 2. Now let’s send a request to the service upon successful connection to the network:
function changedFunc(state) { console.log('Wifi state: ', state, Wifi.status()); if (state == 2) { mainFunc(); } } function mainFunc() { Http.request({ hostname: 'ngurestexample.us-east-1.elasticbeanstalk.com', port: 80, path: '/', method: 'GET' }, function (response){ console.log(response.body); }) .end() .setTimeout(5000, function(){ console.log('timeout error'); }); } We receive an answer in the form of a string: {“light01”: false}. We transform it into a JS object and set the state on our output in accordance with what we received from the service:
var states = JSON.parse(response.body); GPIO.write(pin, !!states[resource]); Well, and so that our device periodically polls the service, we put the second call to mainFunc via setTimeout in the service response handling function and in the request timeout handling function:
setTimeout(mainFunc, 1000); Now our device is ready to work.
6.2. AWS Service
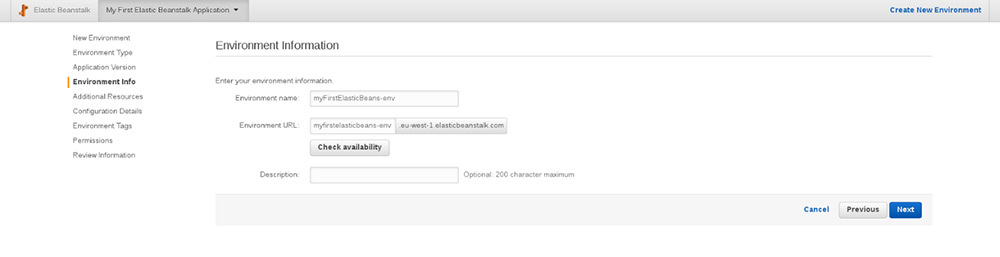
Elastic Beanstalk is one of the useful AWS services for quickly deploying and scaling web applications. Its use frees us from the need to create and customize the environment. The service of choice provides several pre-configured. All that is required of us is to choose the right environment and load the assembled application using an intuitive UI. The rest will be done by the Beanstalk service. At the output we get the URL to which the application will be accessible via HTTP.
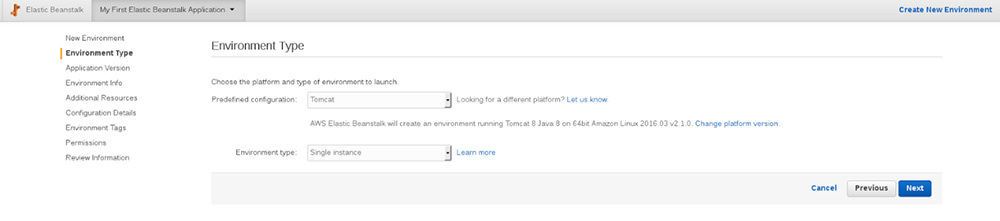
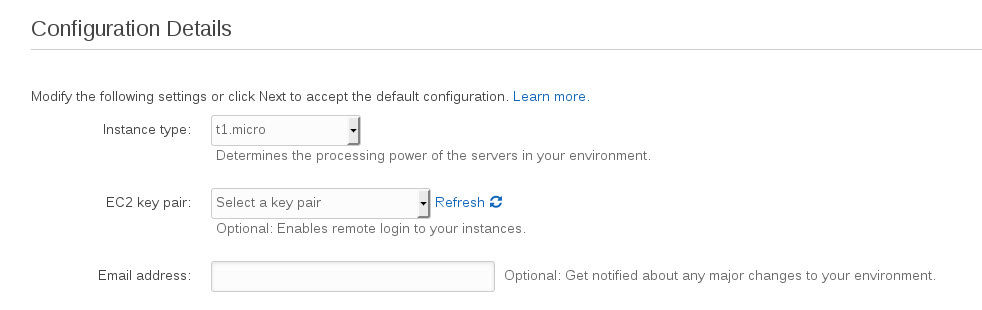
Select the Tomcat environment (servlet container) and the following configuration:
- Amazon Linux operating system;
- disable the load balancer, because we will not need it;
- choose a small virtual machine t1.micro.
The same actions in the pictures:
In addition, Beanstalk provides the ability to:
- configure application server settings (JVM settings) and pass environment variables;
- connect to the built-in monitoring tools CloudWatch;
- select the appropriate database or storage;
Let's proceed to the creation of our web application.
The goal is to implement a small and simple application that could store the state of the light bulbs (off / on) and change this state. Clients are completely different (microcontroller and mobile application), so it makes sense to use the REST architecture.
As a result, our application will provide the following standard REST API:
- [get] "/" - returns the status of all the lights. Example: {“bulb-1”: false, “bulb-2": true}
- [get] "/ {resource}" - returns the status of the requested light bulb
- [delete] "/ {resource}" - will remove a light bulb from the list of light bulbs
- [put] "/ {resource}" - will update the status of the specified light bulb
- [post] "/ {resource}" - will create a new light bulb
We will write the code in Java, collect the results of our work using Maven, and use the resteasy library to write the code.
Using Maven, we connect the necessary dependencies
[ github.com/EBTRussia/nsucareerdays2016/edit/master/cloud/sample-web-app-rest ] easy / pom.xml]:
resteasy-jaxrs - to work with jaxrs
resteasy-servlet-initializer - for integration with Tomcate
resteasy-jackson2-provider - to work with json
Why resteasy. In the Java world, there are many tools that allow you to create rest-applications (Jersey, Spring, Spark, etc.). We simply chose one of them, which, by the way, is included in the standard delivery of the WildFly application server.
[ github.com/EBTRussia/nsucareerdays2016/blob/master/cloud/sample-web-app-resteasy/src/main/java/ru/ebt/LightAppController.java ]
@Path("/") @Produces(MediaType.APPLICATION_JSON) public class LightAppController { private ConcurrentMap<String, Boolean> resource = new ConcurrentHashMap<>(); @GET public Map getAll() { return resource; } @GET @Path("/{resource}") public Boolean get(@PathParam("resource") String r) { return resource.get(r); } @PUT @Path("/{resource}") public Boolean put(@PathParam("resource") String r, Boolean status) { if (resource.containsKey(r)) { resource.put(r, status); return status; } throw new WebApplicationException(Response.Status.NOT_FOUND); } @POST @Path("/{resource}") public Boolean post(@PathParam("resource") String r, Boolean status) { resource.put(r, status); return status; } @DELETE @Path("/{resource}") public void delete(@PathParam("resource") String r) { resource.remove(r); } } GET , PUT , POST , DELETE - Annotations from JAX-RS, which show what http methods to contact our api.
Path ("/ {resource}") & @PathParam ("resource") show which URL to access api and which part of the URL we want to process as a parameter in the application logic. In our case, the resource is the name / id for the bulb.
To store the state of our lamps, we use the ConcurrentHashMap [ docs.oracle.com/javase/8/docs/api/java/util/concurrent/ConcurrentHashMap.html ], a thread-safe dictionary of keys and values.
Now we will turn our usual class into real rest-service. To do this, create the BaseApplication configuration class, which we will inherit from javax.ws.rs.core.Application. Inside the getSingletons () method, we list all the classes that will be REST services.
@ApplicationPath("") public class BaseApplication extends Application { @Override public Set<Object> getSingletons() { HashSet<Object> objects = new HashSet<>(); objects.add(new LightAppController()); return objects; } } Putting the application. Go to the root directory of our application and execute the command:
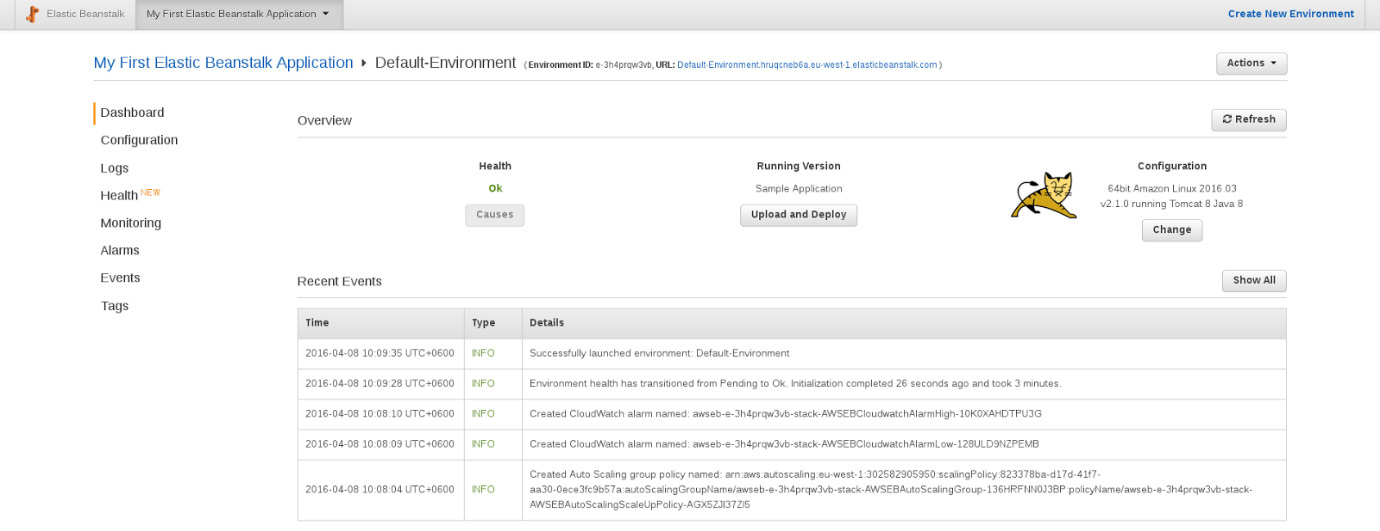
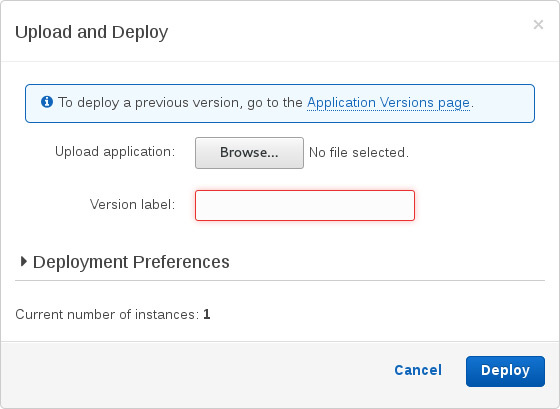
mvn clean install After we go to the target folder created by maven and pick up the * .war file, deploy it to Tomcat using the BeansTalk service.
Just press the button, everything should fly up:
We check that everything works:
- we pull the URL of our application with the get [http: // whichever.address/] method and in response we get an empty json: {}
- using any REST client, we execute the request using the POST [http: // whatever.address/light01] method in the request body we write true
- and we see that the bulb lights up) (you can pull get “/” again and get {“light01”: true})
6.3. Android application
Step 0. Preparatory
To create Android applications, the Gradle automated build system is used. In his build.gradle script, we will include several dependencies that will simplify our coding and life:
dependencies { compile 'com.jakewharton:butterknife:7.0.1' compile 'com.squareup.retrofit2:retrofit:2.0.0' compile 'com.squareup.retrofit2:converter-gson:2.0.0' } The Butterknife library will help us more easily set up a graphical interface, and Retrofit is ideal as an HTTP client if you plan to interact with a REST service.
Step 1. Graphical Interface
Add a Switch component to an empty screen (activity), which, like no one else, is well suited for controlling a light bulb, almost like a real switch:
<Switch android:id="@+id/light_switch" android:layout_width="match_parent" android:layout_height="wrap_content" android:text=""/> We gave our component the unique name light_switch and wrote the text that will be visible to the user.
Now add a switch to the code of our activity:
public class MainActivity extends AppCompatActivity { @Bind(R.id.light_switch) SwitchCompat lightSwitch; @Override protected void onCreate(Bundle savedInstanceState) { super.onCreate(savedInstanceState); setContentView(R.layout.activity_main); ButterKnife.bind(this); } @OnClick(R.id.light_switch) void onLightSwitchClicked(Switch lightSwitch) { boolean checked = lightSwitch.isChecked(); Toast.makeText(this, "Switch checked = " + checked, Toast.LENGTH_SHORT).show(); } } We used two annotations from the ButterKnife library: Bind and OnClick . The first connects our switch, declared in the xml-markup with the switch that is declared in the code. The second sets the onLightSwitchClicked () method as a click handler on our switch.
Step 2. HTTP client
Creating an http client is not at all difficult if you resort to using the retrofit library. It is only necessary to create an interface and describe in it all requests to the server as its methods, and then feed this interface to retrofit, which will independently create a suitable implementation of our interface.
public interface WebApi { @GET("/") Call<Map<String, Boolean>> list(); @POST("/{resource}") Call<Boolean> switchBulb(@Path("resource") String resource, @Body Boolean enabled); } In our interface, only 2 methods:
- list () - GET request to get all the lights and their states in the form of a dictionary <String, Boolean>
- switchBulb (...) - POST request, creating (or re-creating) the state of the light bulb:
webApi = new Retrofit.Builder() .baseUrl(getString(R.string.api_url)) .addConverterFactory(GsonConverterFactory.create()) .build() .create(WebApi.class);
Here we specify the base url to the retrofit library, we inform you that the requests and responses will be in JSON format and we specify the interface we have just written, after which the HTTP client is ready for work.
Step 3. We are on friendly terms with UI and HTTP client
First, you need to get and display the current state of the light bulb. Make a GET request and look for a lightbulb named “light01” in the returned dictionary:
webApi.list().enqueue(new Callback<Map<String, Boolean>>() { @Override public void onResponse(Call<Map<String, Boolean>> call, Response<Map<String, Boolean>> response) { Boolean light01Enabled = response.body().get("light01"); lightSwitch.setChecked(Boolean.TRUE == light01Enabled); } @Override public void onFailure(Call<Map<String, Boolean>> call, Throwable t) { } }); Secondly, when switching light bulbs on the client, you need to notify the server about it. We have already written a click handler for the switch in the previous step, now we will add an HTTP request to it:
@OnClick(R.id.light_switch) void onLightSwitchClicked(Switch lightSwitch){ boolean checked = lightSwitch.isChecked(); webApi.switchBulb("light01", checked).enqueue(new Callback<Boolean>() { @Override public void onResponse(Call<Boolean> call, Response<Boolean> response) { Toast.makeText(MainActivity.this, "Light01 changed", Toast.LENGTH_SHORT).show(); } @Override public void onFailure(Call<Boolean> call, Throwable t) { } }); } And-and-and, the light is on!
Chapter 7. Short, concluding.
The complete solution code can be found at: github.com/EBTRussia/nsucareerdays2016
We wanted to show a master class and this example - you can do cool and interesting things in a short time and with a minimum of effort. Need an idea. Dare! It is from simple and necessary things that entire industries are born, such as the Internet of things.
And come to work with us :) We have a truly unique team and very interesting projects.
See you!
Source: https://habr.com/ru/post/281238/
All Articles