How we implemented DevOps: continuous integration with GitHub and the Visual Studio Team Services build system
Hello! We continue the series of articles “How we implemented DevOps” from the Vorlon.JS team.Microsoft offers a large number of tools that can be used to implement DevOps practices, and in this cycle we will tell you in detail about Visual Studio Team Services, Visual Studio Code, and working with Microsoft Azure. Of course, we will also touch on the possibility of using many non-Microsoft tools, including when deploying applications to Microsoft Azure.
Vorlon.JS is a node.js-based tool that allows web developers a convenient way to remotely test, control and debug a web application, especially on mobile and embedded systems. In her blog on MSDN, the team described in detail the phased introduction of DevOps practices into the organization of work on Vorlon.JS and the selection of tools for solving daily tasks. Vorlon.JS is an open source project .
Cycle content:
- Project Planning and Management with Visual Studio Team Services
- Continuous integration with GitHub and Visual Studio Team Services build system
- Infrastructure-as-code with Microsoft Azure and Azure Resource Manager
- Release Management in Visual Studio Team Services
- Testing in production environment with Microsoft Azure App Service and Web Apps
You may already know that Visual Studio Team Services (VSTS) provides source code management tools that support GIT or TFVSC (Team Foundation Version Source Control).
')
In this article, we will explain in detail how to easily implement continuous integration for code located on GitHub using Visual Studio Team Services.
Pay attention to the previous article of the cycle , if you do not have a VSTS account, it tells in detail how to get it for free.
Connect GitHub to Visual Studio Team Services
To get started with GitHub, first of all you need to connect your account on the external services settings page in VSTS.
Go to the project team settings by clicking on the six in the upper right corner of the window, and then select the Services tab. You can add a new connection to the service, including to GitHub, if you click on the “New Service Endpoint” button
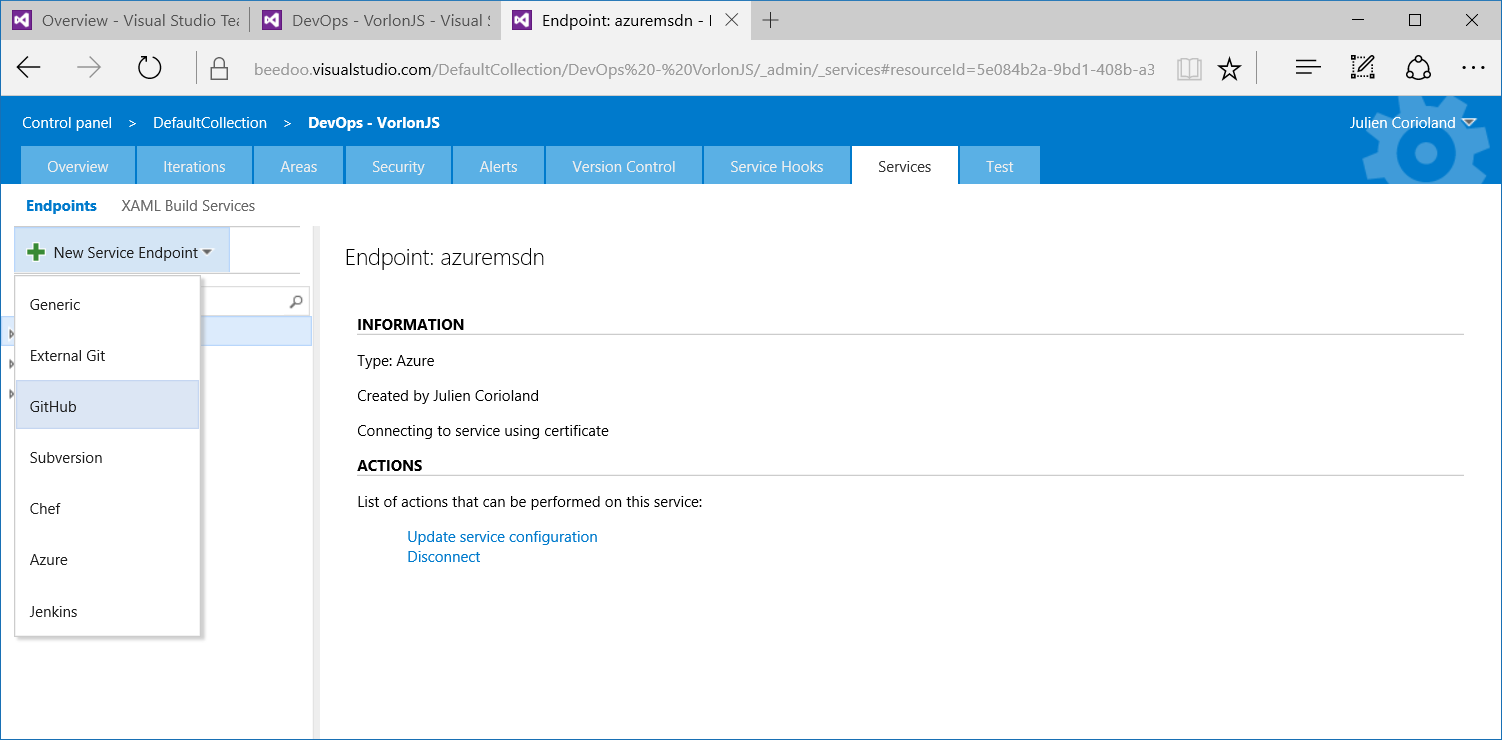
Click on the Authorize button to connect to your GitHub account and use your GitHub account information for authentication.
Creating a build definition
Once you have set up your GitHub account, go back to the team’s project and click “BUILD” to access the build definitions.
A new build service is an open system that can run various build agents (Linux, Windows, etc.) and handle a large number of build tasks such as MSBuild, Maven, Ant, creating packages for Android applications, running NPM or Gulp tasks. etc.
In fact, the assembly system is completely open and provides opportunities to create your own tasks if the ones provided from the box are not suitable for your purposes. All existing tasks are shared with the GitHub repository . It also presents tasks for creating application packages and deploying them (Azure Resource Manager, Web App, Docker, Tom Cat ..), but we will discuss them a little later in the article where we will talk about Release Management with VSTS.
In general, you need to take a few steps to create a new build definition.
Define the tasks to form the build process
This is the most important step, and it may take more time, depending on the solution you want to collect. In the case of Vorlon.JS, we needed the following:
- Run NPM install to add all application dependencies, and perform the default Gulp task, which will generate JavaScript and CSS files from TypeScript, Less, etc.
- Launching the “test” Gulp task, which is responsible for launching unit tests with Mocha.JS
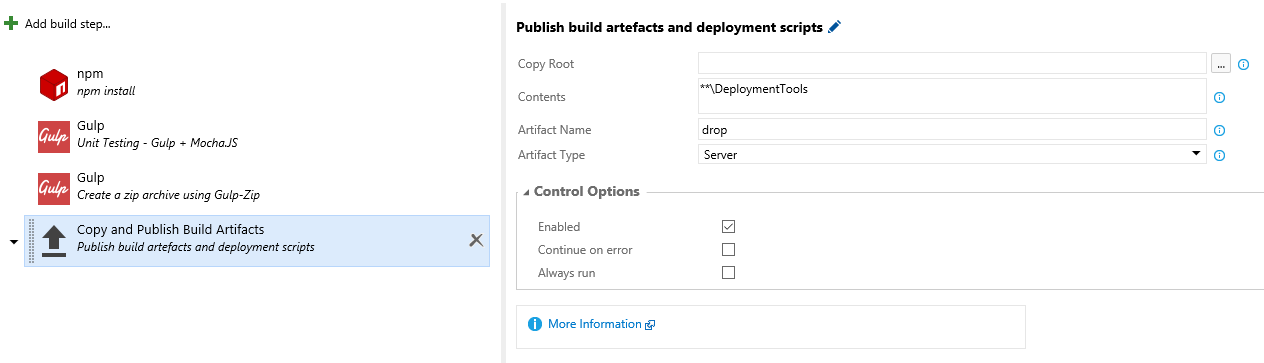
- Running the “zip” of the Gulp task, responsible for creating the zip archive containing the application
- Publishing build artifacts (zip file created in the previous step and other deployment scripts, which we will discuss in the next article). These artifacts will be used by the Release Management service to publish the application to various environments (dvelopment, QA, pre-production, production ...)
On the “Build” tab, click on the plus to the left to create a new build definition. You can select both the existing template and the empty definition:
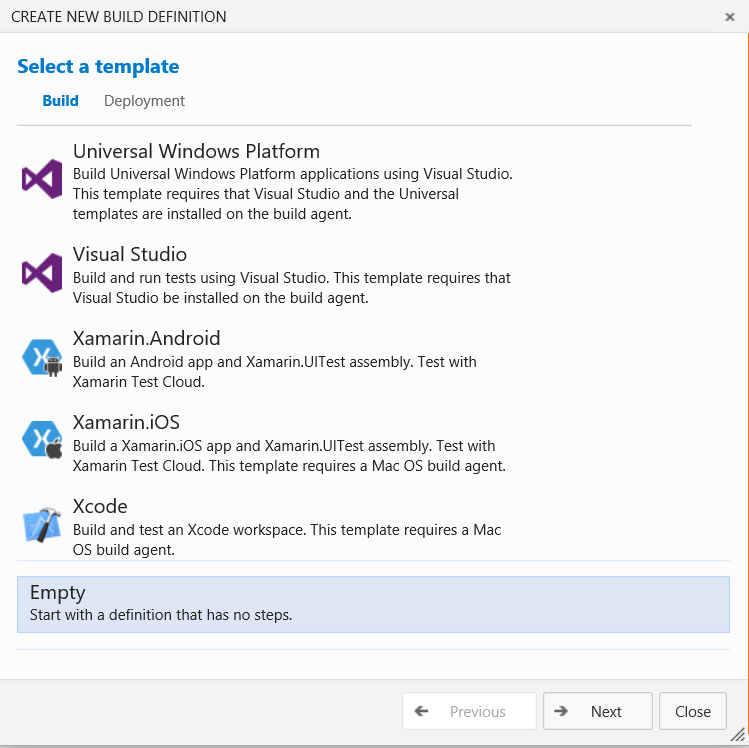
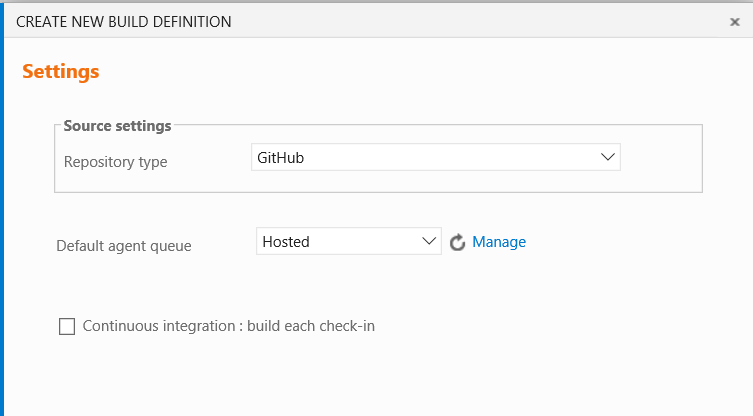
In this case, I chose an empty definition. Click “Next” to access the “Settings” page, where you can configure the repository type to store the source code that will be associated with the new build, the queue of agents to use when the build was initiated, and if you want to use continuous integration, To run the build each time a commit is made, you need to check the appropriate setting:
There are two types of build agents that can be used:
- Hosted build agents - are provided as a service in Visual Studio Team Services, and you pay for their use by the minute
- Private build agents are those that you can configure on your own / virtual machines, they can run on Windows or Linux.
In this step, we can use the Hosted agent, which natively supports all the tools that we will use for the build process.
Click “Create” to create a build definition. You will be redirected to the assembly definition designer, which will allow you to define the process to be performed during assembly. The assembly consists of steps that will be performed one after the other.
Click “Add build step”. You can choose different steps to add to the process:
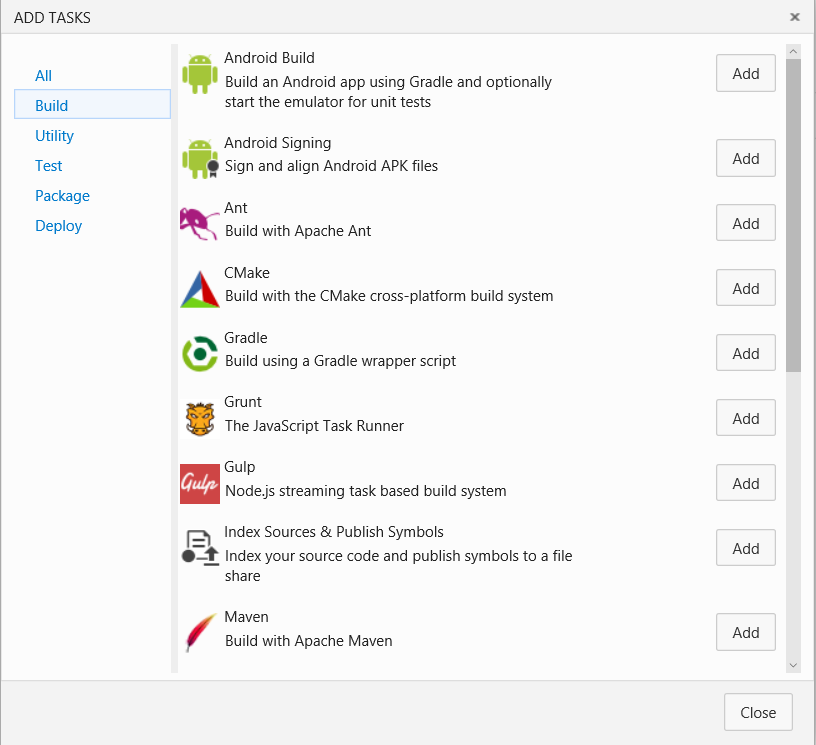
Below is the process that we defined to build Vorlon.JS:
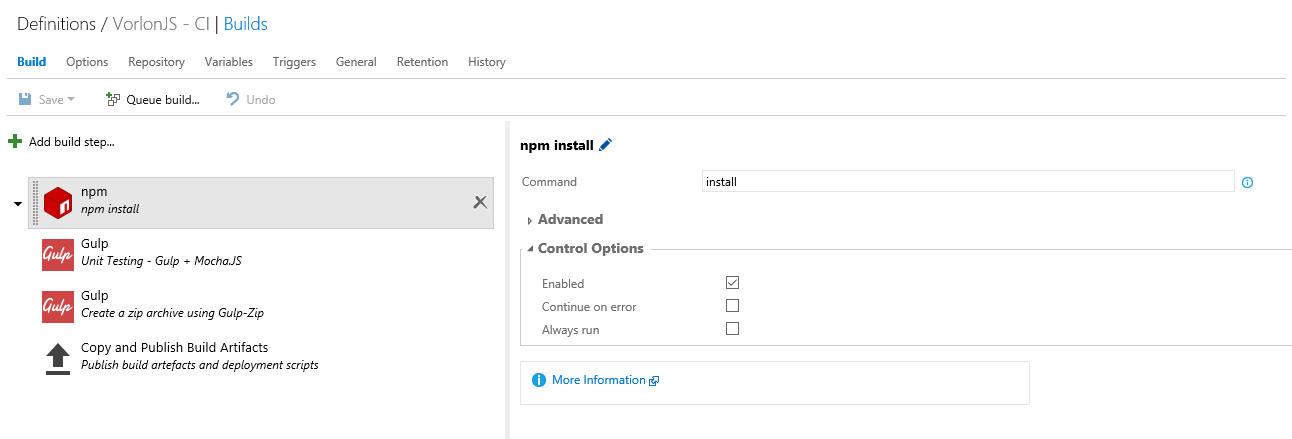
As you can see, each step can be configured in the area on the right. For example, the first task “NPM install” will be executed after cloning the repository. Then two gulp tasks will be executed: the first will perform unit testing with Gulp using the Mocha.JS framework, the second will generate a zip archive with all the code and root modules. The latter task is used to publish the build artifacts to the build agent in order to be able to use these artifacts in the Release Management phase to deploy the application.
Repository definition
Once you have added all the necessary steps for your build process, return to the Repository tab to configure the source code repository that should be used by this build definition. In the case of Vorlon.JS, we used the GitHub repository:

We initiate assembly
In this project, we wanted the launch of the new build to occur as soon as the source code changes in the GitHub repository were made. To configure this, you need to go to the “Triggers” tab and select Continuous Integration, as shown in the screenshot:
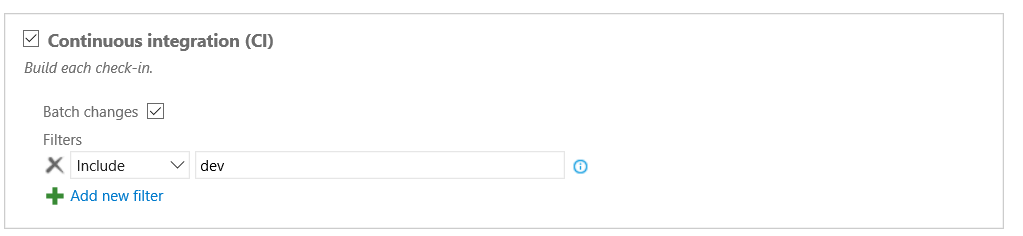
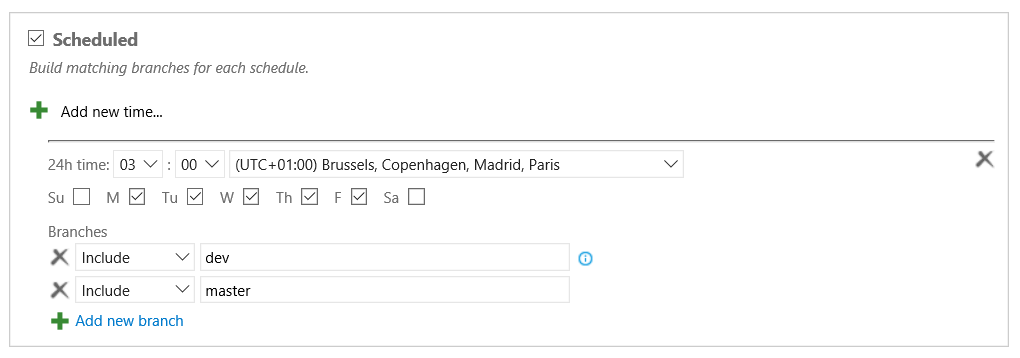
You can also choose to run the assembly on a schedule for different branches of the repository, for example, to start the nightly assembly:
Click “Save” on the panel. The first time, a pop-up window will ask you for the name of the assembly.
The next step is to make changes in the code and commit to the repository to check if the build process starts and if everything works well. Here we use GitHub, but all steps taken to create an assembly definition can also be done with other providers in VSTS (GIT or TFVSC), so using GitHub is optional!
In our case, we use the Visual Studio Code tool, which provides native integration with GIT, so it becomes very easy to program and then immediately send the changes to GitHub.
Verify build results and output
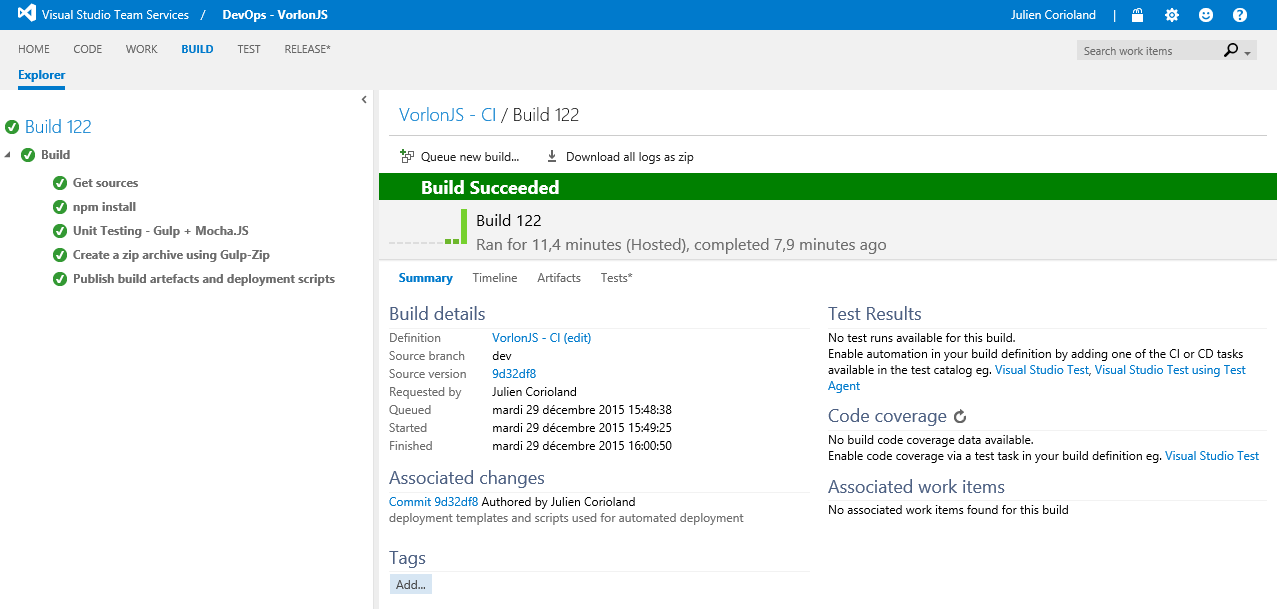
To access the latest build, click on the build definition on the left. You can choose to display the assemblies in the queue and the completed assemblies.
Once the build is complete, you can access the logs directly on the VSTS portal to see if all the build steps were completed correctly:
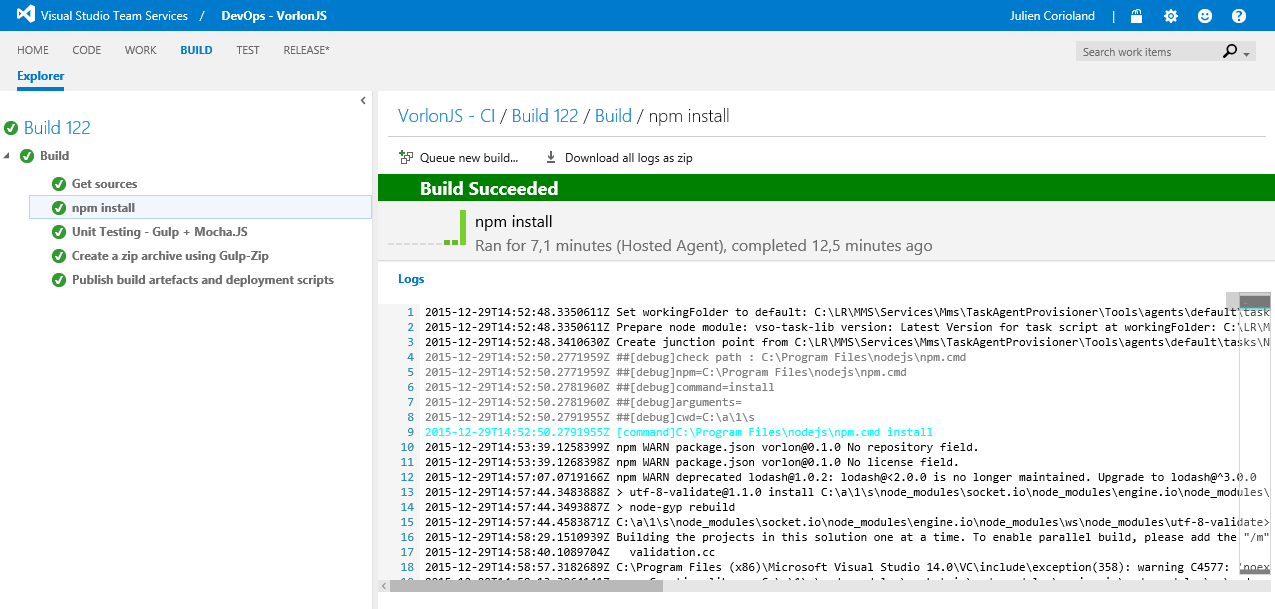
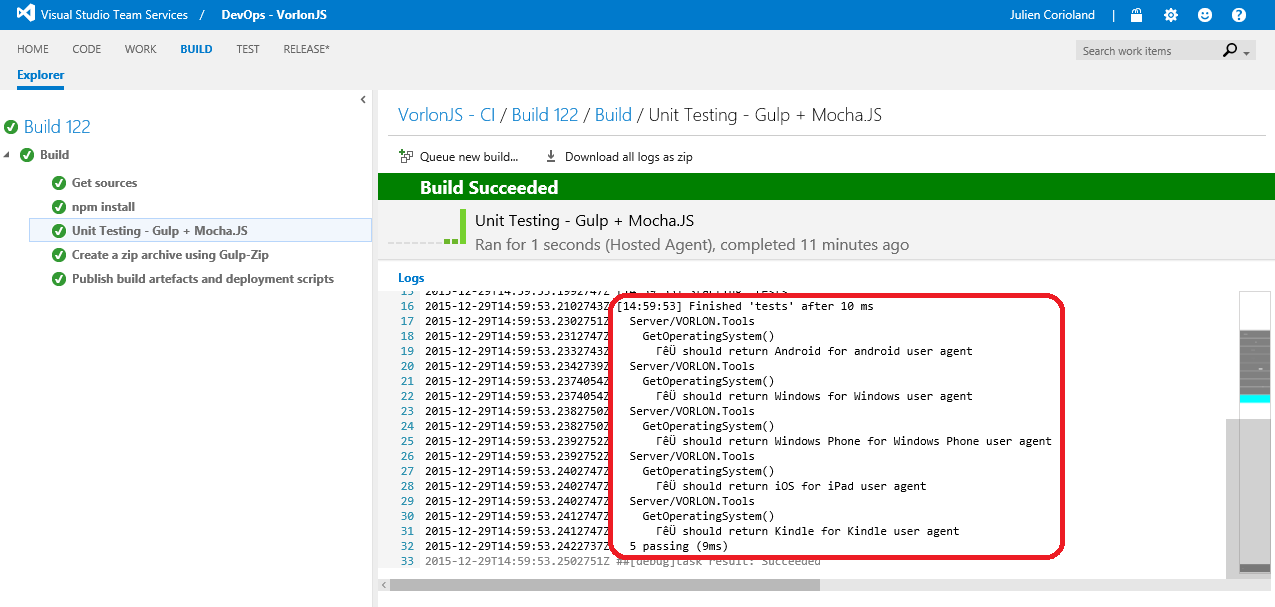
You can get logs for each step:
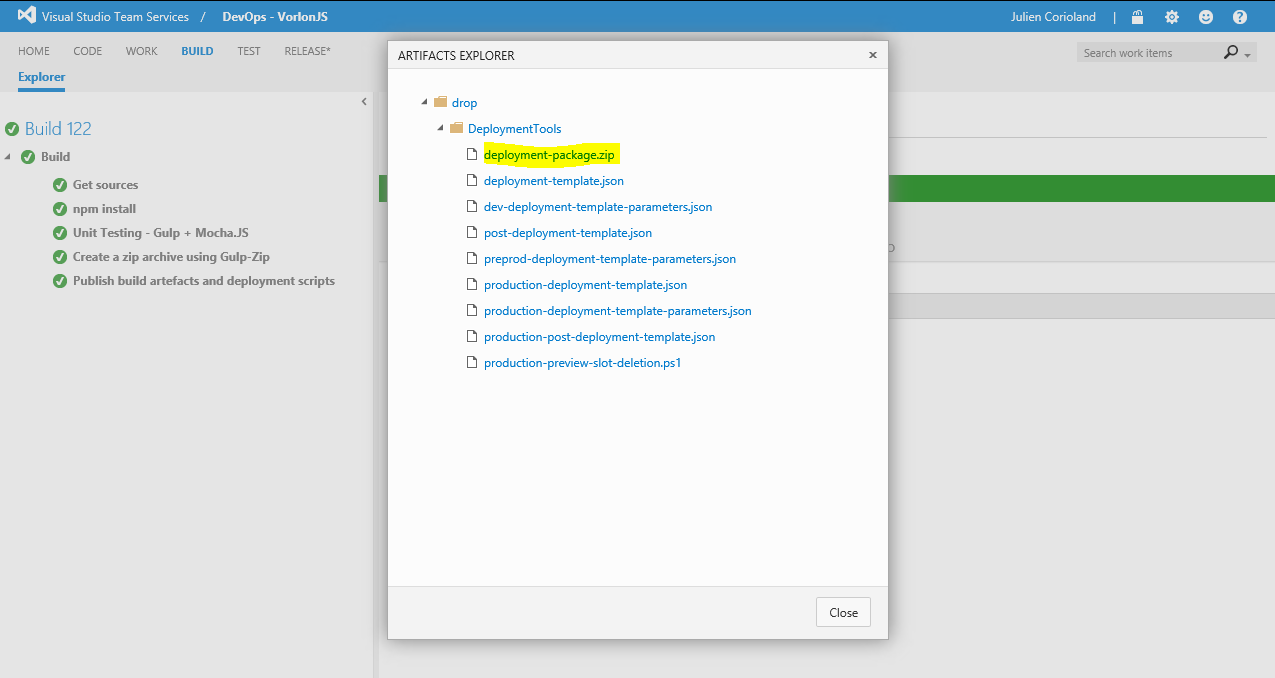
It is also possible to download build artifacts from the portal, so that you can see what was published to the build agent during the execution of the entire process. We will use these artifacts in a future article on release management.
But before going to the issue management issue, in the next article of the series we will look at what the “Infrastructure-as-code” approach is and how it can improve the process of creating environments and deploying an application.
Stay in touch!
About the authors

Julien Corioland is a technology evangelist from Microsoft, France. After six years as a consultant, he is a Microsoft technical evangelist in France. The main direction of work is the Microsoft Azure application platform. He helps developers create cloud-based applications, and also belongs to the Vorlon.JS tool development group, in which he helps to implement DevOps practices.
We are pleased to announce that the developers of the Vorlon.JS project - Julien Corioland and Ettiene Margraff will speak at the DevCon 2016 conference, where they will talk about their experience of implementing practices live exclusively for the participants of the DevOps Intensive by hands.
If you have questions about this series of publications or about the DevOps methodology, you can contact the author directly via Twitter: twitter.com/jcorioland
useful links
- Visual Studio 2015, Visual Studio Team Services, Visual Studio Code: free offers for developers
- Additional and free tools and services in Visual Studio Dev Essentials
- Laboratory work on the development, testing and management of the life cycle of software for Visual Studio 2015
Source: https://habr.com/ru/post/281024/
All Articles