Simple Yii2 application to send mail
Seeing how cleverly the printer in the office sends letters from anyone to anywhere, I decided to implement a simple letter sender. Yii 2 framework with a swiftmailer module embedded in it, virtual Ubuntu on VirtualBox (you can do without it if you install php and web server locally) turned out to be from improvised tools.
So, let's begin.
Install the basic application Yii 2 in the server folder. After receiving the following picture, you can move on:

')
Next, you need to change the configuration file /config/web.php . The 'useFileTransport' parameter is initially set to true for error trapping purposes. With this value, letters in the file format fall into the / runtime / mail folder. There you can check the main headers of the letter and make sure that the settings are correct.
For correct sending it is necessary to use a valid mail service as a transport. Here is an example configuration for mail gmail.com:
For sending inside the corporate environment, you can use both the server name and its IP address. In my case there is a corporate environment built on the basis of Microsoft products. I consider it as an example. If the Exchange server does not have a mandatory user check, then you can not specify anything in the 'username' and 'password' fields. However, there is no guarantee that the sent letter will not be sent to the “Spam” folder of the recipient.
To prevent email from being filtered by anti-spam, you need to enter the domain username and password for authorization on the Exchange server.
Next, create the MailerForm.php model in the / models folder:
Let's create a mailer.php view for the form in the / views / site / folder:
Next, you need to add an action in the controller /controllers/SiteController.php . At the very beginning of the site you need to remember to add use app \ models \ MailerForm to connect the namespace of the model MailerForm. And in the class itself add the actionMailer () method.
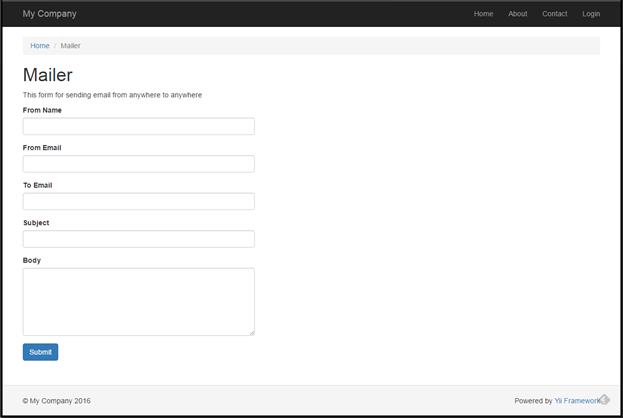
After these manipulations, following the link index.php? R = site / mailer you can get on the form of sending mail.
The final touch will add a menu item for ease of reference. In the file /views/layouts/main.php we find the following block:
And add the line:
All is ready!
PS: Do not abuse fraudulent emails with fake senders. And do not send spam.
If you are too lazy to do everything with your hands, you can simply clone the project from https://github.com/danvop/mailer . There is also a guide to the deployment.
So, let's begin.
Install the basic application Yii 2 in the server folder. After receiving the following picture, you can move on:
')
Next, you need to change the configuration file /config/web.php . The 'useFileTransport' parameter is initially set to true for error trapping purposes. With this value, letters in the file format fall into the / runtime / mail folder. There you can check the main headers of the letter and make sure that the settings are correct.
For correct sending it is necessary to use a valid mail service as a transport. Here is an example configuration for mail gmail.com:
//config/web.php 'mail' => [ 'class' => 'yii\swiftmailer\Mailer', 'useFileTransport' => false, 'transport' => [ 'class' => 'Swift_SmtpTransport', 'host' => 'smtp.gmail.com', 'username' => 'username@gmail.com', 'password' => 'password', 'port' => '587', 'encryption' => 'tls', ], ], For sending inside the corporate environment, you can use both the server name and its IP address. In my case there is a corporate environment built on the basis of Microsoft products. I consider it as an example. If the Exchange server does not have a mandatory user check, then you can not specify anything in the 'username' and 'password' fields. However, there is no guarantee that the sent letter will not be sent to the “Spam” folder of the recipient.
'mailer' => [ 'class' => 'yii\swiftmailer\Mailer', 'useFileTransport' => false, 'transport' => [ 'class' => 'Swift_SmtpTransport', 'host' => 'exchange.example.com', // 'username' => '', 'password' => '', 'port' => '25', 'encryption' => '', ], ], To prevent email from being filtered by anti-spam, you need to enter the domain username and password for authorization on the Exchange server.
Next, create the MailerForm.php model in the / models folder:
MailerForm.php
//models/MailerForm.php <?php namespace app\models; use Yii; use yii\base\Model; class MailerForm extends Model { public $fromEmail; public $fromName; public $toEmail; public $subject; public $body; public function rules() { return [ [['fromEmail', 'fromName', 'toEmail', 'subject', 'body'], 'required'], ['fromEmail', 'email'], ['toEmail', 'email'] ]; } public function sendEmail() { if ($this->validate()) { Yii::$app->mailer->compose() ->setTo($this->toEmail) ->setFrom([$this->fromEmail => $this->fromName]) ->setSubject($this->subject) ->setTextBody($this->body) ->send(); return true; } return false; } } Let's create a mailer.php view for the form in the / views / site / folder:
mailer.php
//views/site/mailer.php <?php /* @var $this yii\web\View */ /* @var $form yii\bootstrap\ActiveForm */ /* @var $model app\models\MailerForm */ use yii\helpers\Html; use yii\bootstrap\ActiveForm; $this->title = 'Mailer'; $this->params['breadcrumbs'][] = $this->title; ?> <div class="site-contact"> <h1><?= Html::encode($this->title) ?></h1> <?php if (Yii::$app->session->hasFlash('mailerFormSubmitted')) : ?> <div class="alert alert-success"> Your email has been sent </div> <?php else : ?> <p> This form for sending email from anywhere to anywhere </p> <div class="row"> <div class="col-lg-5"> <?php $form = ActiveForm::begin(['id' => 'mailer-form']); ?> <?= $form->field($model, 'fromName') ?> <?= $form->field($model, 'fromEmail') ?> <?= $form->field($model, 'toEmail') ?> <?= $form->field($model, 'subject') ?> <?= $form->field($model, 'body')->textArea(['rows' => 6]) ?> <div class="form-group"> <?= Html::submitButton('Submit', ['class' => 'btn btn-primary', 'name' => 'contact-button']) ?> </div> <?php ActiveForm::end(); ?> </div> </div> <?php endif; ?> </div> Next, you need to add an action in the controller /controllers/SiteController.php . At the very beginning of the site you need to remember to add use app \ models \ MailerForm to connect the namespace of the model MailerForm. And in the class itself add the actionMailer () method.
<?php namespace app\controllers; use Yii; use yii\filters\AccessControl; use yii\web\Controller; use yii\filters\VerbFilter; use app\models\LoginForm; use app\models\ContactForm; use app\models\MailerForm; // class SiteController extends Controller { //… … public function actionMailer() { $model = new MailerForm(); if ($model->load(Yii::$app->request->post()) && $model->sendEmail()) { Yii::$app->session->setFlash('mailerFormSubmitted'); return $this->refresh(); } return $this->render('mailer', [ 'model' => $model, ]); } //… … } After these manipulations, following the link index.php? R = site / mailer you can get on the form of sending mail.
The final touch will add a menu item for ease of reference. In the file /views/layouts/main.php we find the following block:
echo Nav::widget([ 'options' => ['class' => 'navbar-nav navbar-right'], 'items' => [ ['label' => 'Home', 'url' => ['/site/index']], ['label' => 'About', 'url' => ['/site/about']], ['label' => 'Contact', 'url' => ['/site/contact']], And add the line:
['label' => 'Mailer', 'url' => ['/site/mailer']], All is ready!
PS: Do not abuse fraudulent emails with fake senders. And do not send spam.
If you are too lazy to do everything with your hands, you can simply clone the project from https://github.com/danvop/mailer . There is also a guide to the deployment.
Source: https://habr.com/ru/post/280310/
All Articles