Our experience of using photogrammetry in the development of a computer game (Part 2)

Today we will continue the story of our research in the field of photogrammetry, but using the example of creating materials. Let me remind you that last time we began to tell you about this discipline and its experience in using content for creating a three-dimensional computer game in the Half-Life universe. Well, let's get down to business right away.
Shooting and processing
After our first forays into the nearest forest parks, it became clear that in order to efficiently use the time allotted for shooting on location, we need to find a place with the maximum concentration of interesting objects and a diverse landscape. In the urban forest park, for example, you will not find old fallen trees, huge boulders and rocky cliffs. After a brief search, we found a suitable place - the federal reserve “not far” from the city.
')
Without hesitation, we packed up and went for one day on a small 130 km long expedition, and found ourselves in a real fairy tale!

Shooting surfaces to create materials was fraught with its features and difficulties. In order to finally get an interesting material with a variety of details, you need to capture a sufficiently large surface - at least 3x3 meters. At the same time, in order to obtain high detail of the material, it is necessary to take pictures from a short distance and ensure that adjacent images intersect, i.e. so that in the adjacent images 50-60% of the frame occupy the same surface area (this intersection will be used in the process of photogrammetry).
In view of the above, when shooting, one has to slowly move through the intended area and take a huge number of shots in a row (150, or even all 200 photos) at a time in a bent, uncomfortable position. If you take a break, then the risk of losing the exact place where you stopped, or to get a change in lighting, if the sun has time to go out from behind a cloud while you are resting. Another nuance that you should constantly follow is where you step. The branch that you accidentally did not notice and moved in the middle of the shooting can spoil all the work, and the prints of your shoes or forgotten things can migrate to the final material in the game, which is very undesirable.
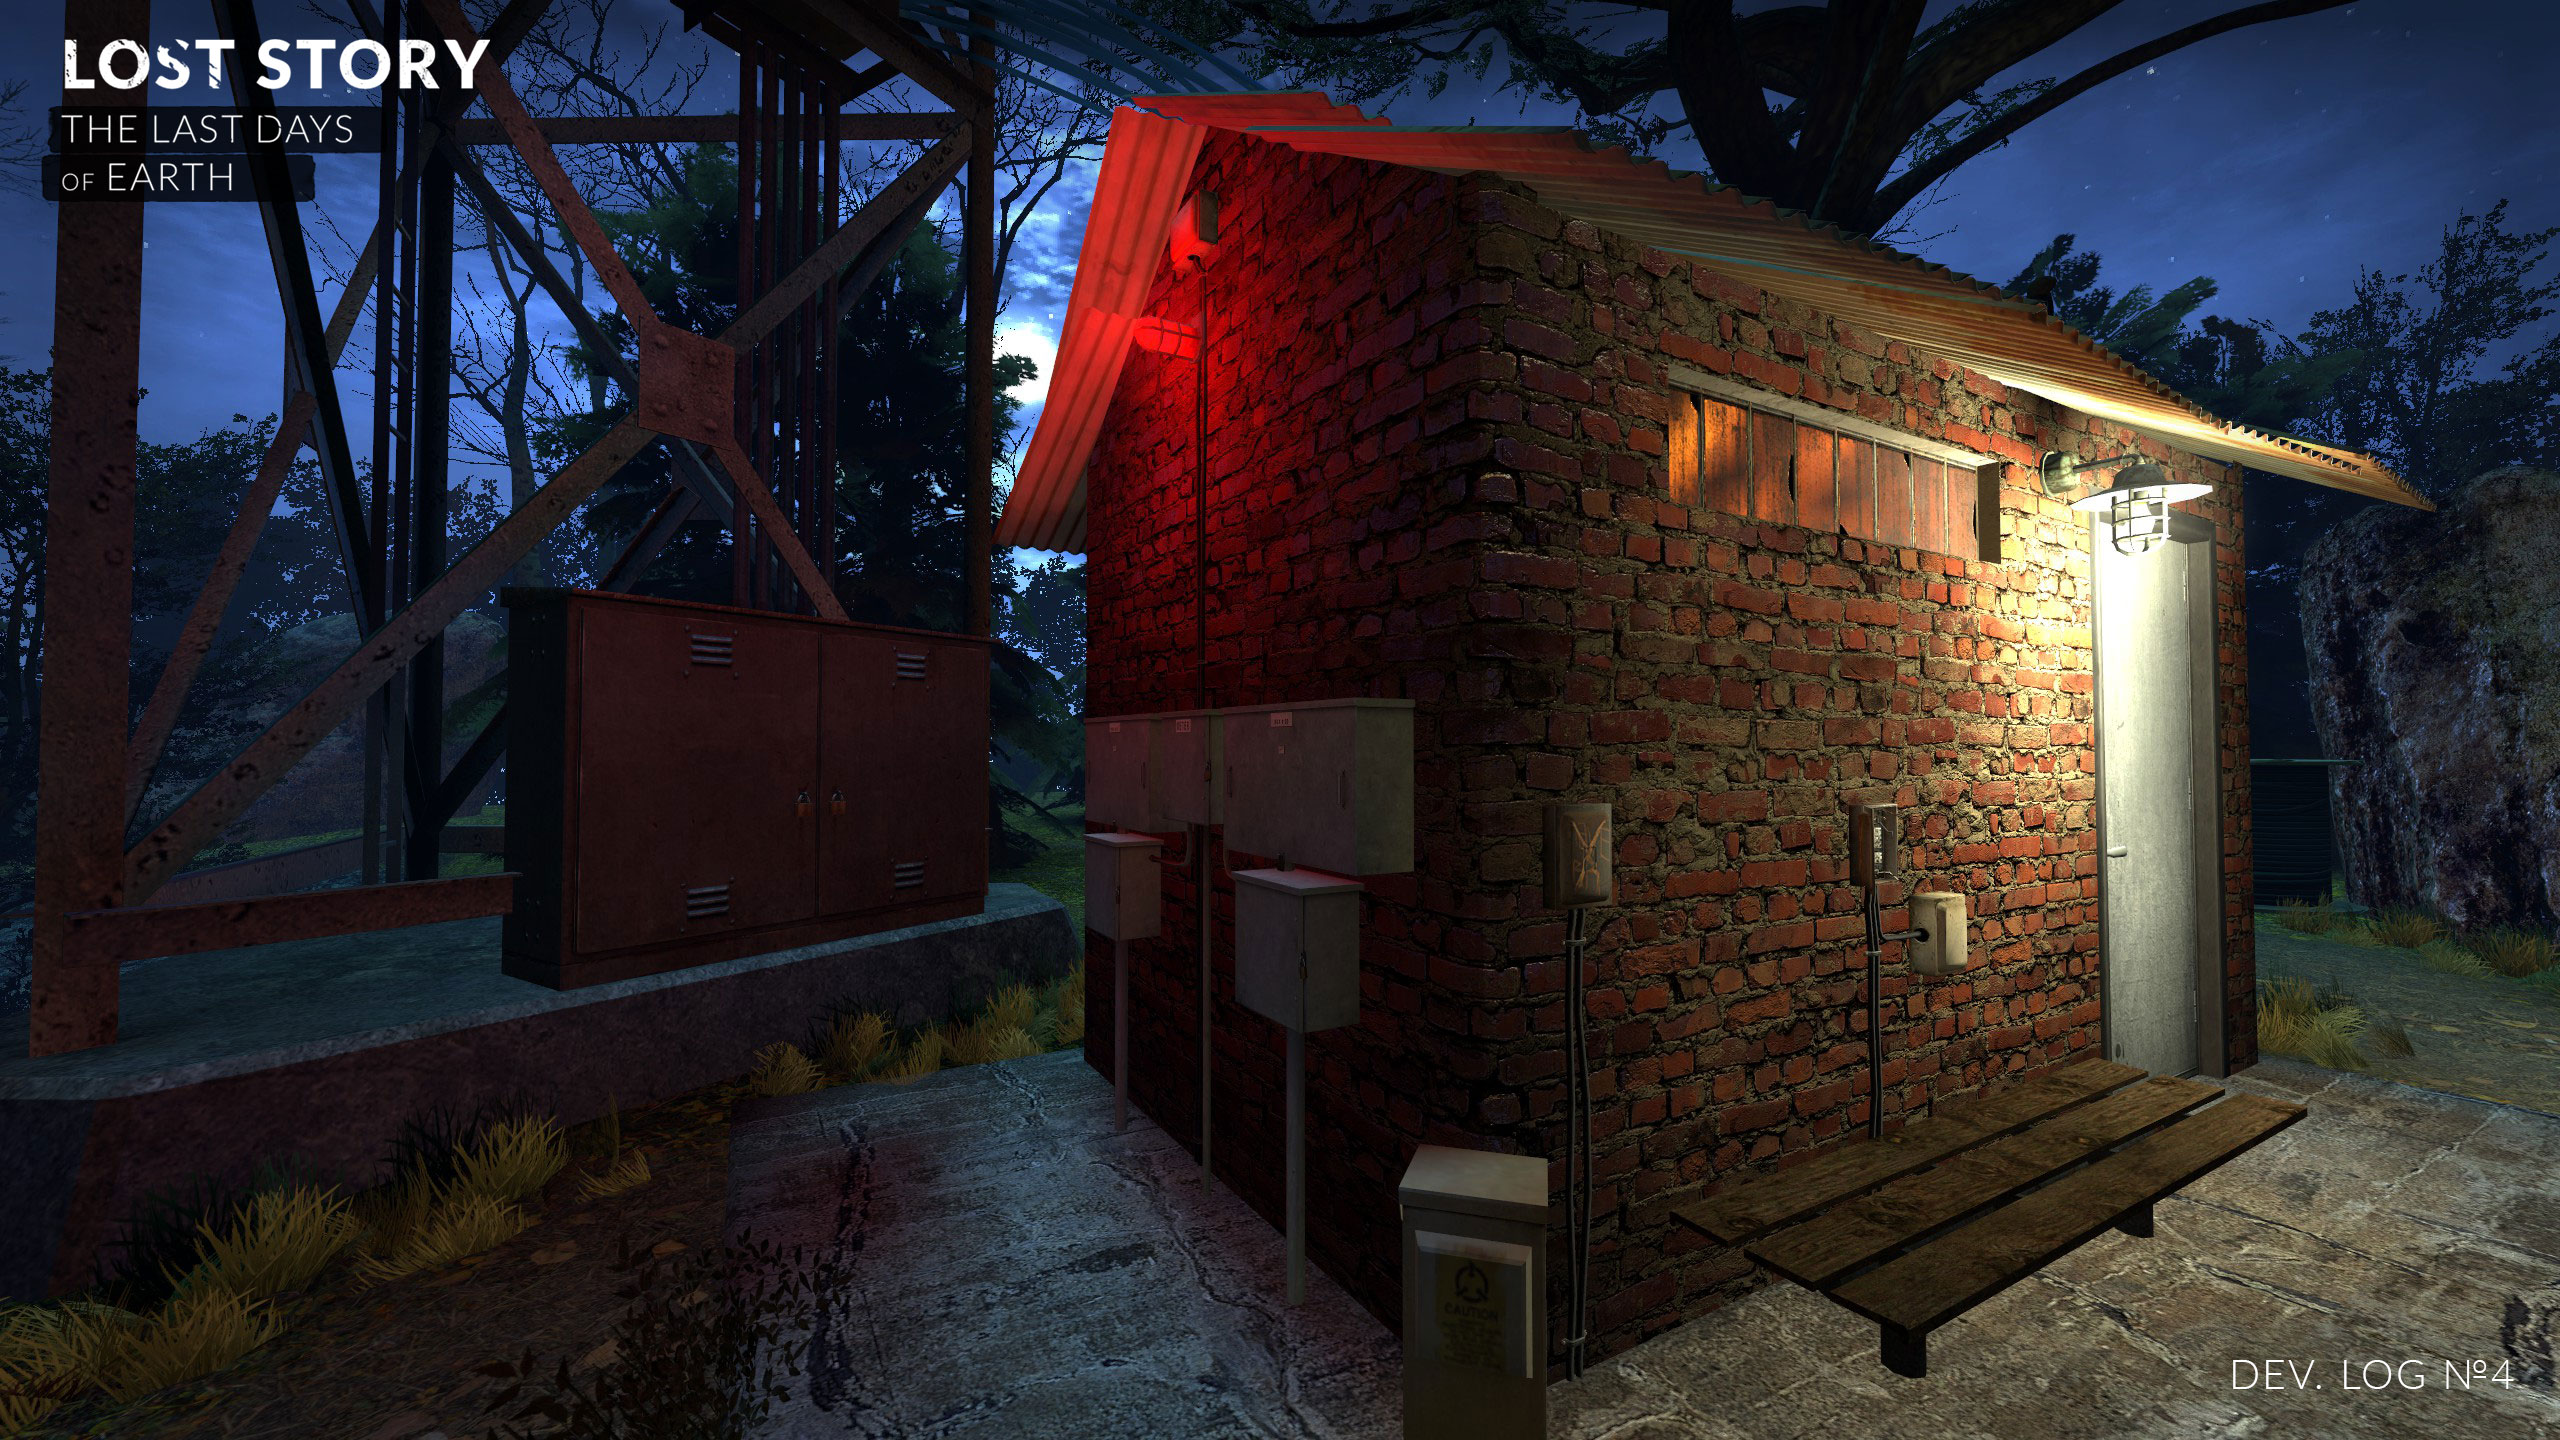
Although it seemed to us that shooting various surfaces for creating materials is more difficult (at least physically) than shooting objects, but in time it came out, on the contrary, faster. In one day, we managed to shoot six natural materials, a lot of photo-references of the forest, a couple of models and even brick material on the way back, which was not originally in our plans. The brick material, however, was very useful to us.

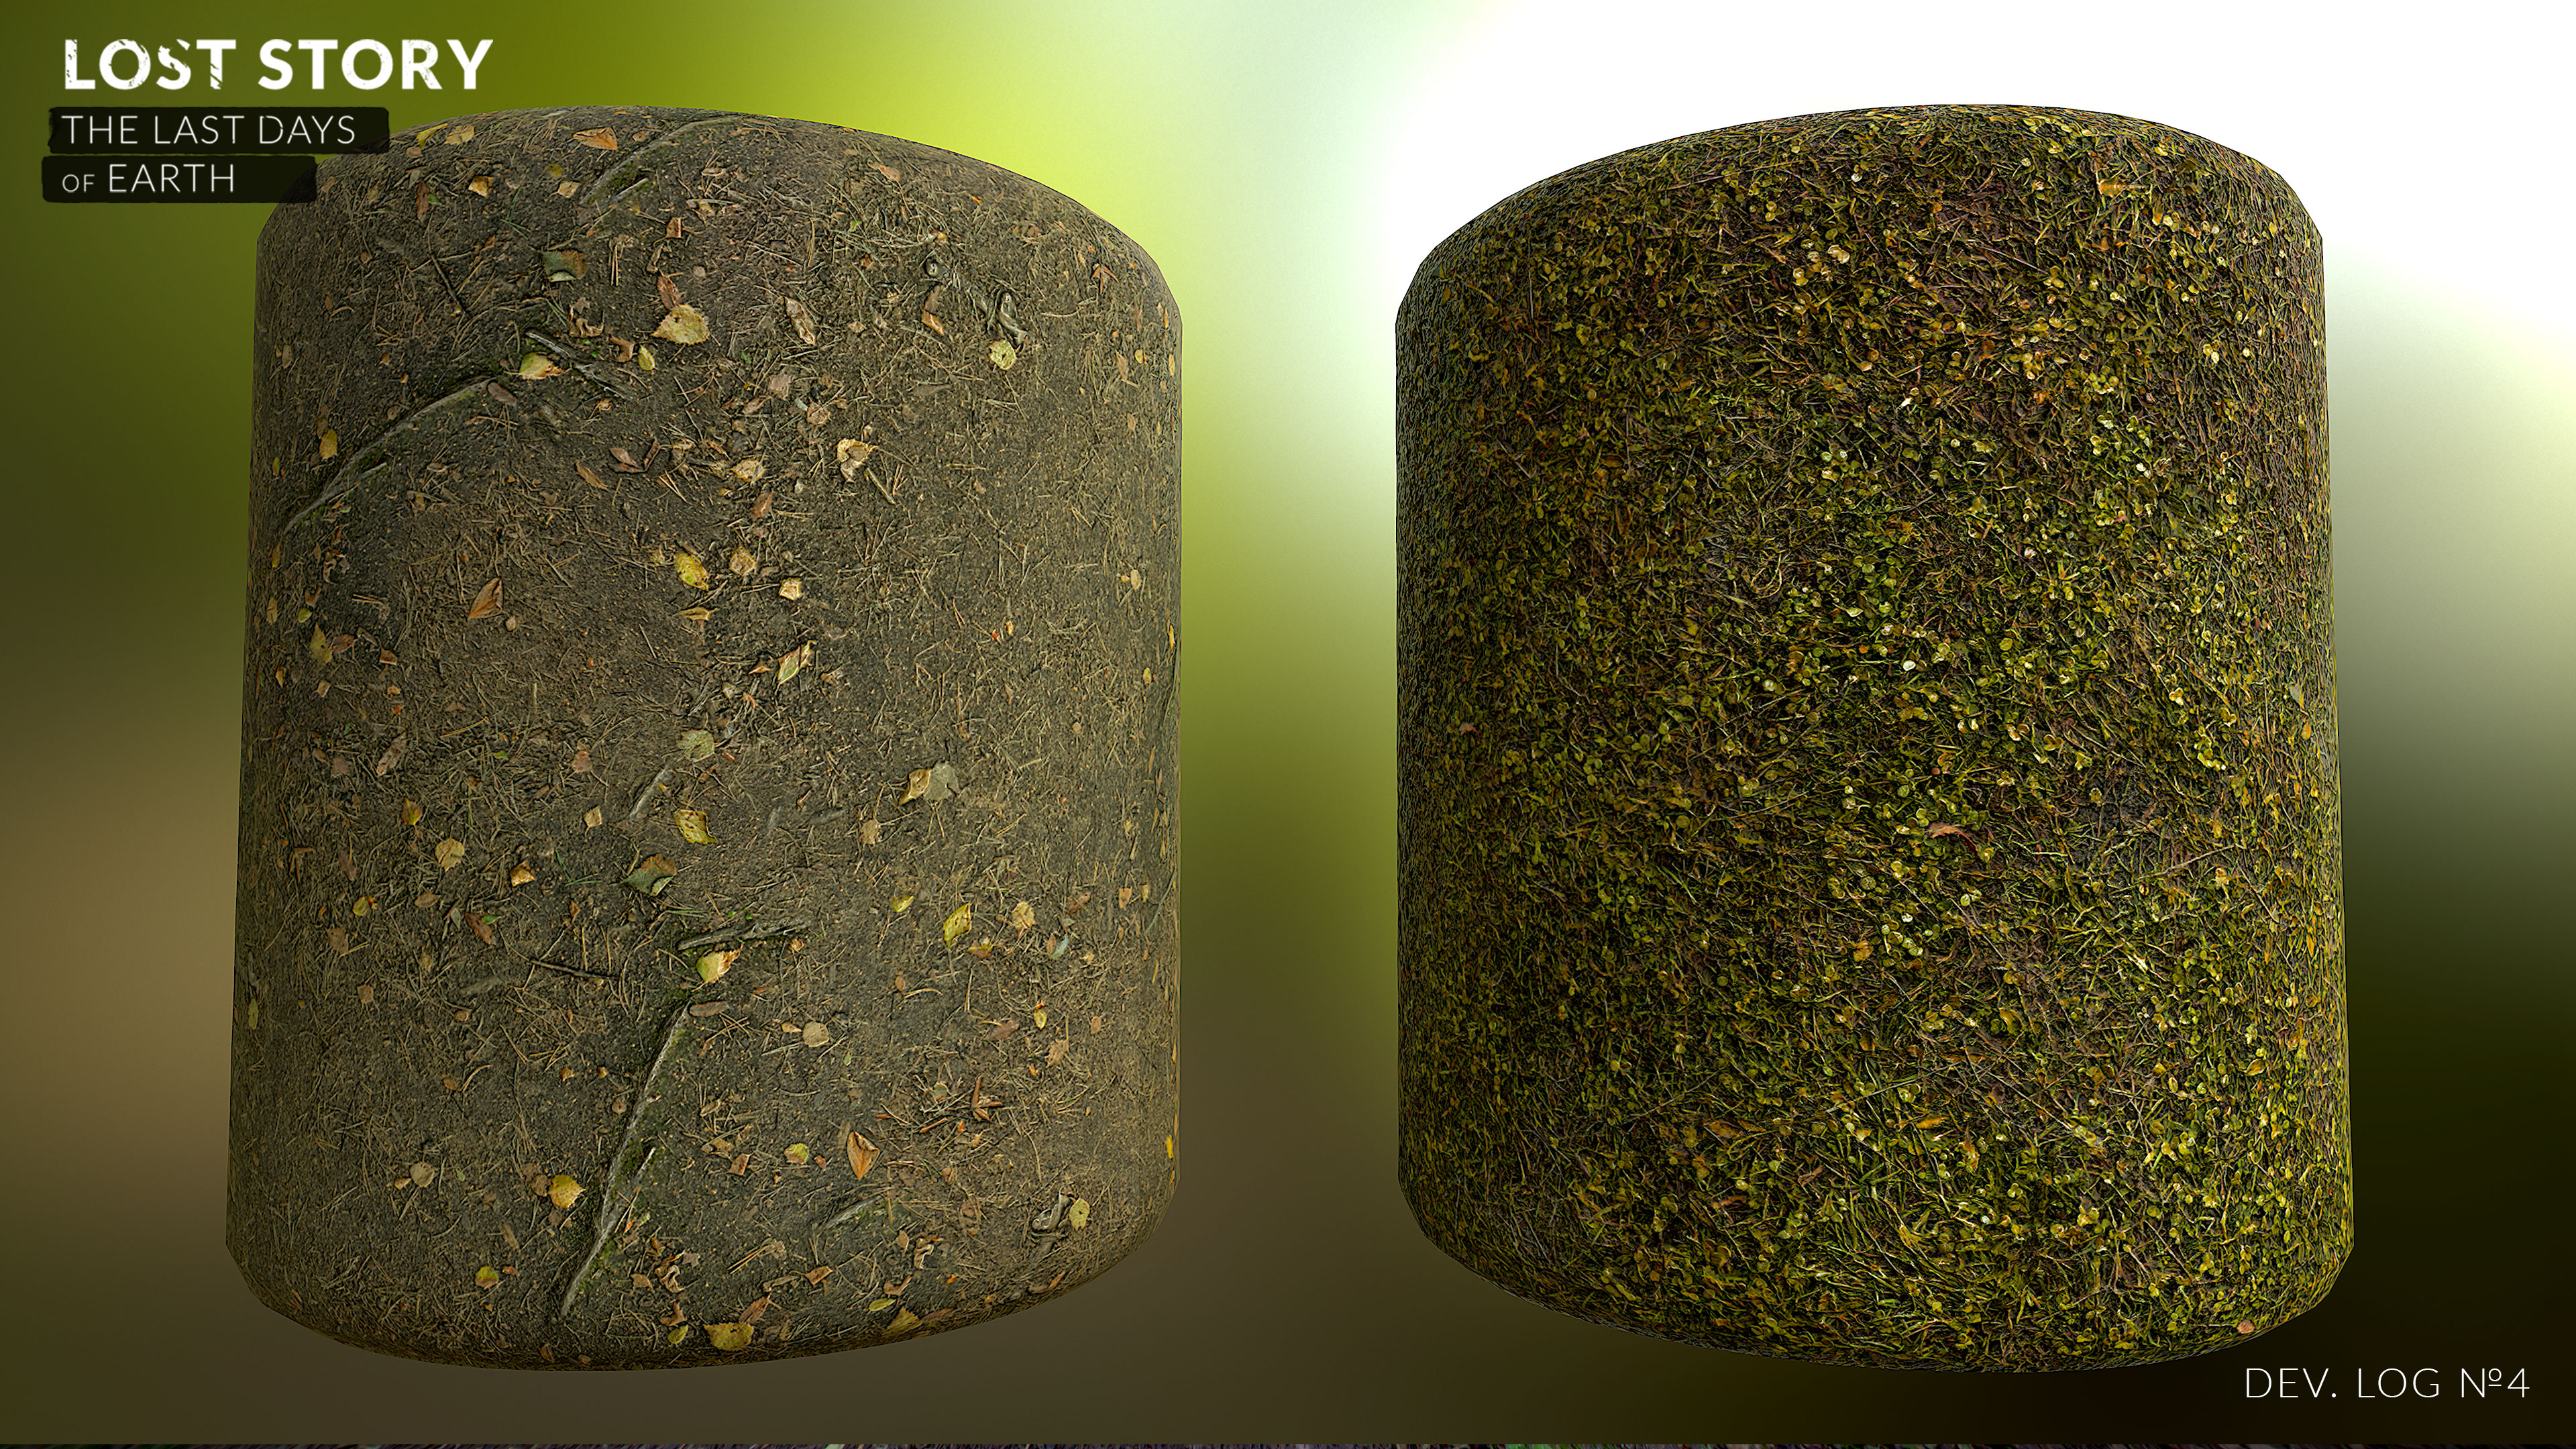
Processing photos to create materials in general is no different from what we described in the previous part of the diary, except that this time the models had a little more polygons. The results of photogrammetry you see above are high poly models of surfaces (from 11 to 16 million triangles), each with an albedo map of 16 384 pixels in size.
Tiling
Since we conceived the use of photogrammetry primarily for landscape materials (earth, grass, rocks), we inevitably faced the problem of tiling. Tiling is a technique for optimization in 3D graphics, in which only one texture is superimposed on polygons to fill in large areas, which is repeated in all directions and fills all the specified space. In order for such a texture on the surface to look best, it must be prepared so that its edges smoothly continue to each other.
It is obvious that as a result of photogrammetry we do not get any smooth transitions at the edges of high-poly models. Alternatively, you can try to dock nine copies of the model obtained as a result of photogrammetry and with the help of special software manually change the shape of the polygonal mesh to get smooth transitions. Unfortunately, a lot of time is spent in such a case, and for each new material the models have to be joined from scratch. This method is clearly not suitable for quick processing of photogrammetry results. Therefore, we have chosen a different path.
We decided to work with the texture maps already received from the high-poly model and prepare them for tiling in one of the programs used to create procedural materials. The beauty of such a program is that it allowed us to create our own templates using graph-schemes, which will save us a lot of time when creating similar materials in the future.
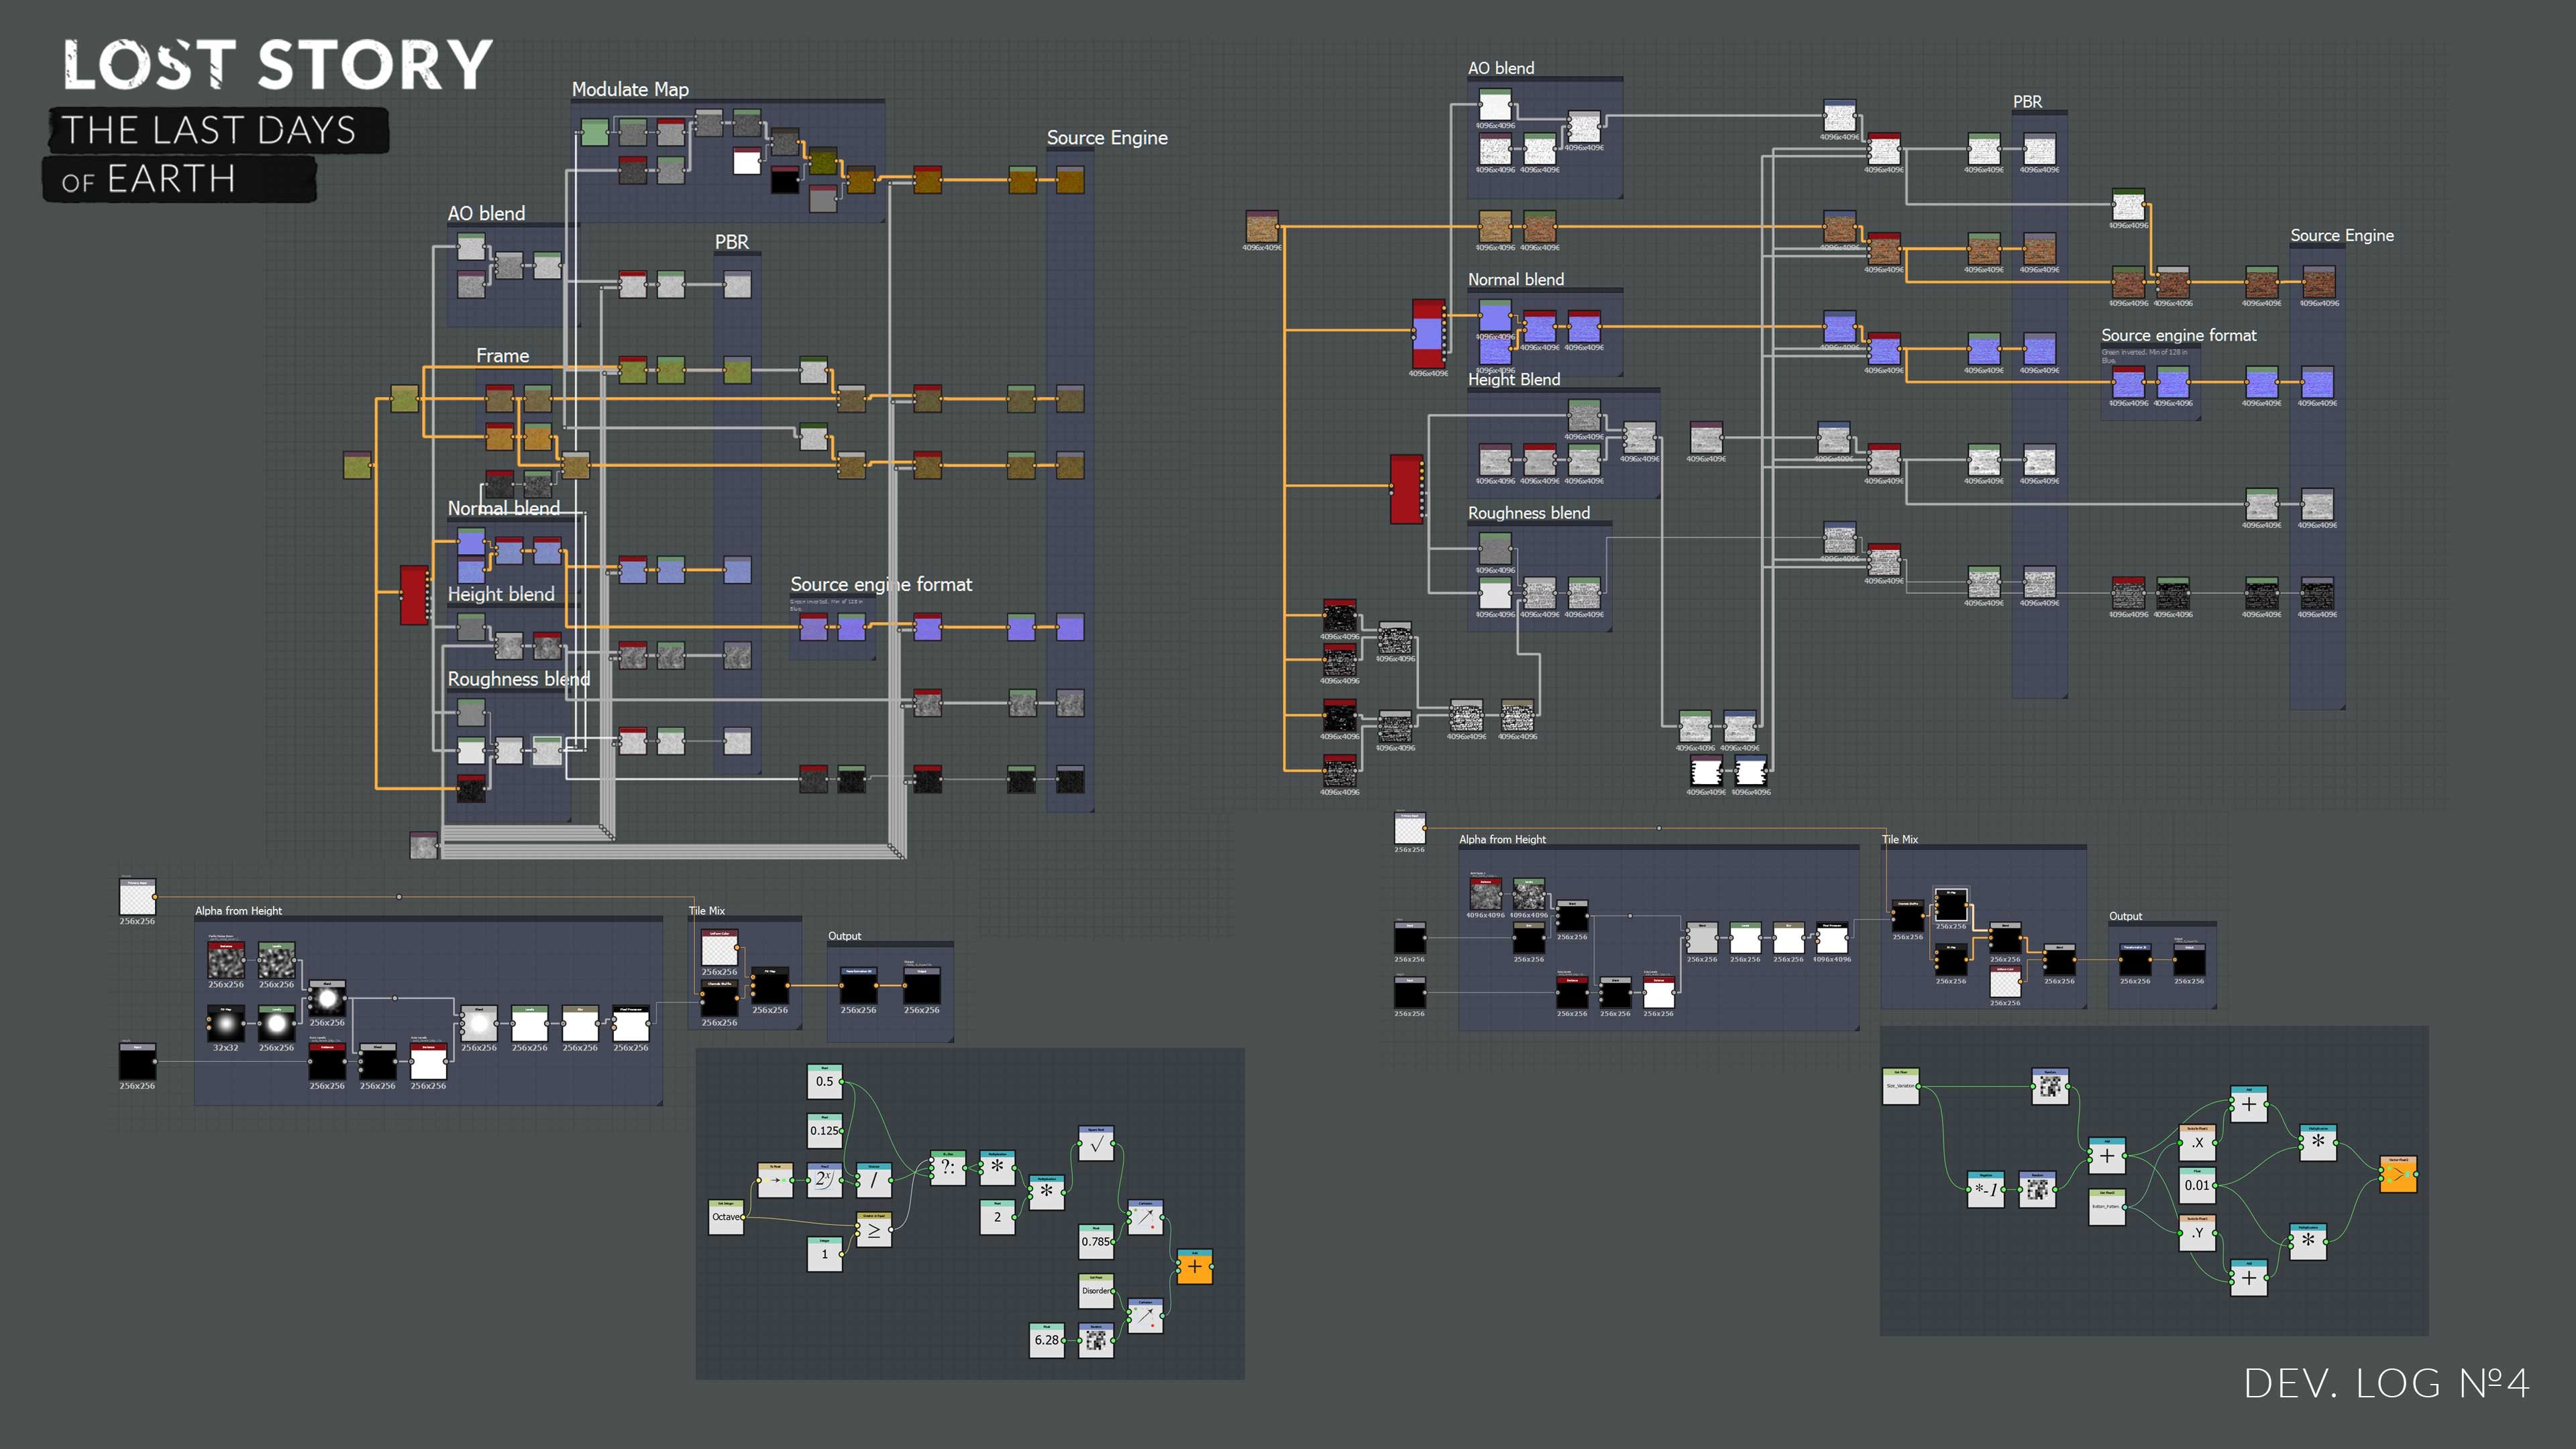
We have created two large templates (see image above), consisting of dozens of operations. One is designed for materials with a chaotic structure (grass, soil, moss, stone surface and other natural materials), the other for materials with a kind of repeating pattern (brick, tile, and other handmade materials). However, both templates are united by the fact that they allow you to extract and customize all additional texture maps to create a full-fledged material, as well as to obtain, without loss of quality, material prepared for tiling.
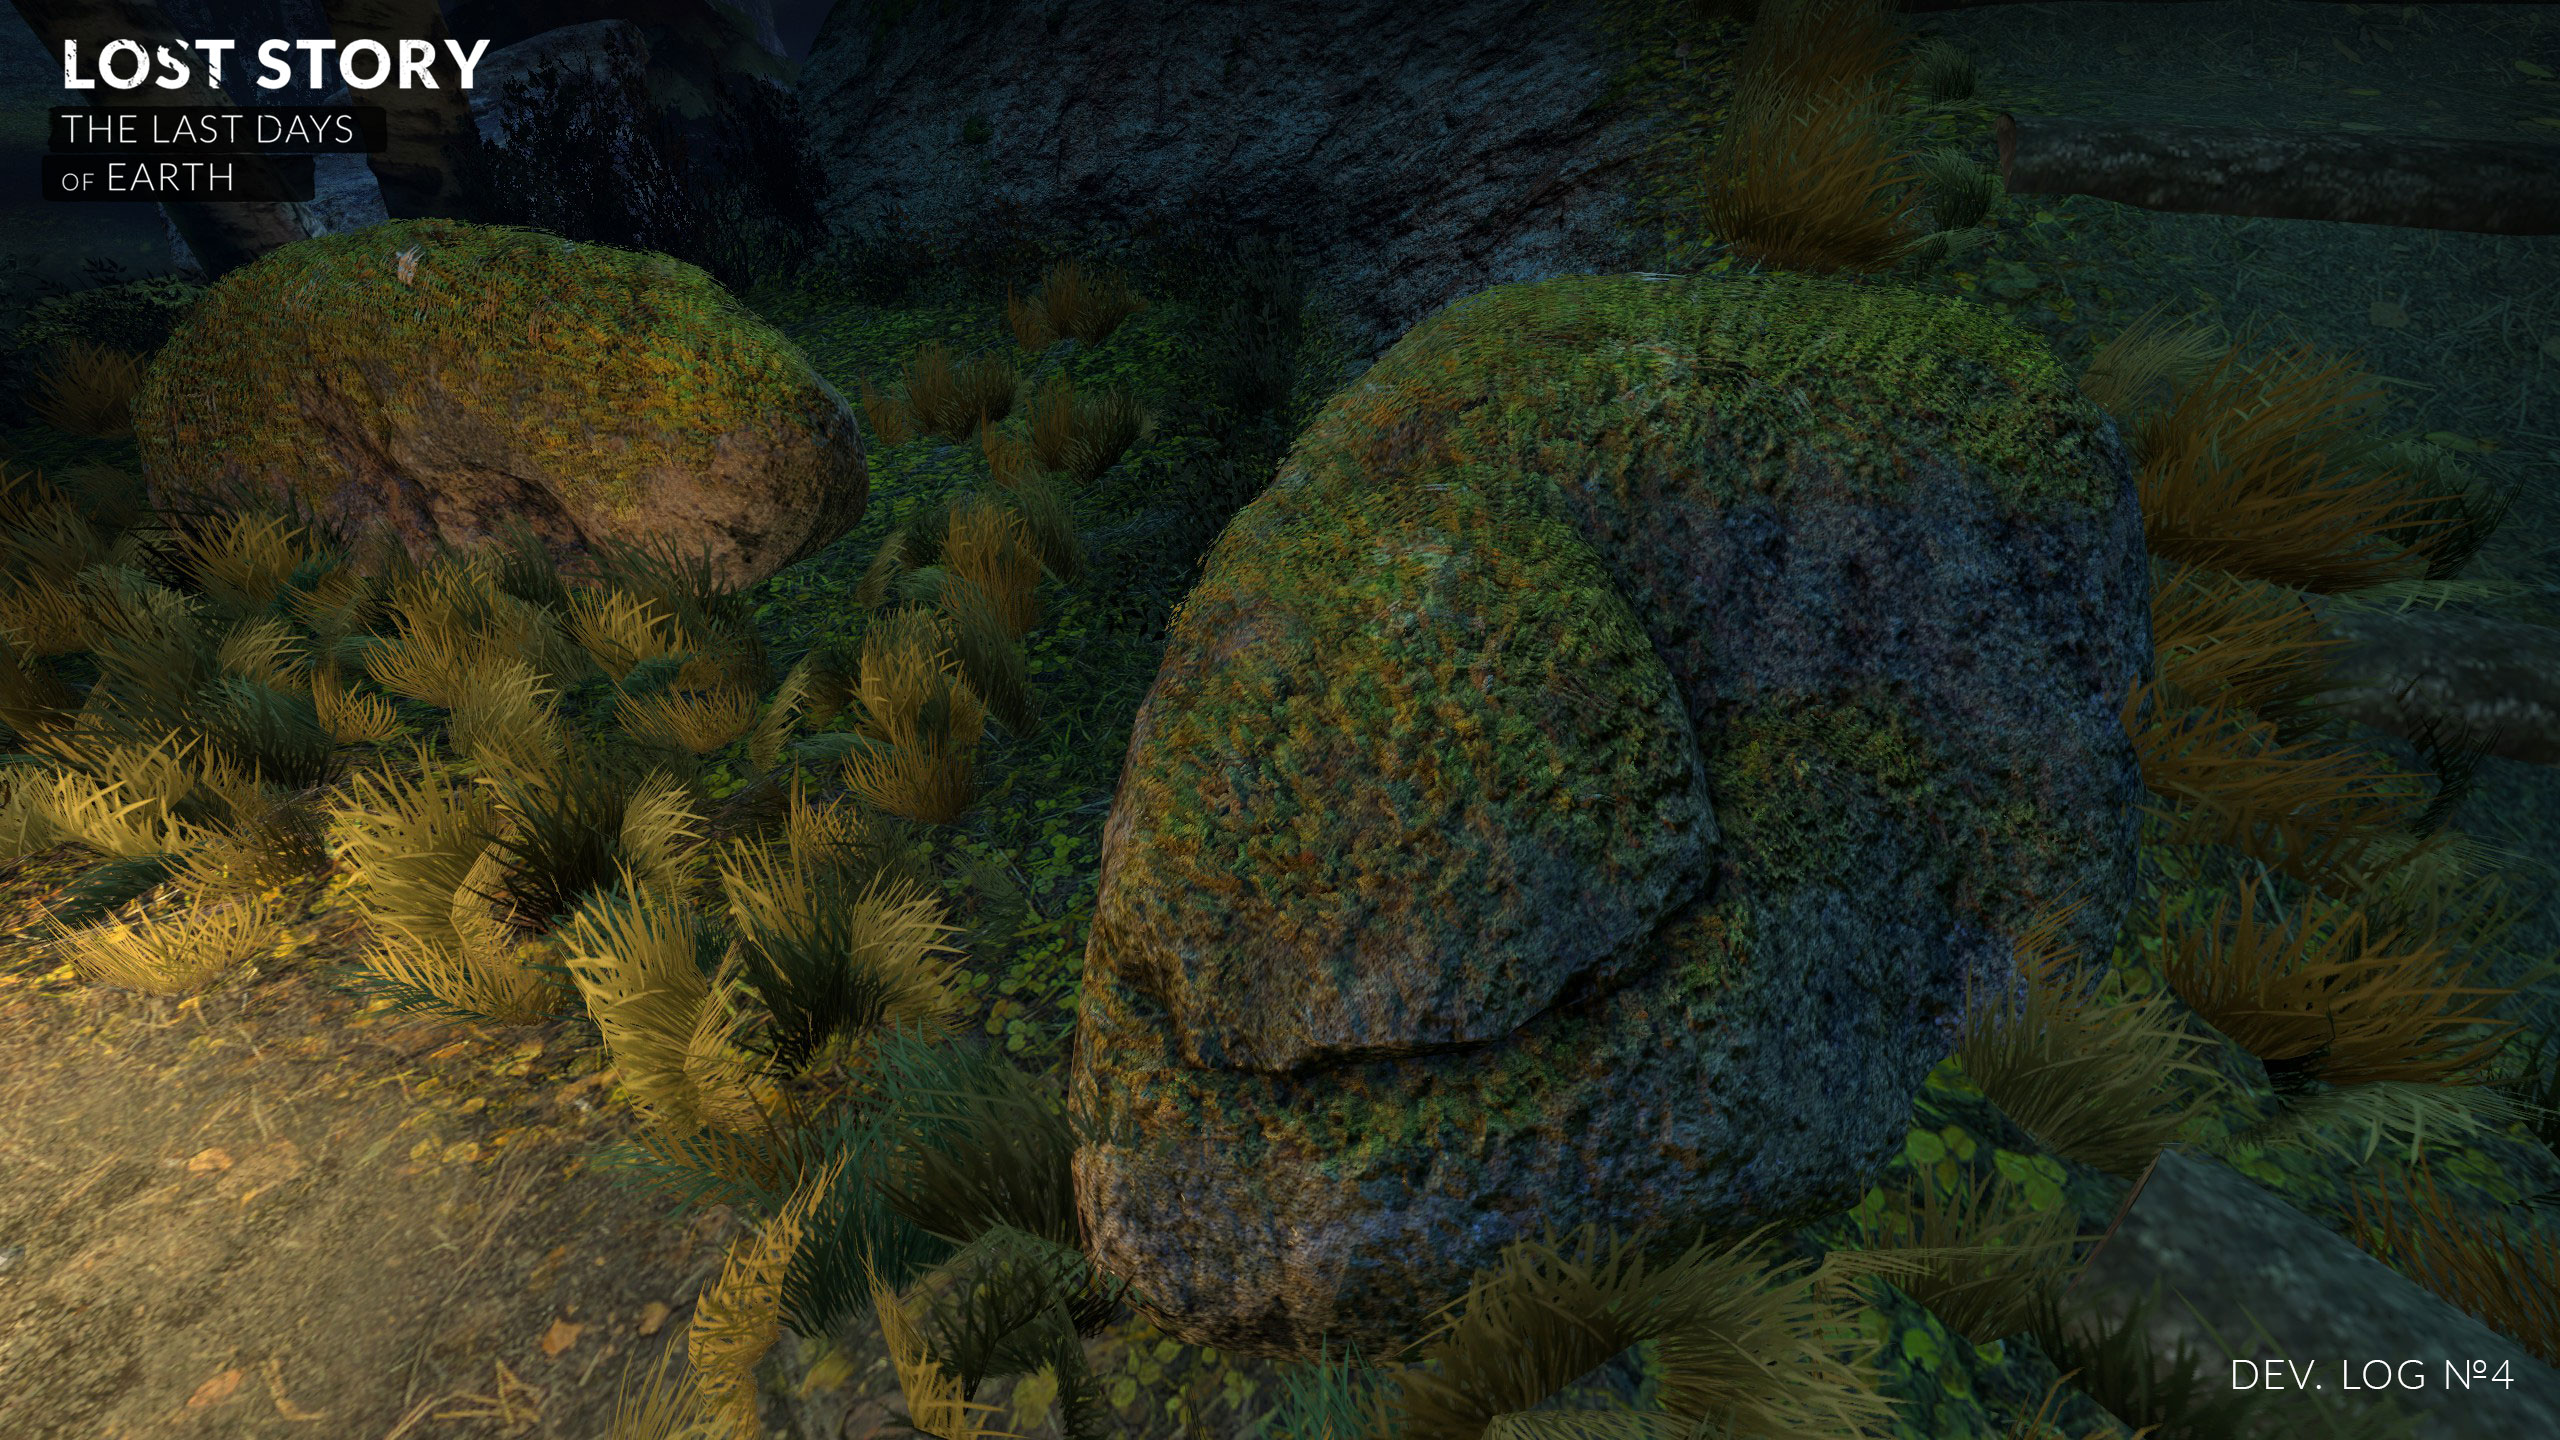
In order to avoid losing the quality resulting from photogrammetry during the preparation of the material for tiling, we had to radically alter the graph-scheme for tiling already built into the program. Our new graph-scheme allows you to use when mixing different tiles (copies of the original texture map) information about the height above one or another part on the texture (you can see in the image below how individual leaves and sticks appear on a flat surface of the ground).
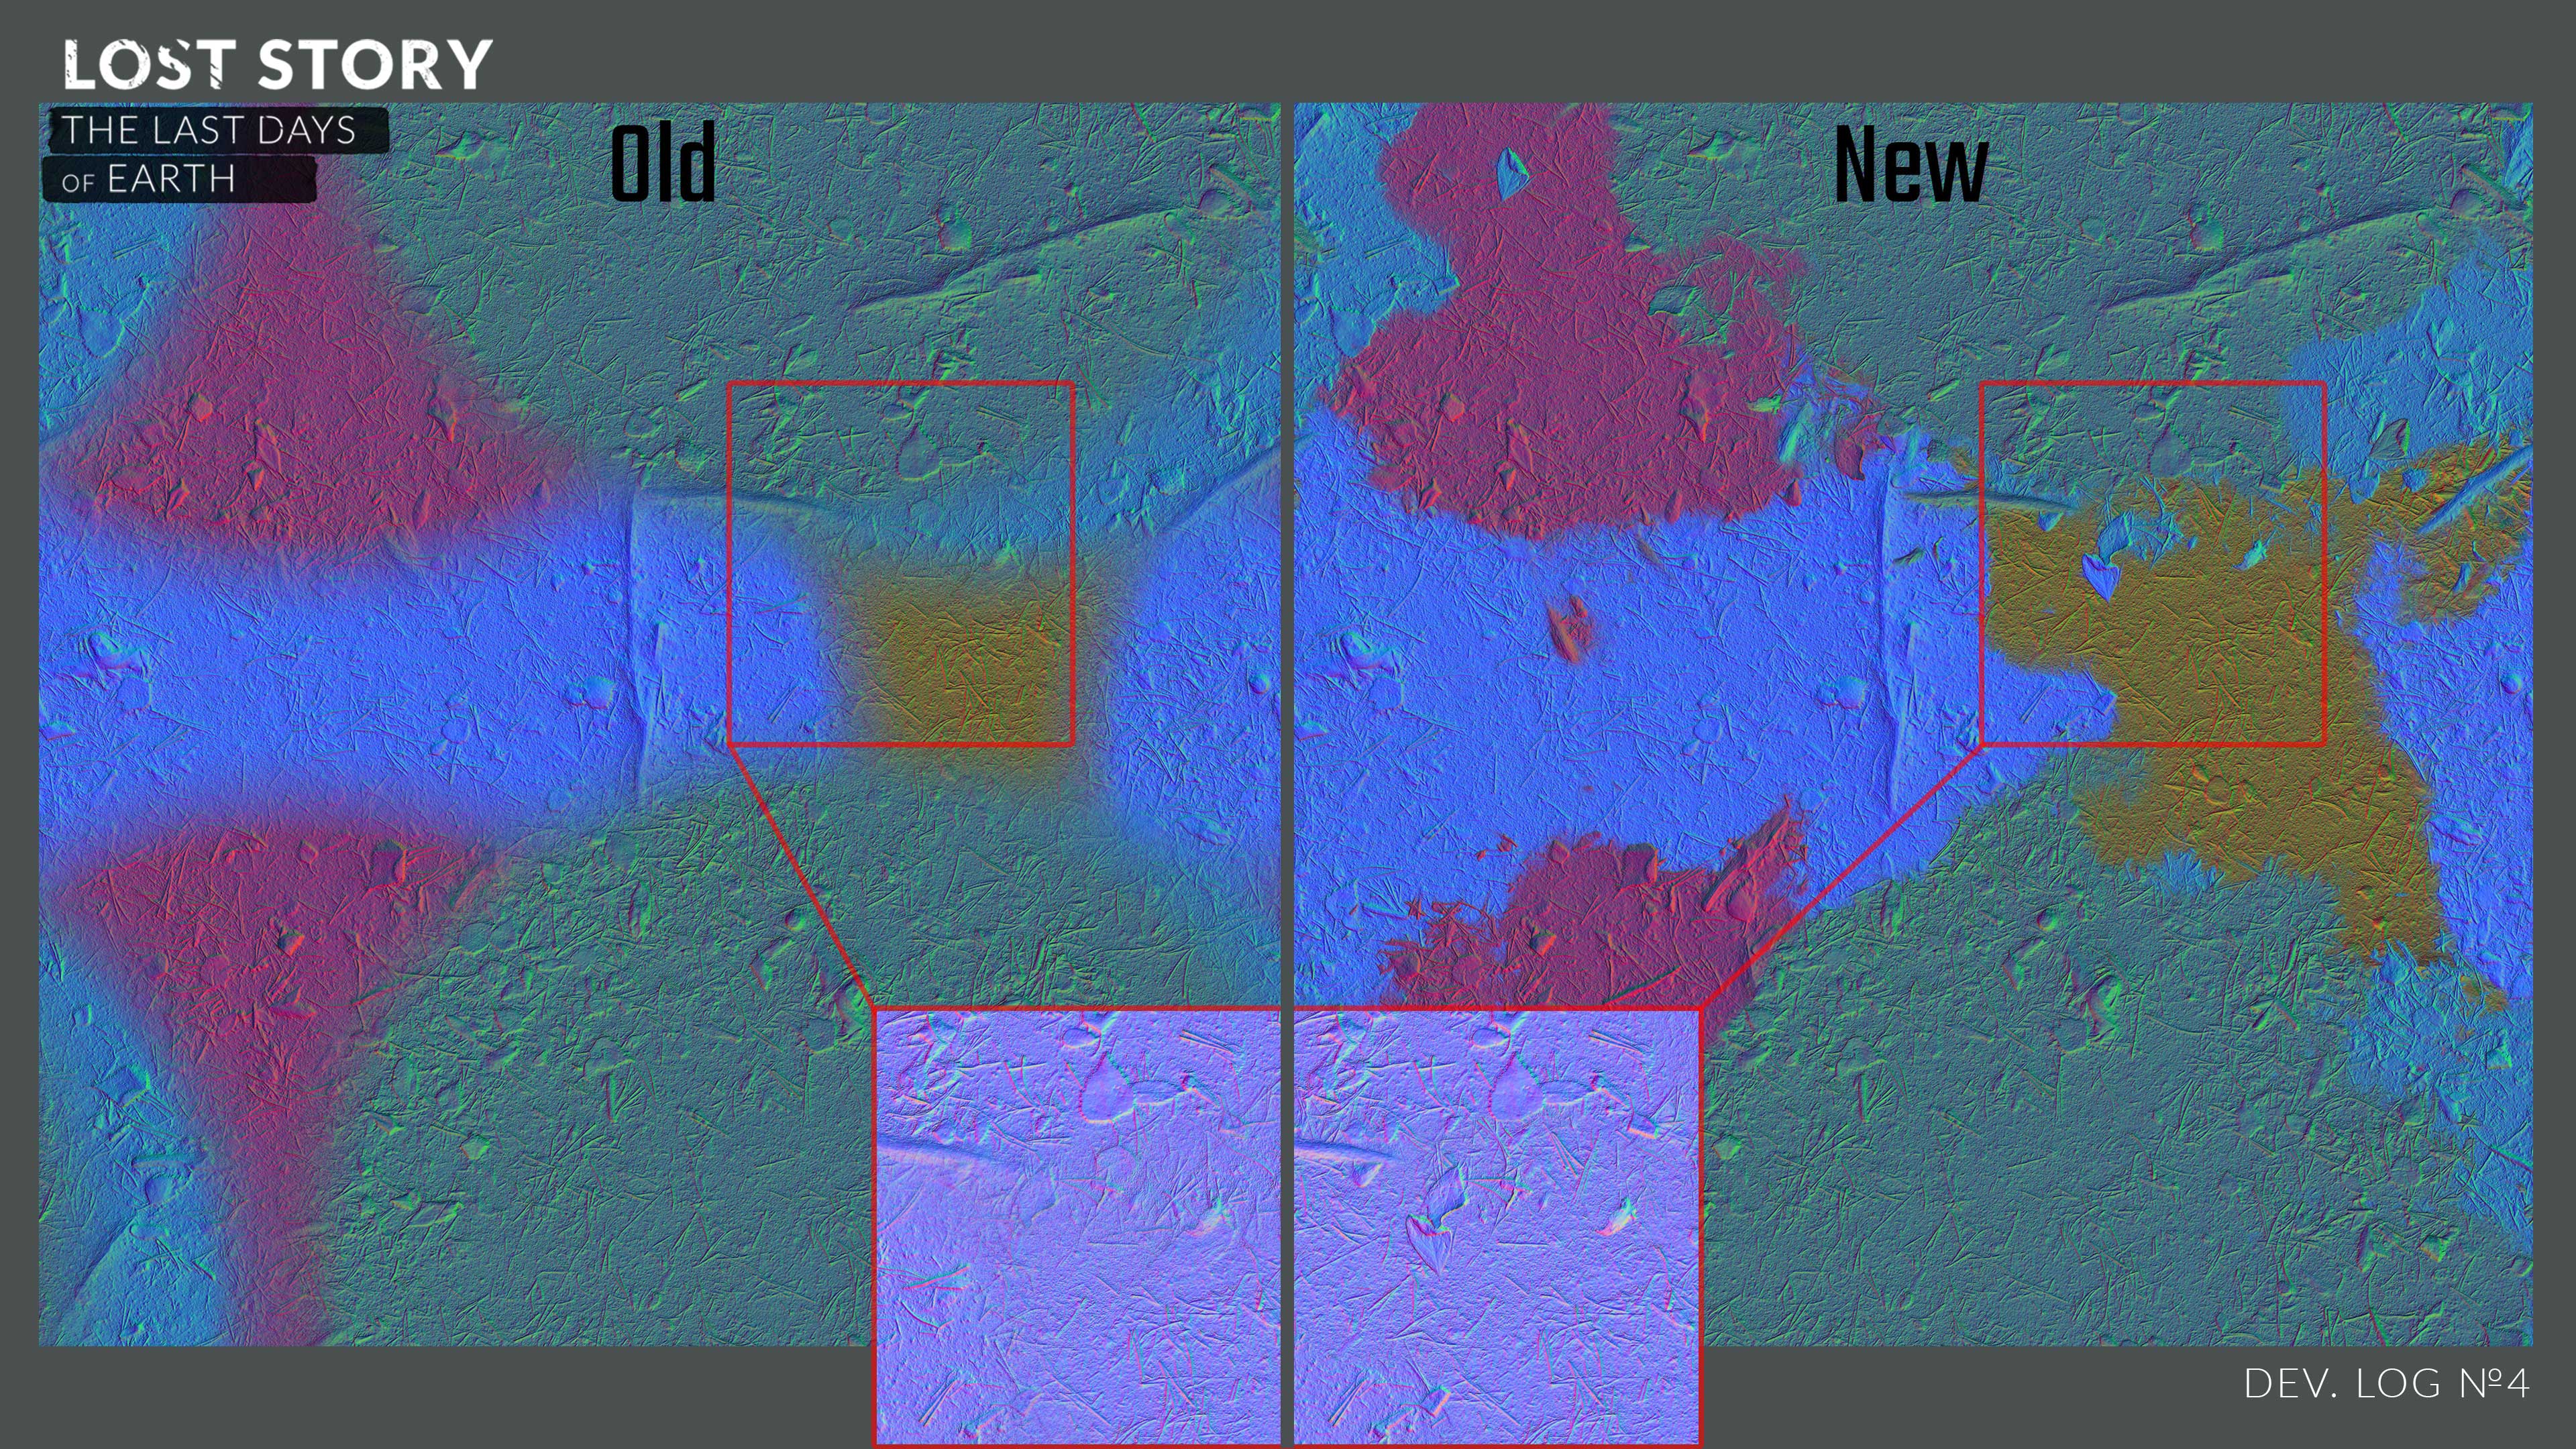
The standard graph scheme simply mixed the edges of texture map tiles. This method may be acceptable when preparing for the albedo tiling of cards, but when using with normal maps, information is lost at the junction of tiles. That is why we abandoned the standard graph scheme. You yourself can compare the result when preparing normal maps in the image below (different tiles were deployed and painted in different colors for greater clarity).
Based on a homemade graph scheme, we were able to create another new graph scheme to prepare for the tiling of materials with a pattern, where we added more settings for the blending mask and the deformation of the tile. The new graph-scheme, in turn, has developed into a second pattern.
Thus, after we received the first finished material, we had a template left on our hands that allowed us to create each subsequent natural material in just two days (without taking into account the time for the shooting). And the brick material, which successfully turned up on the way home, allowed us to create a second template, which, of course, will also greatly reduce our time for creating various handmade materials with a pattern in the future.
results
Well, it's time to sum up. But what can tell about the results of photogrammetry better than the images of the final results? That's right, nothing! Therefore, renders of the final materials are waiting for you below.

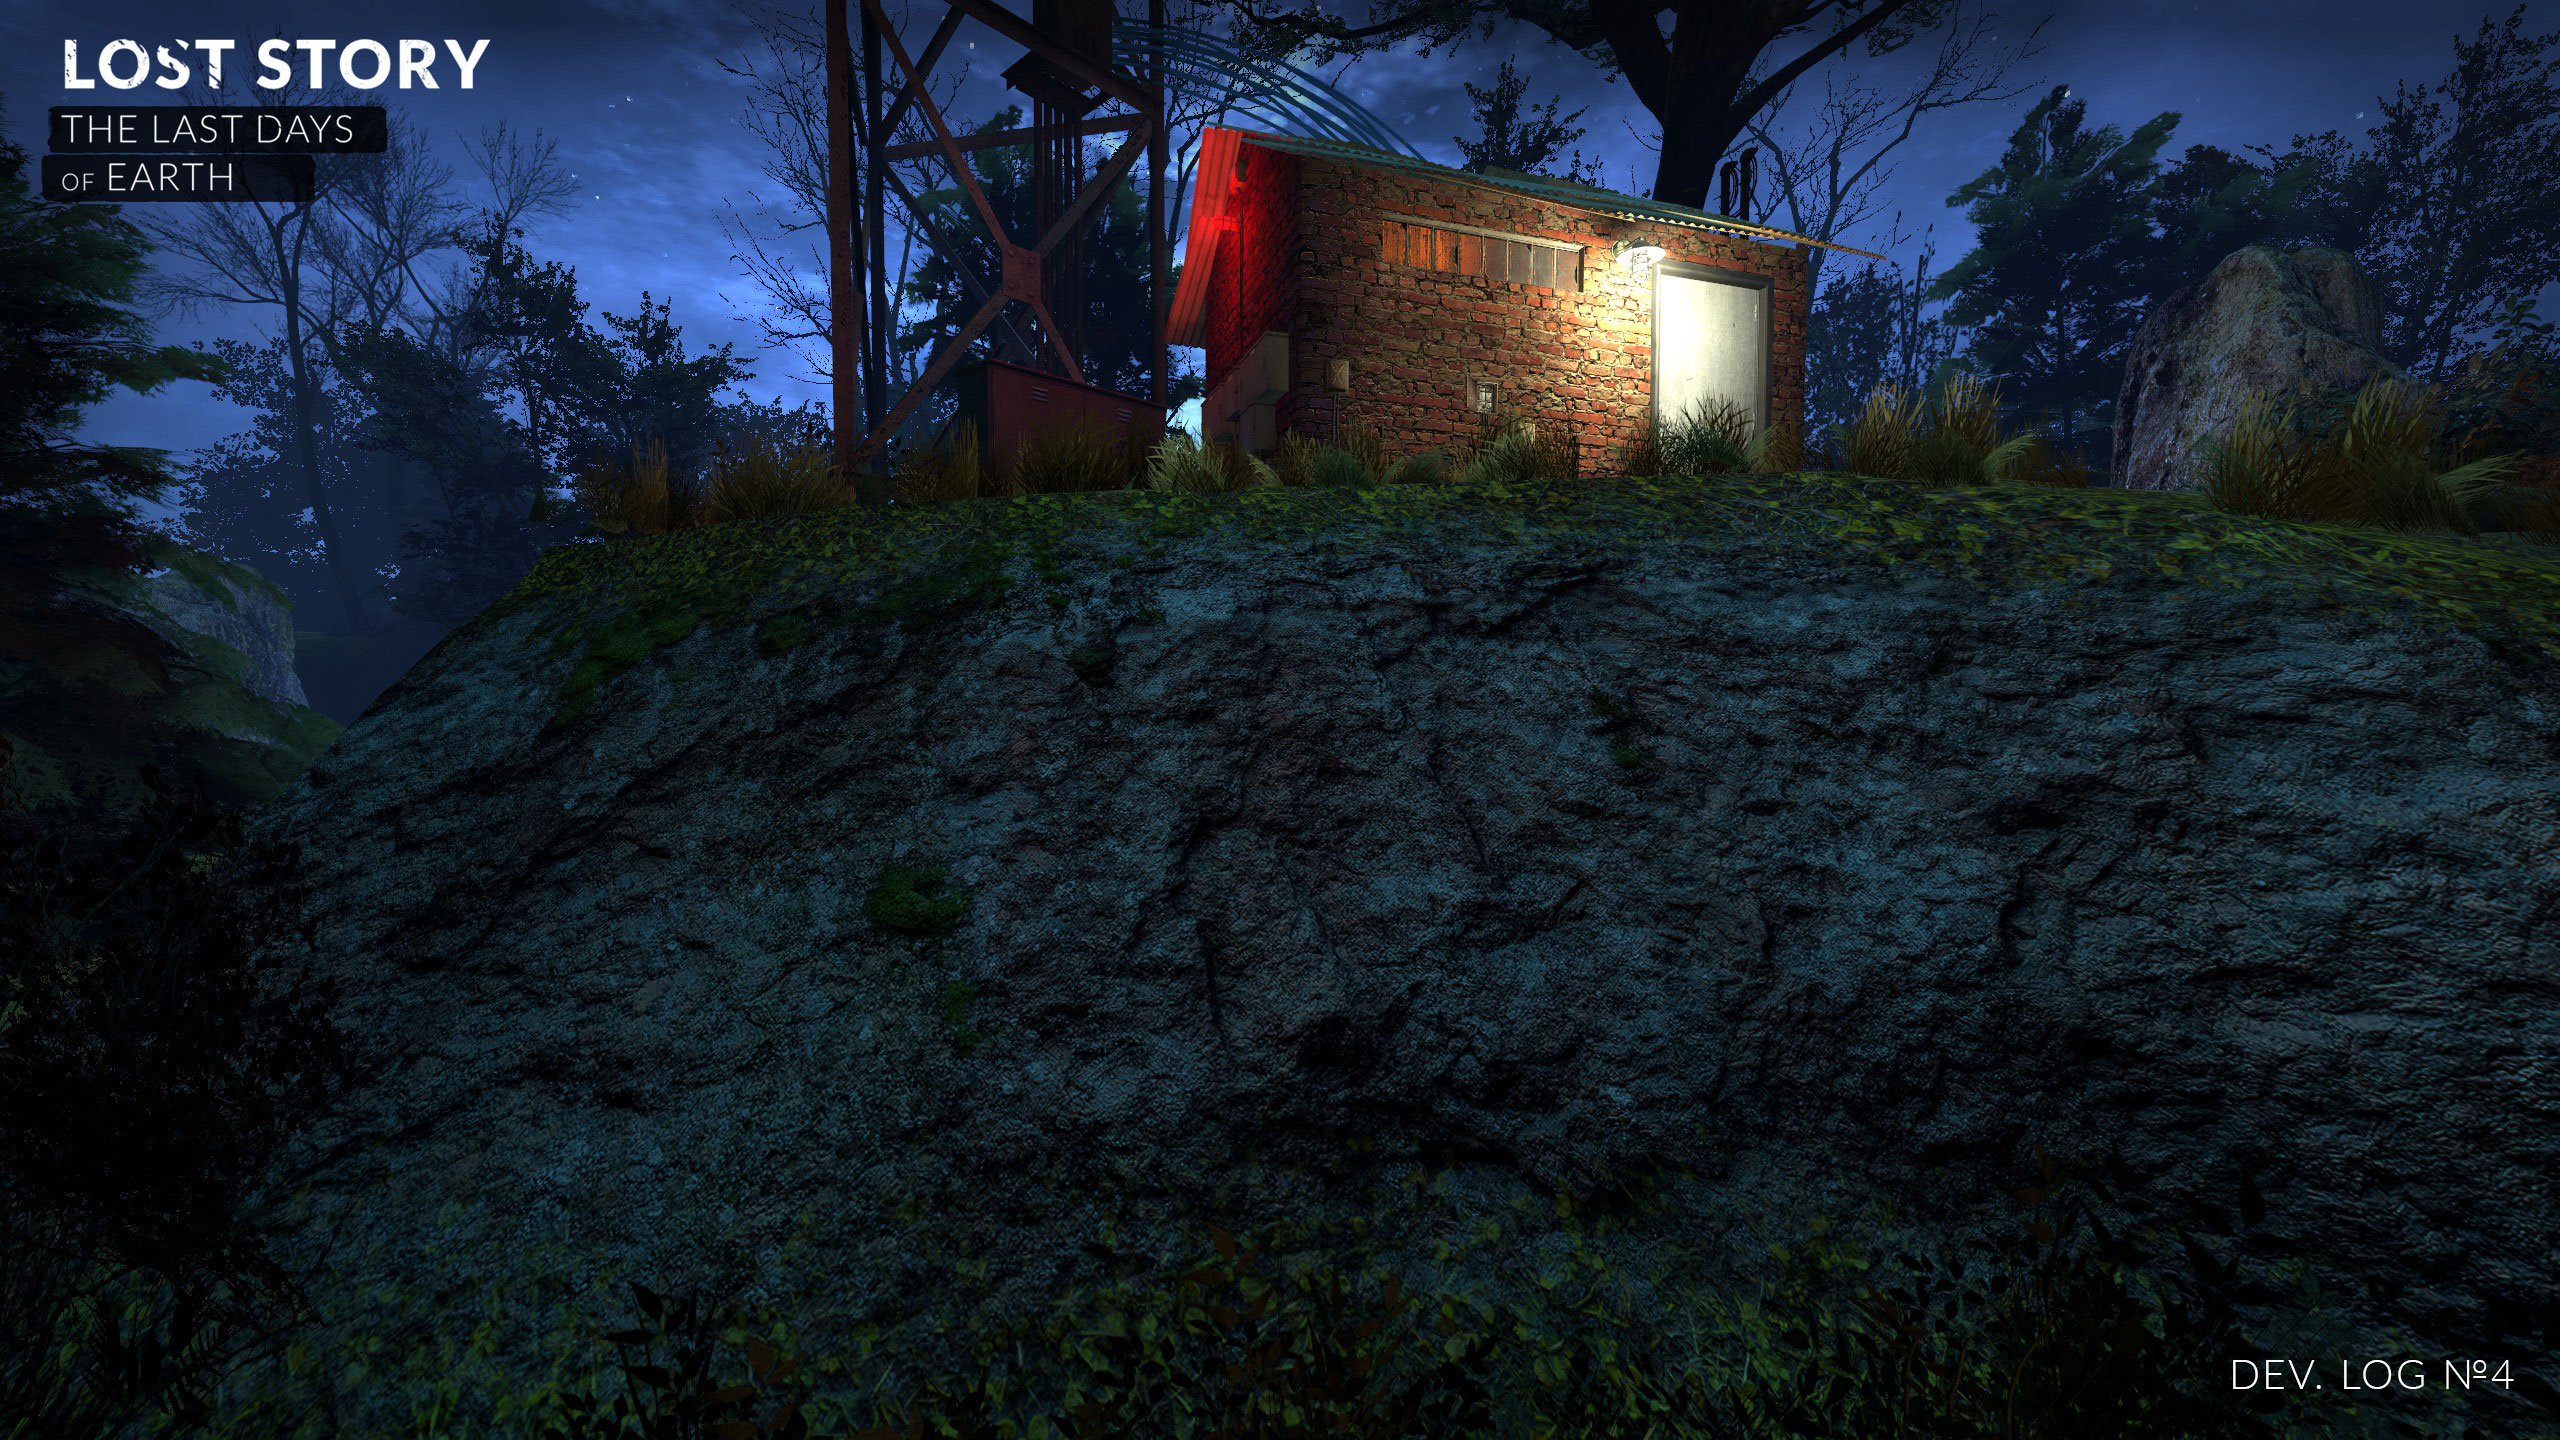
We also prepared a small scene on the test map to show the new models and materials as they will appear in the game itself. In addition, in a small “video” you can follow all the changes on the map that occurred to her in a couple of days while we were preparing her for display in this diary. Let us know if you are interested in this format.
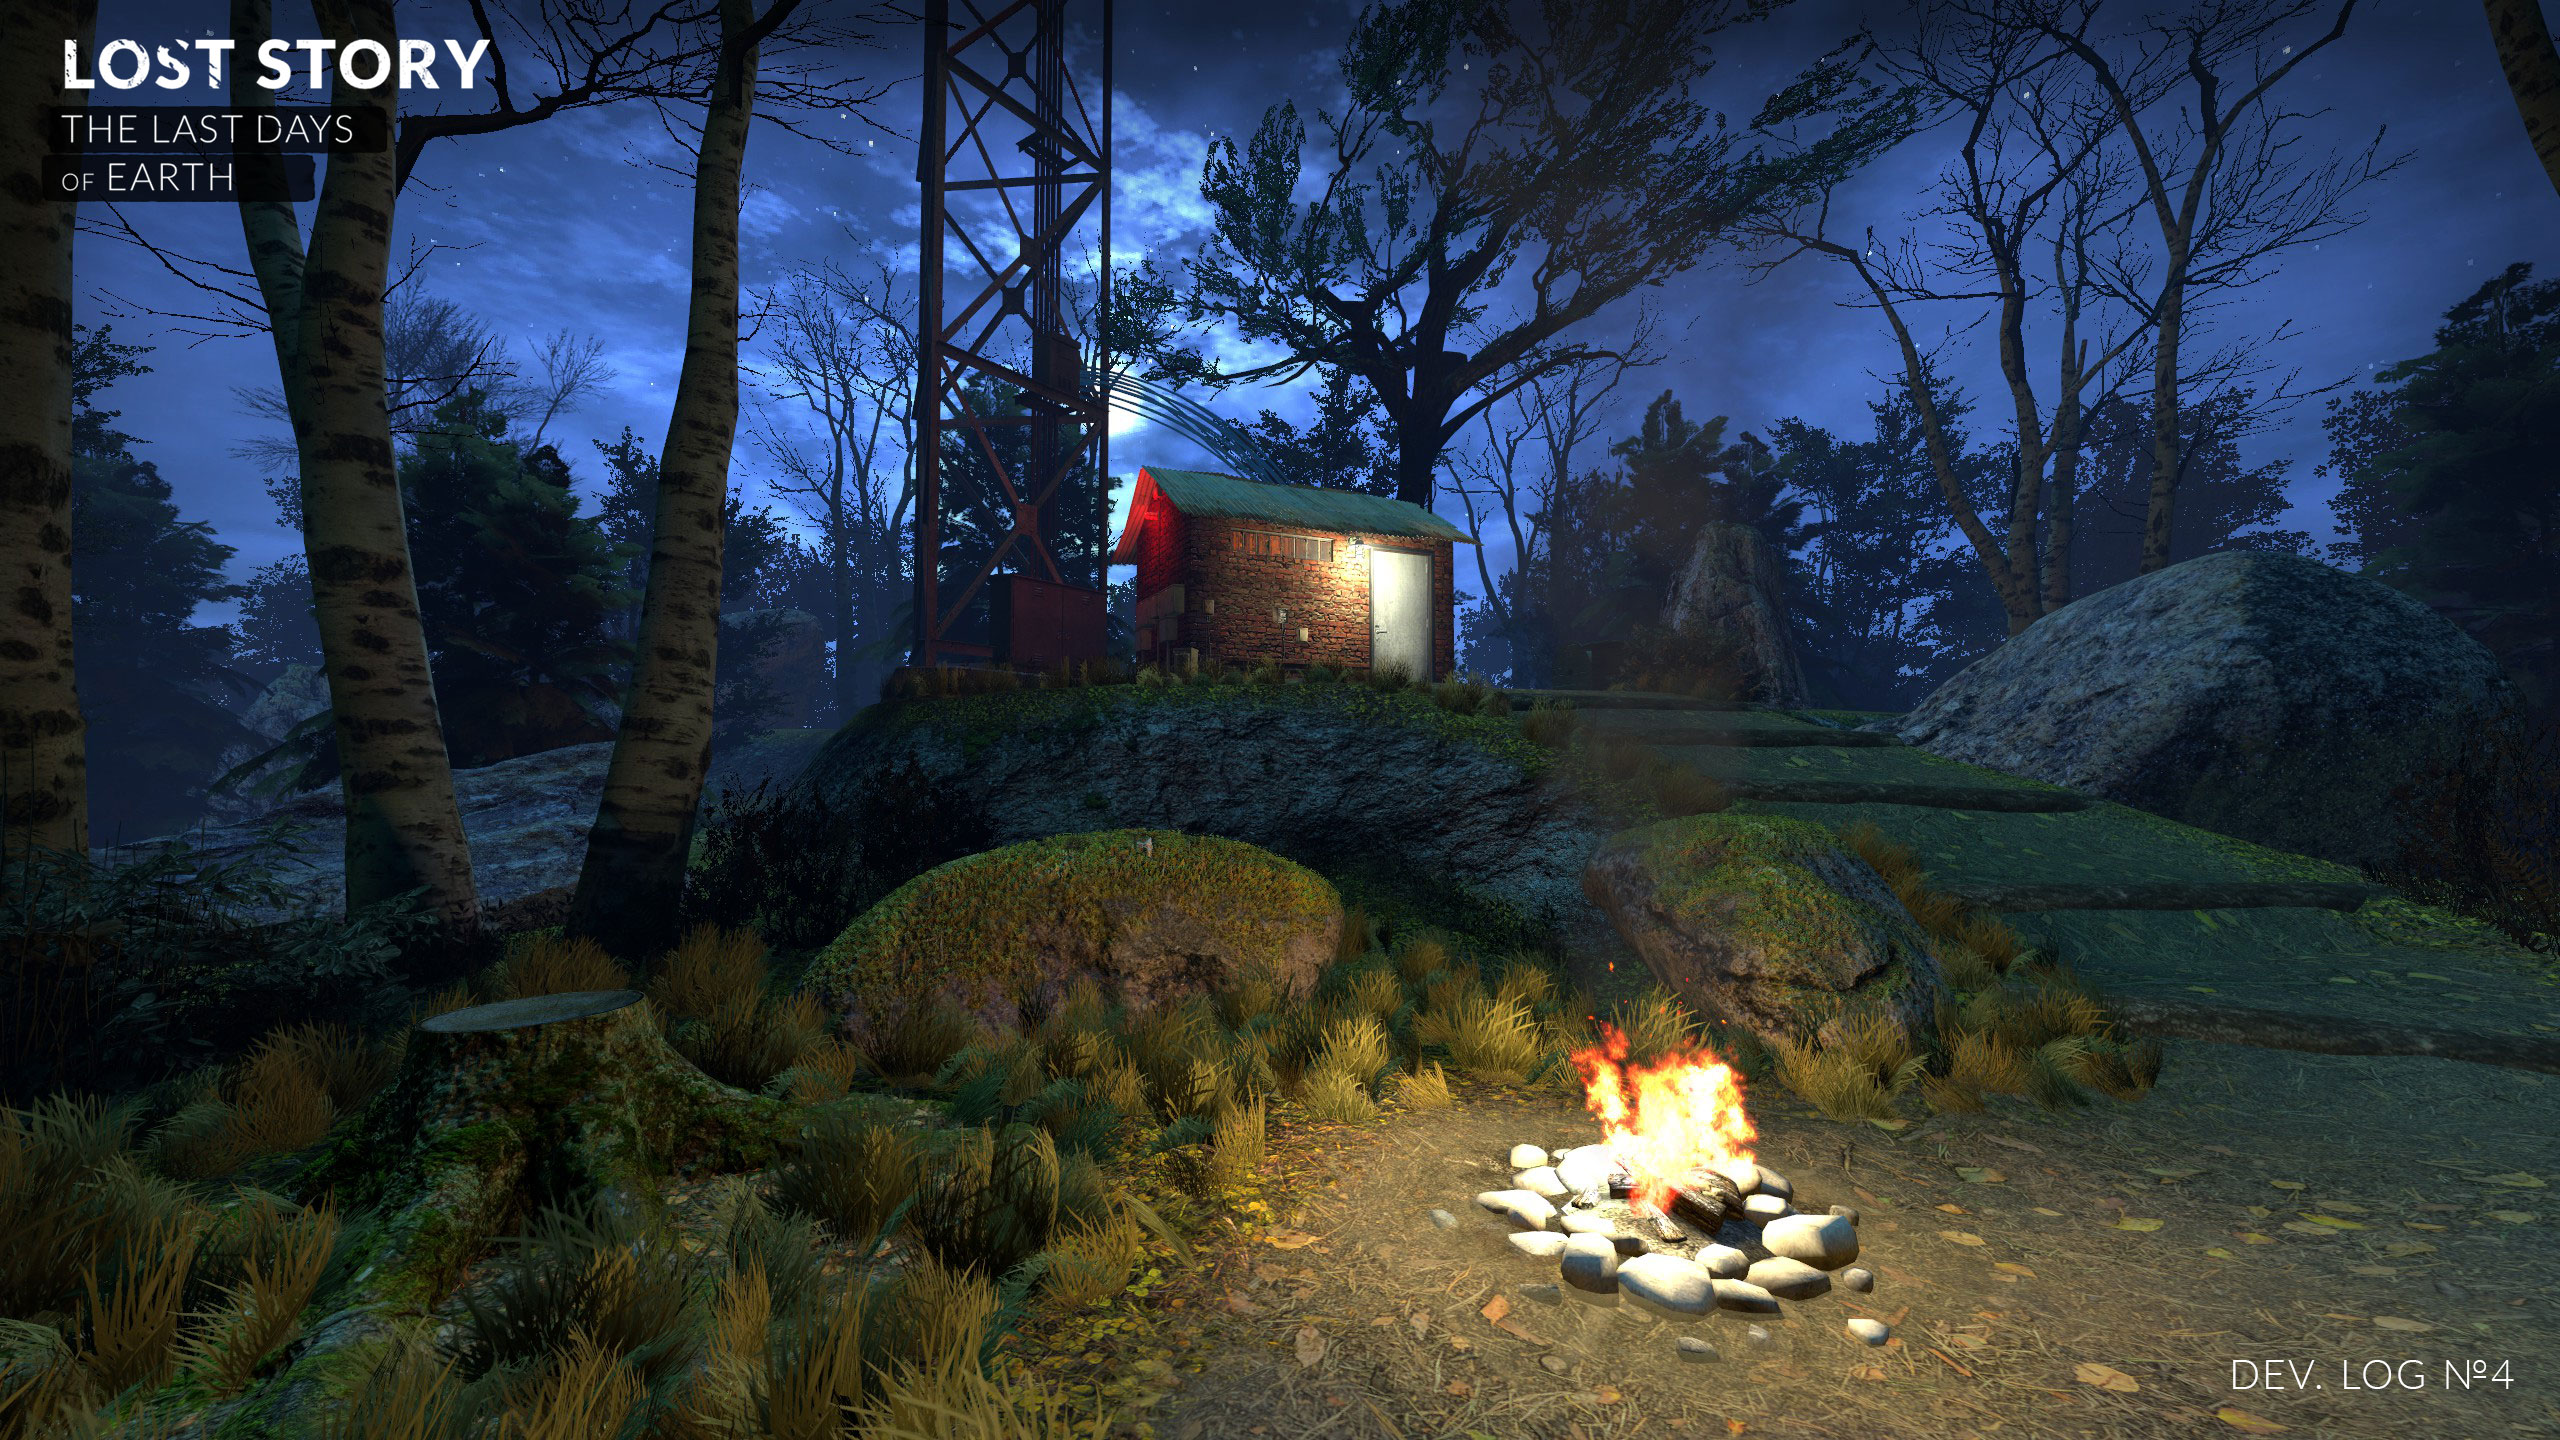
Note that this is not the final type of natural locations, we still have to deal with new trees, grass and other vegetation, as well as the sky. Perhaps about some of this, we will tell in the following development diaries of the game.
And a little more screenshots in the end, to see everything in more detail.

Now back to the results in text form. Our experiment with photogrammetry, as we believe, was completely successful. We not only learned a lot, but also developed a ready-made chain of techniques for working with this technology.
Photogrammetry has fully justified itself as a powerful and reliable tool for a developer who is able to solve a number of difficult tasks in Spartan conditions in a small team of igrodelov, and we gladly took this tool into service. We will definitely make a few more forays for new surveys of natural objects and materials, and besides, we are thinking about forays into industrial zones for interesting man-made materials (and maybe objects). Wait, it won't be boring.
Well, on this we have so far everything. Stay with us and do not forget to share your opinion on the development diaries and the development of “Lost Story: The Last Days of Earth” as a whole.
Source: https://habr.com/ru/post/280119/
All Articles