DroidShoter - screenshots of the application at different screen resolutions, using one device and Adb
As you know, there are many Android devices ... a lot. This gives us a huge number of screens, with a different combination of resolution and pixel density, which greatly complicates the development of applications. At a certain point, I wanted to try to simplify application testing on different screens and avoid launching on many devices and emulators. Analysis of the problem showed that everything necessary to solve the problem is there, and using Adb, you can do with one connected device. As a result, a cross-platform utility was developed to automatically save screenshots of the application on different screen parameters of one device, which does not require any additional manipulations with the source code of the application (everything works with emulators as well). After the utility is working, you get screenshots of the application in the form in which it looks on various devices. In the future, using the obtained screenshots, you can identify the artifacts of displaying the application and analyze the optimality of the layouts.
In order not to burden people who are not interested in the details of the development of the application, I will immediately give a brief information on working with the program.
Detailed instructions with links to Java and Adb are on GitHub.
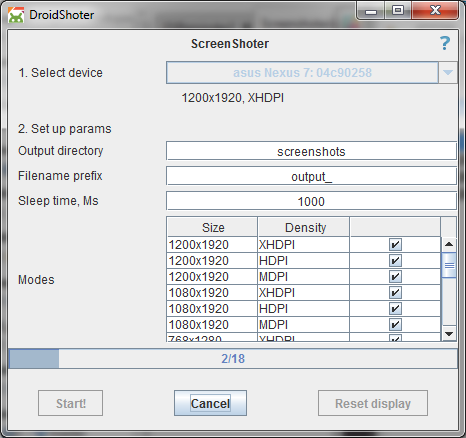
The use of the DroidShoter itself is extremely simple: we launch the utility, select the device, set the parameters and click “Start!” .
')
An example of the result of the program you can find under the spoiler at the end of the article.
Attention! There was a message about problems with the Samsung Tab S (SM-T700) with the official firmware Android 5.0.2. If you decide to use the utility with this device, be prepared that you may need to reset the settings. No problems were found on other Samsung devices.
According to Google’s official documentation , the screens are divided into: small, normal, large, and xlarge; pixel density: ldpi, mdpi, hdpi, xhdpi:

It can be seen that the variety of combinations of screens arises from the intersection of the possible size and density of pixels. The combination of screen size and pixel density determines its resolution. Thus, we can distinguish two basic characteristics that sufficiently characterize the screens: resolution and pixel density . It is these characteristics that we can change with Adb . We can also use Adb to take screenshots, which means that nothing prevents us from walking through different combinations of screen parameters and taking screenshots on each of them. This process and wanted to automate.
To begin with, it was necessary to learn how to take screen parameters. And if for devices, starting with Android 4.3, there were no problems (parsing the output of the wm size and wm density commands), then for the rest it was necessary to find a different method. As a result, I used the “dumpsys window” command, finding a line in the result output, like “init = 480x800 240dpi” . Unfortunately, some devices (so far only one phone from Sharp) with this approach do not give out density and will not be supported by the utility.
To change the display settings, use the following Adb shell commands:
Unfortunately, when changing the screen configuration, system elements (status bar, for example) may be incorrectly drawn. This problem lies in Android and could not be solved. However, this does not prevent the application itself from displaying correctly.
In general, by this time, it was already clear that everything necessary for the work is also for the utility - to be. The case remains for the direct development. As a language, I used Java , as the closest programming language to me at the moment and Swing framework for working with UI. In addition, Java has a great ddmlib library, which greatly simplifies working with Adb .
DroidShoter has a fairly simple basic logic at the moment. When a device is selected, the physical parameters of the screen are determined, and on the basis of them the order of the display parameters is built up for subsequent work. Then, after clicking on “Start” , the process of changing screen parameters and taking screenshots begins.
As a queue of display parameters, all combinations of screen resolution and pixel density values from “basic” are used, which are less than the physical parameters of the device. Those. for a screen with a physical resolution of 720x1280, the resolution of 1020x1980 will not be used. The same is true with a density of 320 with a physical density of 240.
Strictly speaking, Adb allows you to use parameters that exceed the physical indicators of the device, but at the moment I decided to abandon their use, because there will be a loss of some pixels and the appearance of the application will not correspond to the real one (for example, element separators may fall out in lists).
The logic was framed with additional features for convenience:
For some applications, a situation may arise when it “falls” with some screen parameters. In such cases, it is enough to exclude this mode from work (but, of course, it is better to consider the cause of the "crash" - there may be a problem in the application).
From the point of view of the operating system, changing the display settings is changing the screen configuration, which entails the standard process of re-creating the current activity . The configuration change occurs by the screenSize parameter and can be intercepted in the activity by registering in the manifest with the tag
This results in an additional plus of DroidShoter: the correctness of the restoration of the application state after a configuration change is tested.
DroidShoter development plan, if the program will be claimed by the community:
Your ideas, problems and suggestions are welcome in the comments, in the form of an issue on GitHub or can be sent by personal message.
PS No device was damaged during the operation.
Again, Samsung distinguished themselves (since the development of the Intent Sender plug-in to IDEA is offended by them): Samsung Tab S (SM-T700) went into reboot after several screenshots and subsequently did not start (only through hard reset).
Quick start
In order not to burden people who are not interested in the details of the development of the application, I will immediately give a brief information on working with the program.
- You can download it on GitHub in the Releases section . Unfortunately, due to the GitHub policy, it is impossible to attach * .jar files in their pure form, so I had to wrap the zip archive.
- Requirements: installed Java (JRE is sufficient) and Adb .
- Launch: double click on the DroidShoter.jar file or the java -jar command of the DroidShoter.jar in the terminal.
Detailed instructions with links to Java and Adb are on GitHub.
The use of the DroidShoter itself is extremely simple: we launch the utility, select the device, set the parameters and click “Start!” .
')
An example of the result of the program you can find under the spoiler at the end of the article.
Attention! There was a message about problems with the Samsung Tab S (SM-T700) with the official firmware Android 5.0.2. If you decide to use the utility with this device, be prepared that you may need to reset the settings. No problems were found on other Samsung devices.
Few details
According to Google’s official documentation , the screens are divided into: small, normal, large, and xlarge; pixel density: ldpi, mdpi, hdpi, xhdpi:
It can be seen that the variety of combinations of screens arises from the intersection of the possible size and density of pixels. The combination of screen size and pixel density determines its resolution. Thus, we can distinguish two basic characteristics that sufficiently characterize the screens: resolution and pixel density . It is these characteristics that we can change with Adb . We can also use Adb to take screenshots, which means that nothing prevents us from walking through different combinations of screen parameters and taking screenshots on each of them. This process and wanted to automate.
To begin with, it was necessary to learn how to take screen parameters. And if for devices, starting with Android 4.3, there were no problems (parsing the output of the wm size and wm density commands), then for the rest it was necessary to find a different method. As a result, I used the “dumpsys window” command, finding a line in the result output, like “init = 480x800 240dpi” . Unfortunately, some devices (so far only one phone from Sharp) with this approach do not give out density and will not be supported by the utility.
To change the display settings, use the following Adb shell commands:
- wm size [WxH] (starting with Android 4.3) and am display-size [WxH] (up to 4.3.) - to change the screen resolution
- wm density [value] (starting with Android 4.3) and am display-size [value] (up to 4.3.) - to change the pixel density
- To reset the display parameters, use the above commands with “reset” instead of the parameters to be set.
Unfortunately, when changing the screen configuration, system elements (status bar, for example) may be incorrectly drawn. This problem lies in Android and could not be solved. However, this does not prevent the application itself from displaying correctly.
In general, by this time, it was already clear that everything necessary for the work is also for the utility - to be. The case remains for the direct development. As a language, I used Java , as the closest programming language to me at the moment and Swing framework for working with UI. In addition, Java has a great ddmlib library, which greatly simplifies working with Adb .
DroidShoter has a fairly simple basic logic at the moment. When a device is selected, the physical parameters of the screen are determined, and on the basis of them the order of the display parameters is built up for subsequent work. Then, after clicking on “Start” , the process of changing screen parameters and taking screenshots begins.
As a queue of display parameters, all combinations of screen resolution and pixel density values from “basic” are used, which are less than the physical parameters of the device. Those. for a screen with a physical resolution of 720x1280, the resolution of 1020x1980 will not be used. The same is true with a density of 320 with a physical density of 240.
Strictly speaking, Adb allows you to use parameters that exceed the physical indicators of the device, but at the moment I decided to abandon their use, because there will be a loss of some pixels and the appearance of the application will not correspond to the real one (for example, element separators may fall out in lists).
Basic parameters:
| Dpi | Screen resolution - maximum pixel density for resolution |
|---|---|
| XXXHDPI - 640 DPI_560 - 560 XXHDPI - 480 DPI_420 - 420 XHDPI - 320 HDPI - 240 MDPI - 160 | 2560x1600 - XHDPI 2560x1440 - DPI_560 1920x1200 - DPI_560 1920x1080 - DPI_560 1280x768 - DPI_420 1280x720 - DPI_420 854x480 - HDPI 800x480 - HDPI 480x320 - MDPI 320x240 - MDPI |
The logic was framed with additional features for convenience:
- Automatic detection of device connection / disconnection
- Ability to specify a folder for screenshots (both relative and absolute paths are supported)
- Specifying a screenshot file name prefix. The name follows the pattern: [prefix] [width] x [height] _ [density]
- Ability to set a delay before taking a screenshot after a mode change (necessary to allow the activity to perform time-consuming operations, for example, to receive data from the server)
- Saving the list of active modes for each device (after restarting the DroidShoter, the checkboxes from the modes that were deactivated last time are removed)
- Automatic search for Adb in ANDROID_HOME variable. Save the path to Adb , if the user specified it manually
- A separate button to reset the screen settings to physical. The button is entered just in case, the need for its actual use did not arise.
For some applications, a situation may arise when it “falls” with some screen parameters. In such cases, it is enough to exclude this mode from work (but, of course, it is better to consider the cause of the "crash" - there may be a problem in the application).
From the point of view of the operating system, changing the display settings is changing the screen configuration, which entails the standard process of re-creating the current activity . The configuration change occurs by the screenSize parameter and can be intercepted in the activity by registering in the manifest with the tag
android:configChanges="screenSize" This results in an additional plus of DroidShoter: the correctness of the restoration of the application state after a configuration change is tested.
Example of the result of the DroidShoter:
We used the Nexus 7 tablet (2013) and the native Calculator application. The calculator is interesting because at different screen resolutions the additional functions are displayed differently on a green background, which clearly shows the change in layout.
Contents of the screenshots folder
1200x1920_MDPI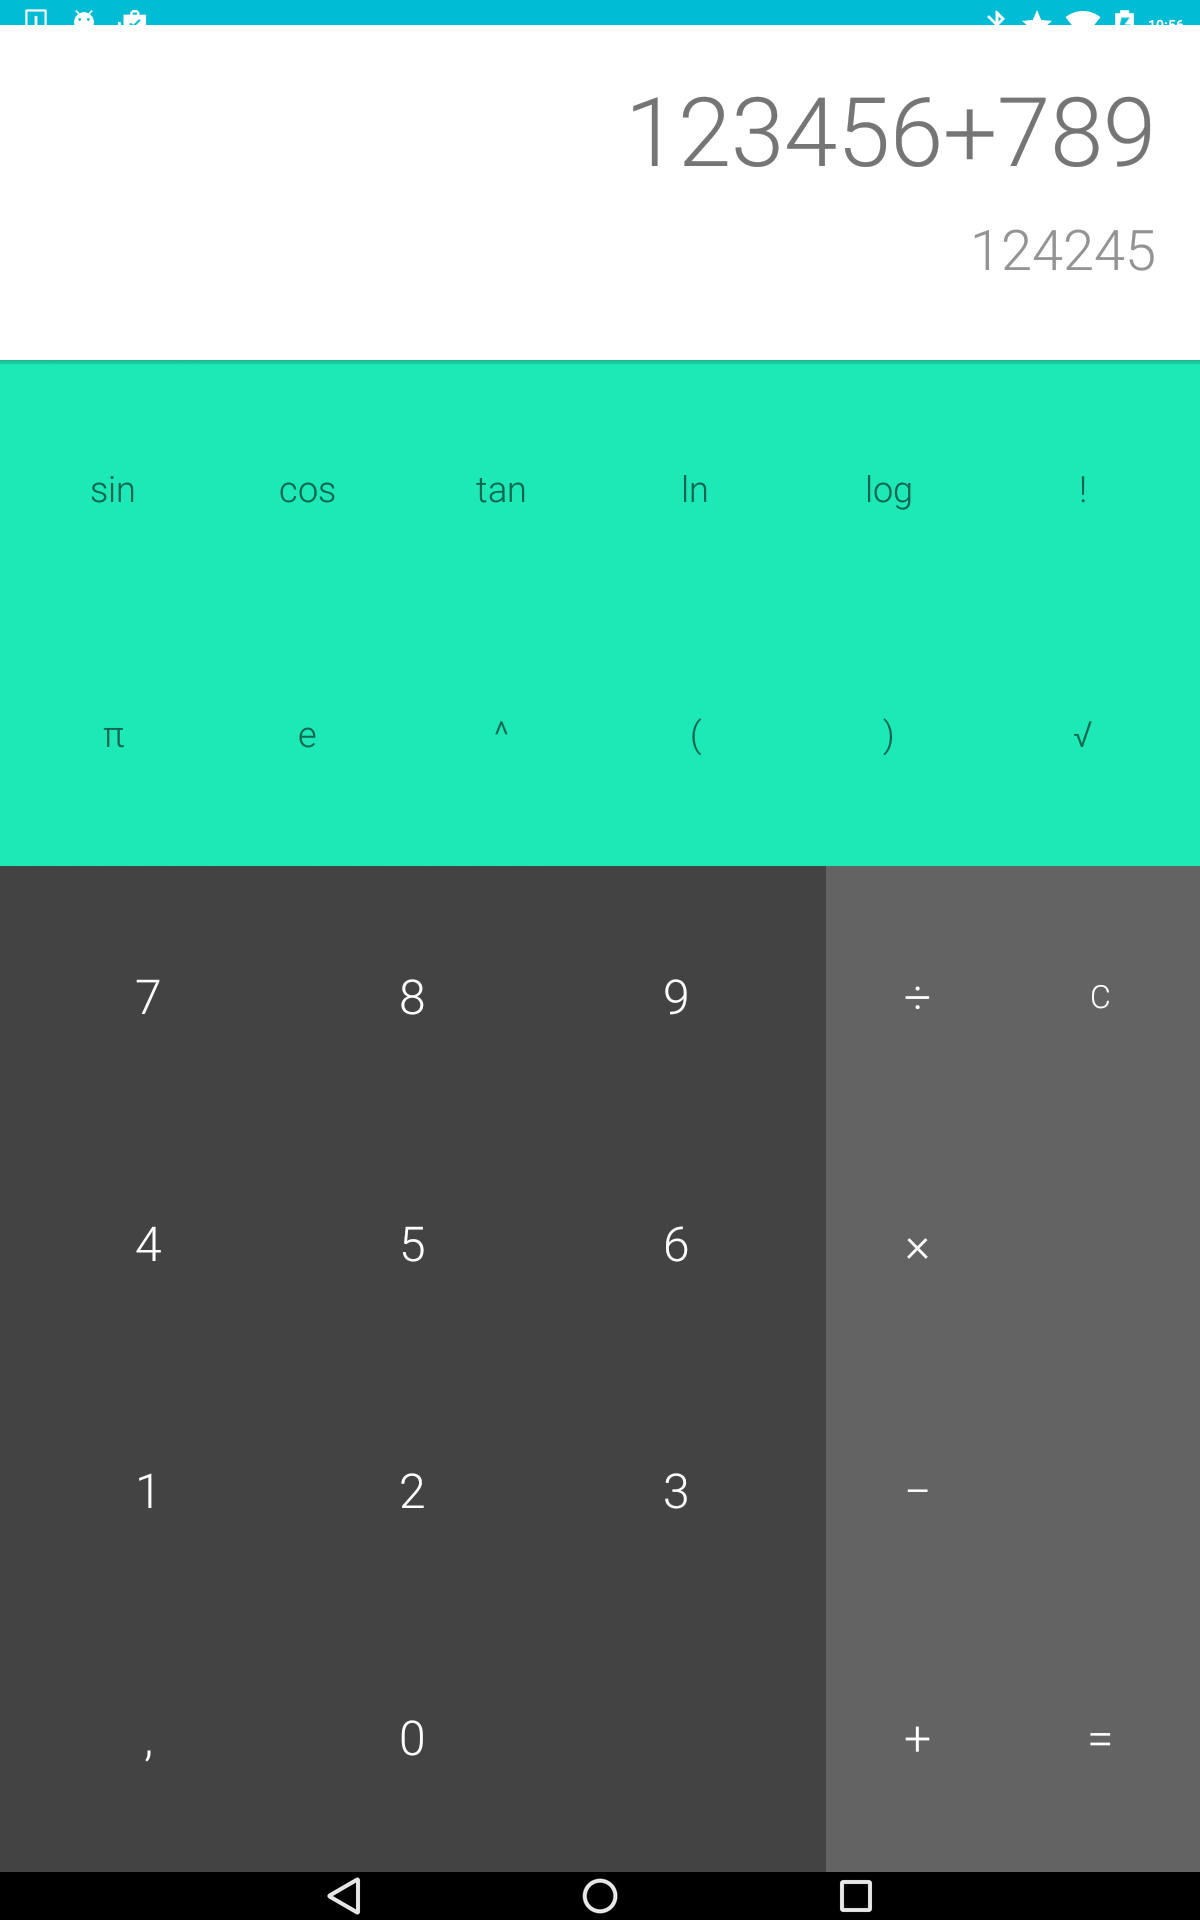
768x1280_XHDPI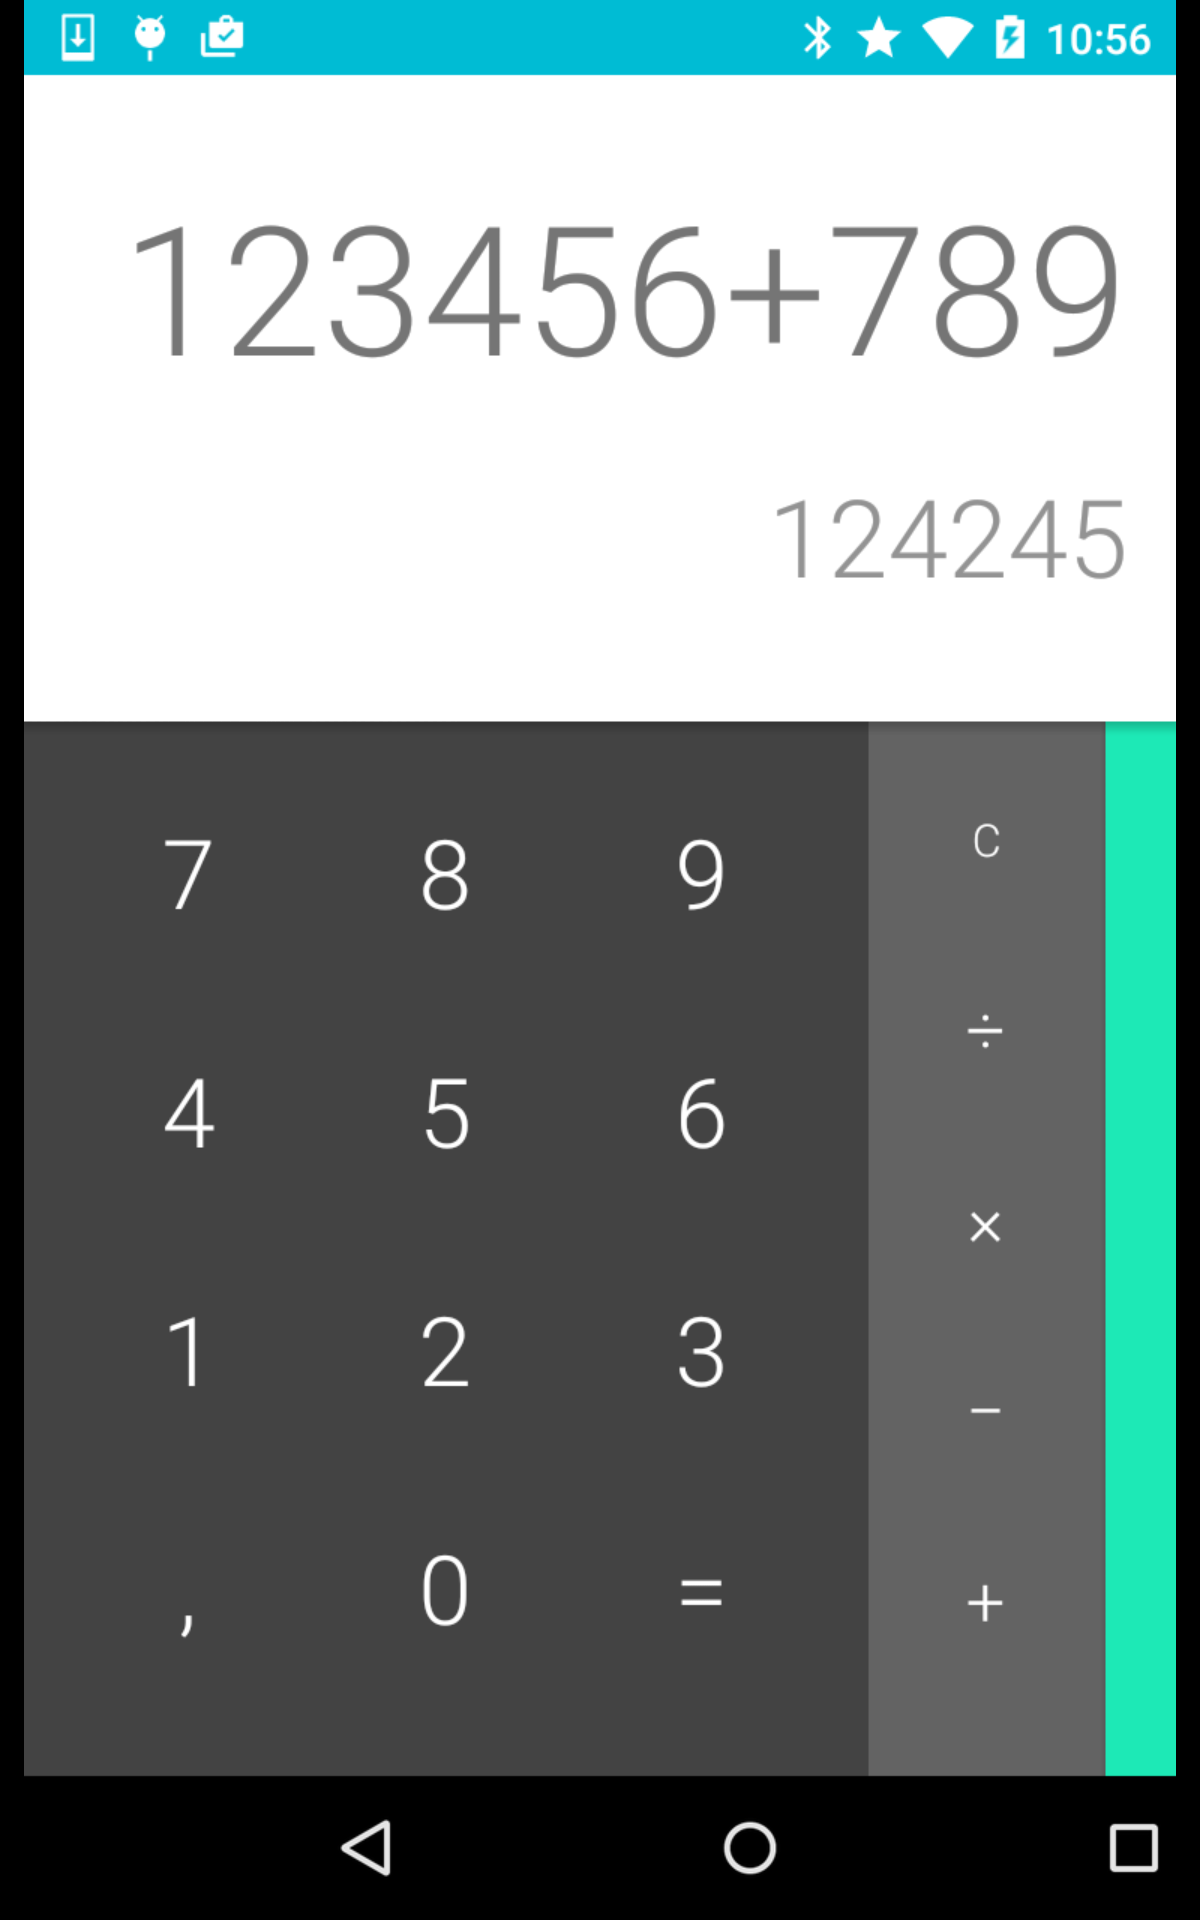
480x854_MDPI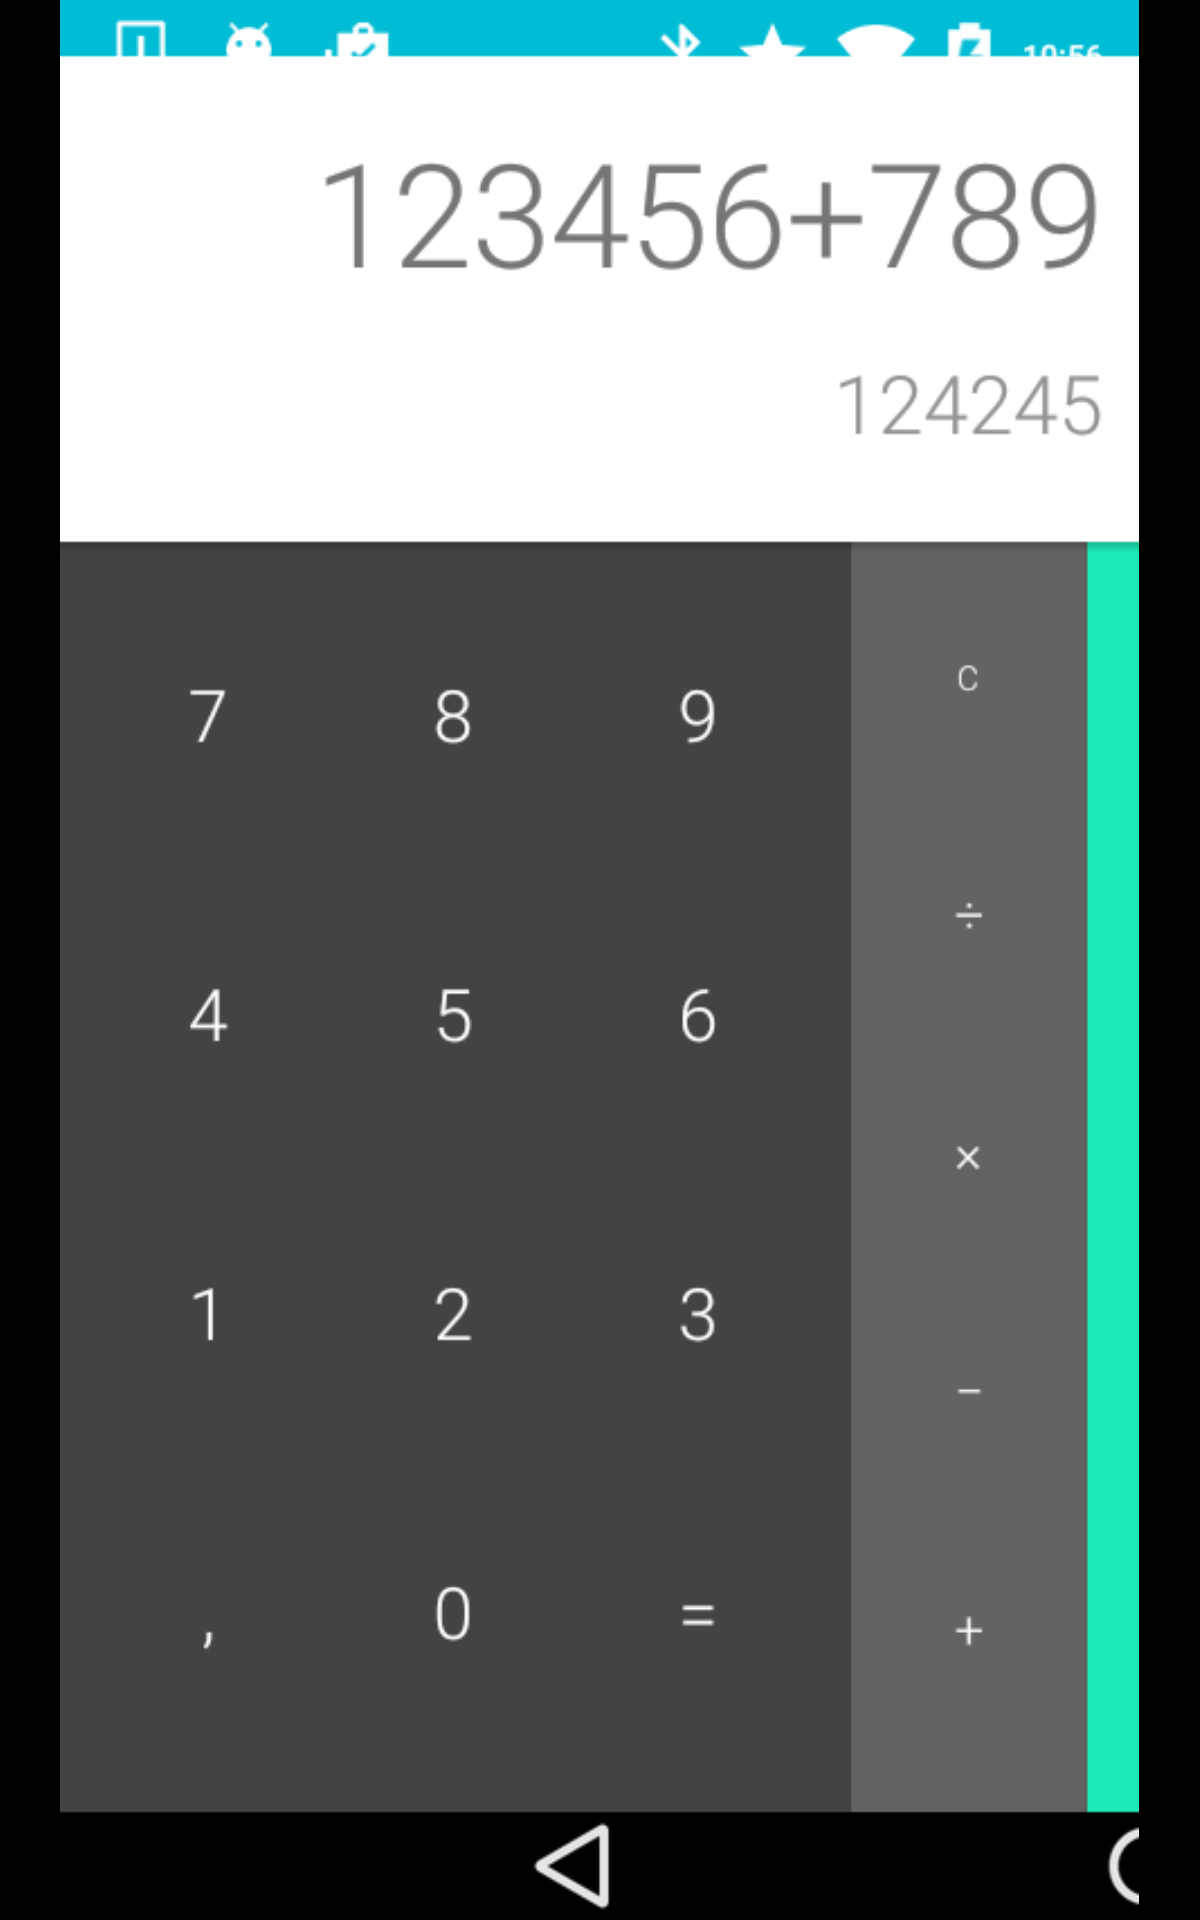
320x480_MDPI
Video work
In the video, the size of the content decreases, but in reality the screen of the device is almost completely filled.
Change of resolution occurs about once every 5 seconds.
Change of resolution occurs about once every 5 seconds.
DroidShoter development plan, if the program will be claimed by the community:
- Orientation change support
- Support localization change
- Automatic launch of various application screens (with the required Intent extra )
- Ensuring integration into the CI system
Your ideas, problems and suggestions are welcome in the comments, in the form of an issue on GitHub or can be sent by personal message.
Again, Samsung distinguished themselves (since the development of the Intent Sender plug-in to IDEA is offended by them): Samsung Tab S (SM-T700) went into reboot after several screenshots and subsequently did not start (only through hard reset).
Source: https://habr.com/ru/post/279573/
All Articles