Google's beacon platform. Part 1 - Proximity beacon API
Google's beacon platform is a solution for working with Bluetooth beacons. The platform works with different beacons from different manufacturers, providing developers with a single, simple and flexible tool.
Before reading this article, I recommend to get acquainted with the concept of Physical Web about which I spoke in my last article: The Concept of Physical web. Bluetooth beacons. Comparison of iBeacon, AltBeacon and Eddystone standards .
Google's beacon platform. Part 1 - Proximity beacon API
Google's beacon platform. Part 2 - Nearby meassages API
')
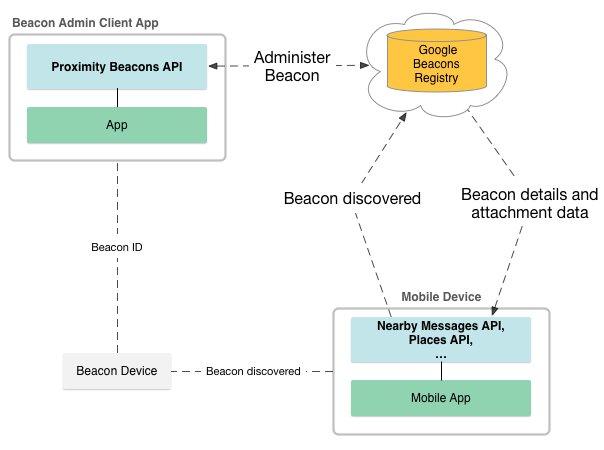
Google's beacon platform allows us to avoid the need for physical contact with beacons to reconfigure them, as is the case with Physical Web, when we broadcast a regular URL ( Eddystone-URL ), we can only change attachments that are attached to beacons, thereby controlling beacons remotely. This solution also allows you to monitor all our beacons remotely. How this is implemented, I will tell you further.
As can be seen from the diagram, for the administration of beacons, we are provided with the Google Proximity Beacon API , with which we can register our devices with the Google Beacons Registry . It stores information about registered beacons. On the client side, to interact with devices, it is suggested to use the Nearby Messages API , Places API or something else at your discretion.
In short, with such a scheme of work, the beacons translate an Advertisment ID ( Eddystone-UID ), to which we can attach some attachments ( Attachments ), which I will describe in detail below. After we find the beacon with our smartphone or tablet, we make a request for its Advertisment ID in the Beacons Registry , and the answer is to get this very attachment. Such a script is great when we need to make a non-public application for special or internal use. Or when we want to add to the existing, popular with users, application the ability to work with beacons, for example, to navigate or to get some additional data.
Those. we definitely need an application, but what about Physical Web ???
Due to the fact that some of the beacons can send two types of packages at the same time, for example, Eddystone-URL or Eddystone-UID , we can provide our application with additional metadata, and users without an application can provide the application itself!
The Google Proximity Beacon API is a cloud service that, through a REST interface, allows you to control beacons, or rather related data.
Proximity Beacon API allows you to:
Before using the Proximity Beacon API , it will be helpful to understand or become familiar with the following:
To work with the Proximity Beacon API, you must perform the following 5 steps:
After enabling and basic setting of the beacon to broadcast messages, the Proximity Beacon API can be used to register it. To it, we can bind additional data that will help users' devices to understand where they are. An entry in the Google Beacons Registry may contain the following metadata:
You can read more about metadata values here .
This is the very additional metadata about which I spoke at the beginning of the article; they can be used by our application for their needs or for improving the overall UX. For example, we can use the Google Places API Place ID for Place Picker . Place Picker is a dialog that displays an interactive map of nearby places, organizations, establishments, etc. A user can get information about a nearby place or share information on a social network in a social network. Place Picker are part of the Places API and is available on both Android and iOS platforms .
The Distributed ID ( Advertised ID ) must be a valid Eddystone-UID beacon identifier (16 bytes containing 10 bytes of namespaceId and 6 bytes of instance Id ). The ID value should be the base64 representation of the data.
Beacons are represented as a beacon resource and can be registered by calling the
About other methods you can see here .
The beacon can be registered at a time in only one project in the Google Developers Console . Attempting to register a beacon again or in another project will result in an error. Once a beacon is registered, its
Therefore, be sure to set up your beacons accordingly before registering.
Once a beacon has been registered, it cannot simply be removed from the Google Beacons Registry . There are two options for how to turn the beacon offline:
After the beacon has been registered, it is ready for the next step.
You can attach arbitrary data to beacons, called Attachments . They are blobs stored in Google’s scalable cloud . Currently, attachments are available only for the project in which they were created; you cannot use them in another project.
When creating an attachment, you need to fill in two fields:
To find out what namespaces are associated with your project, you can call
Attachments can be up to 1024 bytes in length. You can use any
I strongly advise you to refrain from linking to an external database if you want to return large data items, such as images or videos, as well as if the data rests on a third-party database that you do not manage.
It is highly recommended not to use attachments to store and transmit any sensitive data.
After we deployed our beacons to make sure that they are working properly, they need to be monitored. Eddystone-TLM frames allow beacons to communicate their status to devices that detect them, but if there are many beacons and the area on which they are deployed is large enough, then independent walking of beacons with a special monitoring application can be a problem. There is a way out. We can periodically send Eddystone-TLM frames to the user, which through him will be transmitted to us in Google's beacon platform . The alternation of monitoring frames with frames that are directly intended for user devices (for example, Eddystone-UID ) occurs at regular intervals set during the initialization of beacons.
If the beacon is installed in a place where it will not be used often, it is recommended to alternate Eddystone-TLM frames with target frames more often in order to maximize the probability that the user will receive such a frame.
The following data is transmitted in the Eddystone-TLM frame:
Based on this data, Google's beacon platform can provide the following information:
You can track the status of beacons using the
I'll tell you how to add the ability to interact with the beacons on the client side (Android and iOS) using the Google Nearby Messages API .
Examples of Android and iOS service applications using the Proximity Beacon API on GitHub
Before reading this article, I recommend to get acquainted with the concept of Physical Web about which I spoke in my last article: The Concept of Physical web. Bluetooth beacons. Comparison of iBeacon, AltBeacon and Eddystone standards .
Google's beacon platform. Part 1 - Proximity beacon API
Google's beacon platform. Part 2 - Nearby meassages API
')
Google's beacon platform allows us to avoid the need for physical contact with beacons to reconfigure them, as is the case with Physical Web, when we broadcast a regular URL ( Eddystone-URL ), we can only change attachments that are attached to beacons, thereby controlling beacons remotely. This solution also allows you to monitor all our beacons remotely. How this is implemented, I will tell you further.
As can be seen from the diagram, for the administration of beacons, we are provided with the Google Proximity Beacon API , with which we can register our devices with the Google Beacons Registry . It stores information about registered beacons. On the client side, to interact with devices, it is suggested to use the Nearby Messages API , Places API or something else at your discretion.
In short, with such a scheme of work, the beacons translate an Advertisment ID ( Eddystone-UID ), to which we can attach some attachments ( Attachments ), which I will describe in detail below. After we find the beacon with our smartphone or tablet, we make a request for its Advertisment ID in the Beacons Registry , and the answer is to get this very attachment. Such a script is great when we need to make a non-public application for special or internal use. Or when we want to add to the existing, popular with users, application the ability to work with beacons, for example, to navigate or to get some additional data.
Those. we definitely need an application, but what about Physical Web ???
Due to the fact that some of the beacons can send two types of packages at the same time, for example, Eddystone-URL or Eddystone-UID , we can provide our application with additional metadata, and users without an application can provide the application itself!
Google Proximity Beacon API
The Google Proximity Beacon API is a cloud service that, through a REST interface, allows you to control beacons, or rather related data.
Proximity Beacon API allows you to:
- Register devices
- Attach attachments to beacons
- Monitor device
- Receive attachments from beacons
Before using the Proximity Beacon API , it will be helpful to understand or become familiar with the following:
To work with the Proximity Beacon API, you must perform the following 5 steps:
- Create or sign in to Google Account
- Create a new project or select an existing one in the Google Developer Console
- Activate the Proximity Beacon API - in the Google Developer Console, click Select a project and select the project you want to use. In the left, side menu, click on API Manager, then find the Proximity Beacon API and set its status to
enabled - Get OAuth 2.0 client ID
- Get API KEY . I strongly advise you to familiarize yourself with Best practices for securely using API keys
Caution, gif! Points 1,2 and 3
Caution, gif! Point 4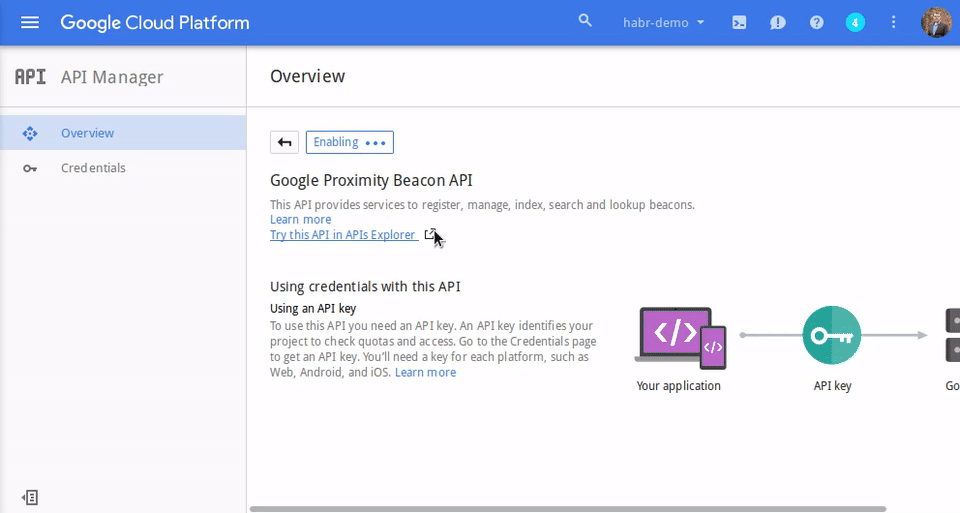
Caution, gif! Point 5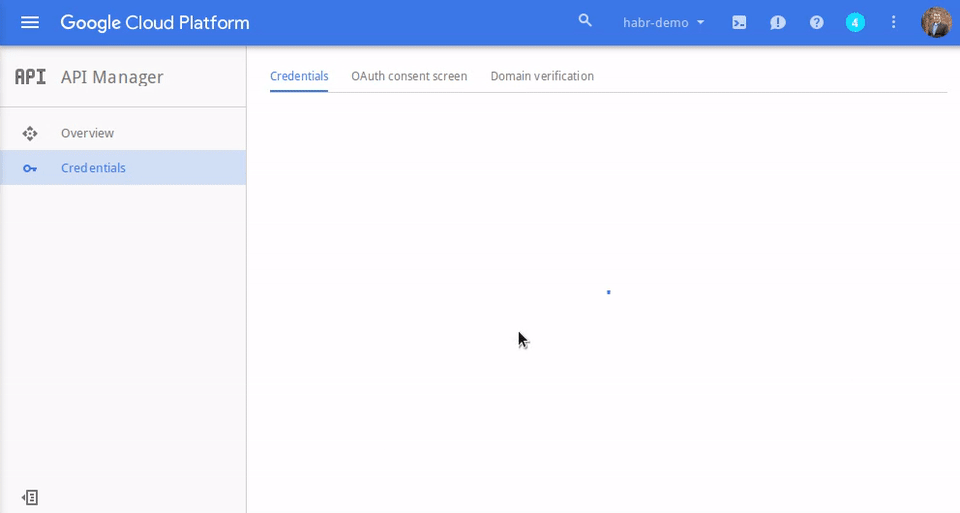
Registration of beacons
After enabling and basic setting of the beacon to broadcast messages, the Proximity Beacon API can be used to register it. To it, we can bind additional data that will help users' devices to understand where they are. An entry in the Google Beacons Registry may contain the following metadata:
- Advertised ID (required)
- Current status - active, not active, decommissioned.
- Stability - expresses the expected stability of the placement. (Stable, rarely moved, often moved, constantly moving)
- Latitude and longitude - a pair of double representing the value in degrees. Must be consistent with the WGS84 submission, unless otherwise indicated. Values must be within normalized ranges.
- The inside of the building is a human-readable line to indicate on which floor the beacon is located.
- Google Places API Place ID
- Text Description
- Arbitrary properties like key / value pair
You can read more about metadata values here .
This is the very additional metadata about which I spoke at the beginning of the article; they can be used by our application for their needs or for improving the overall UX. For example, we can use the Google Places API Place ID for Place Picker . Place Picker is a dialog that displays an interactive map of nearby places, organizations, establishments, etc. A user can get information about a nearby place or share information on a social network in a social network. Place Picker are part of the Places API and is available on both Android and iOS platforms .
The Distributed ID ( Advertised ID ) must be a valid Eddystone-UID beacon identifier (16 bytes containing 10 bytes of namespaceId and 6 bytes of instance Id ). The ID value should be the base64 representation of the data.
Beacons are represented as a beacon resource and can be registered by calling the
beacons.register method.About other methods you can see here .
The beacon can be registered at a time in only one project in the Google Developers Console . Attempting to register a beacon again or in another project will result in an error. Once a beacon is registered, its
AdvertisedID field cannot be changed.Therefore, be sure to set up your beacons accordingly before registering.
The example shows how to register the Eddystone beacon in a specific place:
HTTP method:
Request URL:
Request body:
Response:
If everything went well, the answer will be the status code:
POSTRequest URL:
https://proximitybeacon.googleapis.com/v1beta1/beacons:registerRequest body:
{ "advertisedId": { "type": "EDDYSTONE", "id": "Fr4Z98nSoW0hgAAAAAAAAg==" }, "status": "ACTIVE", "placeId": "ChIJTxax6NoSkFQRWPvFXI1LypQ", "latLng": { "latitude": "47.6693771", "longitude": "-122.1966037" }, "indoorLevel": { "name": "1" }, "expectedStability": "STABLE", "description": "An example beacon.", "properties": { "position": "entryway" } } Response:
If everything went well, the answer will be the status code:
200 . The response body contains a JSON beacon representation containing the value beacon.beaconName , which can be used as a link to control the beacon.Cancel registration
Once a beacon has been registered, it cannot simply be removed from the Google Beacons Registry . There are two options for how to turn the beacon offline:
- Call
beacons.deactivateto temporarily remove the beacon from our project. After deactivation, the API will not return any associated data or information on the beacon. In order to return the beacon in working condition, you need to callbeacons.activate - Call
beacons.decommissionto deactivate beacon ID from our project forever. You can no longer use the ID with which it was previously registered. But you can easily assign a new ID beacon and re-register the new ID beacon.
Adding attachments to beacons
After the beacon has been registered, it is ready for the next step.
You can attach arbitrary data to beacons, called Attachments . They are blobs stored in Google’s scalable cloud . Currently, attachments are available only for the project in which they were created; you cannot use them in another project.
When creating an attachment, you need to fill in two fields:
- namespacedType is a string consisting of a namespace identifier, a slash, and a data type.
Npirmer:surreptitious-banjo-145/string - data - base64 representing the type of data defined in the namespacedType field. For example:
aGVsbG8gd29ybGQh
To find out what namespaces are associated with your project, you can call
namespaces.list .Attachments can be up to 1024 bytes in length. You can use any
string that matters to your application, for example, a bus stop or store location ID, structured data, such as JSON, or a link to an external database.I strongly advise you to refrain from linking to an external database if you want to return large data items, such as images or videos, as well as if the data rests on a third-party database that you do not manage.
It is highly recommended not to use attachments to store and transmit any sensitive data.
The example shows how to attach data (line ** aGVsbG8gd29ybGQh **) to the beacon:
HTTP method:
Request URL:
Request body:
Response:
If everything went well, the answer will be the status code:
The response body contains a JSON attachment representation that contains the value of
POSTRequest URL:
https://proximitybeacon.googleapis.com/v1beta1/beacons/beaconName/attachmentsRequest body:
{ "namespacedType":"surreptitious-banjo-145/my-attachment-type", "data":"aGVsbG8gd29ybGQh" } Response:
If everything went well, the answer will be the status code:
200 .The response body contains a JSON attachment representation that contains the value of
BeaconAttachment.attachment_name , which can be used as a reference for managing attachments.Monitoring
After we deployed our beacons to make sure that they are working properly, they need to be monitored. Eddystone-TLM frames allow beacons to communicate their status to devices that detect them, but if there are many beacons and the area on which they are deployed is large enough, then independent walking of beacons with a special monitoring application can be a problem. There is a way out. We can periodically send Eddystone-TLM frames to the user, which through him will be transmitted to us in Google's beacon platform . The alternation of monitoring frames with frames that are directly intended for user devices (for example, Eddystone-UID ) occurs at regular intervals set during the initialization of beacons.
If the beacon is installed in a place where it will not be used often, it is recommended to alternate Eddystone-TLM frames with target frames more often in order to maximize the probability that the user will receive such a frame.
The following data is transmitted in the Eddystone-TLM frame:
- Battery charge level
- Number of frames transmitted
- Amount of time since activation
- Its temperature
Based on this data, Google's beacon platform can provide the following information:
- Predicted battery discharge time
- Moving beacon (if there is an accelerometer)
- Unusually low detection
You can track the status of beacons using the
beacons.diagnostics resource.In the next part ...
I'll tell you how to add the ability to interact with the beacons on the client side (Android and iOS) using the Google Nearby Messages API .
Examples of Android and iOS service applications using the Proximity Beacon API on GitHub
Source: https://habr.com/ru/post/279381/
All Articles