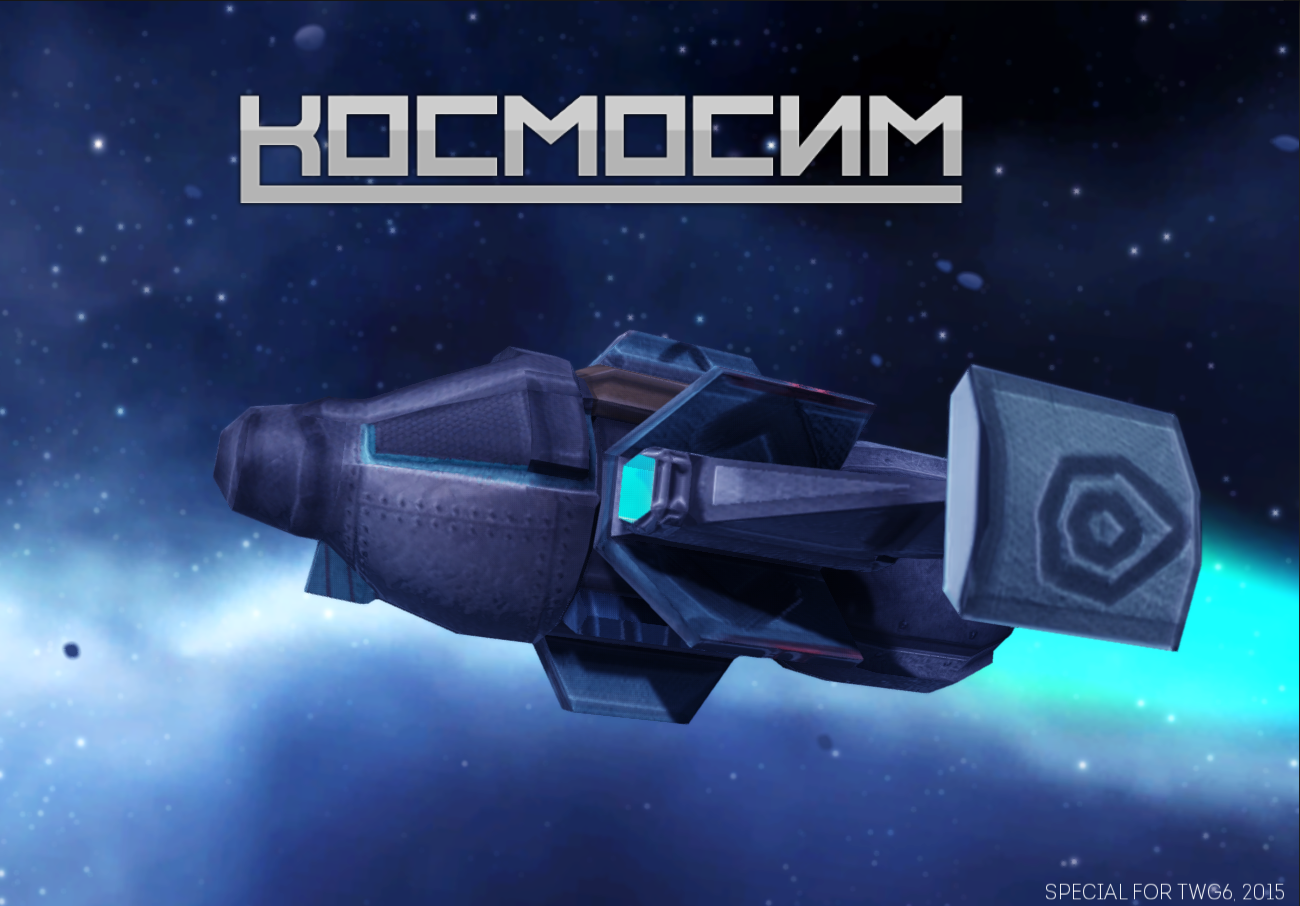
The story of the development of Cosmos on Unity
In my article, I will try to describe my experience of creating a game in two weeks, starting with the choice of genre and setting, ending with the final captions, as well as all the rakes that I stepped on during the development process, and I don’t want to step on anymore. Those who have quite a lot of experience in the development of games, the article is likely to be uninteresting, but novice developers, I think they will be able to find something interesting for themselves.
The name is that part of the game, the work on which was postponed to the very last moment. In the end, nothing worthwhile to come up with, unfortunately, failed.
It all started pretty standard, the competition, the topic - “Choice” (treat as you like, called), the term is two weeks. I suffer a slight rejection of 2D games, so the question of 2D / 3D was not at all. With the genre and the setting it was already more difficult, it was decided to build on two favorite games, after which more than one hundred hours were spent - “Space Rangers” and “Mechanoids”. So I decided on the genre - a game built on the mechanics of Elite, of course, heavily curtailed. The logical setting for this genre was Sci-fi, the place of action is space, because in two weeks to create minimally decent “ground levels” is very problematic.
To minimize the required amount of content, it was decided to abandon the generated planetary systems, and from any scale in general. The whole game takes place within one asteroid belt, divided into several sectors, the number of points of interest is minimal. But such a decision left time for other aspects of the game, if you delve into the elaboration of the world, there will be no time left for everything else.
')
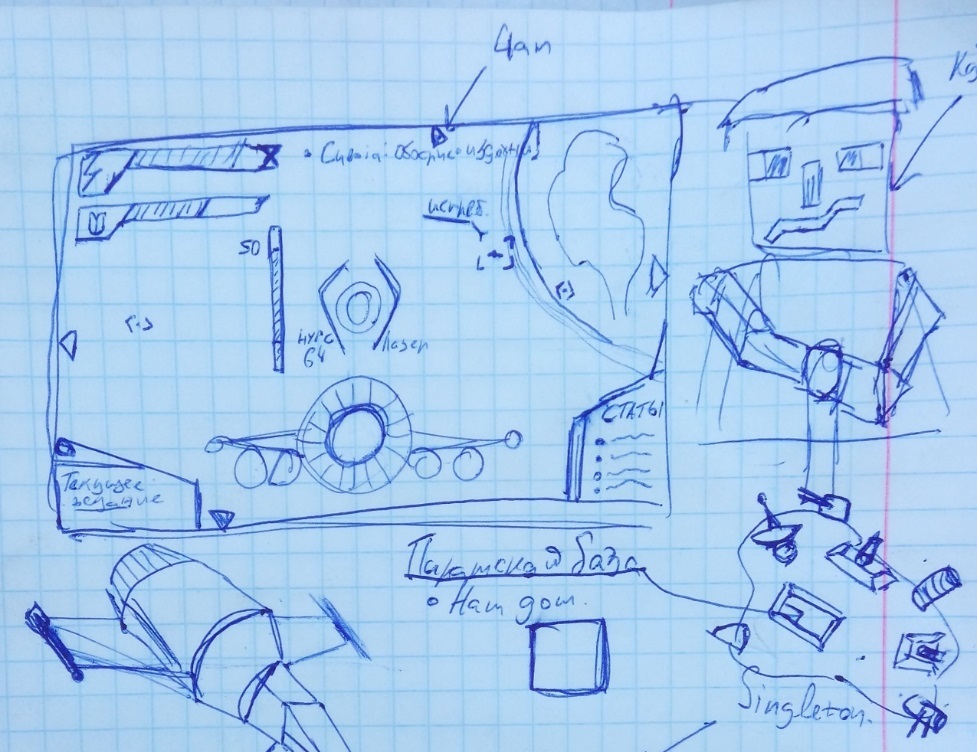
On the first day, a sketch of the interface was born and a set of features that were implemented in the next 14 days.
I acted even more barbarically with the plot (in vain, as it turned out later) - the first idea about mysterious invaders who encroached on the asteroid belt, in which the base of the GG was located, was taken as a basis. Thinking through the details was left for later, as well as inventing plot tasks.
Ahead was the most important thing - features.
I really wanted to give my all to the maximum, and to realize as many different chips as possible, many of which had only one goal - to please that they were implemented in the game. One of these chips was self-guided missiles. It seems, despite their ability to blow up small enemies with one hit, none of them who played the game so plainly used it. At the same time, the time for their creation was well spent.
In general, the approximate list of basic features looked like this:
The list turned out to be quite large, but somehow, all these possibilities were realized in the game with varying degrees of development.
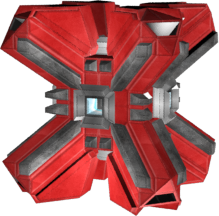
After it was decided with a genre and a set of features, two models were quickly sketched in the 3d editor - the main character's spaceship and one of the opponents.
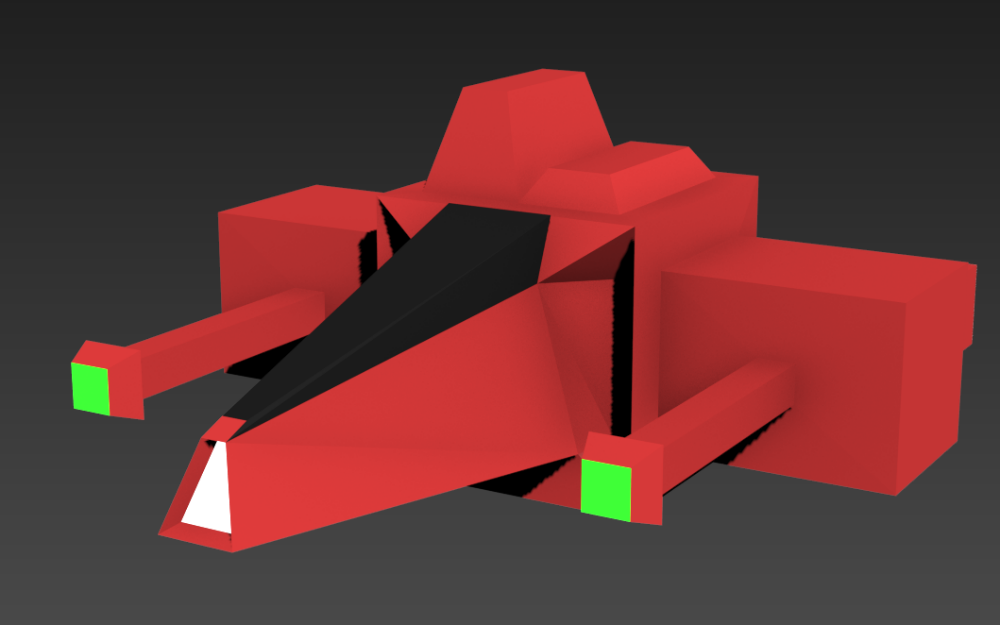
The primitiveness and cubicity of the ships of the enemies has a plot substantiation.
And now, finally, it was possible to start programming.
The first thing it was decided to implement the movement of the spacecraft and camera.
The movement is implemented quite simply, no inertia and other realistic things. The player's ship is a model with a rigidbody, to which each tick is given angular and translational speeds. To obtain the angular velocity, the displacement vector is taken from the mouse from the center, with each tick the current delta of the mouse movement is added to the displacement, and the vector itself is multiplied by a factor less than 1. A fairly smooth control is obtained, with the illusion of a small inertia of the ship.
For translational motion, it is still easier - the ship moves in the direction of the local “forward”, the speed gradually increases or decreases when you press the W / S keys.
With the camera, everything turned out pretty simple too. Tying a camera to the ship in the forehead is a bad idea, so the camera and the ship are not connected, but for the camera there is a target point behind-the top of the ship to which it is aiming, and target angles of rotation. The current and target points are interpolated, thereby creating a “smooth tracking camera” effect.
To give a sense of speed, with the acceleration of the ship, the camera's field of view slightly increases, and when it slows down, it slows down.
It can be seen how the ship twitches unpleasantly. This was cured by the inclusion of interpolation in the settings of the Rigidbody ship.
Moving in an empty black space is somehow uninteresting. Therefore, the next step was to fill the space with objects.
Since the asteroid belt was the setting for the setting of the game, the problem was solved very simply - in a space of several tens of cubic kilometers a couple of hundreds of asteroids were scattered at random. Seed for random generation was saved in advance, so you could not worry about the fact that the base or quest object will be inside the asteroid.
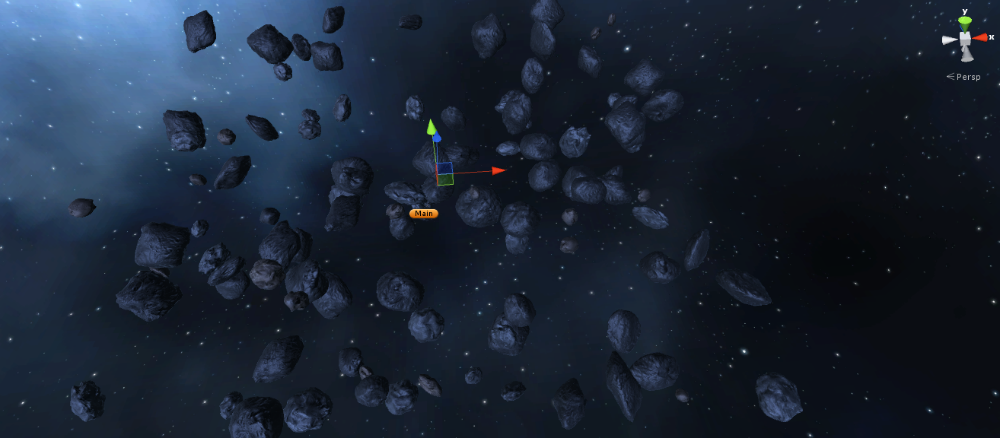
It looks like this from a distance.
For more "liveliness" and dynamism, in addition to large asteroids, small, and "star dust" were added. These little things were no longer generated throughout the location, but were created directly around the moving ship.
The ship of the main character, it was decided to give the opportunity to carry weapons on six points of suspension (two or four points is too undignified for a heavily armed fighter). Arms attachment points were set using dummy GameObjects, the number of points for the suspension was hard-coded (yes, I confess). In this case, the suspension points were divided into two types - the main weapon and auxiliary. The difference was essentially one thing - the weapon on the main slots was activated on the paintwork material, and on additional slots - on the gap. With the ship, the weapon interacted fairly limitedly - through an interface that provides access to the main functions, which made it quite easy to add new types of weapons. In addition, as it was developed, several more functions were added to it, which are responsible for its appearance in the store and hangar interface.
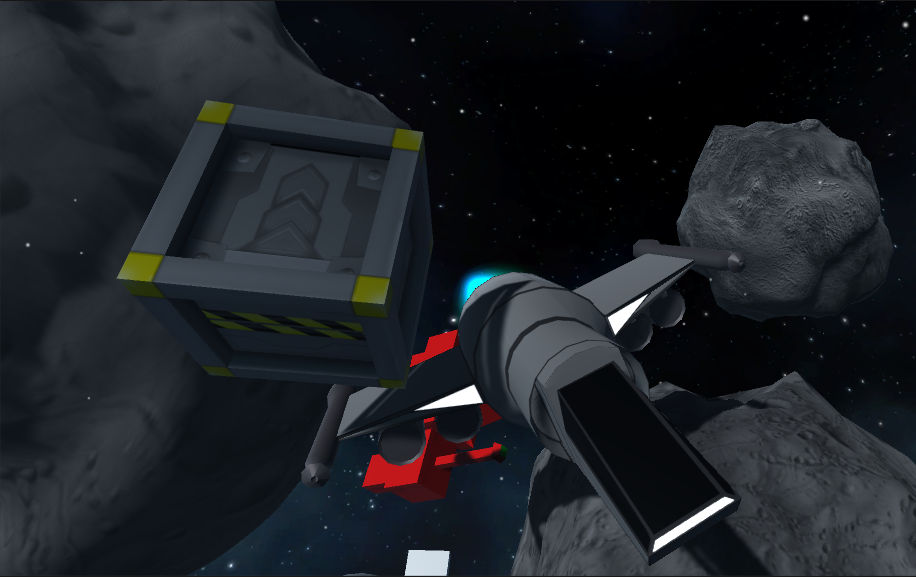
One of the first screenshots of a ship with a suspended weapon
In total, five types of weapons were made: Double-barreled gun, Laser, unguided missiles, heavy homing torpedo, homing missile.
The self-guided missile, for greater accuracy, calculated the lead point, with the assumption that the target would move in the same direction at the same speed. As a rule, this was enough for a rocket to hit a moving target with a rather high probability.
Below is a video of the work of two types of weapons. Also on the video you can see the effect of the destruction of the enemy, but since it is quite simple, I will not dwell on it separately.
The time spent on the interface unexpectedly turned out to be very significant, it took at least three days of work to develop the interface. The UI system, which appeared in Unity 4.6, was used, in my opinion, very convenient and quite simple to learn.
The most difficult part of the work on the interface was the base interface, it was necessary to implement a fairly large functionality. Dialogues, buying / selling weapons, selling items from the hold, repairs. As cargo / weapon icons, their models were used in an orthogonal projection, because the time for drawing icons was simply not enough. A small description was made for each item, telling the player what it is before him.
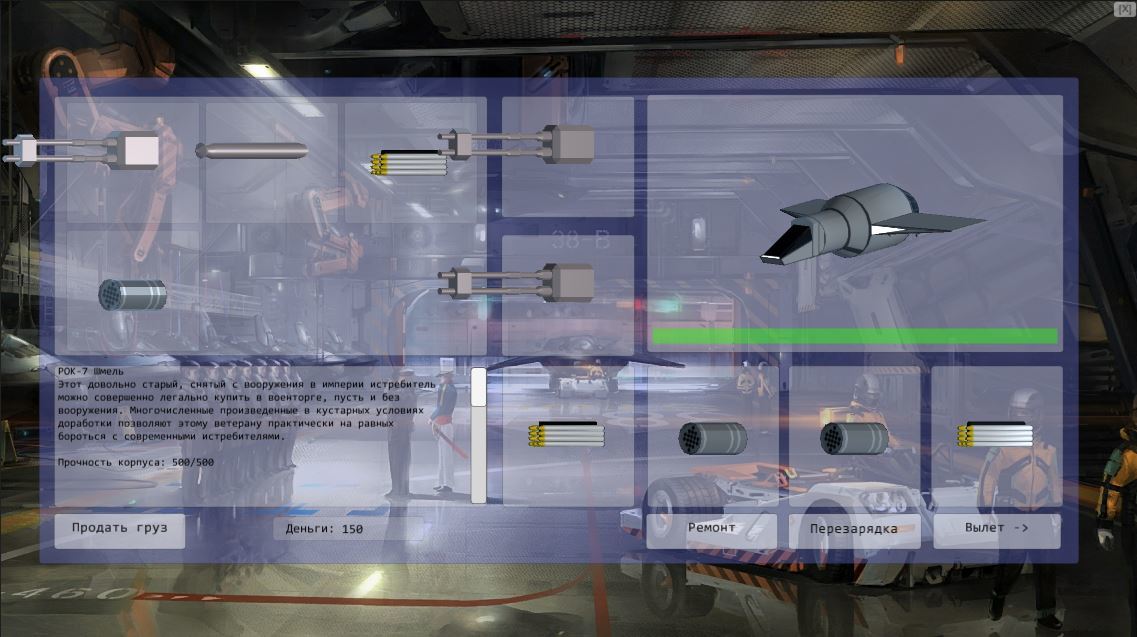
The first version of the interface, the curve, without the tasks tab
Later, the interface was finalized graphically (thanks to the person who helped me with sprites for him, I myself could never do that), and began to look noticeably prettier and neater.
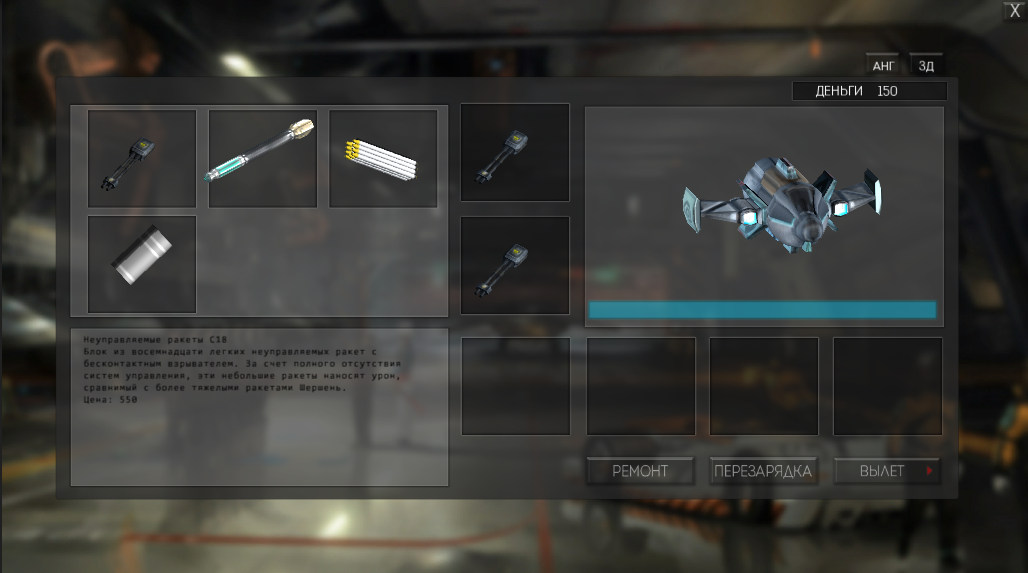
The final version, the essence is the same, but more pleasant to the eye.
Flight interface was easier. The player with him in fact does not interact, and in itself he is dovalno minimalist. For progress bars, a regular sprite was used, cut by Unity into 9 parts and stretched horizontally, very simply and quite nicely. With curved bars to the side of the sight all the more difficult. Just stretching the sprite on one of the axes will not work out anymore, you need to use a more complex solution. A simple shader with one parameter was written - clipping height. It was set from a script, and in accordance with it the sprite was drawn with the necessary filling.
Flight Interface Screenshot:
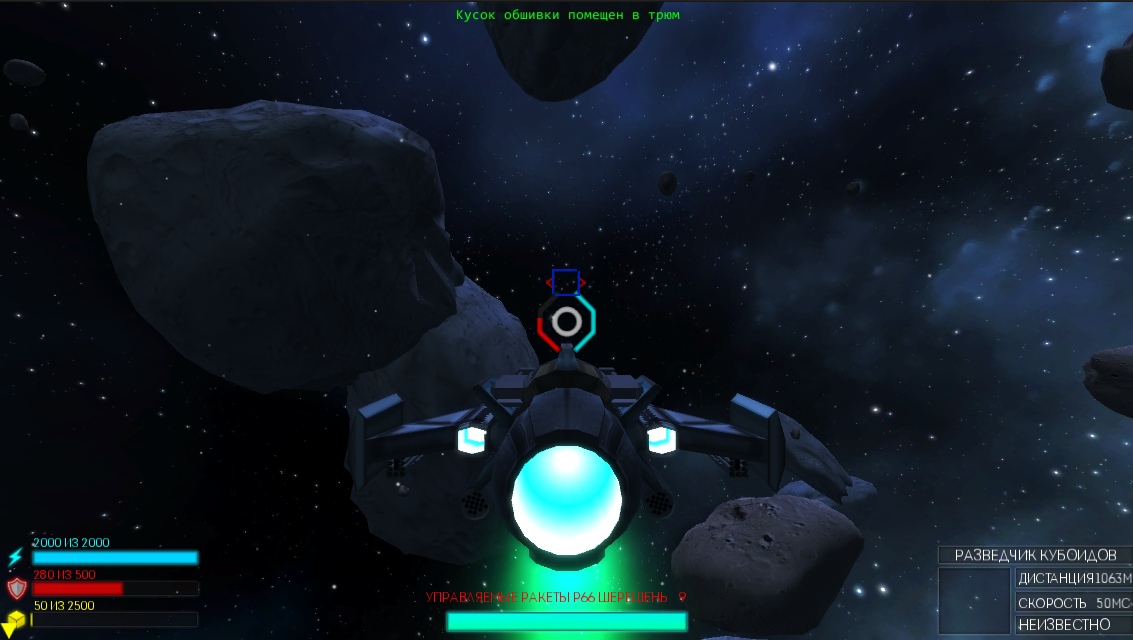
The screenshot shows a half-filled health indicator in the center of the screen.
In my opinion, one of the weak points of the game. They have only one tactic - to fly after the player, if he is in their sight, and having approached at a distance of opening fire, start shooting. Despite this, in large numbers even such enemies pose a serious danger.
Of course, in addition to the above behavior, they also had auxiliary functions. For example, having lost sight of the player, they flew to the last point where they saw him, and not finding him there, they began to randomly wander or return to the starting point. And also, they sometimes avoided collisions with asteroids, but only if they flew not too fast. The full state machine for AI opponents was not implemented this way, the AI script ran a pass every 0.1 seconds, in which it decided what the enemy would do in the next 0.1s. Because of this, in order to achieve more or less tolerable behavior, we had to get a lot of additional variables describing the state of AI.
The main boss was completely defenseless and relied only on a huge number of his minions.
Before that I had never done a quest system, so I didn’t even have any idea where to start. But there was no time to talk or look for lessons - it was necessary to act, because there was a second week! As a result, a very ugly system was born with a hard-nosed list of quests (to add a new quest, it was necessary to prescribe its name in the variables of the Main Quest Script, increase the number of quests by one, and prescribe the quest to which database it belongs to). pieces), and with other signs of jumping on a rake.
Dialogues were saved in xml, for their editing a simple editor was even made in the same place, in Unity.
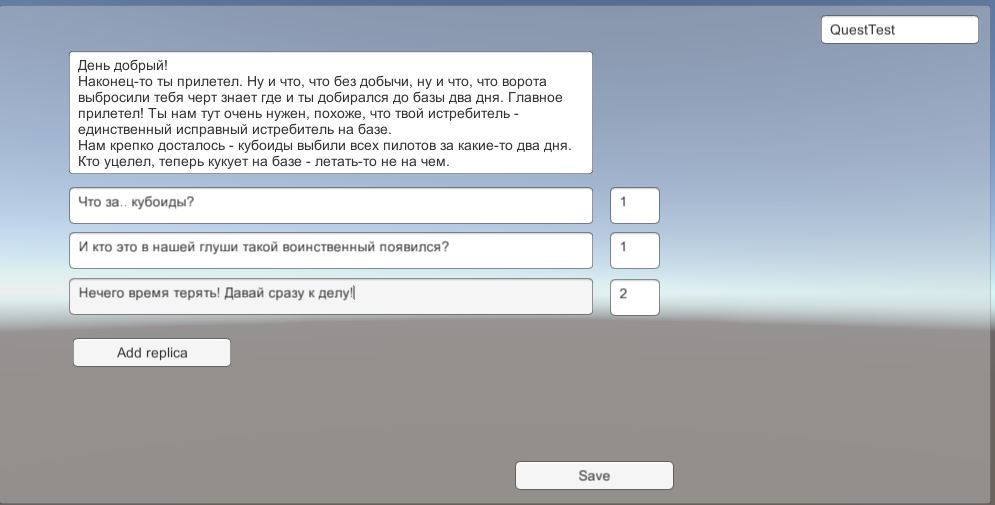
The editor is probably the best part of the quest system.
The quests themselves were made by the prefabs, who instanced when the quest was activated and were deleted after receiving the reward. It's crooked, but it worked. On the system of quests, writing dialogues and quests themselves took another three days. The term was coming to an end.
I would like here to list the various chips that are unworthy of a separate section, but which nevertheless want to tell.
Perhaps I'll start with the effect of hyper-jump. How it looks, you can see below.
It is implemented very simply. First we start the sound, start shaking the camera, show a slightly enlarged model of the same ship over the main model, but with the texture of the “energy field”, then animate it using the Animation Curves, and just before the jump, launch the flash particle system and hide the main model . It seems to me that for the “low-budget” effect it turned out quite well.
I also want to say a few words about the save system. Oddly enough, she is present in the game. The .xml file with the player's name is saved in the game folder, the player's name itself is saved in PlayerPrefs (in the registry). Theoretically, you can even use several saves, changing the player's name in the main menu. Saving is automatic, after each completed quest.
It is implemented extremely simply: the SaveInfo class was created, where all the necessary parameters of the game state are saved, the class implements two methods: Load () and Save (), which serialize / deserialize the data into the xml file using standard C # tools.
Everything, nothing else needs to be done, it remains only to disassemble the fields of this class.
So, if you are too lazy to go through the game, you can conjure up with saving and speed up progress, or put a weapon more powerful.
Separately, I would like to thank the kind people who, during the development process, volunteered to help me with graphic content for the game. Considering its quantity (several dozens of models alone), I doubt that I could manage to make it in time, I don’t have to say about quality. As a result, almost all the graphics in the game (except for two backgrounds and skybox) was created specifically for this game.
Since the end of work on the game has already passed more than six months, and it's time to take stock.
I did not take a prize place with this game, apparently I did not get into the trend of pixel art adventure. But while working on the game, a huge amount of invaluable experience and skills was obtained, and the bumps from the overtaken rake will remind me for a long time that some things should not be done.
Findings:
Of course, many of my conclusions may seem obvious, but sometimes without trying, you will not understand. For example, the desire to make the project as complex as possible is one of the most common mistakes of novice developers. I could not avoid this problem.
Finally, I want to show you the gameplay video from the game. On it you can roughly estimate what happened in the end.
I hope the article was useful to you in some way, or at least it would be interesting for you to learn the history of the development of the next small game.
Link to build:
yadi.sk/d/j-v8WoyCiaNuQ
Link to the GitHub repository (Raw code, after the contest almost did not rule, and since everything was written in a great hurry, there are plenty of pearls)
github.com/TxN/TWG6-Spacesim
The name is that part of the game, the work on which was postponed to the very last moment. In the end, nothing worthwhile to come up with, unfortunately, failed.
Genre, setting and plot
It all started pretty standard, the competition, the topic - “Choice” (treat as you like, called), the term is two weeks. I suffer a slight rejection of 2D games, so the question of 2D / 3D was not at all. With the genre and the setting it was already more difficult, it was decided to build on two favorite games, after which more than one hundred hours were spent - “Space Rangers” and “Mechanoids”. So I decided on the genre - a game built on the mechanics of Elite, of course, heavily curtailed. The logical setting for this genre was Sci-fi, the place of action is space, because in two weeks to create minimally decent “ground levels” is very problematic.
To minimize the required amount of content, it was decided to abandon the generated planetary systems, and from any scale in general. The whole game takes place within one asteroid belt, divided into several sectors, the number of points of interest is minimal. But such a decision left time for other aspects of the game, if you delve into the elaboration of the world, there will be no time left for everything else.
')
On the first day, a sketch of the interface was born and a set of features that were implemented in the next 14 days.
I acted even more barbarically with the plot (in vain, as it turned out later) - the first idea about mysterious invaders who encroached on the asteroid belt, in which the base of the GG was located, was taken as a basis. Thinking through the details was left for later, as well as inventing plot tasks.
Ahead was the most important thing - features.
Opportunities
I really wanted to give my all to the maximum, and to realize as many different chips as possible, many of which had only one goal - to please that they were implemented in the game. One of these chips was self-guided missiles. It seems, despite their ability to blow up small enemies with one hit, none of them who played the game so plainly used it. At the same time, the time for their creation was well spent.
In general, the approximate list of basic features looked like this:
- Player controlled spacecraft, with the possibility of customization of weapons
- Several types of weapons that can be hung at different points of the suspension
- The ability to pick up the wreckage of enemies and take them to the bases, getting paid for it
- Several sectors, moving between which is made by the hyper-jump
- Guided and unguided weapons
- Several types of opponents, different characteristics
- Ten or two story quests, at least two endings
- Boss, and an important element of the game - the fight with the boss
The list turned out to be quite large, but somehow, all these possibilities were realized in the game with varying degrees of development.
Start: First Models and Movement in the Void
After it was decided with a genre and a set of features, two models were quickly sketched in the 3d editor - the main character's spaceship and one of the opponents.
The primitiveness and cubicity of the ships of the enemies has a plot substantiation.
And now, finally, it was possible to start programming.
The first thing it was decided to implement the movement of the spacecraft and camera.
The movement is implemented quite simply, no inertia and other realistic things. The player's ship is a model with a rigidbody, to which each tick is given angular and translational speeds. To obtain the angular velocity, the displacement vector is taken from the mouse from the center, with each tick the current delta of the mouse movement is added to the displacement, and the vector itself is multiplied by a factor less than 1. A fairly smooth control is obtained, with the illusion of a small inertia of the ship.
For translational motion, it is still easier - the ship moves in the direction of the local “forward”, the speed gradually increases or decreases when you press the W / S keys.
With the camera, everything turned out pretty simple too. Tying a camera to the ship in the forehead is a bad idea, so the camera and the ship are not connected, but for the camera there is a target point behind-the top of the ship to which it is aiming, and target angles of rotation. The current and target points are interpolated, thereby creating a “smooth tracking camera” effect.
To give a sense of speed, with the acceleration of the ship, the camera's field of view slightly increases, and when it slows down, it slows down.
It can be seen how the ship twitches unpleasantly. This was cured by the inclusion of interpolation in the settings of the Rigidbody ship.
Fill the void
Moving in an empty black space is somehow uninteresting. Therefore, the next step was to fill the space with objects.
Since the asteroid belt was the setting for the setting of the game, the problem was solved very simply - in a space of several tens of cubic kilometers a couple of hundreds of asteroids were scattered at random. Seed for random generation was saved in advance, so you could not worry about the fact that the base or quest object will be inside the asteroid.
It looks like this from a distance.
For more "liveliness" and dynamism, in addition to large asteroids, small, and "star dust" were added. These little things were no longer generated throughout the location, but were created directly around the moving ship.
Asteroid Trivial Code
public class MiniAsteroids : MonoBehaviour { private Transform tx; private GameObject[] asteroids = new GameObject[155]; public GameObject[] prefabs = new GameObject[2]; public int asteroidsMax = 100; public float asteroidSize = 1; public float asteroidDistance = 10; public float asteroidClipDistance = 1; private float asteroidDistanceSqr; private float asteroidClipDistanceSqr; private ParticleSystem pSystem; private int updateEvery = 5; private int counter = 0; GameObject root; void Start() { root = new GameObject(); root.transform.position = Vector3.zero; root.name = "Small Asteroid Field"; tx = transform; asteroidDistanceSqr = asteroidDistance * asteroidDistance; asteroidClipDistanceSqr = asteroidClipDistance * asteroidClipDistance; pSystem = GetComponent<ParticleSystem>(); } private void CreateStars() { for (int i = 0; i < asteroidsMax; i++) { asteroids[i] = Instantiate(prefabs[Random.Range(0, prefabs.Length - 1)]) as GameObject; asteroids[i].transform.position = Random.insideUnitSphere * asteroidDistance + tx.position; asteroids[i].transform.parent = root.transform; asteroids[i].GetComponent<Rigidbody>().angularVelocity = Random.insideUnitSphere * 2f; } } void Update() { counter++; if (asteroids[0] == null) CreateStars(); if (counter == updateEvery) { counter = 0; for (int i = 0; i < asteroidsMax; i++) { if ((asteroids[i].transform.position - tx.position).sqrMagnitude > asteroidDistanceSqr) { asteroids[i].transform.position = Random.insideUnitSphere.normalized * asteroidDistance + tx.position; asteroids[i].GetComponent<Rigidbody>().velocity = Vector3.zero; } } } } } We arm the ship
The ship of the main character, it was decided to give the opportunity to carry weapons on six points of suspension (two or four points is too undignified for a heavily armed fighter). Arms attachment points were set using dummy GameObjects, the number of points for the suspension was hard-coded (yes, I confess). In this case, the suspension points were divided into two types - the main weapon and auxiliary. The difference was essentially one thing - the weapon on the main slots was activated on the paintwork material, and on additional slots - on the gap. With the ship, the weapon interacted fairly limitedly - through an interface that provides access to the main functions, which made it quite easy to add new types of weapons. In addition, as it was developed, several more functions were added to it, which are responsible for its appearance in the store and hangar interface.
Interface
interface IWeapon { void Shoot(Transform target); void Refill(); int GetAmmoNum(); void SetAmmoNum(int n); Vector3 GetJointOffset(); string GetWeaponName(); string GetWeaponTitle(); string GetWeaponDesc(); int GetWeaponPrice(); Vector3 GetGUIRotation(); Vector3 GetGUIScale(); } One of the first screenshots of a ship with a suspended weapon
In total, five types of weapons were made: Double-barreled gun, Laser, unguided missiles, heavy homing torpedo, homing missile.
The self-guided missile, for greater accuracy, calculated the lead point, with the assumption that the target would move in the same direction at the same speed. As a rule, this was enough for a rocket to hit a moving target with a rather high probability.
Guided missile script code
public class GuidedRocket : MonoBehaviour { public float selfDestructTime = 5f; public float safetyDelay = 0.5f; public float damageRadius = 6f; public int damage = 120; public float acceleration; public float steerCoef = 0.09f; float maxSpeed = 10f; public Collider col; bool armed = false; public Transform smoke; public GameObject explosion; public GameObject target; Vector3 estimatedPosition; Vector3 targetVelocity; Rigidbody targetBody; public Vector3 fwd = -Vector3.up; public Vector3 fixAngle = new Vector3(-90, 0, 0); float startSpeed; bool first = true; Rigidbody body; public LayerMask hitMask; void Start() { Invoke("SelfDestruct", selfDestructTime); Invoke("Arm", safetyDelay); body = GetComponent<Rigidbody>(); } void FixedUpdate() { if (first) { first = false; startSpeed = transform.InverseTransformDirection(GetComponent<Rigidbody>().velocity).magnitude; maxSpeed = startSpeed * 2; if (target != null) { targetBody = target.GetComponent<Rigidbody>(); } } Vector3 fwdDir = transform.TransformDirection(fwd); if (armed) { startSpeed += Time.deltaTime * acceleration; if (target != null) { Vector3 enemyPos = target.transform.position; Vector3 dir = enemyPos - transform.position; if (targetBody != null) { float distance = dir.magnitude; Vector3 tgVel = targetBody.velocity; estimatedPosition = target.transform.position + (distance / startSpeed) * tgVel; // dir = estimatedPosition - transform.position; } else { } Quaternion targetRotation = Quaternion.LookRotation(dir) * Quaternion.Euler(fixAngle); body.MoveRotation(Quaternion.Lerp(transform.rotation, targetRotation, steerCoef)); } } body.velocity = Vector3.Lerp(body.velocity,fwdDir * startSpeed , 0.5f); } void SelfDestruct() { smoke.parent = null; smoke.gameObject.AddComponent<Autodestruction>().Set(5f); smoke.gameObject.GetComponent<ParticleSystem>().enableEmission = false; explosion.transform.parent = null; explosion.SetActive(true); Destroy(this.gameObject); } void Arm() { armed = true; col.enabled = true; } void OnTriggerEnter(Collider col) { if (armed) { Debug.Log(col.gameObject.name); foreach (Collider c in Physics.OverlapSphere(transform.position, damageRadius)) { if (c.GetComponent<Rigidbody>()) { c.GetComponent<Rigidbody>().AddExplosionForce(20, this.transform.position, damageRadius); c.GetComponent<Rigidbody>().AddTorque(new Vector3(Random.Range(-30f, 30f), Random.Range(-30f, 30f), Random.Range(-30f, 30f))); } if (c.gameObject.GetComponent<IDamageReciever>() != null) { c.gameObject.GetComponent<IDamageReciever>().DoDamage(damage); } } CancelInvoke("SelfDestruct"); SelfDestruct(); } } } Below is a video of the work of two types of weapons. Also on the video you can see the effect of the destruction of the enemy, but since it is quite simple, I will not dwell on it separately.
Interface
The time spent on the interface unexpectedly turned out to be very significant, it took at least three days of work to develop the interface. The UI system, which appeared in Unity 4.6, was used, in my opinion, very convenient and quite simple to learn.
The most difficult part of the work on the interface was the base interface, it was necessary to implement a fairly large functionality. Dialogues, buying / selling weapons, selling items from the hold, repairs. As cargo / weapon icons, their models were used in an orthogonal projection, because the time for drawing icons was simply not enough. A small description was made for each item, telling the player what it is before him.
The first version of the interface, the curve, without the tasks tab
Later, the interface was finalized graphically (thanks to the person who helped me with sprites for him, I myself could never do that), and began to look noticeably prettier and neater.
The final version, the essence is the same, but more pleasant to the eye.
Flight interface was easier. The player with him in fact does not interact, and in itself he is dovalno minimalist. For progress bars, a regular sprite was used, cut by Unity into 9 parts and stretched horizontally, very simply and quite nicely. With curved bars to the side of the sight all the more difficult. Just stretching the sprite on one of the axes will not work out anymore, you need to use a more complex solution. A simple shader with one parameter was written - clipping height. It was set from a script, and in accordance with it the sprite was drawn with the necessary filling.
Shader code
Shader "Custom/CrosshairShader" {
Properties {
_MainTex ("Base (RGB)", 2D) = "white" {}
_Angle ("Angle (Float)", Float) = 0
_Color ("Tint", Color) = (1.0, 0.6, 0.6, 1.0)
}

SubShader {
Tags{"Queue" = "Transparent" }
Pass {
Blend SrcAlpha OneMinusSrcAlpha
CGPROGRAM
#pragma vertex vert_img
#pragma fragment frag

#include "UnityCG.cginc"

uniform sampler2D _MainTex;
uniform float _Angle;
uniform fixed4 _Color;

float4 frag(v2f_img i) : COLOR
{
float4 result = tex2D(_MainTex, i.uv);
float angle = i.uv.y;

if(angle > _Angle)
{
result.a = 0;
}

return result*_Color;
}
ENDCG
}
}
}
Flight Interface Screenshot:
The screenshot shows a half-filled health indicator in the center of the screen.
Opponents
In my opinion, one of the weak points of the game. They have only one tactic - to fly after the player, if he is in their sight, and having approached at a distance of opening fire, start shooting. Despite this, in large numbers even such enemies pose a serious danger.
Of course, in addition to the above behavior, they also had auxiliary functions. For example, having lost sight of the player, they flew to the last point where they saw him, and not finding him there, they began to randomly wander or return to the starting point. And also, they sometimes avoided collisions with asteroids, but only if they flew not too fast. The full state machine for AI opponents was not implemented this way, the AI script ran a pass every 0.1 seconds, in which it decided what the enemy would do in the next 0.1s. Because of this, in order to achieve more or less tolerable behavior, we had to get a lot of additional variables describing the state of AI.
The main boss was completely defenseless and relied only on a huge number of his minions.
Quests
Before that I had never done a quest system, so I didn’t even have any idea where to start. But there was no time to talk or look for lessons - it was necessary to act, because there was a second week! As a result, a very ugly system was born with a hard-nosed list of quests (to add a new quest, it was necessary to prescribe its name in the variables of the Main Quest Script, increase the number of quests by one, and prescribe the quest to which database it belongs to). pieces), and with other signs of jumping on a rake.
Dialogues were saved in xml, for their editing a simple editor was even made in the same place, in Unity.
The editor is probably the best part of the quest system.
The quests themselves were made by the prefabs, who instanced when the quest was activated and were deleted after receiving the reward. It's crooked, but it worked. On the system of quests, writing dialogues and quests themselves took another three days. The term was coming to an end.
Other stuff
I would like here to list the various chips that are unworthy of a separate section, but which nevertheless want to tell.
Perhaps I'll start with the effect of hyper-jump. How it looks, you can see below.
It is implemented very simply. First we start the sound, start shaking the camera, show a slightly enlarged model of the same ship over the main model, but with the texture of the “energy field”, then animate it using the Animation Curves, and just before the jump, launch the flash particle system and hide the main model . It seems to me that for the “low-budget” effect it turned out quite well.
I also want to say a few words about the save system. Oddly enough, she is present in the game. The .xml file with the player's name is saved in the game folder, the player's name itself is saved in PlayerPrefs (in the registry). Theoretically, you can even use several saves, changing the player's name in the main menu. Saving is automatic, after each completed quest.
It is implemented extremely simply: the SaveInfo class was created, where all the necessary parameters of the game state are saved, the class implements two methods: Load () and Save (), which serialize / deserialize the data into the xml file using standard C # tools.
Load and Save
public void Save(string path) { var serializer = new XmlSerializer(typeof(SaveInfo)); using (var stream = new FileStream(path, FileMode.Create)) { serializer.Serialize(stream, this); stream.Close(); } } public static SaveInfo Load(string path) { var serializer = new XmlSerializer(typeof(SaveInfo)); using (var stream = new FileStream(path, FileMode.Open)) { return serializer.Deserialize(stream) as SaveInfo; } } Everything, nothing else needs to be done, it remains only to disassemble the fields of this class.
Save file
<?xml version="1.0" encoding="windows-1251"?> <SaveInfo xmlns:xsi="http://www.w3.org/2001/XMLSchema-instance" xmlns:xsd="http://www.w3.org/2001/XMLSchema"> <name>Mingebag</name> <money>150</money> <health>460</health> <maxHealth>500</maxHealth> <maxcargo>2500</maxcargo> <maxSpeed>25</maxSpeed> <acceleration>3</acceleration> <yawPitchFactor>1.99</yawPitchFactor> <rollFactor>1.98</rollFactor> <wS1Name>Machinegun</wS1Name> <wS1Num>0</wS1Num> <wS2Name>Machinegun</wS2Name> <wS2Num>0</wS2Num> <auxName> <string>GuidedLauncher</string> <string>NursLauncher</string> <string>NursLauncher</string> <string>GuidedLauncher</string> </auxName> <auxNum> <int>6</int> <int>18</int> <int>18</int> <int>9</int> </auxNum> <spawnInNextScene>false</spawnInNextScene> <spawnPositionIndex>0</spawnPositionIndex> <spawned>true</spawned> <hasActiveQuest>false</hasActiveQuest> <base1QuestNum>0</base1QuestNum> <base2QuestNum>0</base2QuestNum> <InventoryItems> <Item> <name>Equipment3</name> <title> </title> <desc> , .</desc> <weight>300</weight> <quantity>1</quantity> <price>100</price> </Item> <Item> <name>Equipment2</name> <title> </title> <desc> . </desc> <weight>150</weight> <quantity>1</quantity> <price>100</price> </Item> <Item> <name>Debris</name> <title> </title> <desc> . </desc> <weight>50</weight> <quantity>1</quantity> <price>10</price> </Item> </InventoryItems> </SaveInfo> So, if you are too lazy to go through the game, you can conjure up with saving and speed up progress, or put a weapon more powerful.
Separately, I would like to thank the kind people who, during the development process, volunteered to help me with graphic content for the game. Considering its quantity (several dozens of models alone), I doubt that I could manage to make it in time, I don’t have to say about quality. As a result, almost all the graphics in the game (except for two backgrounds and skybox) was created specifically for this game.
Results
Since the end of work on the game has already passed more than six months, and it's time to take stock.
I did not take a prize place with this game, apparently I did not get into the trend of pixel art adventure. But while working on the game, a huge amount of invaluable experience and skills was obtained, and the bumps from the overtaken rake will remind me for a long time that some things should not be done.
Findings:
- It is certainly possible to embrace the immensity, but if you have a tight deadline, then it is better not to, nothing good will come of it.
- The plot in the game is not the last thing, and it is worth working on in advance
- Better fewer implemented features than many buggy ones that a player doesn't necessarily get
- Stupid opponents are good for slashers, for a game with fewer of them it’s better to make them smarter.
- Balance is also important, and time should also be spent on it.
- Optimization is important, and you should think about it in advance.
Of course, many of my conclusions may seem obvious, but sometimes without trying, you will not understand. For example, the desire to make the project as complex as possible is one of the most common mistakes of novice developers. I could not avoid this problem.
Finally, I want to show you the gameplay video from the game. On it you can roughly estimate what happened in the end.
I hope the article was useful to you in some way, or at least it would be interesting for you to learn the history of the development of the next small game.
Link to build:
yadi.sk/d/j-v8WoyCiaNuQ
Link to the GitHub repository (Raw code, after the contest almost did not rule, and since everything was written in a great hurry, there are plenty of pearls)
github.com/TxN/TWG6-Spacesim
Source: https://habr.com/ru/post/279231/
All Articles