Build FreeType library for Android x86 using NDK
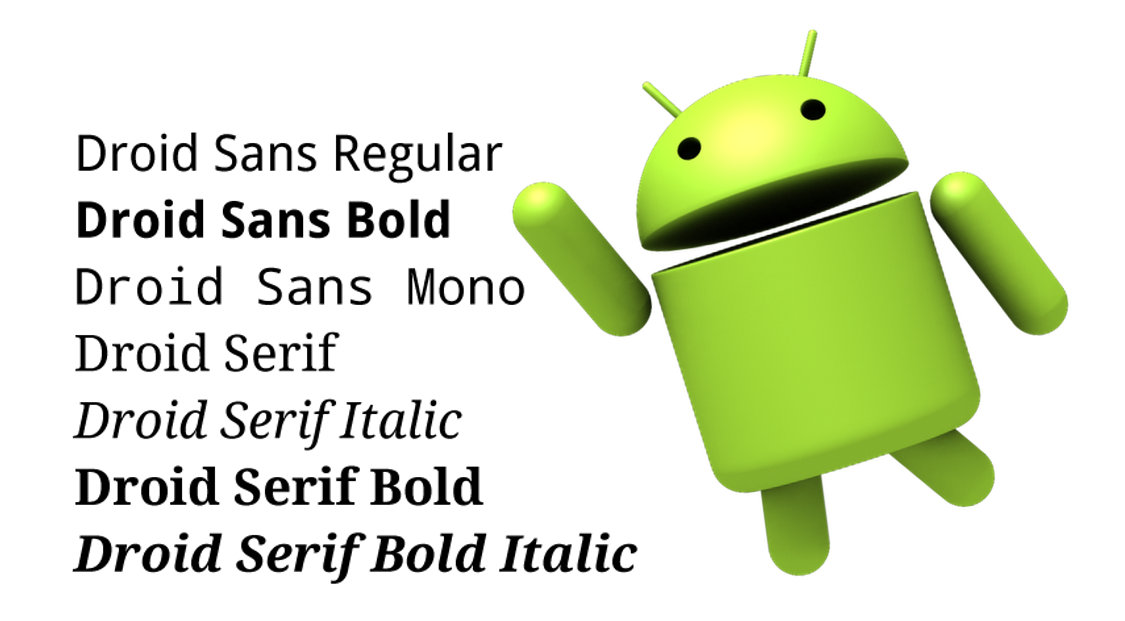
FreeType is a free low-level font library. It is written in ANSI C and is used in a huge number of known projects. In Android, for example. But Android applications do not have direct access to this library. Therefore, if you want to use it in your own project, FreeType will need to be built for the platform you are interested in. We will build it for the x86 platform using NDK tools.
NDK, in addition to building libraries for Android, has other useful features. For example, it can be used to write mobile applications in C and C ++, it also supports many utility functions, such as automatically creating build files and working with the project structure.
You can build libraries for Android in different ways. For example, using the automatic assembly system NDK. Another option is the cross-compilation tools from Cygwin and a separate set of NDK tools.
Here you can find a list of Android libraries that support the x86 platform. And in this article we will describe how, using the Eclipse IDE, to organize the automatic NDK-assembly of the FreeType library.
')
Create a new Android application project in Eclipse and add the jni folder to it.
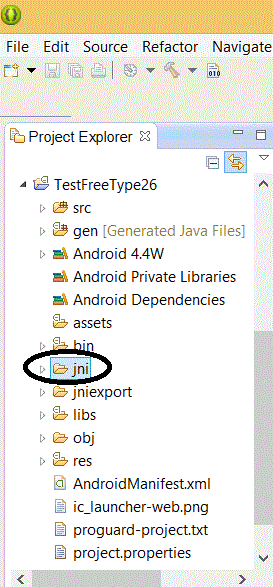
Jni folder in a new Android application project
Now let's download the archive with the FreeType library code. In our case, this is version 2.6. Extract the archive to the jni folder.
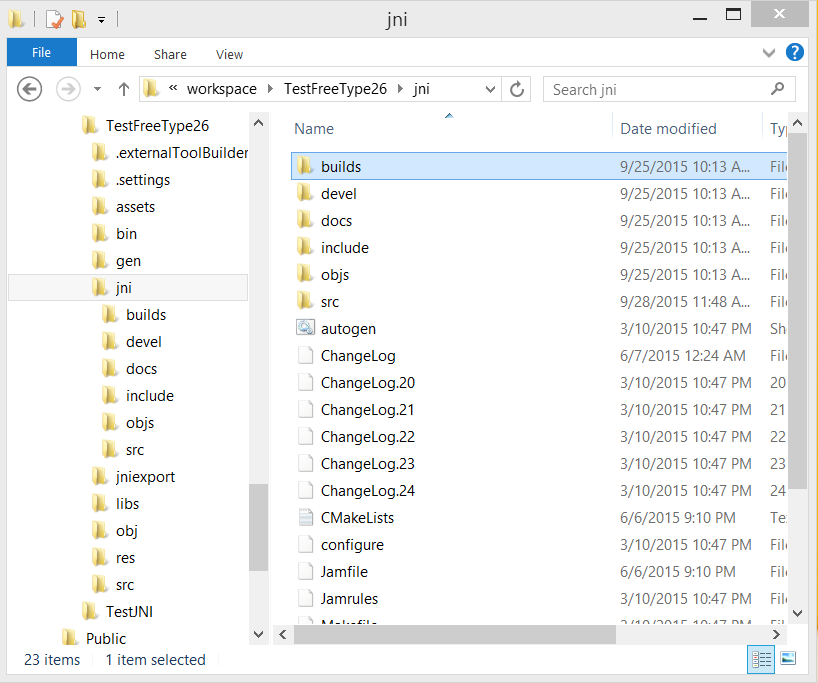
FreeType source code in jni folder
Now we’ll add the Android.mk and Application.mk files to the application project. These files should be located in the jni folder. Adroid.mk is the GNU makefile that the build system handles. This file contains information about the files with the source code of the application and the external libraries required for building the project.
Here you can find details about the syntax of Android.mk and about the features of building Android applications written in C and C ++. Create this file in the jni folder, it is designed to build the FreeType library with all the supported font formats.
Android.mk file
By default, the NDK build system generates machine code for the armeabi architecture. In order to add support for the Intel architecture, we will need to configure the Application.mk file located in the same jni folder. Namely, add “x86” to the APP_ABI variable. The assembly can be carried out simultaneously for several platforms, their identifiers are indicated with a space.
This is what the APP_ABI variable looks like, tuned to two target architectures.
In order to generate machine code for all available instruction sets, you can use the following settings:
The variable APP_PLATFORM contains the name of the target Android platform. Our Application.mk is pretty simple:
Here is what it looks like in the code editor.
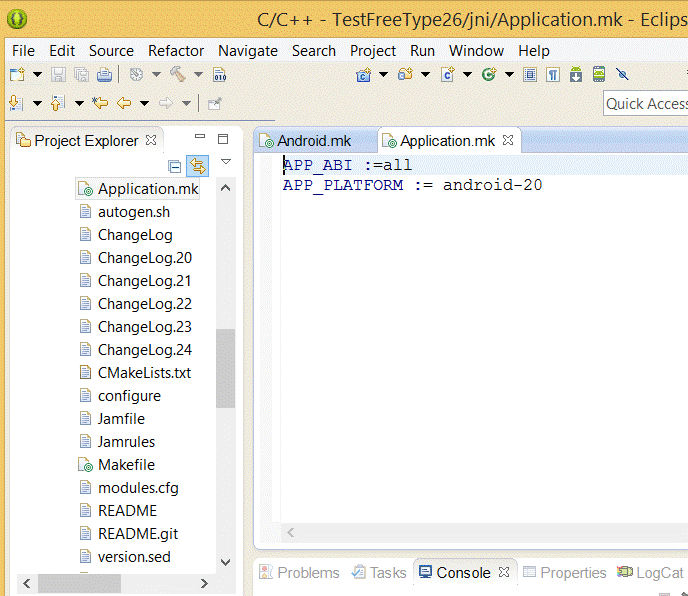
Setting APP_ABI in the Application.mk file
Preliminary preparation is passed, now we will configure automatic assembly of the project with use of NDK. To do this, firstly, set up a list of builders for the project, and secondly, select a specific collector to use in preparing the library.
To do this, right-click on the Android project, select the Properties item in the menu. In order to add a new build system to the list, in the left part of the window that appears, go to the Builders tab, then click on the New button located on the right.
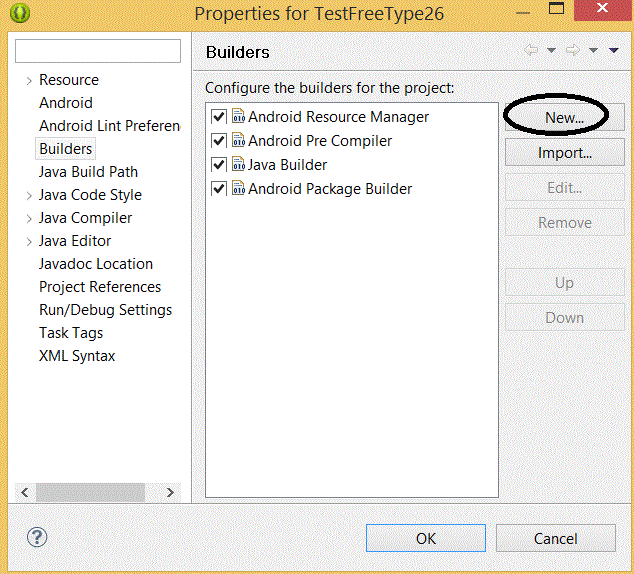
Project Properties
Select Program from the list in the configuration type selection window. This option allows you to specify the location of external tools and exactly how you need to run the scripts that build.
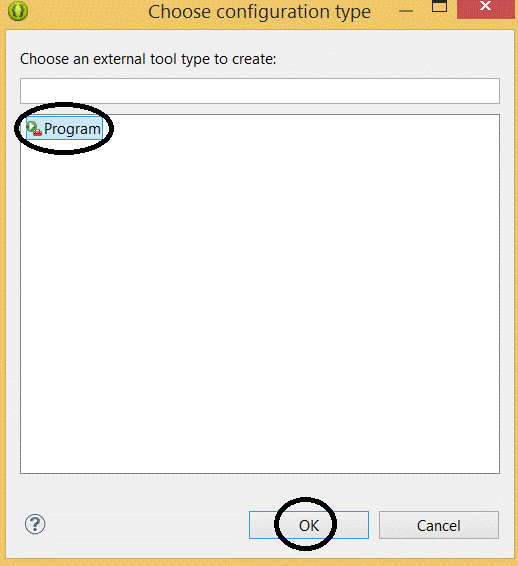
Configuration setting
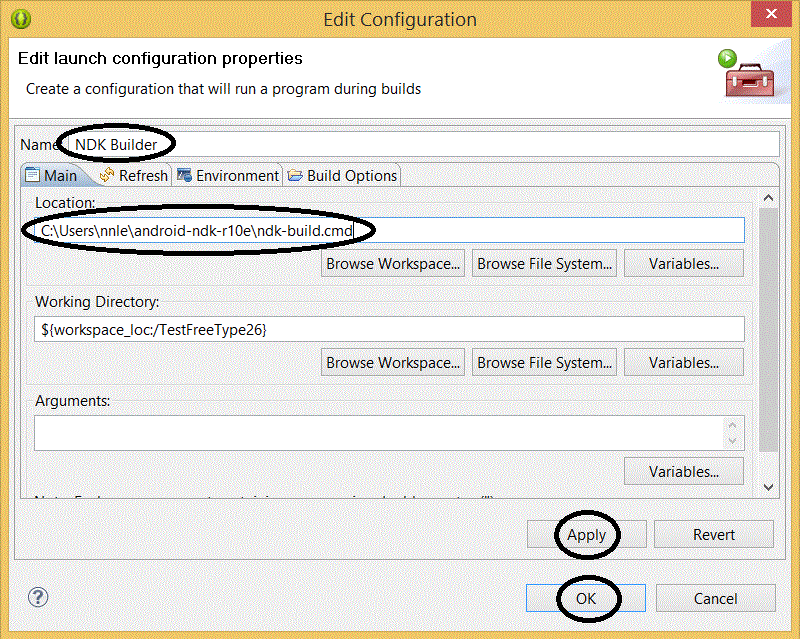
In the window that appears, configure the following fields:
NDK Setup
After completing the above settings, run the project build. When this process is successfully completed, in folders that are named according to the / lib / <APP_ABI> scheme, it will be possible to find library assemblies for the platforms specified in Application.mk. In particular, we are interested in x86 and x86_64 folders.
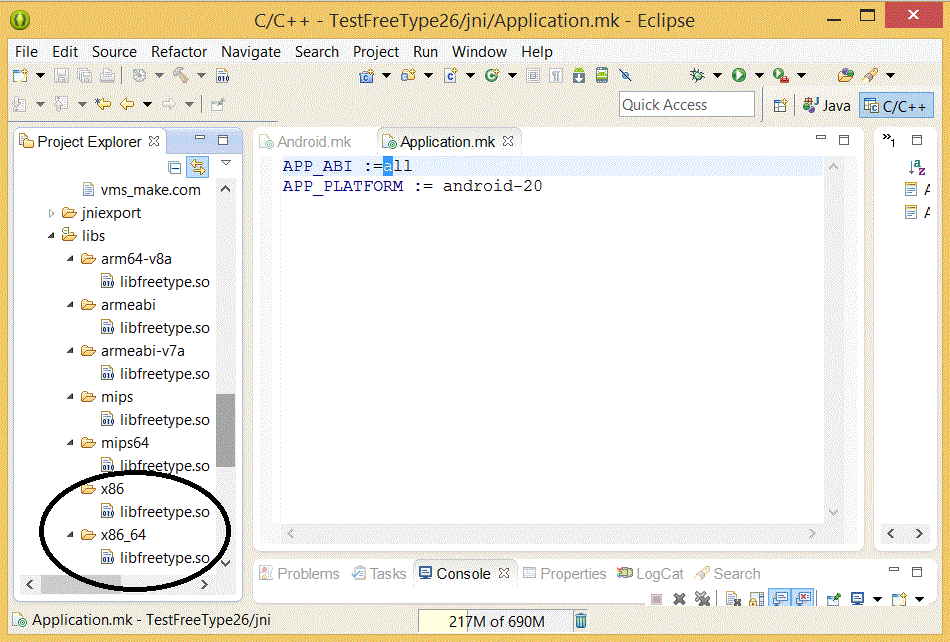
Files libfreetype.so for Android devices built on the x86 platform
The FreeType library is compiled, now you can use it in your own Android applications.
NDK, in addition to building libraries for Android, has other useful features. For example, it can be used to write mobile applications in C and C ++, it also supports many utility functions, such as automatically creating build files and working with the project structure.
You can build libraries for Android in different ways. For example, using the automatic assembly system NDK. Another option is the cross-compilation tools from Cygwin and a separate set of NDK tools.
Here you can find a list of Android libraries that support the x86 platform. And in this article we will describe how, using the Eclipse IDE, to organize the automatic NDK-assembly of the FreeType library.
')
Setting up the project and build the library
Create a new Android application project in Eclipse and add the jni folder to it.
Jni folder in a new Android application project
Now let's download the archive with the FreeType library code. In our case, this is version 2.6. Extract the archive to the jni folder.
FreeType source code in jni folder
Now we’ll add the Android.mk and Application.mk files to the application project. These files should be located in the jni folder. Adroid.mk is the GNU makefile that the build system handles. This file contains information about the files with the source code of the application and the external libraries required for building the project.
Here you can find details about the syntax of Android.mk and about the features of building Android applications written in C and C ++. Create this file in the jni folder, it is designed to build the FreeType library with all the supported font formats.
Android.mk file
LOCAL_PATH := $(call my-dir) include $(CLEAR_VARS) FREETYPE_SRC_PATH := LOCAL_MODULE := freetype LOCAL_CFLAGS := -DANDROID_NDK \ -DFT2_BUILD_LIBRARY=1 LOCAL_C_INCLUDES := $(LOCAL_PATH)/include_all \ $(FREETYPE_SRC_PATH)include \ $(FREETYPE_SRC_PATH)src LOCAL_SRC_FILES := \ $(FREETYPE_SRC_PATH)src/autofit/autofit.c \ $(FREETYPE_SRC_PATH)src/base/basepic.c \ $(FREETYPE_SRC_PATH)src/base/ftapi.c \ $(FREETYPE_SRC_PATH)src/base/ftbase.c \ $(FREETYPE_SRC_PATH)src/base/ftbbox.c \ $(FREETYPE_SRC_PATH)src/base/ftbitmap.c \ $(FREETYPE_SRC_PATH)src/base/ftdbgmem.c \ $(FREETYPE_SRC_PATH)src/base/ftdebug.c \ $(FREETYPE_SRC_PATH)src/base/ftglyph.c \ $(FREETYPE_SRC_PATH)src/base/ftinit.c \ $(FREETYPE_SRC_PATH)src/base/ftpic.c \ $(FREETYPE_SRC_PATH)src/base/ftstroke.c \ $(FREETYPE_SRC_PATH)src/base/ftsynth.c \ $(FREETYPE_SRC_PATH)src/base/ftsystem.c \ $(FREETYPE_SRC_PATH)src/cff/cff.c \ $(FREETYPE_SRC_PATH)src/pshinter/pshinter.c \ $(FREETYPE_SRC_PATH)src/pshinter/pshglob.c \ $(FREETYPE_SRC_PATH)src/pshinter/pshpic.c \ $(FREETYPE_SRC_PATH)src/pshinter/pshrec.c \ $(FREETYPE_SRC_PATH)src/psnames/psnames.c \ $(FREETYPE_SRC_PATH)src/psnames/pspic.c \ $(FREETYPE_SRC_PATH)src/raster/raster.c \ $(FREETYPE_SRC_PATH)src/raster/rastpic.c \ $(FREETYPE_SRC_PATH)src/sfnt/pngshim.c \ $(FREETYPE_SRC_PATH)src/sfnt/sfntpic.c \ $(FREETYPE_SRC_PATH)src/sfnt/ttbdf.c \ $(FREETYPE_SRC_PATH)src/sfnt/ttkern.c \ $(FREETYPE_SRC_PATH)src/sfnt/ttload.c \ $(FREETYPE_SRC_PATH)src/sfnt/ttmtx.c \ $(FREETYPE_SRC_PATH)src/sfnt/ttpost.c \ $(FREETYPE_SRC_PATH)src/sfnt/ttsbit.c \ $(FREETYPE_SRC_PATH)src/sfnt/sfobjs.c \ $(FREETYPE_SRC_PATH)src/sfnt/ttcmap.c \ $(FREETYPE_SRC_PATH)src/sfnt/sfdriver.c \ $(FREETYPE_SRC_PATH)src/smooth/smooth.c \ $(FREETYPE_SRC_PATH)src/smooth/ftspic.c \ $(FREETYPE_SRC_PATH)src/truetype/truetype.c \ $(FREETYPE_SRC_PATH)src/type1/t1driver.c \ $(FREETYPE_SRC_PATH)src/cid/cidgload.c \ $(FREETYPE_SRC_PATH)src/cid/cidload.c \ $(FREETYPE_SRC_PATH)src/cid/cidobjs.c \ $(FREETYPE_SRC_PATH)src/cid/cidparse.c \ $(FREETYPE_SRC_PATH)src/cid/cidriver.c \ $(FREETYPE_SRC_PATH)src/pfr/pfr.c \ $(FREETYPE_SRC_PATH)src/pfr/pfrgload.c \ $(FREETYPE_SRC_PATH)src/pfr/pfrload.c \ $(FREETYPE_SRC_PATH)src/pfr/pfrobjs.c \ $(FREETYPE_SRC_PATH)src/pfr/pfrsbit.c \ $(FREETYPE_SRC_PATH)src/type42/t42objs.c \ $(FREETYPE_SRC_PATH)src/type42/t42parse.c \ $(FREETYPE_SRC_PATH)src/type42/type42.c \ $(FREETYPE_SRC_PATH)src/winfonts/winfnt.c \ $(FREETYPE_SRC_PATH)src/pcf/pcfread.c \ $(FREETYPE_SRC_PATH)src/pcf/pcfutil.c \ $(FREETYPE_SRC_PATH)src/pcf/pcfdrivr.c \ $(FREETYPE_SRC_PATH)src/psaux/afmparse.c \ $(FREETYPE_SRC_PATH)src/psaux/psaux.c \ $(FREETYPE_SRC_PATH)src/psaux/psconv.c \ $(FREETYPE_SRC_PATH)src/psaux/psobjs.c \ $(FREETYPE_SRC_PATH)src/psaux/t1decode.c \ $(FREETYPE_SRC_PATH)src/tools/apinames.c \ $(FREETYPE_SRC_PATH)src/type1/t1afm.c \ $(FREETYPE_SRC_PATH)src/type1/t1gload.c \ $(FREETYPE_SRC_PATH)src/type1/t1load.c \ $(FREETYPE_SRC_PATH)src/type1/t1objs.c \ $(FREETYPE_SRC_PATH)src/type1/t1parse.c\ $(FREETYPE_SRC_PATH)src/bdf/bdfdrivr.c\ $(FREETYPE_SRC_PATH)src/bdf/bdflib.c\ $(FREETYPE_SRC_PATH)src/gzip/ftgzip.c\ $(FREETYPE_SRC_PATH)src/lzw/ftlzw.c \ LOCAL_LDLIBS := -ldl -llog include $(BUILD_SHARED_LIBRARY) By default, the NDK build system generates machine code for the armeabi architecture. In order to add support for the Intel architecture, we will need to configure the Application.mk file located in the same jni folder. Namely, add “x86” to the APP_ABI variable. The assembly can be carried out simultaneously for several platforms, their identifiers are indicated with a space.
This is what the APP_ABI variable looks like, tuned to two target architectures.
APP_ABI := armeabi-v7a x86 # : x86_64, armeabi, arm64-v8a, mips, mips64 In order to generate machine code for all available instruction sets, you can use the following settings:
APP_ABI := all # all32 all64 The variable APP_PLATFORM contains the name of the target Android platform. Our Application.mk is pretty simple:
APP_ABI :=all APP_PLATFORM := android-20 Here is what it looks like in the code editor.
Setting APP_ABI in the Application.mk file
Preliminary preparation is passed, now we will configure automatic assembly of the project with use of NDK. To do this, firstly, set up a list of builders for the project, and secondly, select a specific collector to use in preparing the library.
To do this, right-click on the Android project, select the Properties item in the menu. In order to add a new build system to the list, in the left part of the window that appears, go to the Builders tab, then click on the New button located on the right.
Project Properties
Select Program from the list in the configuration type selection window. This option allows you to specify the location of external tools and exactly how you need to run the scripts that build.
Configuration setting
In the window that appears, configure the following fields:
- Name: the name of the new collector
- Location: path to ndk-build.cmd
- Working Directory: path to our project folder
NDK Setup
After completing the above settings, run the project build. When this process is successfully completed, in folders that are named according to the / lib / <APP_ABI> scheme, it will be possible to find library assemblies for the platforms specified in Application.mk. In particular, we are interested in x86 and x86_64 folders.
Files libfreetype.so for Android devices built on the x86 platform
Results
The FreeType library is compiled, now you can use it in your own Android applications.
Source: https://habr.com/ru/post/278603/
All Articles