Wifi-radio with a warm lamp display. Part 1. Display
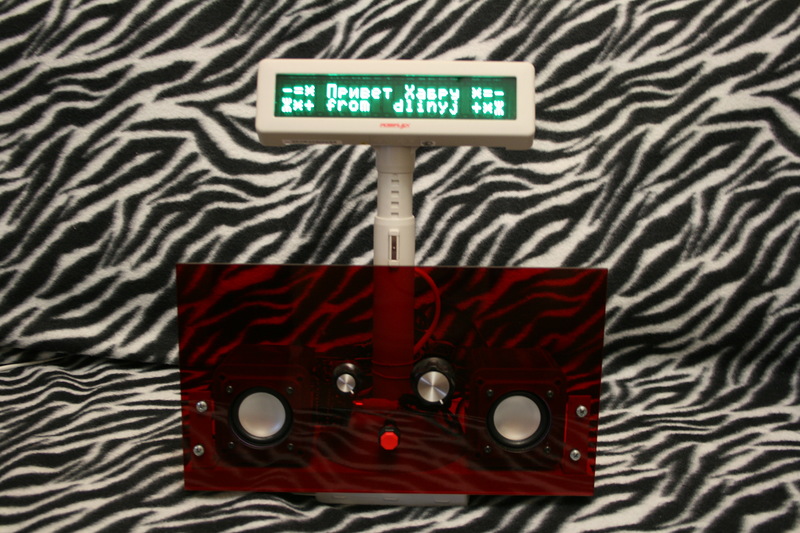
Like many, I like to listen to music from various Internet radio stations. And long ago I decided to make a wifi-radio for myself. At first it was replaced by smartphones, tablets, but I wanted something stationary, original, my own. Plus, I wanted something lamp and linux. This is on sale, of course, no. Then the idea came to sip such a radio myself.
Remark. I would like to immediately note that this series of articles is incredible long-term construction. For a number of reasons, she could not come out in two years. So do not be scared of dates. Fortunately, I found the strength, energy and enthusiasm to put it out. And I sincerely hope that this will not be the last part.
')
After my post about writing a driver for an lcd display on the lpt-port habrahabr.ru/post/206148 I got sick with displays. However, the Hitachi display that I used in that post is completely outdated and is no longer interesting at all. Therefore, to make on it a unique device would be stupid. Once again, in search of inspiration, I wandered around on ebay, looking at the designs of vintage receivers and displays. And suddenly I stumbled upon a VFD (Vacuum fluorescent display - Vacuum-fluorescent indicator (VLI)), just for crazy money (something like $ 500). I was not ready to pay such a sum, but even then the data screens fell in love. Later I learned from goodic that these screens are used in cash registers and are called “Displays of the buyer”. It became clear what to want and look for.
Customer display
Long roving on the Internet, and reading various documentation, I still decided what I really wanted. My choice fell on the displays of the company "Posiflex." Personally, I settled on two models: the PD-2600 and the PD-2800 . I will take this opportunity and bring words of gratitude to ATOL for these models. The main difference between them in the method of connecting to a computer and power supply. An external power supply is required for the first display to work, and it is connected via the computer's COM port. The second display is connected via USB and takes power from it. For the rest, the difference between them ends. Despite the USB-interface - this display does not differ in the principle of operation from the PD-2600. The USB interface of this display is simply a wrapper for virtual COM port and power.
It should be noted that the color of the glow of these displays is different. I had one green, another blue. As it turned out that the color of the display is determined only by a plexiglass filter. In normal form (without a light filter), it shines almost white (with a greenish tint).
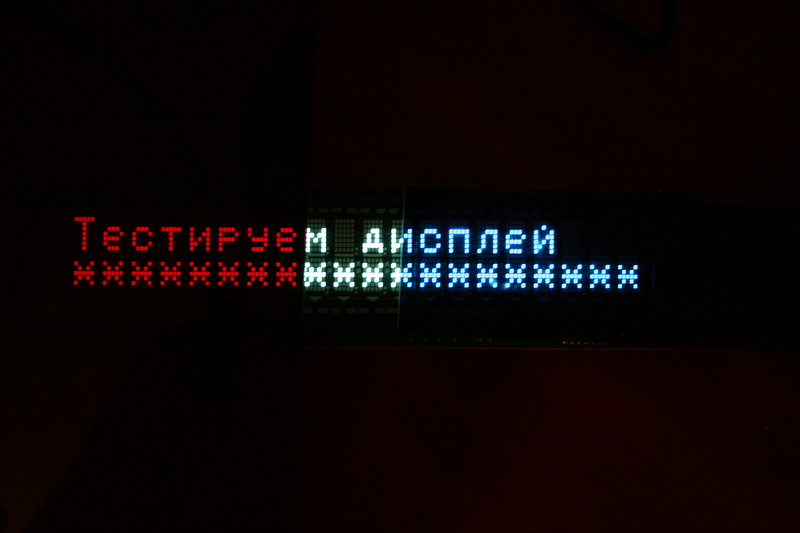
On the left is a piece of orange plexiglass, in the middle is the natural color of the screen, on the right is a native blue light filter.
Displays appeared in my New Year's Eve (from 2013 to 2014), so I didn’t fail to take the opportunity to put congratulations on them :)
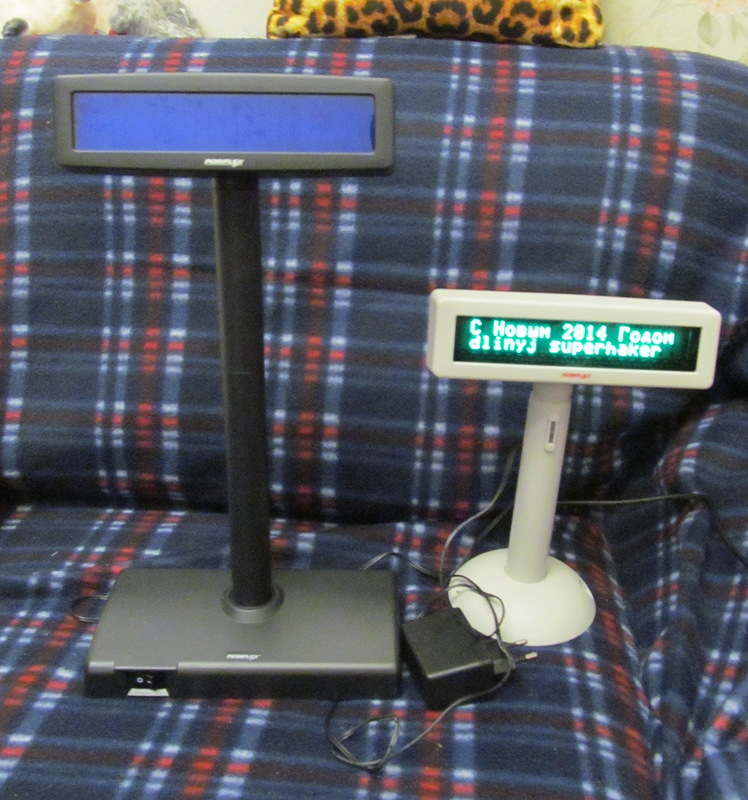
The difference in the appearance of the displays PD-2600 and PD-2800. The inscription is a tribute to the tradition originated during the reading and work in the magazine “Hacker”. Excuse me :)
Of course, all this was vile cheating for sample displays, I did not do anything special. And I just used a ready-made operating system for cash registers based on Linux running on a virtual machine:
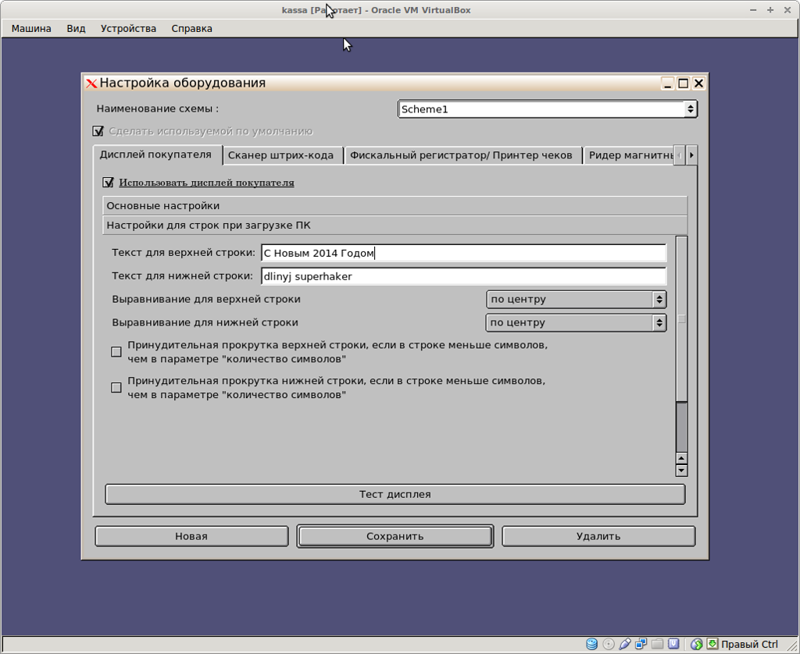
Operating system on virtual
But, to display labels through third-party applications, it was boring and I began to figure out how to be friends with him.
How to work with this animal?
When you prepare an article, then occasionally you scour in search of a better description of your task. And on Habré, I came across an article that briefly describes how the author uploaded his fonts to the display. However, it is not said at all about the model, nor about what these teams actually do. Therefore, I will try to describe in human language what we are doing and why, but this post is not a brief retelling of the manuals ( RTFM !). I also note that the topic is so extensive, so as not to chew every step, there will be a format of matan: "it is obvious that ...".
I immediately give a link to the documentation: DOCUMENTATION I draw your attention to the fact that I searched the documentation long and hard, found it on some American Posiflex website. Now she is on the ATOL website (Russian representative office of Posiflex). Documentation from other displays, alas, will not work or will do, but not in all questions (Not all yogurts are equally useful). Below I will explain why.
So, let's go to the snacks. After turning on any of the displays, it will greet us like this:
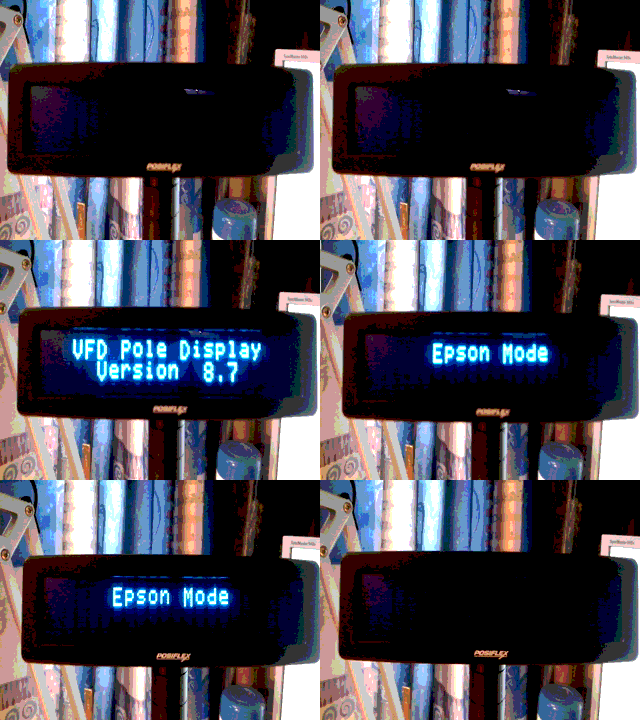
This message tells us that this display is in Epson-compatible instruction mode. This mode is set by switches on the display case, and as a rule, it is by default on all customer displays.
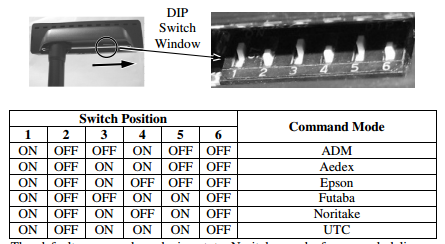
Set the display mode
I pay attention that there are many modes of operation. We will use a command system compatible with Epson displays. The documentation is a section of EPSON EMULATION MODE . “Children ice cream, Baba flowers. Look not confused "(with)
In this mode, the display is controlled by ESC-sequences almost like a vt52-terminal (however, compatibility is not complete).
A few words about the interface
To make it easier to understand what we are doing and why, I’ll remind you that this was described in great detail in his article “ Creating Your Own Linux Drivers ”. There is a FAQ spoiler (look through the search), and it shows beautifully what and how it works, and for what, what commands. To make it clear in that article "\ 033" is equivalent to writing "\ x1B" in this article (one in the octal system, the second in hex)
Let's play around with the display from the command line. We will not connect much programming. For today's article this will be headlong. We assume that the PD-2600 display is connected via a USB adapter and is seen by the system as / dev / ttyUSB0. The same will work with the PD-2800 display, only it will be defined as / dev / ttyACM0.
To begin, set the speed of work. By default, the speed of the COM port (on both displays) is 9600. This speed is also set by switches.
stty 9600 < /dev/ttyUSB0 And after this "very difficult team" we can test.
echo -en "Hello world" > /dev/ttyUSB0 
Severe hardware greetings to the world.
Everything on this narrative can end. Hello world a success. But in fact, not everything is so simple. This display supports the Great and Mighty Russian language. But it does it in a very peculiar way. To work with the Russian language, according to the documentation you need to select a code table. If this is not done, then the output will be such parsley.
echo -en " \n dlinyj" > /dev/ttyUSB0 
To enable the Russian Cyrillic code page, the following command should be given:
echo -en "\x1B\x74\x06" > /dev/ttyUSB0 Then we try to display our text again.
echo -en " \n dlinyj" > /dev/ttyUSB0 And-and-and-and, again we are waiting for a bummer ...

So what's the deal? The problem turned out to be simple, but it took me two days to dock it. Everything is elementary - the problem of encodings. Praise to the comrade goodic for suggesting the correct encoding to me. As a result, we get a long-suffering team that will code our text into Russian and display it on the screen.
echo -en " \n dlinyj" | iconv -f UTF-8 -t CP866 > /dev/ttyUSB0 
In fact, I lowered the detail that every time I disconnected the power of the display, reinitialized the COM port and gave these commands. But there are still many tasty teams. Such as: cursor shift, clearing the screen, placing the cursor home, etc. Some commands are compatible with vt52. If you list all the commands from the documentation, it will look like this:

Now, according to science, in order to display “Hi Habra”, you need to do the following. The English signature corresponds to the name of the command in the table above, for convenience.
stty 9600 < /dev/ttyUSB0 # - echo -en "\x1B\x74\x06" > /dev/ttyUSB0 # Select character code page table. (№6). echo -en "\x1B\x40" > /dev/ttyUSB0 #Initialize display. . ( ). echo -en " \n dlinyj" | iconv -f UTF-8 -t CP866 > /dev/ttyUSB0 #iconv UTF-8 CP866. As we can see, the teams allow you to do various very tasty things. For example, you can use the commands to turn on and off the comma (period) on the screen. For example.
echo -en "\x1F," > /dev/ttyUSB0 # echo -en "\x1F." > /dev/ttyUSB0 # She has a separate place. But I have never seen anyone use this opportunity. As a rule, everyone just uses a single point under the point. There is also an underscore character. In general, the display does not cook soup. I will not demonstrate all the features of the display in photos, especially since this task is not rewarding. In a post about the driver, this huge spoiler was read by only a few people.
For me, the most important thing about these displays is the loading of custom fonts. We will talk about them below.
Connecting heavy artillery. Custom fonts.
The coolest thing about these displays is the support for custom fonts. However, I can disappoint that the further description only applies to the PD-2600 and PD-2800 display models. Even within the same firm, the syntax of the font download commands is different. And personally I had a lot of rakes, using the documentation for the early versions of the displays of this company. Unfortunately, I don’t understand why everyone invents a bicycle in such a simple place, and they don’t accept a single standard, even if only within one enterprise.
The problem of finding developer documentation for these displays was very serious. There is a lot of general information, but it was very difficult to find developer documentation (2013-2014 year). I will briefly describe my thorny path, perhaps someone will follow it.
Initially, the documentation that the programmer managed to find was the documentation on the PD2100 / 2200 display. The peculiarity of loading a symbol is that there are a lot of dots in a symbol, and the map of symbols looks like this:

Character Map
According to the documentation, the symbol is loaded with the command: <1B> <26> ~ (Epson mode and then we only talk about it). Where ad is the number of the character to be loaded, and x1 - x5 are five bytes of the character map, according to the table:

Point table in byte, for PD2100 / 2200 display
It has been established by experience that the characters are loading (at least thanks), but this table does not correspond to the PD-2600 display! Developers, please note that the displays are NOT interchangeable in terms of commands! With great difficulty, I managed to find developer documentation for the PD-2600 display. There the table of points looks like this:

The table of points in the byte for the display PD2600 / 2800
The transcoding of the character turns into that still rebus, but quite solvable.
It also turned out that only two user characters can be loaded; if you load more, the previous characters are reset to their default values! The only thing is that the character displayed on the screen does not change its shape, so you can display characters and reload it with a new value (which is very inconvenient).
We stop whining, and let's consider an example of displaying the vertical bar symbol. Draw it and translate according to the table.

Character transcoding
We get this picture:
X1 = 0001 0000b = 0x10
X2 = 0100 0010b = 0x42
X3 = 0000 1000b = 0x08
X4 = 0010 0001b = 0x21
X5 = 0000 0100b = 0x04
Sending to the COM port will look like this (data in hex):
1B 25 01 allow the use of a custom character (Set / cancel user-defined characters). 01 is the symbol 1.
1B 26 A0 10 42 08 21 04 loading of a user character at A0 (Define user defined characters), the last five bytes is the character bit mask.
A0 - type character
So in the console everything will look like this.
To begin, we initialize the display
echo -en "\x1B\x40" > /dev/ttyUSB0 #Initialize display. First, it is necessary to give a command that allows custom fonts.
echo -en "\x1B\x25\x01" > /dev/ttyUSB0 # Set/cancel user-defined characters. Next, load the vertical bar with the following command
echo -en "\x1B\x26\ xA0\x10\x42\x08\x21\x04" > /dev/ttyUSB0 # Define user defined characters The symbol is loaded at position A0, we derive it:
echo -en "\xA0" > /dev/ttyUSB0 As a result, we get:

Drawn character
You can even fill up the screen “fence”, for clarity

Fence
In general, with a reboot of characters, you can do very cool things. For example, a running stick, which is a reboot of five different characters.
For what it's all needed, I will tell in other articles.
Conclusion to the first part
In this part, we looked at the operation of the Posiflex PD-2600 and PD-2800 displays. This post even claims independence; shows an example of working with a customer display. You can even now get such a display (or similar), and make it display useful information for you. Though messages tweeter.
In the future it will be clear why I made such a big emphasis on the display, because It will be a key link in further crafts.
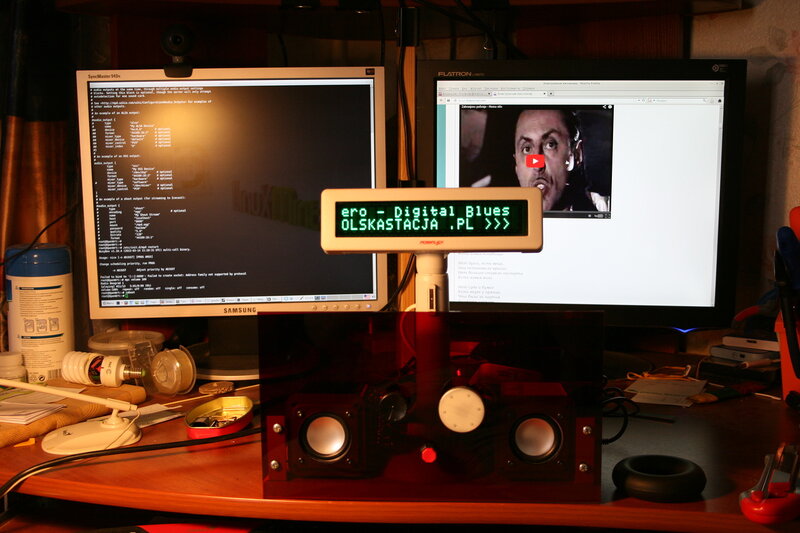
One of the stages of the prototype.
In the following articles we will consider the programming of this display on a warm tube si, work with the router, mpd and many other goodies.
ZY I urge you to write me about all the errors found, inaccuracies, etc. personal message. I will try to fix all errors as quickly as possible !!!
Source: https://habr.com/ru/post/276879/
All Articles