The simplest 3D game on libGDX for Android with 200 lines of code
I teach Samsung IT programming for schoolchildren at the IT school Samsung. The training program covers a wide variety of topics. Among others there is one lesson introducing students to the basics of 3D graphics for Android. The standard study material of this lesson seemed to me very useless for several reasons:
Therefore, I decided to prepare my lesson describing the basics of using libGDX for Android, and since I am still preparing this material, at the same time place it here - on a habr. In this tutorial we will make a simplest 3D game for Android, a screenshot of which you can see in the introduction to the article. So, interested, welcome under cat.
Why libGDX? First, the code should be in Java, because we teach students exactly Java programming. This narrows the choice. Secondly, libGDX was very easy to learn. In my conditions, this is a great advantage that outweighs the other disadvantages.
The idea of the game is very simple: you are a fighter co-pilot responsible for weapons systems. You need to have time to shoot with laser weapons when the engine of the enemy ship is in the crosshairs, while your first pilot tries not to let yourself off the tail. That is, in fact, the gameplay is described by the phrase “click on time”.
In the course of this lesson, we only need Android Studio 1.5 (the version may be different, here I brought the one with which I did it all exactly).
First, we need to download the project creation wizard from libGDX, which greatly simplifies the task of initial setup of the project (you can download it from the link in the instruction on the libGDX project wiki ). Here's what settings I got there:

We import the resulting project in Android Studio and begin the actual work with the code. The main code of the game is in the file MyGdxGame.java (if you called this class just like me). Remove the template code and start writing your own:
Here we create a new camera with a viewing angle of 67 degrees (which is quite often used value) and set the aspect ratio to the width and height of the screen. Then we set the camera position to a point (150, -9, 0) and indicate that it will look at the center of coordinates (since this is where we plan to place the pyramid around which the gameplay will be built). Finally, we call the service update () method so that all our changes are applied to the camera.
')
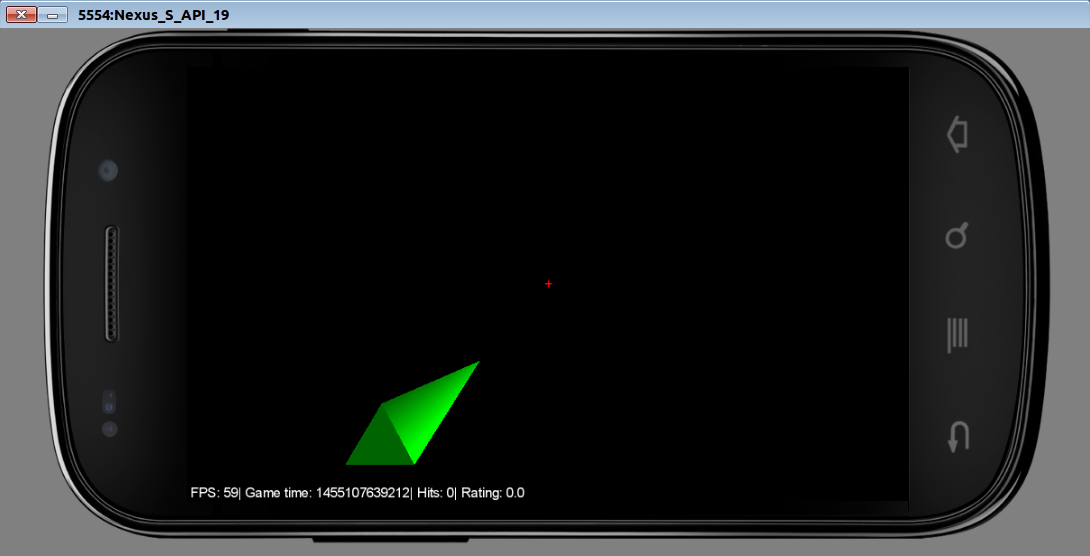
Now you can portray something that we will look at. Of course, we could use some kind of 3D model, but now, in order to simplify the lesson, we will draw only a simple pyramid:
Here we create an instance of ModelBuilder, which is intended for creating models in code. Then we create a simple cone model with dimensions of 20x120x20 and the number of faces 3 (which ultimately gives a pyramid) and ask it the material of green color. When we create a model, you need to set at least Usage.Position. Usage.Normal adds normals to the model, so the lighting can work properly.
The model contains everything you need to draw and manage your own resources. However, it does not contain information on where to draw. So we need to create ModelInstance. It contains information about the location, rotation parameters and scale for drawing the model. The default is drawn to (0, 0, 0) so we simply create a ModelInstance, which will be drawn to (0, 0, 0). But besides, we still call the transform.setToRotation () method to rotate our pyramid by 120 degrees along the Z axis (this is how it can be better seen from the position of the camera).
The model needs to be released after use, so we add some code to our Dispose () method.
Now let's draw our model instance:
Here we add to the create ModelBatch method, which is responsible for drawing and initializing the model. In the render method, we clear the screen, call modelBatch.begin (cam), draw our ModelInstance, and then call modelBatch.end () to complete the rendering process. Finally, we need to free modelBatch to make sure that all the resources (for example, the shaders it uses) are properly freed.

It looks pretty good, but a bit of lighting could improve the situation, so let's add it:
Here we add an instance of Environment. We create it and set the ambient (diffuse) light (0.4, 0.4, 0.4) (note that the transparency value is ignored). Then we create a DirectionalLight (directional light) with a color (0.8, 0.8, 0.8) and a direction (10, 10, 20). I assume that you are already familiar with the sources of illumination in general, although everything is quite obvious here. Finally, during rendering, we transfer the created environment to the model handler.

Since we are still writing the game, it would not hurt to add a little dynamics to the static picture. Let's make the camera move a little with each drawing. Here it is appropriate to say about the life cycle of a libGDX application. At the start, the create () method is called, in which it is appropriate to place all initialization. Then, the render () method is called N times per second, where N is your FPS. This method draws the current frame. Therefore, in order to add dynamics to the application, we just need to somehow change the parameters of our game objects in render ().
Here we create the illusion that our pyramid is moving, although in reality the camera is moving, through which we look at it. At the beginning of the game, in the create () method, the increment value of Vpos [i] is randomly selected for each coordinate (velocity). At each scene redrawing in the render () method, the value of the change step is added to the coordinates. If we go beyond the established boundaries of change of coordinates, then we return the coordinates to these boundaries and generate new speeds so that the camera starts moving in the other direction. cam.position.set () itself sets the camera to new coordinates calculated according to the law described above, and cam.update () completes the process of changing camera parameters.
It can be noted that on different devices the speed of the pyramid will be different due to the difference in FPS and, accordingly, the number of render () calls per second. For good here would add the dependence of the increment of coordinates on the time between frames, then the speed would be the same everywhere. But we will not do this in order not to complicate the project.
Now let's make a game HUD:
Please note that the rotation and shift parameters (translate (x, y, z) method) of the pyramid are changed so that it is located in the center of the screen and is directed to the same place where our camera is looking. That is, at the start of the game we are with the enemy on the same course and we look to him directly into the engines.
Here we create 2 text labels. The label label is designed to display in-game information (FPS, game time and hit statistics). The crosshair label is drawn in red and contains only one character - "+". This shows the player the middle of the screen - his sight. For each of them in the constructor new Label (<TEXT>, new Label.LabelStyle (font, <COLOR>)) a style is defined that includes the font and the color of the label. Labels are passed to the Stage object using the addActor () method, and, accordingly, are drawn automatically when the Stage is drawn.
In addition, for the crosshair label, the setPosition () method sets the position — the middle of the screen. Here we use screen sizes (Gdx.graphics.getWidth (), ... getHeight ()) to calculate where to put our plus sign so that it is in the middle. There is also a small dirty hack: setPosition () sets the coordinates of the lower left corner of the label. So that the plus center is in the center of the screen, I subtract the obtained constants 3 and 9 empirically (that is, at random) from the resulting value. Do not use this approach in full-fledged games. Just a plus sign in the middle of the screen is not serious. If you need a crosshair, you can use sprites .
With each drawing we create the text via StringBuilder, where we put everything that we want to display at the bottom of the screen: FPS, time in the game, number of hits and rating. The setText () method allows you to set the label text, which we do in render () time after time.
True shoot, we can not yet. It's time to fix this flaw.
Notice that the description of the MyGdxGame class has now changed. Here we inherit from InputAdapter and implement the ApplicationListener interface. This structure will allow us to keep our code unchanged, but to supplement it with the ability to handle user input. The create () method adds a string that registers our class as an input handler. We simply have to implement the pause () and resume () methods, since the InputAdapter has it abstract.
The whole hit math is in render (). We check whether the coordinates of the camera are in that zone so that our opponent is in the center of the screen on the same course as us (are the Y and Z coordinates within the start ± zone). If we are on the same course, it means you can shoot: set isUnder = true and make the sight more bright red. Again, this simplicity of hit determination is a trick based on thestupidity of simplicity, a certain conventionality of the gameplay. In general, libGDX has the means to determine which 3D models are in the touch area in the general case .
Touch handling methods are called touchDown and touchUp (finger removed from the screen). These methods take touch coordinates, but we will not use them here. In fact, it is enough for us to determine whether the camera is now in that position to look at the pyramid directly. If this is the case (the user pressed on time), then in touchDown we start counting the time how much the laser was frying the hostile pyramid. If not, then reduce the user's points by dividing in two (penalty for a slip). When the user releases his finger, check if he has released him too late. If you let go late, then we are fined, if on time (the laser was still frying the target), then we add points.
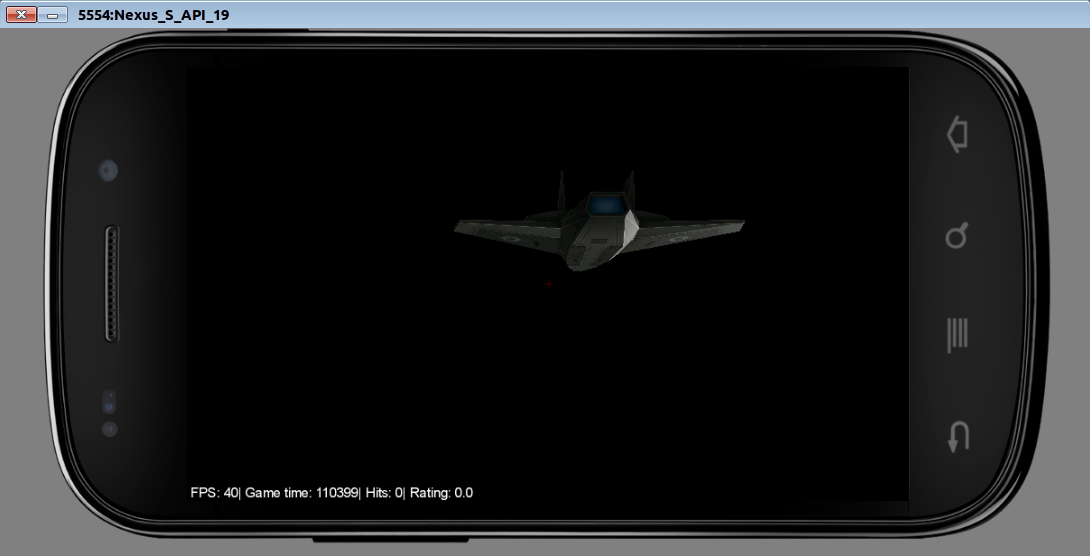
In general, the game is ready, but I want it to look somehow decently, and the pyramid is pretty boring. So, as an optional addition to the lesson, you can still implement a normal 3D model of the aircraft instead of a pyramid. Take this model and try to insert it into our game.
The model is delivered in 4 formats of different 3D editors. However, libGDX uses its binary model format, into which they need to be converted in order to be used in the game. For this, a special utility is provided - fbx-conv . Download the collected binaries and unpack it in any folder. There is a version for Windows, Linux and MacOS. The Windows version will start without much fuss, and for Linux and MacOS you must first run the command
Thus, we tell the utility where to find its shared library libfbxsdk.so, which it requires to work. Run the utility:
Of course, you need to specify your path to the model and use the binary for your OS. As a result, you get a file
And now let's connect it in the game:
Here we create an instance of the class AssetManager, which is responsible for downloading game resources and instruct it to load our model. On each drawing, we check if the AssetManager model has still loaded (the update () method that returns a boolean). If you load, then we push our nyashy plane in the instance instead of the pyramid that has become scorched and set loading = false so that this creation of inctance does not repeat on every frame, otherwise assets.update () will return true further throughout the application's time.
When we start, we get the exception
Bottom line: we wrote a very simple, but almost complete from the point of view of the means used (lighting, motion, HUD, touches, models) game, having packed only 200 lines of code. Of course, there is much to improve: a normal sight, skybox (sky or space around), sounds of shots and flight, game menu, normal hit detection, etc. However, the game already contains the very base of the gameplay and clearly shows the most basic points of game development on libGDX. I hope this lesson will contribute to the emergence of many new interesting games on Android from both my students and the audience of Habr.
PS: here is the github code and apk-file of the game .
- Naked OpenGL is used, and since in practice ready-made engines are most often used in programming games, this is of little use to schoolchildren in the context of their own projects. Someone may argue that to see a clean OpenGL in the business is useful for understanding the basics, but here comes the 2nd flaw.
- The lesson is very incomprehensible. A typical schoolchild, even if versed in programming, does not have a sufficient base to understand much of what is described in the lesson (for example, many of the matrices will pass only in the university).
- At the end of the lesson we come to the result - drawing 3 triangles using OpenGL. This is so far from the real 3D-game that it can easily discourage interest from the student.
Therefore, I decided to prepare my lesson describing the basics of using libGDX for Android, and since I am still preparing this material, at the same time place it here - on a habr. In this tutorial we will make a simplest 3D game for Android, a screenshot of which you can see in the introduction to the article. So, interested, welcome under cat.
Why libGDX? First, the code should be in Java, because we teach students exactly Java programming. This narrows the choice. Secondly, libGDX was very easy to learn. In my conditions, this is a great advantage that outweighs the other disadvantages.
The idea of the game is very simple: you are a fighter co-pilot responsible for weapons systems. You need to have time to shoot with laser weapons when the engine of the enemy ship is in the crosshairs, while your first pilot tries not to let yourself off the tail. That is, in fact, the gameplay is described by the phrase “click on time”.
In the course of this lesson, we only need Android Studio 1.5 (the version may be different, here I brought the one with which I did it all exactly).
First, we need to download the project creation wizard from libGDX, which greatly simplifies the task of initial setup of the project (you can download it from the link in the instruction on the libGDX project wiki ). Here's what settings I got there:
We import the resulting project in Android Studio and begin the actual work with the code. The main code of the game is in the file MyGdxGame.java (if you called this class just like me). Remove the template code and start writing your own:
public class MyGdxGame extends ApplicationAdapter { public PerspectiveCamera cam; final float[] startPos = {150f, -9f, 0f}; @Override public void create() { cam = new PerspectiveCamera(67, Gdx.graphics.getWidth(), Gdx.graphics.getHeight()); cam.position.set(startPos[0], startPos[1], startPos[2]); cam.lookAt(0, 0, 0); cam.near = 1f; cam.far = 300f; cam.update(); } } Here we create a new camera with a viewing angle of 67 degrees (which is quite often used value) and set the aspect ratio to the width and height of the screen. Then we set the camera position to a point (150, -9, 0) and indicate that it will look at the center of coordinates (since this is where we plan to place the pyramid around which the gameplay will be built). Finally, we call the service update () method so that all our changes are applied to the camera.
')
Now you can portray something that we will look at. Of course, we could use some kind of 3D model, but now, in order to simplify the lesson, we will draw only a simple pyramid:
public class MyGdxGame extends ApplicationAdapter { ... public Model model; public ModelInstance instance; @Override public void create() { ... ModelBuilder modelBuilder = new ModelBuilder(); model = modelBuilder.createCone(20f, 120f, 20f, 3, new Material(ColorAttribute.createDiffuse(Color.GREEN)), VertexAttributes.Usage.Position | VertexAttributes.Usage.Normal); instance = new ModelInstance(model); instance.transform.setToRotation(Vector3.Z, 120); } @Override public void dispose() { model.dispose(); } } Here we create an instance of ModelBuilder, which is intended for creating models in code. Then we create a simple cone model with dimensions of 20x120x20 and the number of faces 3 (which ultimately gives a pyramid) and ask it the material of green color. When we create a model, you need to set at least Usage.Position. Usage.Normal adds normals to the model, so the lighting can work properly.
The model contains everything you need to draw and manage your own resources. However, it does not contain information on where to draw. So we need to create ModelInstance. It contains information about the location, rotation parameters and scale for drawing the model. The default is drawn to (0, 0, 0) so we simply create a ModelInstance, which will be drawn to (0, 0, 0). But besides, we still call the transform.setToRotation () method to rotate our pyramid by 120 degrees along the Z axis (this is how it can be better seen from the position of the camera).
The model needs to be released after use, so we add some code to our Dispose () method.
Now let's draw our model instance:
public class MyGdxGame extends ApplicationAdapter { ... public ModelBatch modelBatch; @Override public void create() { modelBatch = new ModelBatch(); ... } @Override public void render() { Gdx.gl.glViewport(0, 0, Gdx.graphics.getWidth(), Gdx.graphics.getHeight()); Gdx.gl.glClear(GL20.GL_COLOR_BUFFER_BIT | GL20.GL_DEPTH_BUFFER_BIT); modelBatch.begin(cam); modelBatch.render(instance); modelBatch.end(); } @Override public void dispose() { model.dispose(); modelBatch.dispose(); } } Here we add to the create ModelBatch method, which is responsible for drawing and initializing the model. In the render method, we clear the screen, call modelBatch.begin (cam), draw our ModelInstance, and then call modelBatch.end () to complete the rendering process. Finally, we need to free modelBatch to make sure that all the resources (for example, the shaders it uses) are properly freed.
It looks pretty good, but a bit of lighting could improve the situation, so let's add it:
public class MyGdxGame extends ApplicationAdapter { ... public Environment environment; @Override public void create() { environment = new Environment(); environment.set(new ColorAttribute(ColorAttribute.AmbientLight, 0.4f, 0.4f, 0.4f, 1f)); environment.add(new DirectionalLight().set(0.8f, 0.8f, 0.8f, 10f, 10f, 20f)); ... } @Override public void render() { ... modelBatch.begin(cam); modelBatch.render(instance, environment); modelBatch.end(); } } Here we add an instance of Environment. We create it and set the ambient (diffuse) light (0.4, 0.4, 0.4) (note that the transparency value is ignored). Then we create a DirectionalLight (directional light) with a color (0.8, 0.8, 0.8) and a direction (10, 10, 20). I assume that you are already familiar with the sources of illumination in general, although everything is quite obvious here. Finally, during rendering, we transfer the created environment to the model handler.
Since we are still writing the game, it would not hurt to add a little dynamics to the static picture. Let's make the camera move a little with each drawing. Here it is appropriate to say about the life cycle of a libGDX application. At the start, the create () method is called, in which it is appropriate to place all initialization. Then, the render () method is called N times per second, where N is your FPS. This method draws the current frame. Therefore, in order to add dynamics to the application, we just need to somehow change the parameters of our game objects in render ().
public class MyGdxGame extends ApplicationAdapter { ... final float bound = 45f; float[] pos = {startPos[0], startPos[1], startPos[2]}; float[] Vpos = new float[3]; final float speed = 2f; private float getSpeed() { return speed * Math.signum((float) Math.random() - 0.5f) * Math.max((float) Math.random(), 0.5f); } @Override public void create () { ... // initialize speed for (int i = 0; i < 3; i++){ Vpos[i] = getSpeed(); } } @Override public void render() { ... for (int i = 0; i < 3; i++) { pos[i] += Vpos[i]; if (pos[i] <= startPos[i] - bound) { pos[i] = startPos[i] - bound; Vpos[i] = getSpeed(); } if (pos[i] >= startPos[i] + bound) { pos[i] = startPos[i] + bound; Vpos[i] = getSpeed(); } } cam.position.set(pos[0], pos[1], pos[2]); cam.update(); modelBatch.begin(cam); modelBatch.render(instance, environment); modelBatch.end(); } } Here we create the illusion that our pyramid is moving, although in reality the camera is moving, through which we look at it. At the beginning of the game, in the create () method, the increment value of Vpos [i] is randomly selected for each coordinate (velocity). At each scene redrawing in the render () method, the value of the change step is added to the coordinates. If we go beyond the established boundaries of change of coordinates, then we return the coordinates to these boundaries and generate new speeds so that the camera starts moving in the other direction. cam.position.set () itself sets the camera to new coordinates calculated according to the law described above, and cam.update () completes the process of changing camera parameters.
It can be noted that on different devices the speed of the pyramid will be different due to the difference in FPS and, accordingly, the number of render () calls per second. For good here would add the dependence of the increment of coordinates on the time between frames, then the speed would be the same everywhere. But we will not do this in order not to complicate the project.
Now let's make a game HUD:
public class MyGdxGame extends ApplicationAdapter { ... protected Label label; protected Label crosshair; protected BitmapFont font; protected Stage stage; protected long startTime; protected long hits; @Override public void create() { ... instance.transform.setToRotation(Vector3.Z, 90).translate(-5,0,0); font = new BitmapFont(); label = new Label(" ", new Label.LabelStyle(font, Color.WHITE)); crosshair = new Label("+", new Label.LabelStyle(font, Color.RED)); crosshair.setPosition(Gdx.graphics.getWidth() / 2 - 3, Gdx.graphics.getHeight() / 2 - 9); stage = new Stage(); stage.addActor(label); stage.addActor(crosshair); startTime = System.currentTimeMillis(); } @Override public void render() { ... StringBuilder builder = new StringBuilder(); builder.append(" FPS: ").append(Gdx.graphics.getFramesPerSecond()); long time = System.currentTimeMillis() - startTime; builder.append("| Game time: ").append(time); builder.append("| Hits: ").append(hits); builder.append("| Rating: ").append((float) hits/(float) time); label.setText(builder); stage.draw(); } @Override public void resize(int width, int height) { stage.getViewport().update(width, height, true); } } Please note that the rotation and shift parameters (translate (x, y, z) method) of the pyramid are changed so that it is located in the center of the screen and is directed to the same place where our camera is looking. That is, at the start of the game we are with the enemy on the same course and we look to him directly into the engines.
Here we create 2 text labels. The label label is designed to display in-game information (FPS, game time and hit statistics). The crosshair label is drawn in red and contains only one character - "+". This shows the player the middle of the screen - his sight. For each of them in the constructor new Label (<TEXT>, new Label.LabelStyle (font, <COLOR>)) a style is defined that includes the font and the color of the label. Labels are passed to the Stage object using the addActor () method, and, accordingly, are drawn automatically when the Stage is drawn.
In addition, for the crosshair label, the setPosition () method sets the position — the middle of the screen. Here we use screen sizes (Gdx.graphics.getWidth (), ... getHeight ()) to calculate where to put our plus sign so that it is in the middle. There is also a small dirty hack: setPosition () sets the coordinates of the lower left corner of the label. So that the plus center is in the center of the screen, I subtract the obtained constants 3 and 9 empirically (that is, at random) from the resulting value. Do not use this approach in full-fledged games. Just a plus sign in the middle of the screen is not serious. If you need a crosshair, you can use sprites .
With each drawing we create the text via StringBuilder, where we put everything that we want to display at the bottom of the screen: FPS, time in the game, number of hits and rating. The setText () method allows you to set the label text, which we do in render () time after time.
True shoot, we can not yet. It's time to fix this flaw.
public class MyGdxGame extends InputAdapter implements ApplicationListener { ... final float zone = 12f; boolean isUnder = false; long underFire; @Override public void create() { ... Gdx.input.setInputProcessor(new InputMultiplexer(this)); } @Override public void render() { if (Math.abs(pos[1] - startPos[1]) < zone && Math.abs(pos[2] - startPos[2]) < zone) { isUnder = true; crosshair.setColor(Color.RED); } else { isUnder = false; crosshair.setColor(Color.LIME); underFire = 0; } ... } @Override public void pause() {} @Override public void resume() {} @Override public boolean touchDown(int screenX, int screenY, int pointer, int button) { if (isUnder) { underFire = System.currentTimeMillis(); } else { hits /= 2; } return true; } @Override public boolean touchUp(int screenX, int screenY, int pointer, int button) { if (isUnder && underFire != 0) { hits += System.currentTimeMillis() - underFire; underFire = 0; } else { hits /= 2; } return false; } } Notice that the description of the MyGdxGame class has now changed. Here we inherit from InputAdapter and implement the ApplicationListener interface. This structure will allow us to keep our code unchanged, but to supplement it with the ability to handle user input. The create () method adds a string that registers our class as an input handler. We simply have to implement the pause () and resume () methods, since the InputAdapter has it abstract.
The whole hit math is in render (). We check whether the coordinates of the camera are in that zone so that our opponent is in the center of the screen on the same course as us (are the Y and Z coordinates within the start ± zone). If we are on the same course, it means you can shoot: set isUnder = true and make the sight more bright red. Again, this simplicity of hit determination is a trick based on the
Touch handling methods are called touchDown and touchUp (finger removed from the screen). These methods take touch coordinates, but we will not use them here. In fact, it is enough for us to determine whether the camera is now in that position to look at the pyramid directly. If this is the case (the user pressed on time), then in touchDown we start counting the time how much the laser was frying the hostile pyramid. If not, then reduce the user's points by dividing in two (penalty for a slip). When the user releases his finger, check if he has released him too late. If you let go late, then we are fined, if on time (the laser was still frying the target), then we add points.
Addition: model of a fighter instead of a pyramid
In general, the game is ready, but I want it to look somehow decently, and the pyramid is pretty boring. So, as an optional addition to the lesson, you can still implement a normal 3D model of the aircraft instead of a pyramid. Take this model and try to insert it into our game.
The model is delivered in 4 formats of different 3D editors. However, libGDX uses its binary model format, into which they need to be converted in order to be used in the game. For this, a special utility is provided - fbx-conv . Download the collected binaries and unpack it in any folder. There is a version for Windows, Linux and MacOS. The Windows version will start without much fuss, and for Linux and MacOS you must first run the command
export LD_LIBRARY_PATH=/folder/where/fbx-conv/extracted/ Thus, we tell the utility where to find its shared library libfbxsdk.so, which it requires to work. Run the utility:
./fbx-conv-lin64 -f space_frigate_6/space_frigate_6.3DS Of course, you need to specify your path to the model and use the binary for your OS. As a result, you get a file
space_frigate_6.g3db , which must be placed in the android/assets project folder (folder with application resources for the Android platform).On the difficulties of converting models for libGDX for those who want to use other models
In general, the libGDX + fbx-conv bundle is very problematic. I tried about a dozen free spacecraft models from http://tf3dm.com/ and http://www.turbosquid.com/ before I managed to find this one that worked. Difficulties are very different. Sometimes the model in the game is obtained without textures, sometimes it loads normally, but it is simply not displayed, and sometimes (this is most often) when the model is loaded, the game drops out with OutOfMemoryError. I, of course, understand that this is a mobile platform. But games in the Play Market show much more complicated graphics and memory for them to do. Even the model that I eventually used caused problems. From obj it wasn’t normally converted, but from 3ds it turned out. In light of this, we can say that for the time being, libGDX with model support is tight. You can use this engine for simple games, if you carefully select models or make them yourself with an eye to compatibility with libGDX. Or use more advanced engines such as jMonkeyEngine .
And now let's connect it in the game:
public class MyGdxGame extends InputAdapter implements ApplicationListener { ... public AssetManager assets; public boolean loading; @Override public void create() { ... assets = new AssetManager(); assets.load("space_frigate_6.g3db", Model.class); loading = true; } @Override public void render() { if (loading) if (assets.update()) { model = assets.get("space_frigate_6.g3db", Model.class); instance = new ModelInstance(model); loading = false; } else { return; } ... } @Override public void dispose() { model.dispose(); modelBatch.dispose(); } } Here we create an instance of the class AssetManager, which is responsible for downloading game resources and instruct it to load our model. On each drawing, we check if the AssetManager model has still loaded (the update () method that returns a boolean). If you load, then we push our nyashy plane in the instance instead of the pyramid that has become scorched and set loading = false so that this creation of inctance does not repeat on every frame, otherwise assets.update () will return true further throughout the application's time.
When we start, we get the exception
java.io.FileNotFoundException: SPACE_FR.PNG . So the model file does not include textures, they need to be thrust separately. We take from 4 presented pleasant texture, we rename into SPACE_FR.PNG , we put in assets , we start. As a result, we get that in the introductory picture. Well, for a snack - gif with gameplay:Bottom line: we wrote a very simple, but almost complete from the point of view of the means used (lighting, motion, HUD, touches, models) game, having packed only 200 lines of code. Of course, there is much to improve: a normal sight, skybox (sky or space around), sounds of shots and flight, game menu, normal hit detection, etc. However, the game already contains the very base of the gameplay and clearly shows the most basic points of game development on libGDX. I hope this lesson will contribute to the emergence of many new interesting games on Android from both my students and the audience of Habr.
Sources:
- https://libgdx.badlogicgames.com/nightlies/docs/api/overview-summary.html
- http://www.todroid.com/android-gdx-game-creation-part-i-setting-up-up-android-studio-for-creating-games/
- https://xoppa.imtqy.com/blog/basic-3d-using-libgdx/
- http://stackoverflow.com/questions/19699801/dewitters-game-loop-in-libgdx
- http://stackoverflow.com/questions/21286055/run-libgdx-application-on-android-with-unlimited-fps
- https://xoppa.imtqy.com/blog/interacting-with-3d-objects/
- https://xoppa.imtqy.com/blog/loading-models-using-libgdx/
PS: here is the github code and apk-file of the game .
Source: https://habr.com/ru/post/276139/
All Articles