How to use SQL DB in student Microsoft AZURE from Dreamspark
Hello habrozhiteli!
Many of you have heard or read that Microsoft Azure was specifically added to students in Dreamspark so that students can get free hosting for their educational projects. A small spoiler: free and without ads!
Student azure has the following features:
- Azure App Service Web Apps are part of a fully managed cloud platform that allows you to build and deploy web apps in seconds. You can use ASP.NET, Java, PHP, Node.js or Python. Run popular web applications and CMS solutions. Configure continuous integration and deployment using VSO, GitHub, TeamCity, Hudson or BitBucket. This will allow you to automatically build, test, and deploy a web application after each successful test of building code or integration.
- With MySQL from ClearDB, your web applications will get all the power of MySQL. With the help of clearDB MySQL solutions, you can expand support for various types of web applications and CMS solutions, including Wordpress, Joomla, Acquia Drupal, phpBB and many others.
- Visual Studio Application Insights provides informative telemetry data and performance information with which you can ensure the maximum efficiency of your web applications and services. Data search and analysis functions ensure continuous improvement of applications, prioritization for future investments and increased customer satisfaction.
- Visual Studio Online is the fastest and easiest way to plan, create and deliver software for various platforms today. Our cloud infrastructure allows you to make all the necessary preparations for a launch in a matter of minutes, without having to install and configure individual servers.
')
Currently, Microsoft Azure for DreamSpark is available to DreamSpark audited students for free and without commitment, time constraints, and incidental payouts. Later, if necessary, you can upgrade to use more services, but today you can host your web applications and websites, taking advantage of the enormous capabilities of Microsoft cloud solutions, and at no additional cost.
Azure Student Subscription offers to use only MySQL with limiting the database to 32 MB and the ability to connect the maximum number of sites - 5 pcs. What should be enough for educational projects.
If you lack these resources, then I want to dispel this myth of the uselessness of azure for educational purposes and offer you a solution to this problem. For your more complex projects, you can use the Microsoft SQL Server Database File . Now let's create a test project for example, let's call it “ TwoNotes ”.
Building a test ASP.NET MVC application and deploying it in student AZURE
Let's open Visual Studio and create our test application.

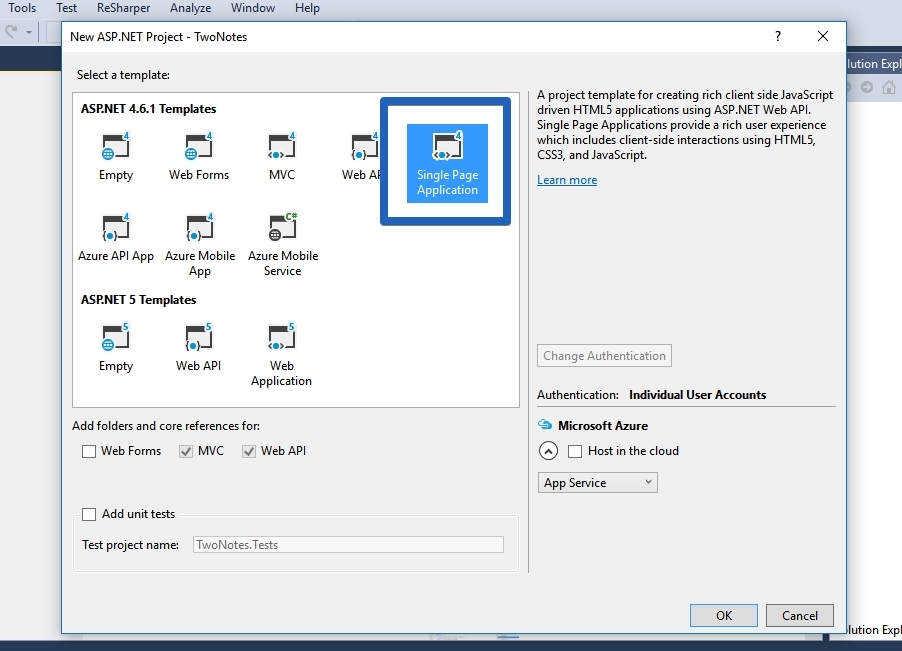
Choose the C # language type and the Web project type. I gave my application a name - TwoNotes.

To write the application will be used template Single Page Application .
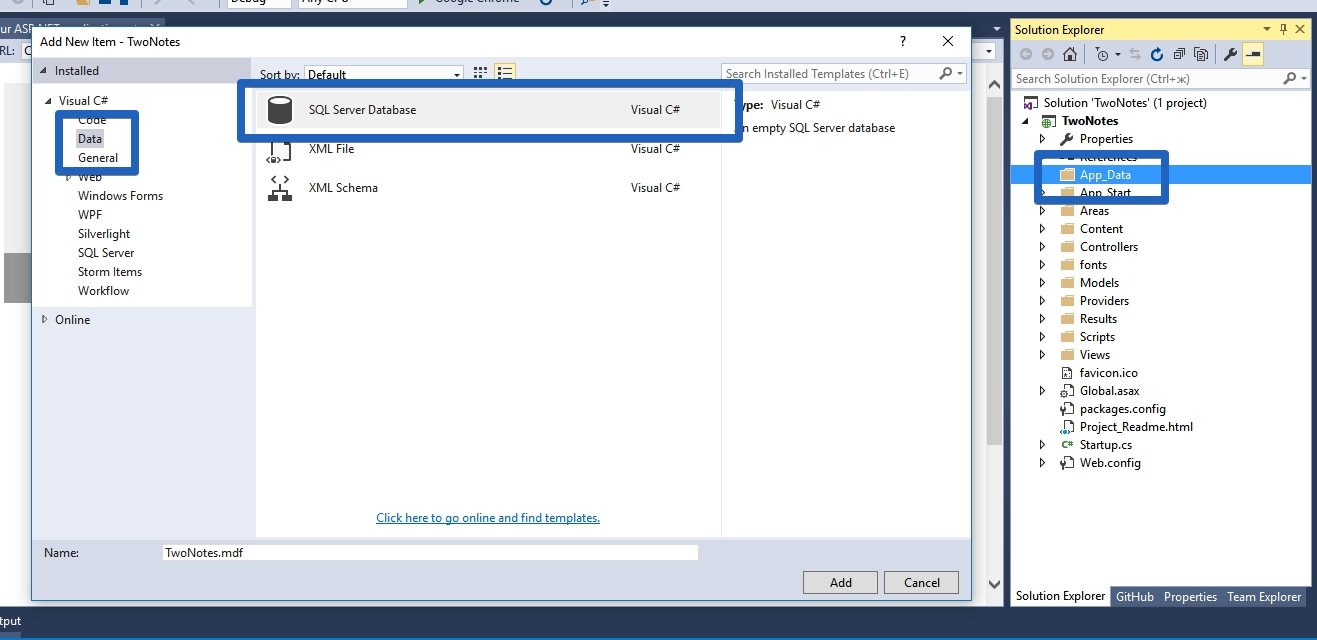
After the application is ready, we right-click the App_Data folder and select Add> new item. In the Add New Item dialog box, we will select SQL Server Compact 4.0.
Note : You can skip this step and simply configure the correct DB connection, the DB will be created during the first launch of the application.
Also do not forget in References via NuGet System.Data.SqlServerCe.
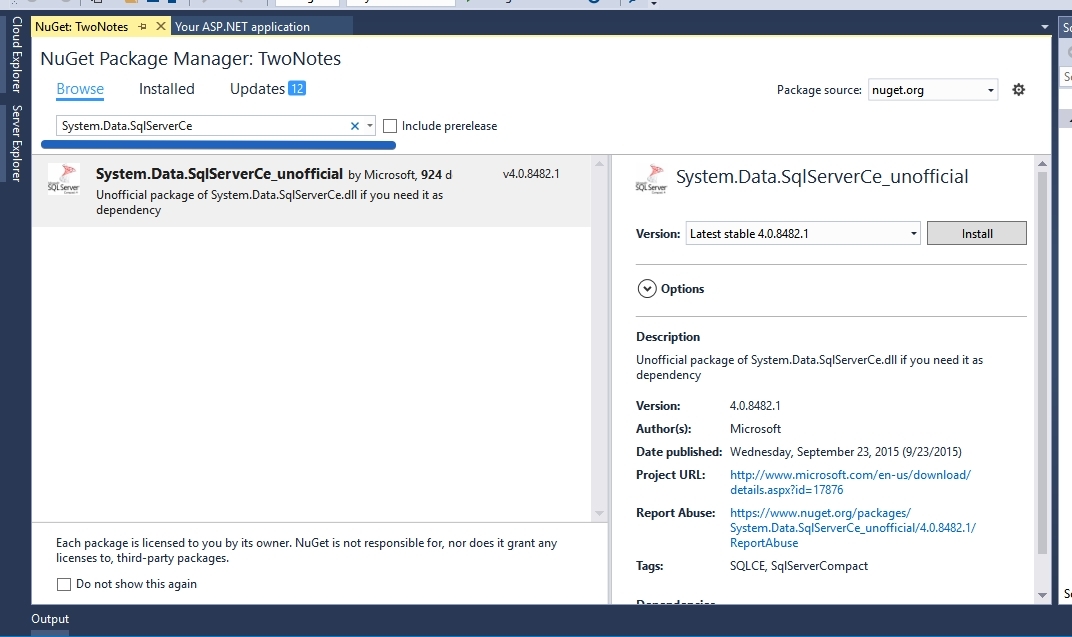
After installation, check for System.Data.SqlServerCe in References.

Configure SqlServerCompact to properly deploy to Azure websites
Step 1. Installing SqlServerCompact dependencies.
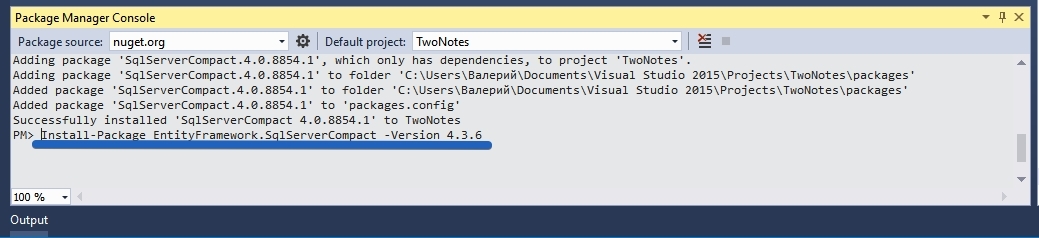
Open the NuGet package manager console and type PM> Install-Package SqlServerCompact

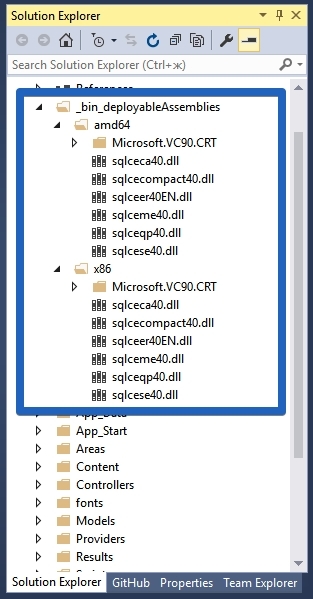
First check that you do not have these dependencies. If they are not there, they will be added, and then a bunch of dependencies for SqlServerCompact will be downloaded, which are necessary for proper operation on Azure websites.
Step 2. Next, we add a link to System.Data.SqlServerCe.dll, so that it is available during build / deployment.
In order to do this, you must do the following:
- Select the System.Data.SqlServerCe in the folder and press the F4 button.
- In the Properties panel, select Copy Local and set the value to true.
- Remove DLL link from project
- Add the link back by going to the folder above and select the dll you just copied
Step 3: Finally, install the Entity Framework with SQL Server Compact support using the following Nuget command.
PM> Install-Package EntityFramework.SqlServerCompact. Any version is valid.
Now you have installed all the necessary dependencies and now you can move on.
Adding a connection string to the database
To add a database connection, open Server Explorer and click on the green plug icon.
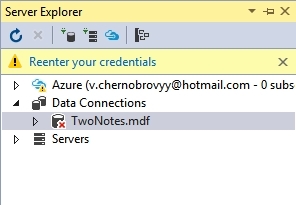
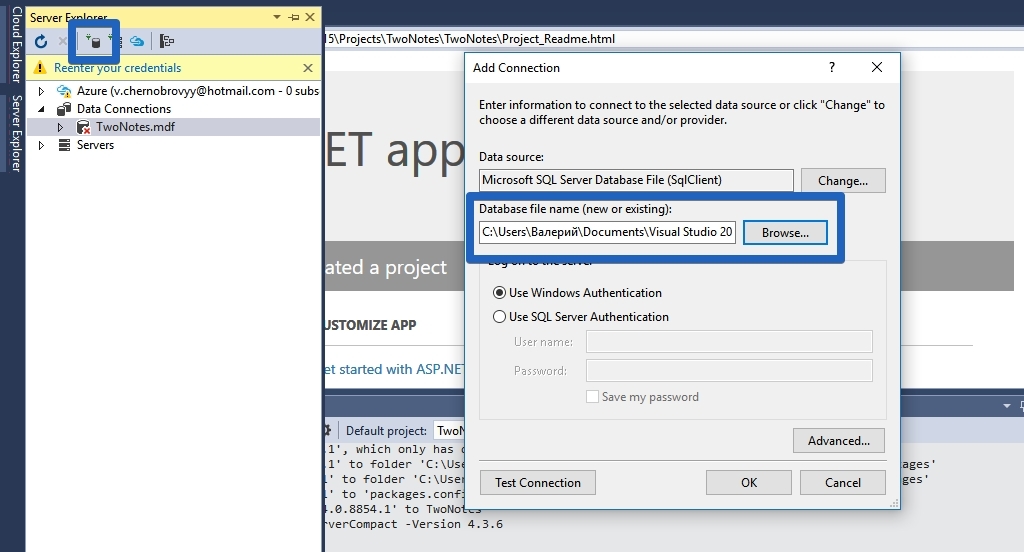
Next, you will have a window in which you will need to select the location of your database file.
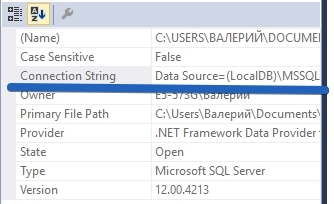
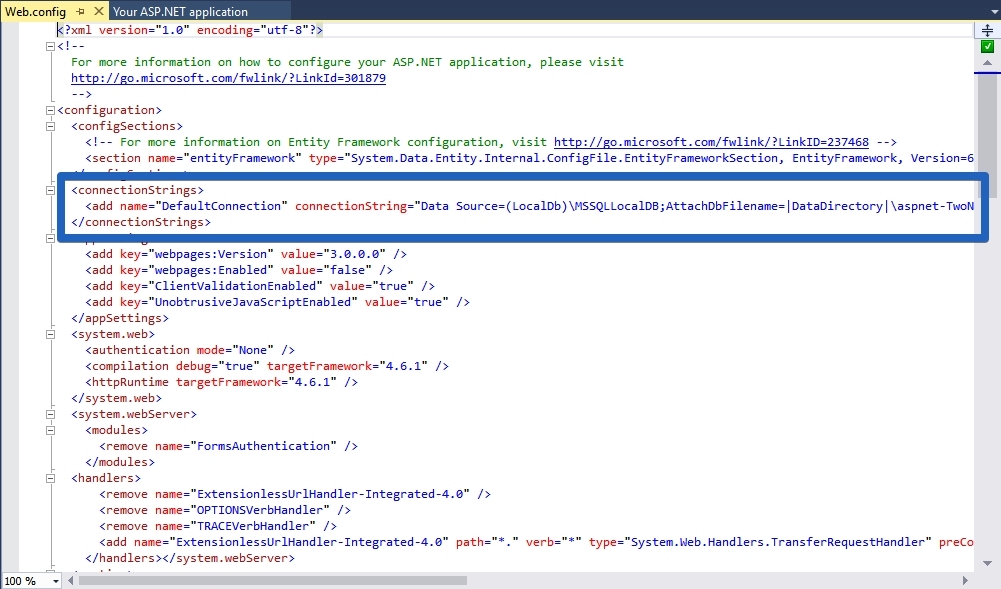
So, you have connected the database, and now you need to add a Connection String to the config of your project. To do this, click on the icon of your database and select Properties and in this window find the string Connection String. And add it to the web.config.
User setting in our application
Launch our website on the local computer and add a user using the registration button:
Username: twonotestest
Password: tw0Not3sTest
After registration and authorization, you can check the created records in the database.
Deploying to a Microsoft Azure Student Account
Select a project and click the right mouse button. In the context menu, select the Publish item and this menu will open.
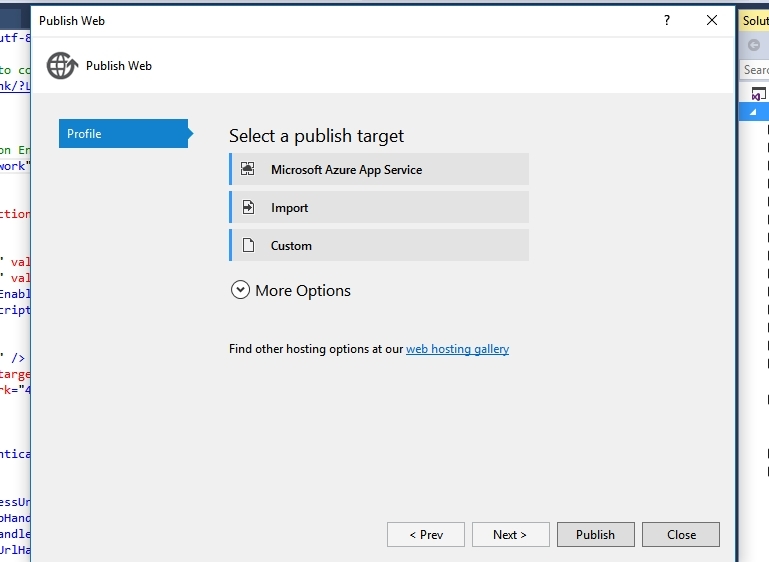
In the window that opens, click on the item Microsoft Azure App Service and click next. Next, you will see the Azure subscription selection and project selection window. Since no application has been created in azure, we will create it directly from this window. To do this, simply press the NEW button.

Then just enter all the necessary data and your application will be created and published.
You can also create an application on the Azure Portal and download the publication profile. And with it, just publish your application.
Let's sum up!
Now you know how to bypass the database limitation on a student subscription in Azure. The process is of course a bit complicated and lengthy, but you can get free hosting for your projects quite legally. And besides without advertising.
If you have any questions, you can send them to my e-mail: valeriy.chernobrovyy@studentpartner.com
Source: https://habr.com/ru/post/275785/
All Articles