Pro trackpoint and mouse emulation
Why do you need it and how to implement it programmatically
A lot of reasoning
In the previous article about setting up docking stations, I mentioned how hard it was, at one time, I was using laptops in the “consumer” segment. The lack of a docking port and the need to connect a bunch of cables every time you come home or to work is annoying and annoying, but what really caused suffering is the lack of a trackpoint: the very “red one” that can be found on laptops from IBM / Lenovo (blue or gray in the case of HP and DELL). Details can be read on the same Wikipedia .
Why is it needed? When most operations are performed from the keyboard, be it writing code or working in the command shell, the need to move the hand to the mouse in order to move the graphic cursor and click something there does not cause much joy.
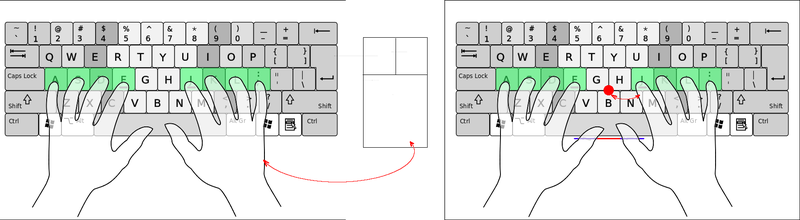
The particular dislike of using the mouse creates the habit of working at a sufficient distance from the monitor (up to two meters), placing the keyboard on your lap. Here a wonderful mini-joystick comes to the rescue: to manipulate the graphic cursor, the whole brush does not need to leave the limits of the home row, you only need to move the index finger of the right or left hand, and the keys are under the thumbs. For clarity, here is an old video from IBM:
')
The problem is that at the moment, finding a decent keyboard equipped with such a device is getting harder: only Unicomp produces them serially, while the keyboards themselves are quite cumbersome, with the classic 104-key layout.
There are models from Lenovo that are mainly oriented for use in the server rack (that is, most of the time, lying there, connected to the console) with a rather low quality of materials (cheap, quickly wiping plastic, flimsy legs), plus all these keyboards are membrane.
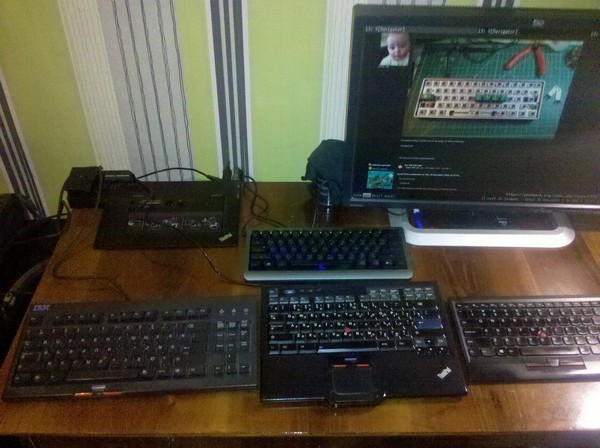
Of the three IBM / Lenovo keyboards, the Space Saver 2 is the warmest feeling: a rather heavy, rough plastic, strong legs and rubber inserts that did not peel off after about eight years of operation. The disadvantage of this keyboard is exactly one: it is also membrane with all the consequences.
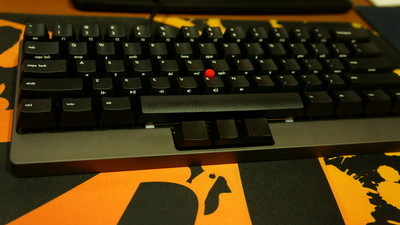
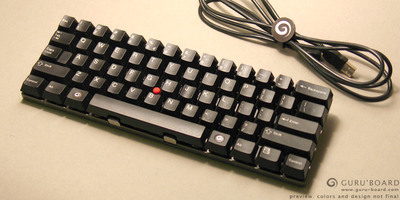
The so-called 60% keyboards with a trackpoint are literally very handy when used in a Unix environment: Tex Yoda and Guru-board , and they are rather custom than serial-made.
In general, it’s hard now for trackpoint lovers: the choice is very small. You have to either look for model M rarities from IBM, or purchase Unicomp, or be content with Lenovo's scissor membranes (by the way, it’s not quite cheap either).

Thus, the idea was born that it would be nice to emulate the trackpoint itself. That is, control the movement of the graphic cursor from the keyboard.
Few settings
Immediately I remembered that in the X-system the necessary functionality was once available: you can use padpad to control the graphic cursor (activation by Shift + Numlock).
True, I haven’t been using keyboards with nampads for a long time, and again pulling the brush back and forth is not the case. Therefore, this method is not suitable. We will go the other way.
There is a utility: xdotool, which allows to emulate keystrokes and mouse movements. It is suitable not only to simulate mouse movements, but also to automate any mouse-keyboard actions.
And so, the script is simple: bind the call to xdotool with the necessary parameters for hot keys, or enter an additional keyboard mode.
Install:
#apt-get install xdotool Since I use the i3 window manager, I will show it by example. It is a pleasure to create keyboard modes that can be used both for keychains and modified input, in this WM:
mode "name"{ bindsym <key> action bindsym <key> mode "default" # } bindsym <key> mode "name" # In order to move the mouse cursor to a given position relative to the current location, run the following command:
xdotool mousemove_relative xy To emulate a click:
xdotool click [123] Where 1 is the left button, 2 is the middle button, 3 is the right button.
And the config for i3 will look like this:
mode "rat" { bindsym f exec --no-startup-id xdotool click --delay 100 1 bindsym --release a exec --no-startup-id xdotool click --delay 100 3 bindsym --release i exec --no-startup-id xdotool key --clearmodifiers --delay 20 Shift+Insert bindsym --release l exec --no-startup-id xdotool mousemove_relative 20 0 bindsym --release h exec --no-startup-id xdotool mousemove_relative -- -20 0 bindsym --release j exec --no-startup-id xdotool mousemove_relative 0 20 bindsym --release k exec --no-startup-id xdotool mousemove_relative 0 -20 bindsym Return exec --no-startup-id xdotool click --delay 100 1; mode "default" bindsym Escape mode "default" bindsym Mod1+Escape mode "default" } bindsym Mod1+Escape mode "rat" I think that the config does not need excessive comments: everything seems to be pretty obvious.
Unfortunately, to implement the acceleration of the cursor offhand failed.
For those who use other window managers or DE, I can recommend the utility xbindkeys .
A trackpoint is certainly much more convenient, but it's still better than reaching for a mouse every time.
Someone may ask: if we work for a laptop, then why not use the touchpad? First of all, I personally use it hard, right up to the onset of pain: without tearing the fingers off the home row, the control is performed by the thumb of a strong hand, turned out at an obtuse angle. In this position, the finger quickly begins to hurt. If you poke your index finger, then again there is the problem of transferring the brush, and in this case it is much easier and more logical to take on the mouse. Also terribly annoyed by false positives while typing, learned to turn off when typing not so long ago, and even then not all.
That's all for now. Such a solution is quite suitable as a temporary measure. And as a permanent, I plan to restore IBM SpaceSaver 2 and convert it into a mechanic.
Source: https://habr.com/ru/post/275427/
All Articles