Using ASF and Atmel Start in IAR

ASF and IAR
The library for products Atmel ASF has two versions: built into Atmel Studio and the so-called stand-alone. Stand-alone version can be used, for example, in IAR. Since IAR itself is somewhat ascetic from the point of view of various autocomplete chips, the use of ASF as an external library is not as interactive and convenient as in Atmel Studio, but nevertheless, you can customize and use everything once Atmel Start - WEB configurator code for ease and speed development.
Configuring IAR + ASF
First you need to download the stand-alone version of ASF and unpack.
Then create a new project in IAR with the necessary options. Suppose we have a motherboard of our own production with a SAMD20G16 microcontroller.
In the options of the project choose:
General -Options-Target-Device - Atmel ATSAMD20G16
General -Options-Library Configuration-Use CMSIS
C / C ++ Compiler -Preprocessor: here you need to specify the paths to the ASF files that will be used in the project.
If you are not going to use Atmel Start (for example, there is no internet connection)
The folders in the ASF itself that store the peripheral drivers, as well as the configuration files, must be copied to the project folder. System files, such as working with interrupts, can be left in the folder with the ASF (if you are not going to change them).
In order not to overload the preprocessor field and for convenience in principle, you can use the PROJ_DIR system variable to specify the path to the files in the working project folder and create your own for the path to the ASF folder.
To do this: Tools -Configure Custom Argument Variables-Global-New Group (set the group name) –Add Variable (set the variable name and path).
Then the Preprocessor might look something like this (depending on the required periphery):
$ PROJ_DIR $ / drivers / port
$ PROJ_DIR $ / drivers / system / interrupt / system_interrupt_samd20
$ PROJ_DIR $ / drivers / system / interrupt
$ PROJ_DIR $ / drivers / system / pinmux
$ PROJ_DIR $ / drivers / system
$ PROJ_DIR $ / drivers / nvm
$ PROJ_DIR $ / drivers / extint
$ PROJ_DIR $ / drivers / system / clock
$ PROJ_DIR $ /.
$ PROJ_DIR $ / drivers / sercom
$ PROJ_DIR $ / drivers / sercom / usart
$ PROJ_DIR $ / drivers / rtc
$ PROJ_DIR $ / drivers / sercom / spi
$ PROJ_DIR $ / drivers / sercom / spi / module_config
$ PROJ_DIR $ / drivers / sercom / i2c
$ PROJ_DIR $ / drivers / tc
$ PROJ_DIR $ / drivers / system / clock / clock_samd20
$ ASF_DIR $ / utils
$ ASF_DIR $ / utils / preprocessor
$ ASF_DIR $ / utils / cmsis / samd20 / source
$ ASF_DIR $ / utils / cmsis / samd20 / include / pio
$ ASF_DIR $ / utils / cmsis / samd20 / include
$ ASF_DIR $ / utils / header_files
$ ASF_DIR $ / boards
$ ASF_DIR $ / boards / samd20_xplained_pro
$ ASF_DIR $ / .. / common / utils
$ ASF_DIR $ / .. / common / boards
$ ASF_DIR $ / utils / header_files
Even in this section, you must specify defyny for the project. In our case:
Defined symbols: (one per line)
ARM_MATH_CM0 = true
EXTINT_CALLBACK_MODE = true
__SAMD20G16__
BOARD = USER_BOARD
TC_ASYNC = true
USART_CALLBACK_MODE = true
RTC_COUNT_ASYNC = true
SPI_CALLBACK_MODE = false
I2C_MASTER_CALLBACK_MODE = false
If you are going to use Atmel Start, then the preprocessor settings are automatically generated when the project is loaded.
Assembler-Preprocessor
Output Converter - Output-Generate, Output Format: Intel Extended, Output File: Override default: file name.hex
Linker -Config-Linker configuration file: Override default: $ PROJ_DIR $ \ samd20g16_flash.icf
Debugger- Setup-Driver: J-Link / J-Trace
All settings are made.
To write the initialization functions of the controller and peripherals, use Atmel Start.
Alternatively, you can see examples for both IAR and Atmel Studio, or documentation.
Use AtmelStart
Atmel Start is an online code generator.
Select a board and controller and create a project: Custom Board, ATSAMD20G16 - Create new project
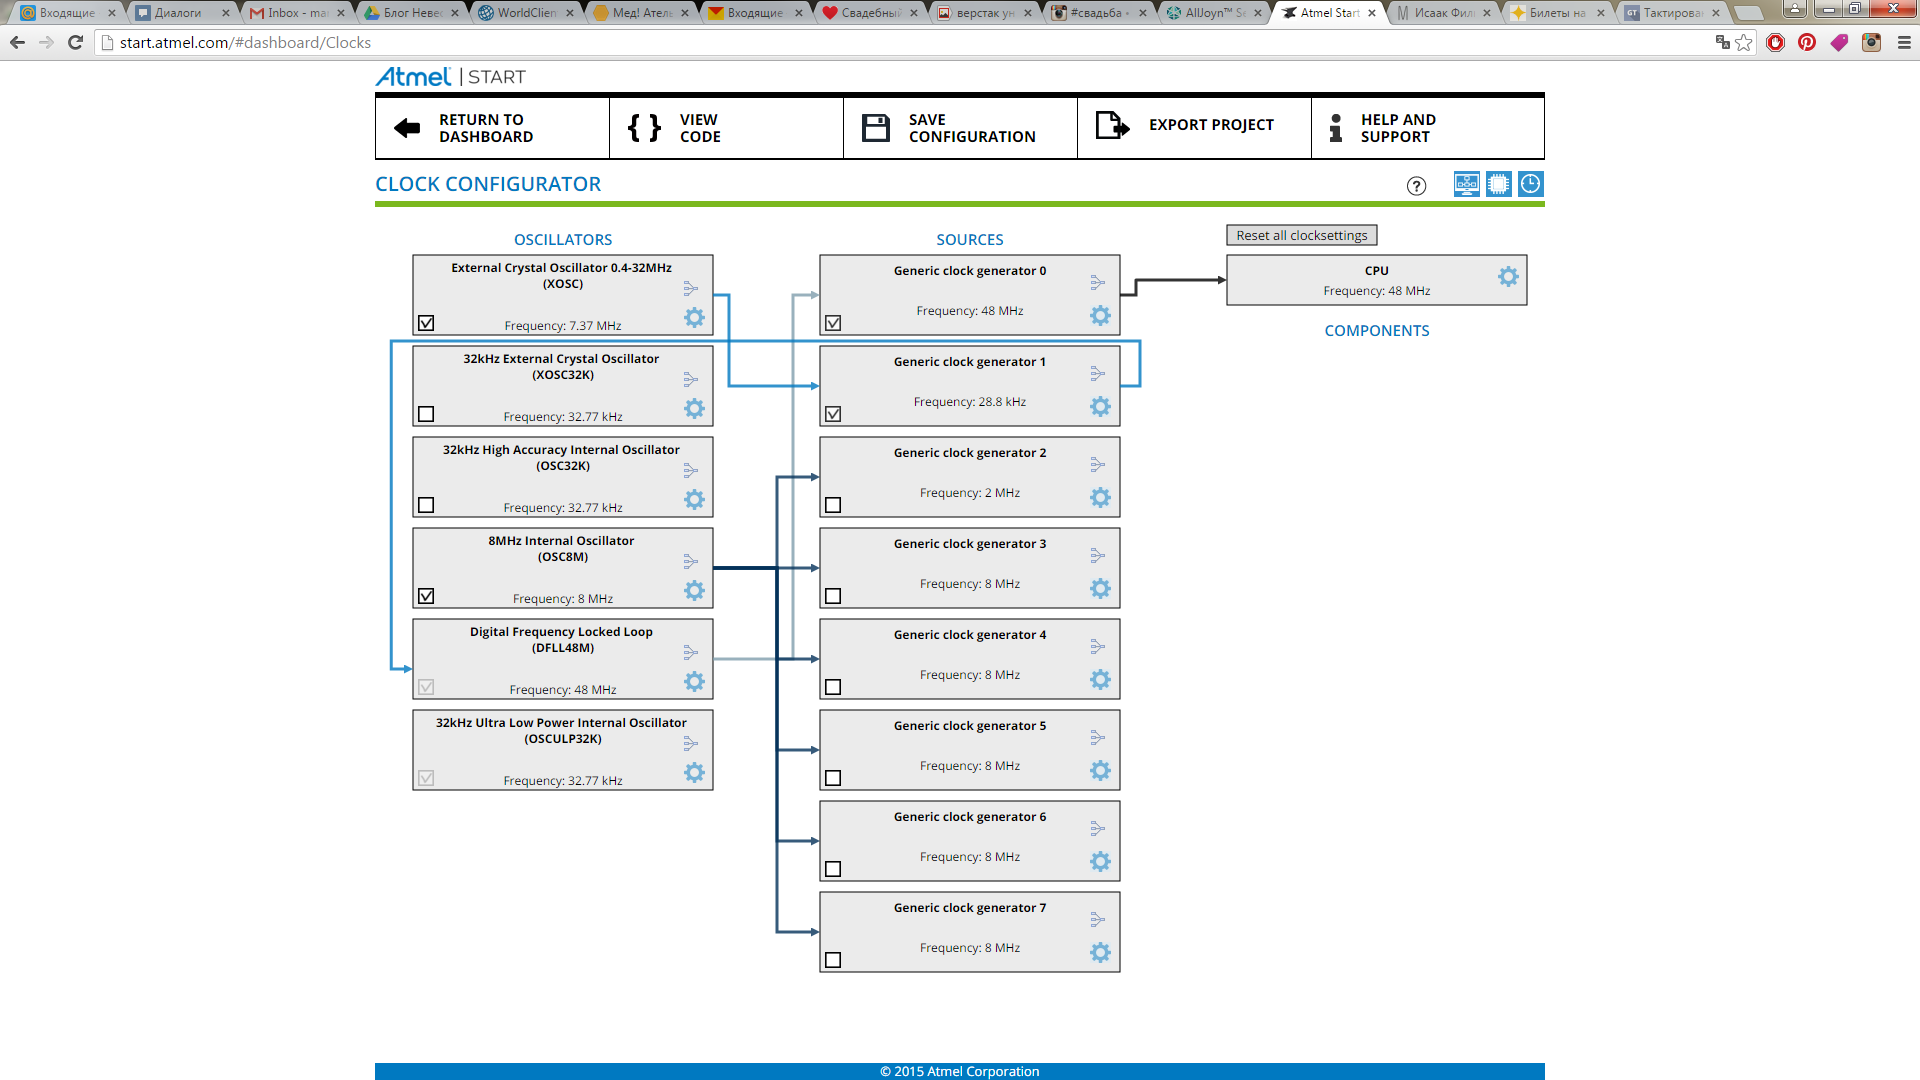
Let's start with the clocking settings. Suppose that our controller is clocked from an external oscillator with a frequency of 7.37 MHz and we want to have a system frequency of 48 MHz (see how to do this in Atmel Studio here ).
Open the Go to clock configurator :
')
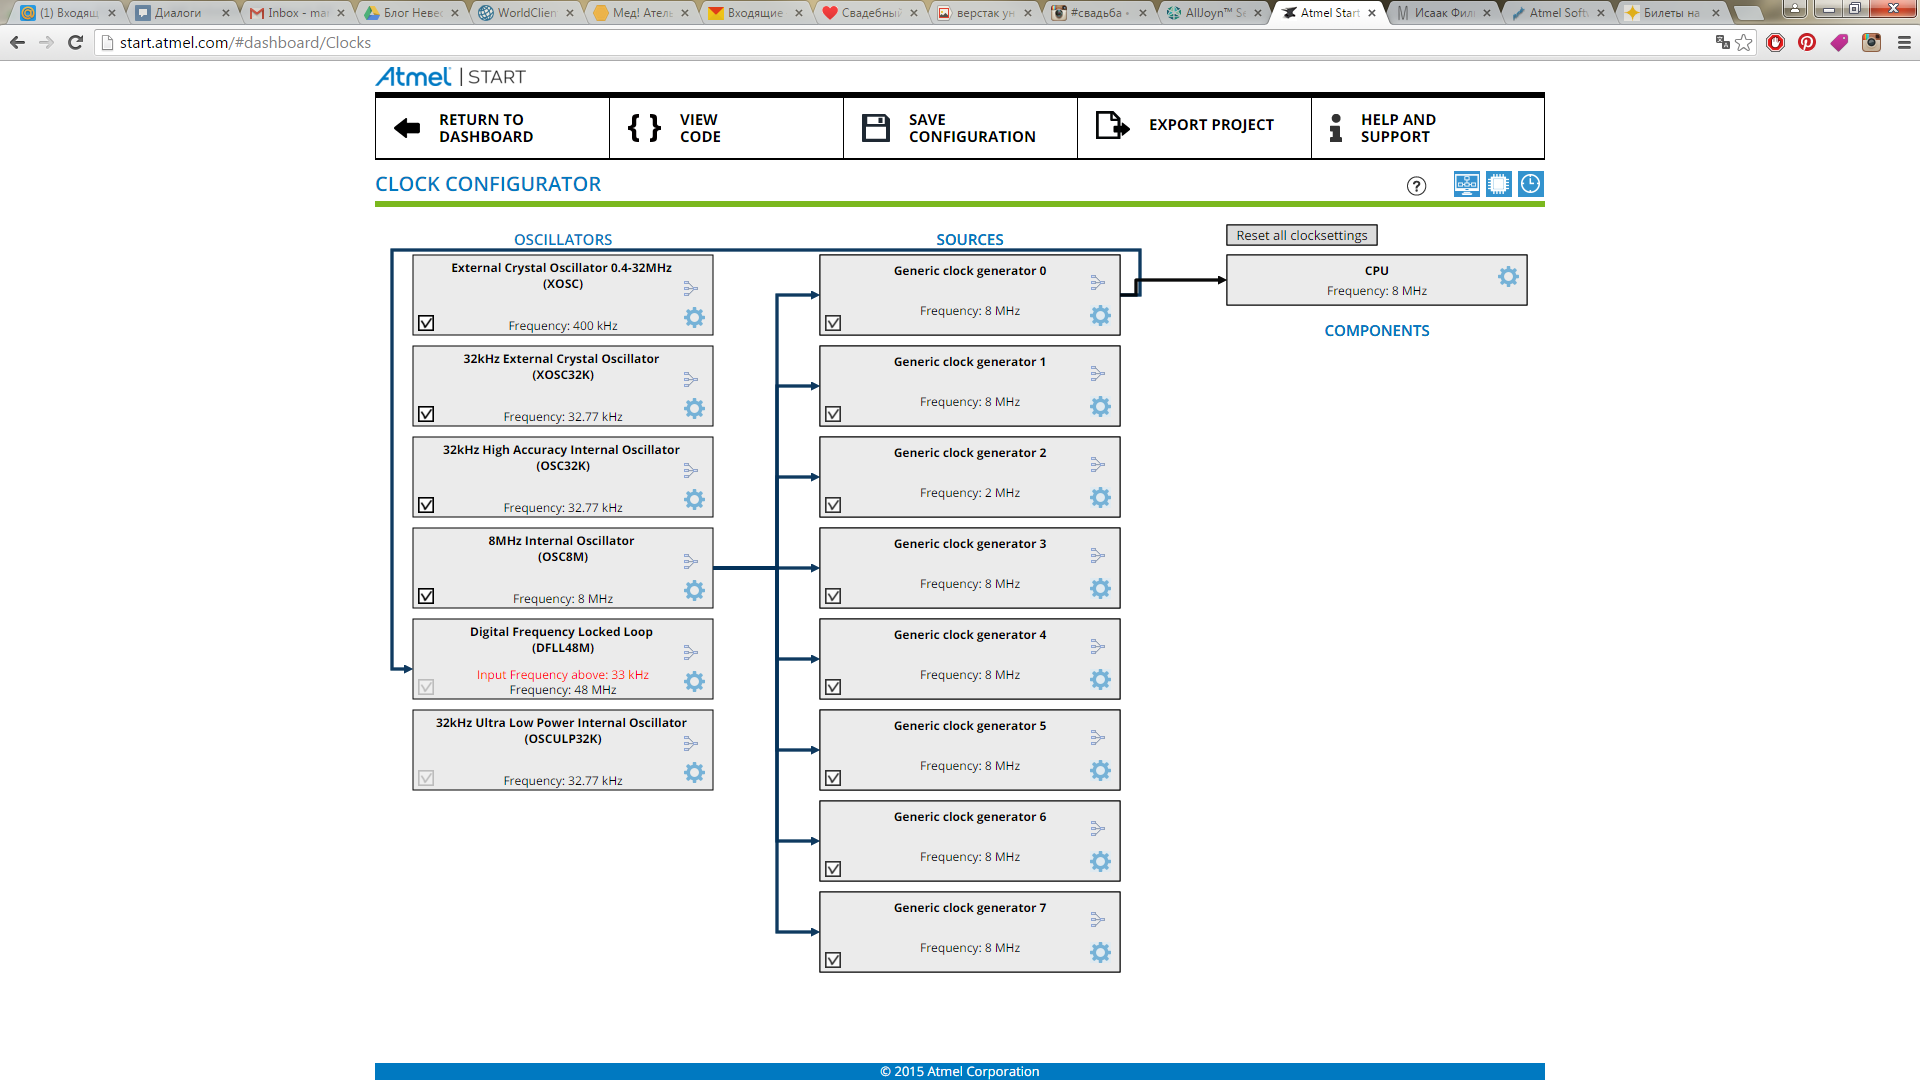
Everything is very clear, click on the modules, enter the necessary settings, and it should turn out like this:
You also need to configure the I / O ports of the microcontroller, for this there is a Pin / Mux Configurator . In this section, everything is intuitive.
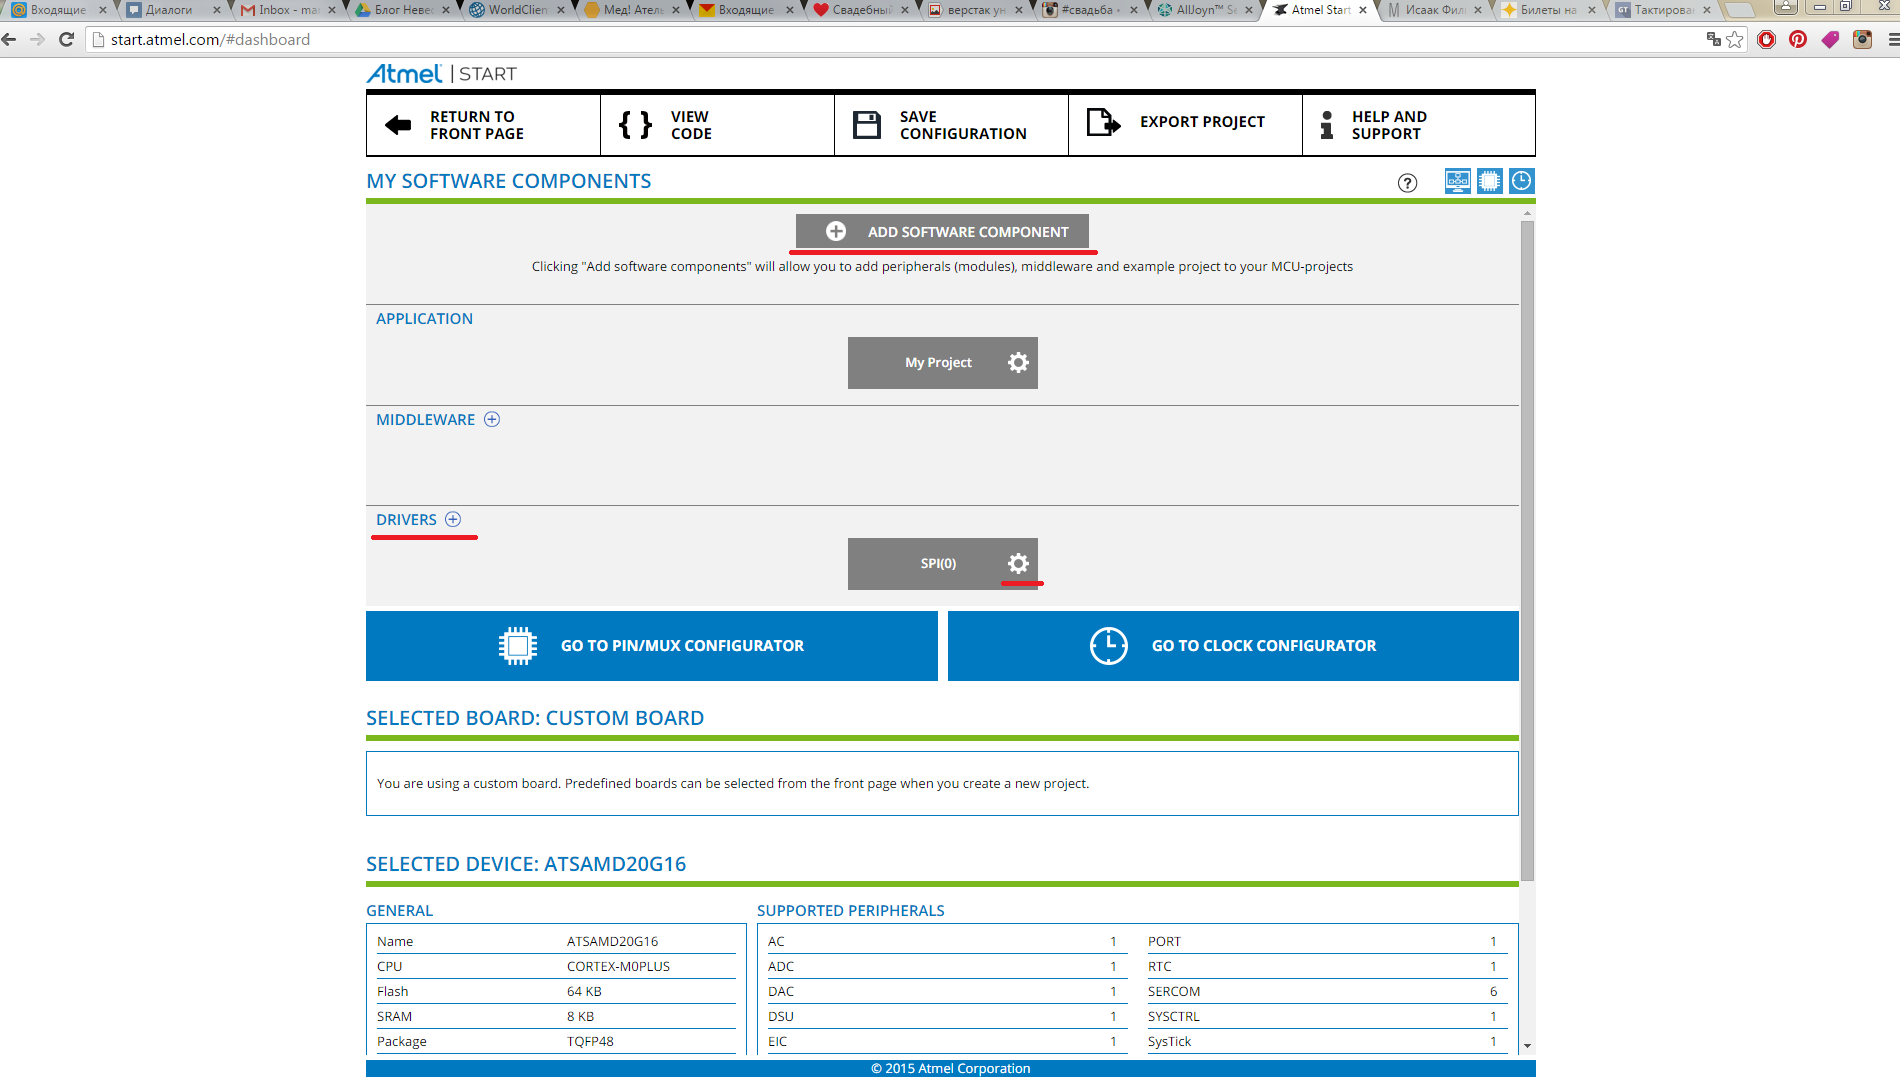
Of course, you need to add the necessary peripherals - Add Software Component. For the convenience of searching, we leave only the search by driver. We find the right one, for example, SPI, select the quantity and add it. This can also be done on the main page by clicking on the "+" near the Drivers.
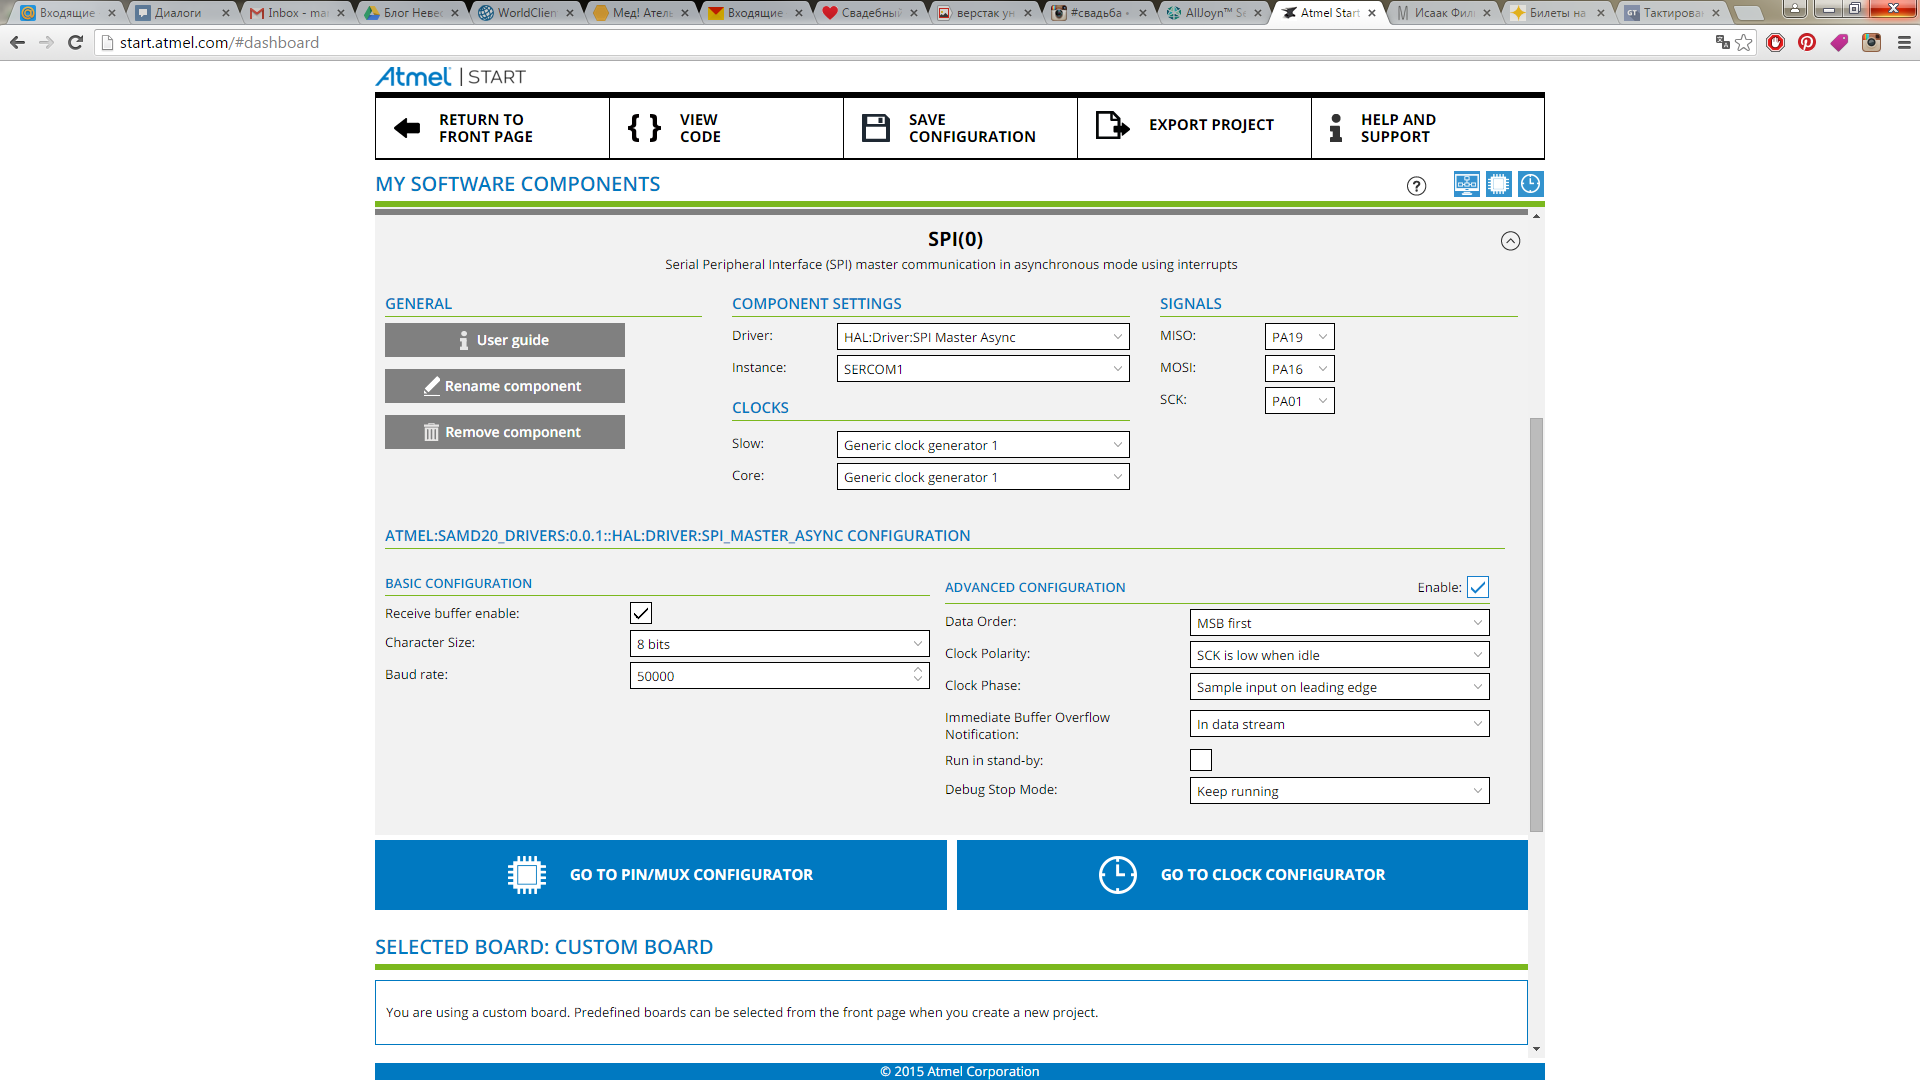
Now go to its settings.
We specify all the parameters we need. It turns out like this:
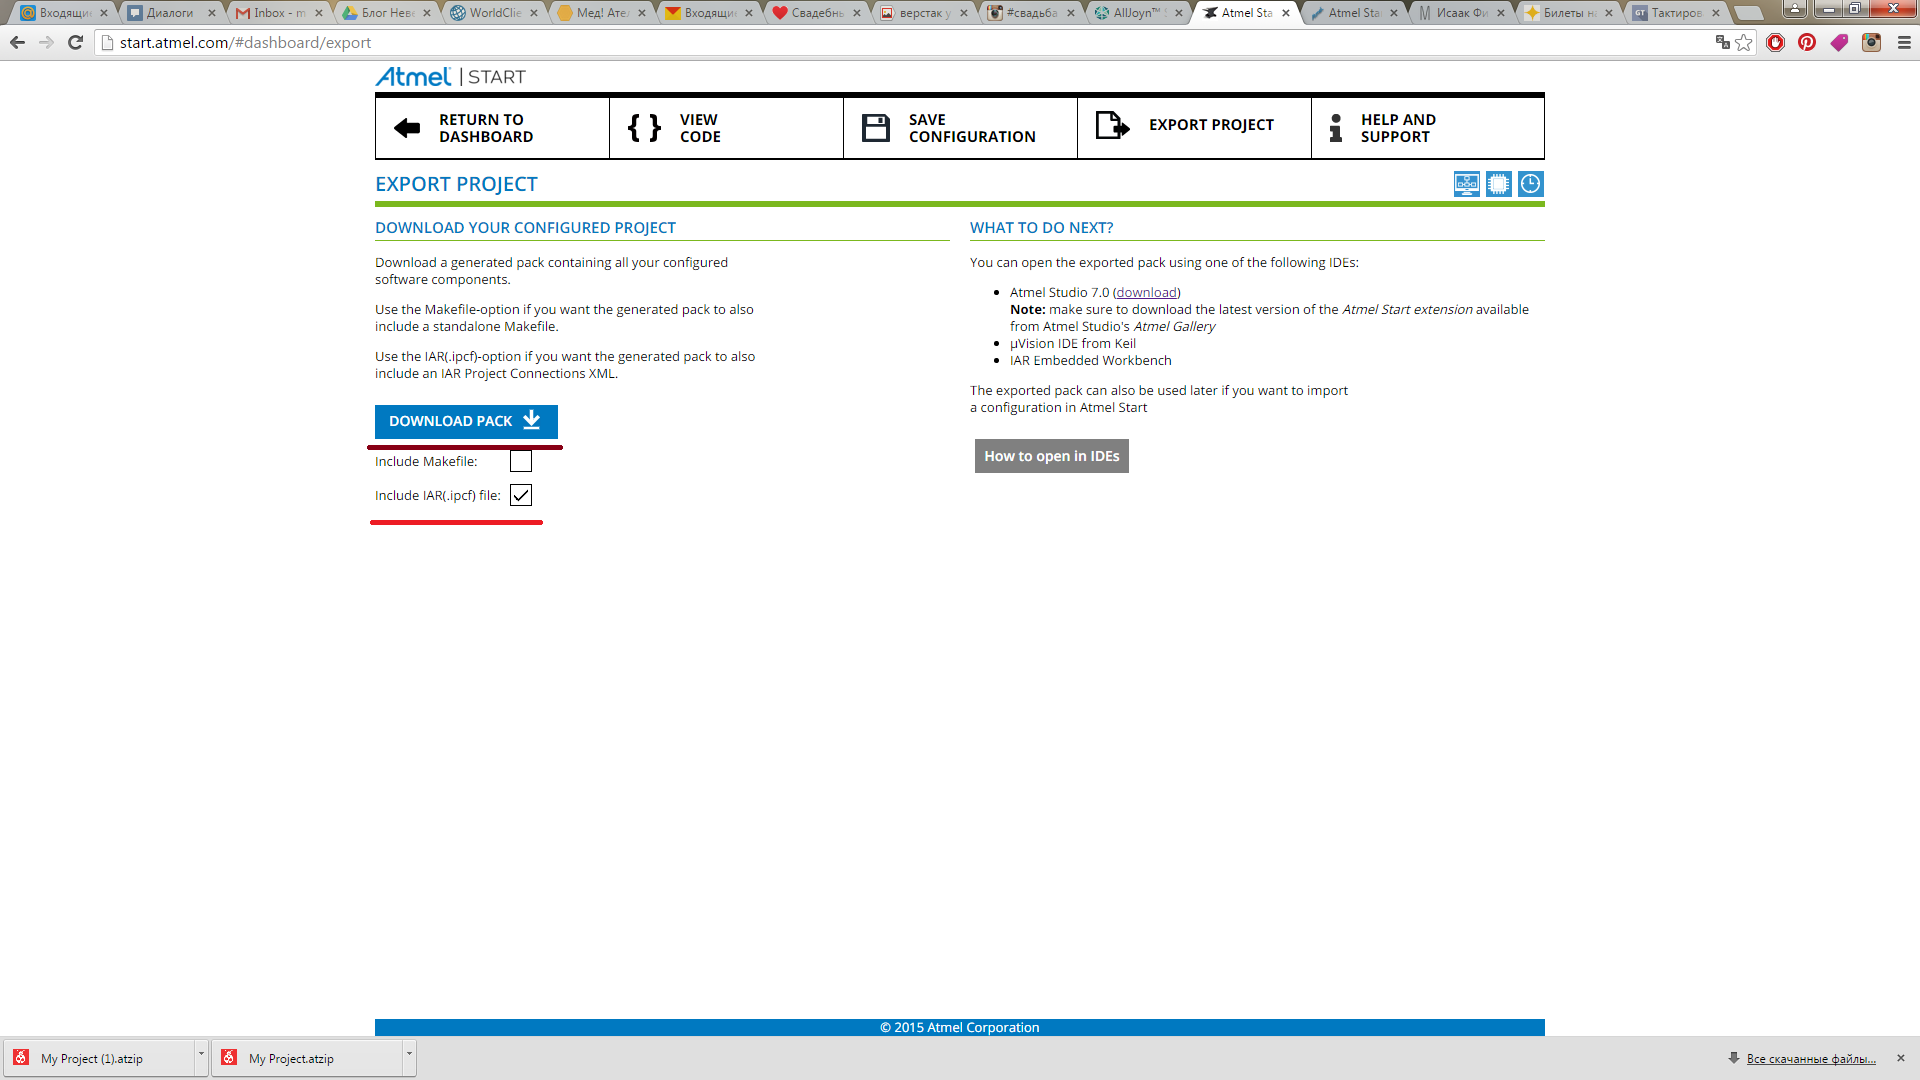
We do all the rest of the peripherals and everything we need. When everything is ready, we export the project to the format we need.
For this: Export Project: - Include IAR (.ipcf) file - Download Pack
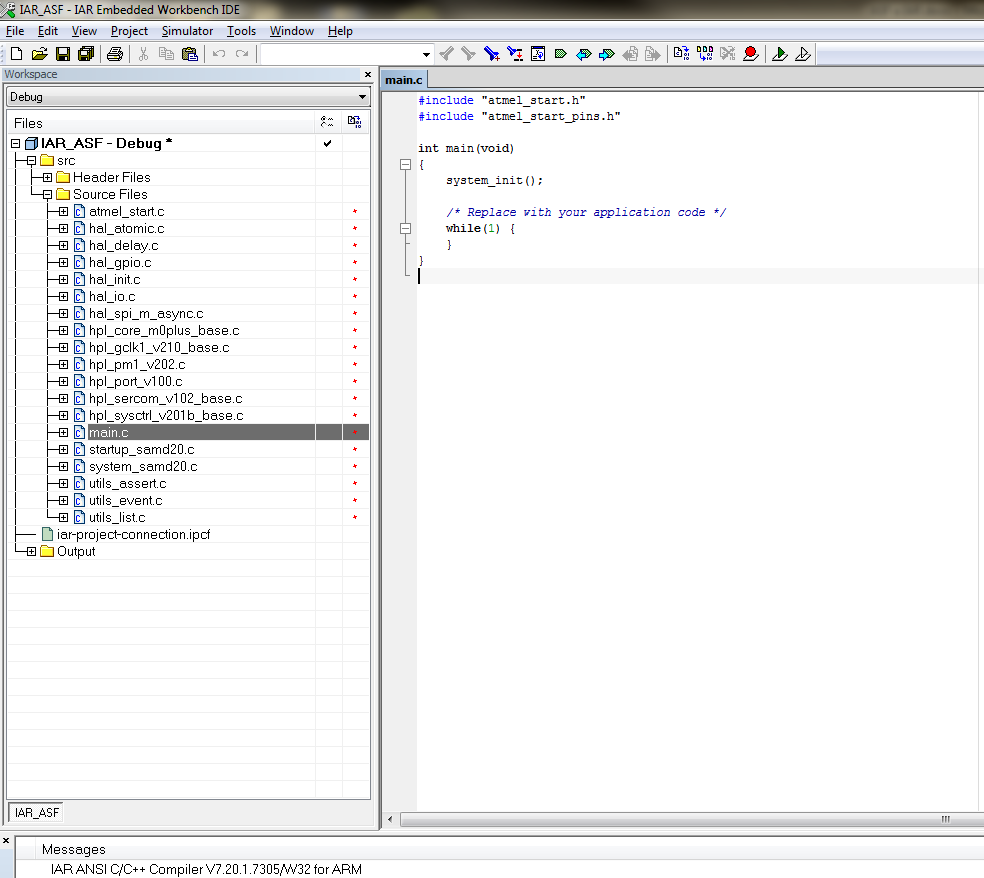
We change the extension of the archive to a simple zip and unpack it into the project folder. In IAR: Tools -Options-Project-Enable Project Connections.
Next Project -Add Project Connection - IAR Project Connection-Ok, select the file: iar-project-connection.ipcf. Then all the settings and the files themselves in the folders appear in the project.
You can compile and enjoy!
Source: https://habr.com/ru/post/275389/
All Articles