System plug-ins and modules in Unreal Engine 4
Hello, my name is Dmitry. I create computer games on the Unreal Engine as a hobby. Today I will tell you how to create your own module, and then how to create a plug-in in Unreal Engine 4.
Module creation
')
So let's start with the modules. When you create a project, a single module is automatically created in the project file.
{ "FileVersion": 3, "EngineAssociation": "4.10", "Category": "", "Description": "", "Modules": [ { "Name": "UICustom", "Type": "Runtime", "LoadingPhase": "Default" } ] } In principle, for a simple project it is enough. But if you read my previous article (and if you didn’t read it, I advise you to do it right now), you can see that we don’t need some code to register an asset, add buttons to the properties panel of this asset, but only need for the editor. Therefore, it was - it would be good to make it so that, when building a game, this code was not included in the game, it was for this purpose that the system of modules was intended.
So, let's begin. First, add another module:
{ "FileVersion": 3, "EngineAssociation": "4.10", "Category": "", "Description": "", "Modules": [ { "Name": "UICustom", "Type": "Runtime", "LoadingPhase": "Default" }, { "Name": "UICustomEditor", "Type": "Editor", "LoadingPhase": "Default" } ] } Module parameters
The module has a type parameter that determines where the module should be included and where it should not. The type can take the following values:
The module also has the LoadingPhase parameter, which determines the stage of module loading:
namespace EHostType { enum Type { Runtime, RuntimeNoCommandlet, Developer, Editor, EditorNoCommandlet, Program, Max, } } The module also has the LoadingPhase parameter, which determines the stage of module loading:
namespace ELoadingPhase { enum Type { Default, PostDefault, PreDefault, PostConfigInit, PreLoadingScreen, PostEngineInit, Max, } } Any module must have 3 files. The first is the header file of this module <Module name> .h, usually it includes the Engine.h file. But it is worth noting that when you turn on the Engine.h file, the size of the Precompiled header becomes ~ 700mgb. If you create a lot of modules in your project, and each will weigh over 700mgb, there won't be enough hard drives, so I recommend opening Engine.h and choosing only what you need. In addition, the module interface is located in this file. In which you can register something, for example.
#pragma once #include "Core.h" #include "CoreUObject.h" #include "Engine/EngineTypes.h" #include "SlateCore.h" #include "SlateBasics.h" #include "ModuleManager.h" DECLARE_LOG_CATEGORY_EXTERN(UICustomEditor, All, All) class FUICustomEditorModule : public IModuleInterface { public: virtual void StartupModule() override; virtual void ShutdownModule() override; }; The second required file is <Module name> .cpp:
#include "UICustomEditor.h" #include "MyObjectAssetAction.h" #include "MyStructCustomization.h" DEFINE_LOG_CATEGORY(UICustomEditor) void FUICustomEditorModule::StartupModule() { FMyObjectAssetAction::RegistrateCustomPartAssetType(); FMyClassDetails::RegestrateCostumization(); UE_LOG(UICustomEditor, Warning, TEXT("Editor module Started")); } void FUICustomEditorModule::ShutdownModule() { UE_LOG(UICustomEditor, Warning, TEXT("Editor module Stoped")); } IMPLEMENT_GAME_MODULE(FUICustomEditorModule, UICustom); Here I register the type of asset and the change of the properties panel, and also added a message to the log.
At the end of this file there must be an IMPLEMENT_GAME_MODULE macro.
The third required file <Module Name> .Build.cs:
using UnrealBuildTool; public class UICustomEditor : ModuleRules { public UICustomEditor(TargetInfo Target) { PublicDependencyModuleNames.AddRange(new string[] { "Core", "CoreUObject", "InputCore" }); PrivateDependencyModuleNames.AddRange(new string[] { "Slate", "SlateCore", "PropertyEditor", "UnrealEd", "EditorStyle" }); PrivateDependencyModuleNames.AddRange(new string[] { "GameLibPluginRuntime","UICustom" }); // } } In this file I connect the modules necessary for the operation of my module (sorry for the tautology). As you can see, in addition to the system modules, I also connected the main module and the plugin (which I will write about below).
Important: If you connect the plugin to the main module, then you need to connect it to the rest. Otherwise, if you use an object from the main module in which there will be an object from the plug-in, the compiler, giving an error saying that it cannot find the file, will refer to the line in the main module, but since you have already connected the plug-in in it, you will not understand what's the matter, and what the compiler requires of you.
Important: In order for a class or structure from a connected module to be used. Need to:
1) Include the header file of this class or structure.
2) When determining the classes and structures that you want to use from other modules, you need to write <module name in capital letters> _API. For example:
class UICUSTOMEDITOR_API UMyObjectFactory : public UFactory After creating these files, you need to put them in the folder with the module name in the Source folder. It remains only to add our module to the UICustomEditor.Target.cs file (we do not add anything to the UICustom.Target.cs file, since the module will only be loaded in the editor)
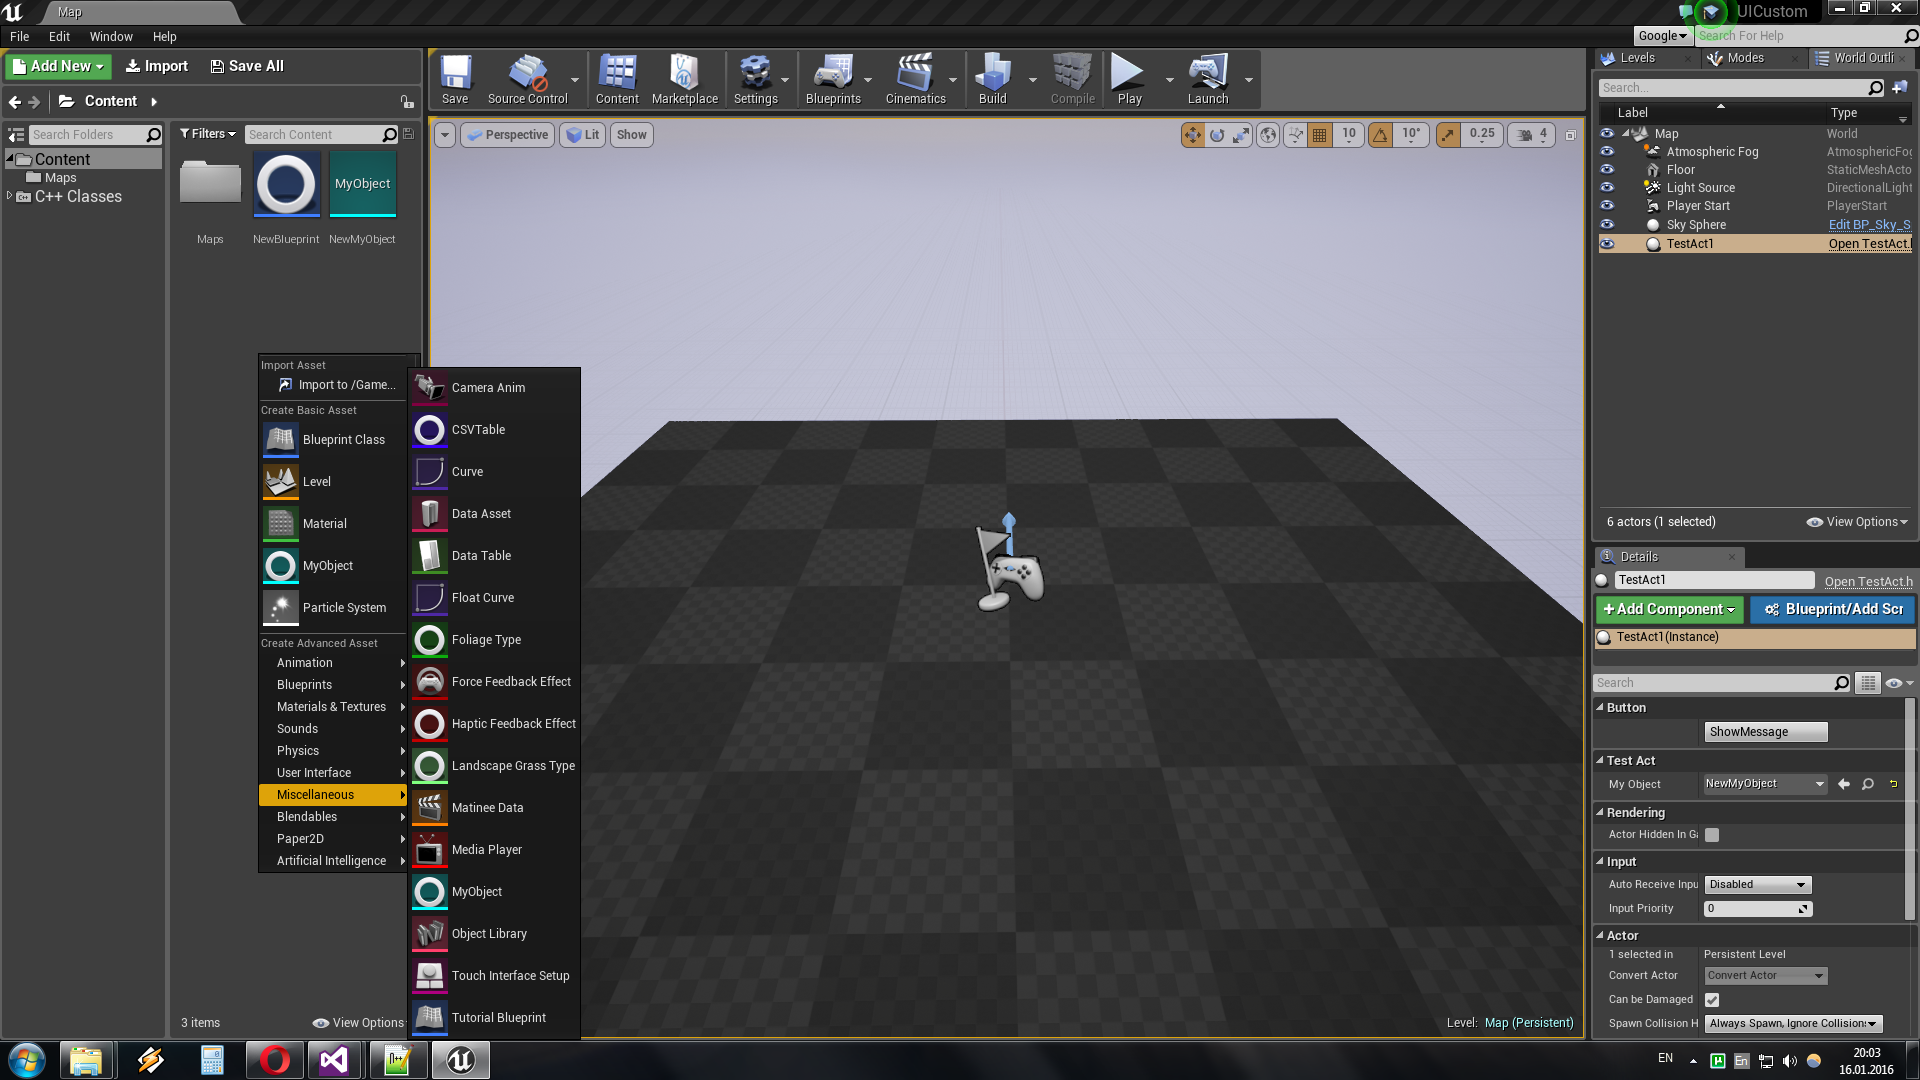
OutExtraModuleNames.AddRange( new string[] { "UICustom", "UICustomEditor" } ); The module is ready, for the payload I used files from the last lesson We now turn to creating a plugin.
Creating a plugin
The plugin should be taken as a project that can be inserted into another project. A plugin, like a project, consists of modules and has its own project file, which has the extension .uplugin. To connect the plugin to the project, you must put it in the <project directory> / plugins folder and regenerate the Visual Studio project. After that, you can connect the plug-in modules, like any other modules (this is written above).
Accordingly, to create a plugin you need to create the file <Plugin name> .uplugin
{ "FileVersion" : 3, "FriendlyName" : "GameLibPlugin", "Version" : 48, "VersionName" : "1.0", "CreatedBy" : "Deema 35", "CreatedByURL" : " ", "EngineVersion" : "4.10.0", "Description" : "Library some system structure", "Category" : "System library", "EnabledByDefault" : true, "MarketplaceURL" : " ", "Modules" : [ { "Name" : "GameLibPluginRuntime", "Type" : "Runtime", "LoadingPhase" : "PreDefault" }, { "Name" : "GameLibPluginEditor", "Type" : "Editor" } ], "CanContainContent" : true } If you create the Resources folder in the plugin folder, then the image put there, in png format, will be displayed in the plugin manager.
Then in the <folder of the plugin> / Source create a folder for each of the modules of the plugin. Creating modules for a plugin is no different from creating modules for a project (as described above). Actually, everything, the plugin is ready.
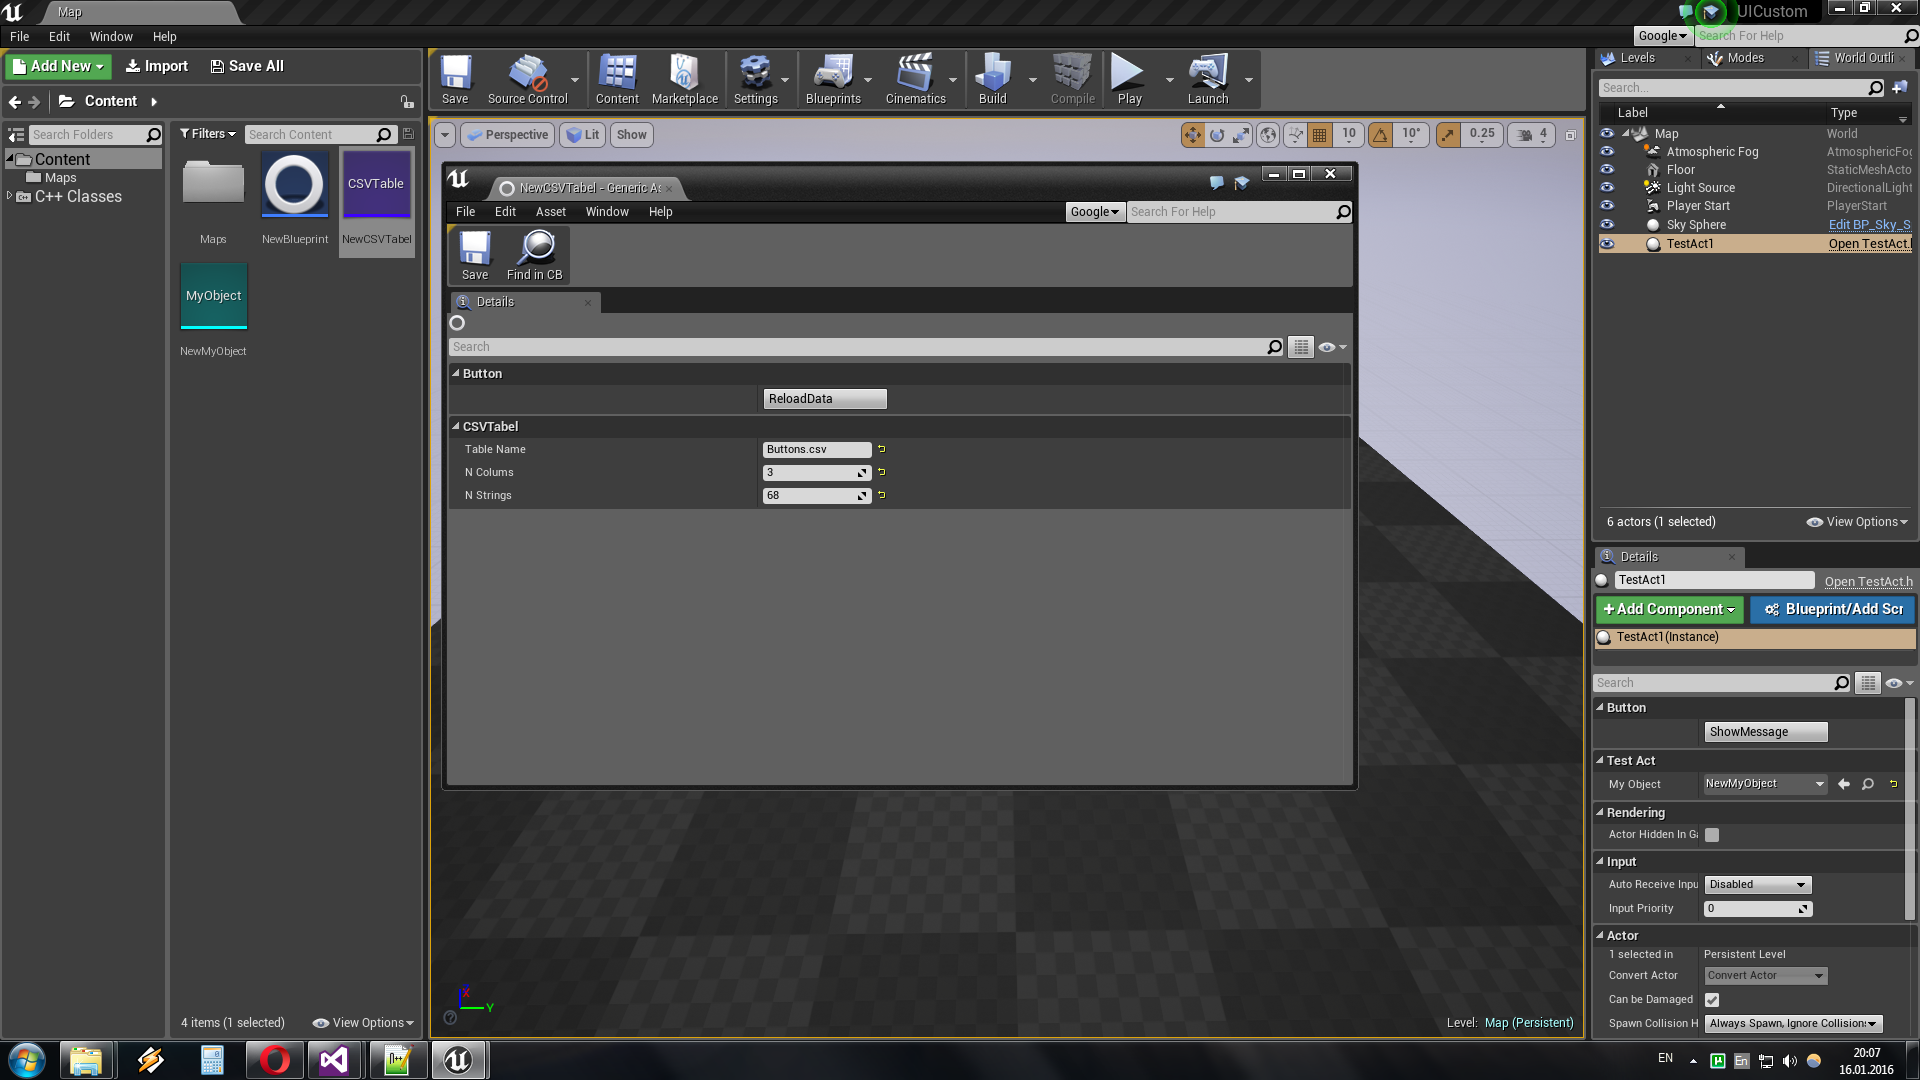
For example, I made a CVS table parser. After connecting the plugin can be observed:
Source code project: here
PS Please note that I am an amateur programmer, so please do not kick with the legs of the parser curvature.
Source: https://habr.com/ru/post/275239/
All Articles