Receptions work in Blender. Part 3
How to apply one attribute to many objects.
How to paint a lot of objects in one material?
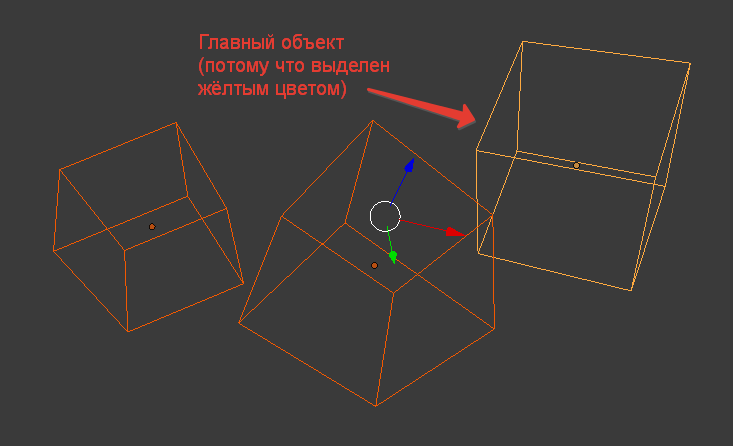
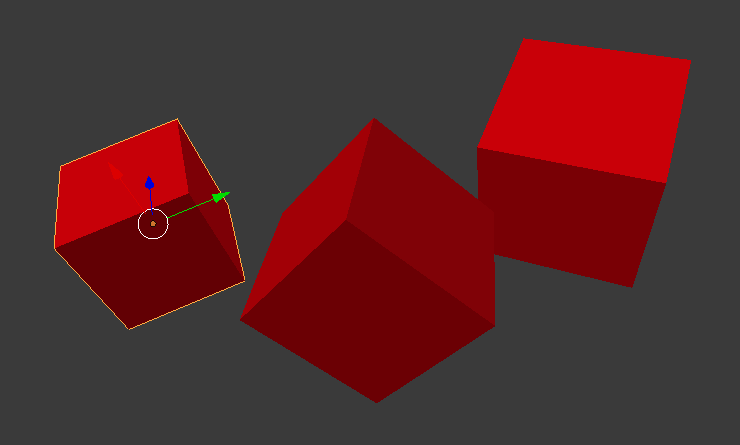
Create a new scene and delete the cube that was given at the start. The material has already been applied to this cube and you may get confused. Create a new cube. Make several copies of it. Select them.
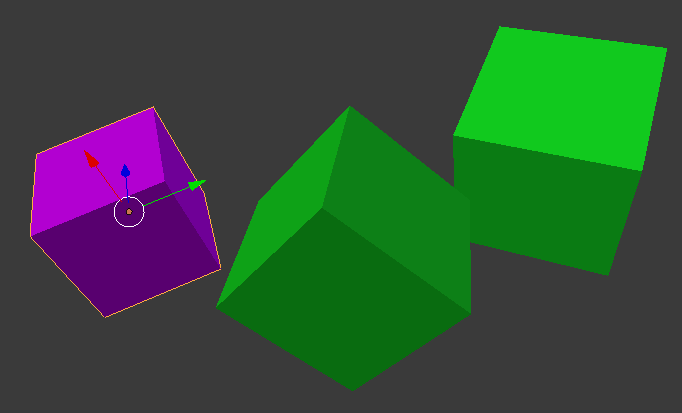
Among the selected objects is the main one. The main object is standardly highlighted in yellow.
')
Without removing the selection, assign the material. He will be assigned only to the main object.
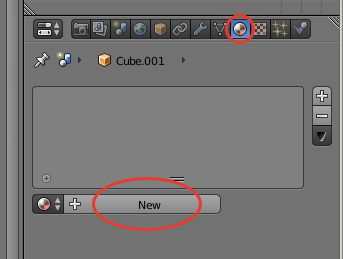
We paint in bright color to understand what is happening.

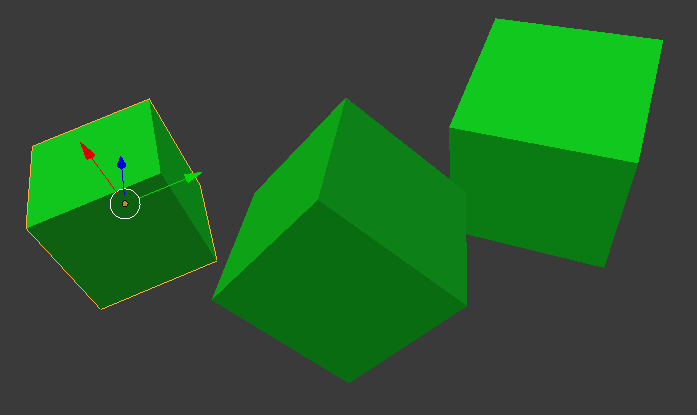
Press Ctrl + L (Link) . In the window that appears, select Materials .
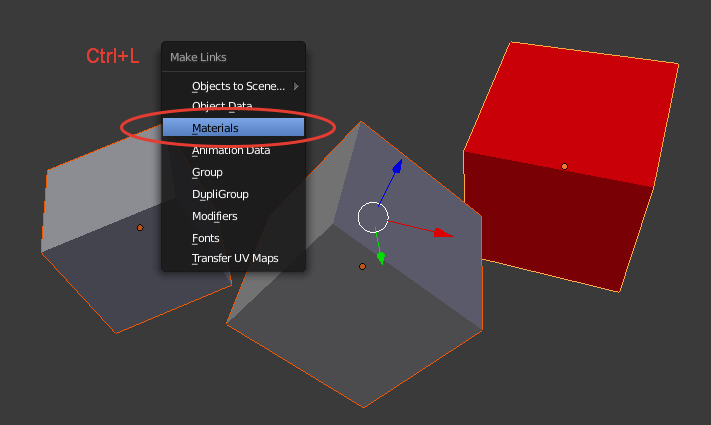
All objects used the same material.
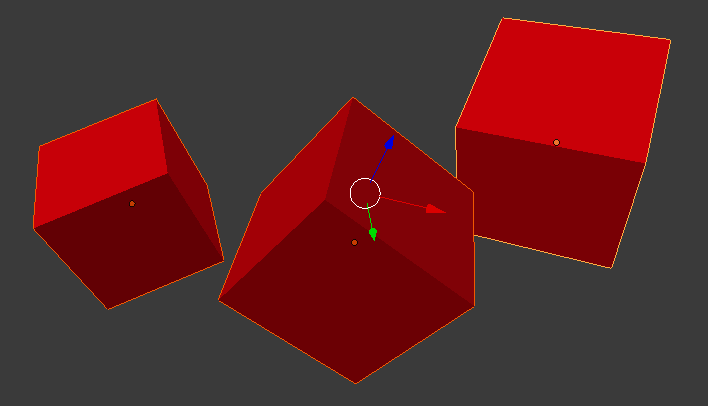
The important point is the connection of all objects with one material, and not the creation of a unique material for each object.
Choose one of the cubes.
Change its color.
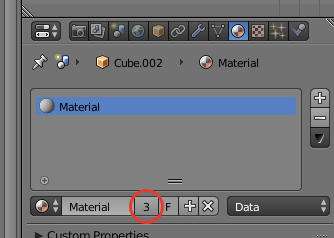
Changed the color of all cubes. Because the material is the same. The number in the materials panel indicates the number of objects on which this material is applied.
Click the left mouse button on this figure.
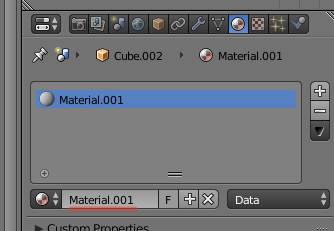
The material changed the name and the connection with the materials of other objects broke. Change the color of this object. Only he will change.
The letter F in the line of the name of the material.
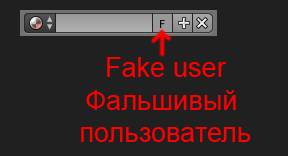
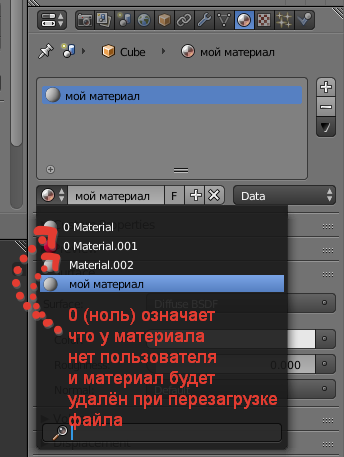
Assigning Fake User to a material will protect the material from being deleted.
Once again, a short method:
- Selection of objects to be painted in one material
- Indication of the main object on which the same material is already assigned.
- Ctrl + L (Link)> Materials
I wanted to tell you how to assign the same characteristics to a large number of objects. In this case, the materials. In this way, you can work not only with materials, but also with geometry, animation, textures, etc. For example, what I had to use.
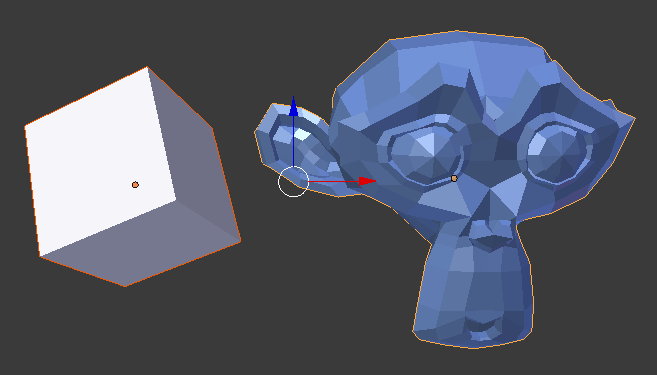
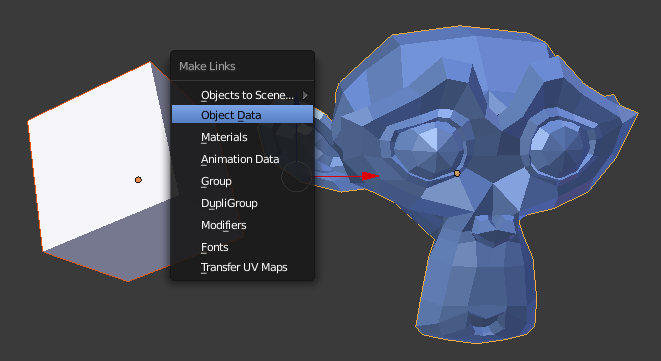
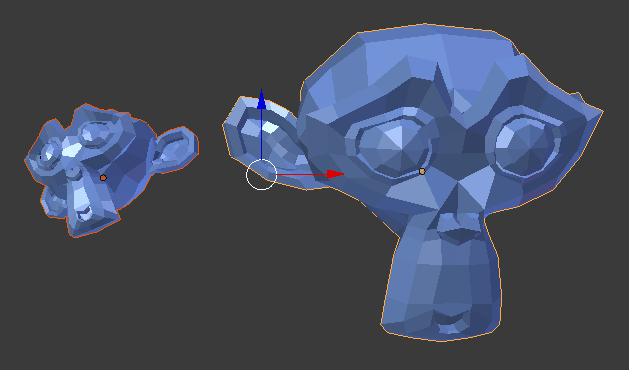
Mesh
The mesh of polygons (mesh) and material are connected. Change one object and everything will change. Generally setting here.
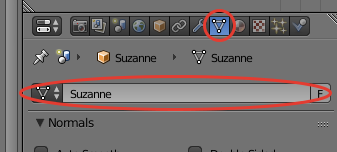
But you can also use Ctrl + L (Link)> Object Data .
Animation
Associates animation. You can through the menu Ctrl + L (Link)> Animation Data . And manual editing is here:

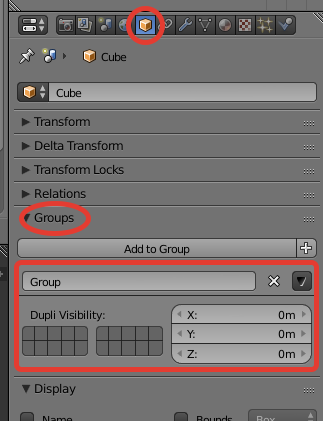
Groups
For example: a car wheel with a disc, tire, brake, bolts, logos. There you have a mesh and curves and empty objects. Heterogeneous objects that can not be combined without applying modifiers. I do not want to use them. And the wheels 4 pieces. Decision. Assign all objects the same group. Now in the menu of adding new objects there is an opportunity to add this group to the scene.
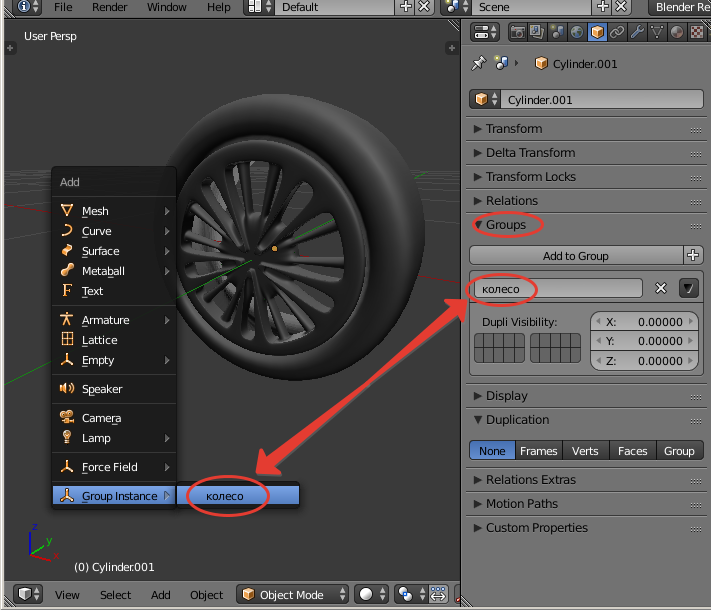
You can Ctrl + L (Link)> Group . Manual settings here:
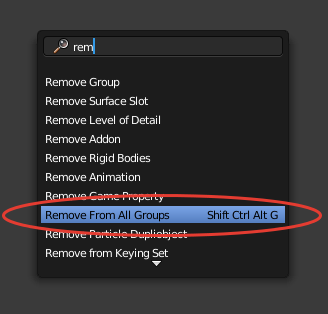
It may be necessary to remove groups from a large number of objects. There is a command Remove From All Groups . I select all the objects from which to remove the group. I press the spacebar . Pops up a search for commands and I type there the name of the command Remove From All Groups and apply.
Modifiers
Ctrl + L (Link)> Modifiers. This is copying modifiers. Deleting those that were and the appointment of new from another object.
Source: https://habr.com/ru/post/274363/
All Articles