Installing and configuring Ubuntu 8.04 on the ASUS Eee PC

When I bought myself an ASUS Eee PC, I did not think at all about what operating system I would install on it - it would definitely be Ubuntu Linux. Firstly, because I have Ubuntu at home and at work, secondly, because at home and at work I have a local mirror of the Ubuntu repository , and thirdly, simply because this distribution kit suits everyone .
After the purchase, I immediately got into the Internet in search of various HowTo to install Ubuntu 8.04 on the Eee PC. The result surprised me a little. Despite the huge excitement around the Eee PC, there are not that many HowTo on the network + most of them are aimed at Ubuntu 7.10 and offer to run some script that will replace the system configuration files with their own, sharpened for Eee PC.
I didn’t even look at these scripts, since they are intended for Ubuntu 7.10, and their launch on Ubuntu 8.04 can lead to bad consequences. Therefore, during the search for the necessary information on the network, I paid attention only to those articles that describe how you can configure Ubuntu under the Eee PC with your own hands. I didn’t manage to find a HowTo that would contain answers to all the questions before me, so I decided to systematize the information I collected and merge it into one article. Now my system is already set up, so I will try to remember all the actions that I performed on it, so that everything worked as I want. I hope I won't miss anything. :)
')
Installation
For installation, we need a boot disk with Ubuntu 8.04 and a flash drive with 1 GB or more.
Before using the flash drive, do not forget to copy all the important data from it.
# Making a disk image
dd if = / dev / cdrom of = ubuntu.iso
# Install the syslinux package
sudo apt-get install syslinux
# Download the script that will write the ISO image to the flash drive
wget kiwilinux.org/public/isotostick.sh
# Making this script executable
sudo chmod a + x isotostick.sh
# It is assumed below that / dev / sdX1 is the device file of your flash drive.
# Format the flash drive
sudo mkfs.vfat -F 32 -n ubuntu / dev / sdX1
# Make the partition bootable
sudo parted / dev / sdX set 1 boot on
# Run the downloaded script
sudo ./isotostick.sh cd.iso / dev / sdX1
# Making a bootable flash drive
sudo syslinux / dev / sdX1
Everything, now you can boot from this flash drive as a disk and install Ubuntu on an Eee PC. To do this, during the Eee PC bootup, press F2 to enter the BIOS and on the Boot tab, make the appropriate settings so that the boot will occur from the flash card.
Loading
To increase the operating system boot speed, in /boot/grub/menu.lst replace the line
# defoptions = quiet splashon
# defoptions = quiet splash clocksource = hpetand run
sudo update-grubNow the operating system boot time should be reduced by about 40 seconds.
Power off
After installation, the first thing that catches your eye is that Ubuntu does not want to shut down. :) At the halt command, the system shutdown process is started, the running services are stopped, the screen goes blank, but the computer does not turn off.
To fix this, open /etc/init.d/halt and add the line "modprobe -r snd-hda-intel" to the body of the do_stop function, as shown below:
...
do_stop () {
modprobe -r snd-hda-intel
if ["$ INIT_HALT" = ""]
....
Sound
Add to the /etc/modprobe.d/snd-hda-intel file (if the file does not exist, create it) the line
options snd-hda-intel model = 3stack-dig
Fn + F hotkeys support [1-9]
Install the source files and compile the module from them:
sudo apt-get install module-assistant eeepc-acpi-source
sudo ma ai eeepc-acpi
sudo sh -c 'echo eeepc-acpi >> / etc / modules'
If you upgrade your kernel in the future, you will have to run the command
sudo ma ai eeepc-acpiwhich will reassemble the module for the new kernel.
I did not earn all the keys. The sleep button and the display brightness increase / decrease buttons work fine. About the setting of the on / off button Wi-Fi, I will tell below. The volume off / decrease / increase buttons did not work when I tried to adjust them according to the HowTo I was caught. I did not dig deeper in this direction, because I personally do not need sound on the Eee PC (I turned it off in the BIOS at all). Therefore, the solution to this problem I leave to you. :) If someone writes in the comments how to set them up - I will be grateful, maybe later it will come in handy.
Dynamic CPU frequency change
I’ll say right away that when I read discussions on forums about reducing the frequency of the processor in order to save energy, I often met the opinions of people who say that saving a lot of battery life will not work - a maximum of 10-15 minutes. I did not do any tests myself, but I still tuned the frequency reduction - maybe at least it will be less heated, and these 15 minutes are also not superfluous ...
It is also worth noting that although the manufacturer claims that the processor frequency is 900 MHz, in fact, it operates at a frequency of 630 MHz. Judging by the reviews, even if you raise the frequency to 900 MHz, then you will not get a performance boost - you need to overclock the bus, which I didn’t do - for me the battery life is much more important.
So…
Install the package we need, allowing us to change the processor frequency on the fly:
sudo apt-get install cpufrequtilsand add the following lines to /etc/rc.local:
# Turn on the dynamic change of the processor frequencyIf the application doesn’t work for you, then you can increase the minimum processor frequency (you can see the list of available frequencies in / sys / devices / system / cpu / cpu0 / cpufreq / scaling_available_frequencies) or decrease the value of the -p option powernowd.
modprobe p4-clockmod
modprobe cpufreq-ondemand
# Turn on the smooth change of the processor frequency depending
# from the load in the range from 112 MHz to 675 MHz. New value
# frequencies will be calculated every 500 ms.
echo 112500> / sys / devices / system / cpu / cpu0 / cpufreq / scaling_min_freq
echo 675000> / sys / devices / system / cpu / cpu0 / cpufreq / scaling_max_freq
powernowd -m 1 -p 500
Wi-Fi
Compile and install the required module:
sudo apt-get install build-essentialIf you update the kernel in the future, you will need to recompile and install the module.
wget 'http://snapshots.madwifi.org/special/madwifi-nr-r3366+ar5007.tar.gz'
tar zxvf madwifi-nr-r3366 + ar5007.tar.gz
cd madwifi-nr-r3366 + ar5007
make clean
make
sudo make install
sudo reboot
Create the /etc/acpi/actions/wireless-toggle.sh file with the following lines:
  #! / bin / sh
 # main wifi toggle script (loads / unloads modules)
 .  / usr / share / acpi-support / key-constants
 # The sequence here * may * be important.
 # (It seems to fail intermittently if you deviate.)
 unload_modules () {
    rmmod wlan_scan_sta
    rmmod wlan_tkip
    rmmod wlan_wep
    rmmod wlan_ccmp
    rmmod wlan_acl
    rmmod ath_pci
    sleep 1
    rmmod ath_rate_atheros
    rmmod ath_hal
    rmmod wlan
    rmmod ath_dfs
 }

 # At least this one's straightforward.
 load_modules () {
    modprobe ath_pci
 }

 wifi_on () {
    # Force PCI Express Hotplug to reinit
    rmmod pciehp
    sleep 1
    # pciehp_force may be unnecessary;  Xandros did it.
    modprobe pciehp pciehp_force = 1
    sleep 1
    # Switch on the hardware
    echo 1> / proc / acpi / asus / wlan
    sleep 1
    load_modules
 }

 wifi_off () {
    unload_modules
    echo 0> / proc / acpi / asus / wlan
 }

 case $ 1 in
    on)
       acpi_fakekey $ KEY_PROG1
       wifi_on
       ;;
    off)
       acpi_fakekey $ KEY_PROG2
       wifi_off
       ;;
    toggle)
       STAT = `cat / proc / acpi / asus / wlan`
       if ["$ STAT" = "1"];
          then wifi_off;
          else wifi_on;
       fi
       ;;
 esac
Also create the file /etc/acpi/eeepc-hotkeys.sh:
  #! / bin / sh
 code = $ 3
 case $ code in
     # Fn + F2 - enable / disable wifi
     00000010)
         /etc/acpi/actions/wireless-toggle.sh on
     ;;
     00000011)
         /etc/acpi/actions/wireless-toggle.sh off
     ;;
 esac
Making these files executable:
chmod a + x /etc/acpi/actions/wireless-toggle.sh
chmod a + x /etc/acpi/eeepc-hotkeys.sh
And create the file / etc / acpi / events / hotkey, in which we write:
event = hotkey ATKD
action = / etc / acpi / eeepc-hotkeys.sh% e
Everything, now Wi-Fi and its on / off button should work. In principle, you can use graphic utilities to connect to a Wi-Fi point, but personally it’s much more convenient for me to type a few words in the console than to click on a lot of buttons. Therefore:
# Install the package to work with WPA encryption
sudo apt-get install wpasupplicant
Create the file /etc/wpa_supplicant/wpa_supplicant.conf with the following content:
ctrl_interface = / var / run / wpa_supplicantwhere ROUTER_ID is the name of the access point, and PASSWORD is the password to access it.
ctrl_interface_group = 0
ap_scan = 1
fast_reauth = 1
eapol_version = 1
network = {
ssid = "ROUTER_ID"
psk = "PASSWORD"
priority = 5
}
Add the following lines to / etc / network / interfaces:
iface ath0 inet dhcp
wpa-driver wext
wpa-conf /etc/wpa_supplicant/wpa_supplicant.conf
All, now to connect to the access point you need to run the command
sudo ifup ath0
If you are using a Wi-Fi open access point, you don’t need to install wpasupplicant and create the /etc/wpa_supplicant/wpa_supplicant.conf file - you just need to add lines to / etc / network / interfaces
iface ath0 inet dhcp
pre-up ifconfig ath0 up
pre-up iwconfig ath0 essid "ROUTER_ID"
To break an already established connection, use the command
sudo ifdown ath0
In principle, you can add the ifup / ifdown commands to the /etc/acpi/actions/wireless-toggle.sh script, so that when you press the Wi-Fi on / off button, a connection to the Wi-Fi point will automatically occur.
We save electricity
To see which applications / services cause the processor to most often go from a sleeping state to a working state and, consequently, increase power consumption, use the powertop utility.
My most active were Wi-Fi, USB and Ethernet. Therefore, I added the following lines to /etc/rc.local, which disable all these interfaces during the boot phase:
# Disable Ethernet
/ sbin / ifconfig eth0 down
# Disable USB
rmmod ehci-hcd
rmmod uhci-hcd
# Turn off Wi-Fi
/ sbin / ifconfig ath0 down
I turn them on only when I need them. They are enabled by the following commands:
# Ethernet
ifup eth0
# Usb
sudo modprobe ehci-hcd
sudo modprobe uhci-hcd
# Wi-Fi
ifup ath0
If there is no desire to type all these commands in the console each time, then you can install the Eee PC sm-Control program, written by a friend, Serge_RUS, which allows you to perform the same actions through a graphical interface.

SD / SDHC card
So far I have enough of the built-in SSD drive, and I don’t think to buy additional flash memory to my Eee PC. But, reading various HowTo and forums, I noticed that many have problems with some memory cards. Because I don’t have such a problem yet, I wasn’t really interested in which cards it was better to buy and how to deal with problems if they suddenly arise. At the end of the article I gave a couple of links on this topic, if it is relevant to you.
Longer SSD life
To reduce the number of write operations on the SSD, add the following lines to / etc / fstab so that all temporary files and logs are written to RAM:
tmpfs / tmp tmpfs defaults, noatime, nodiratime 0 0
tmpfs / var / tmp tmpfs defaults, noatime, nodiratime 0 0
tmpfs / var / log tmpfs defaults, noatime, nodiratime 0 0
Attention! If you use programs that create very large temporary files in / tmp, then the first line should not be added to avoid a shortage of RAM when creating such files.
In the mount parameters of the SSD partition specify the options noatime and nodiratime. That is, if your partition is mounted by the string
UUID = 79d788c4-a8fb-4f03-92c2-e90d4c26b51b / ext2 defaults, errors = remount-ro 0 1then replace it with
UUID = 79d788c4-a8fb-4f03-92c2-e90d4c26b51b / ext2 defaults, noatime, nodiratime, errors = remount-ro 0 1Enabling these options prevents the update of the last access time each time you access a file or folder in this section.
If you don’t use the locate command, you can delete (or just exit 0 after the line #! / Bin / sh) the file /etc/cron.daily/mlocate. This script runs every day and updates the locate database containing the paths of all files in the system (it is very convenient to use locate if you need to quickly find some file by name - the find command works much slower because it uses an unprepared database, but each time browses the entire directory tree). If you use locate, you can move /etc/cron.daily/mlocate to /etc/cron.weekly/ to update the database once a week.
Also, in order to reduce the number of write operations on SSD, turn off all logs (IMHO, they are not needed on a pocket laptop):
apt-get remove klogd sysklogd logrotate
Save space on SSD
Install the localepurge package. It will ask you for the list of locales you need and remove all others. The localepurge will also automatically launch each time apt starts.
Launch Synaptic, go to the Settings-> Preferences menu, go to the Columns and Fonts tab and check the box next to Installed Size. Now one more column will appear in the list of packages - Size. If the package is installed, then this column will display the size of the files of this package. Sort the list of packages by this column and delete all unnecessary packages that take up a lot of space.
Compact theme
To increase the amount of useful information displayed on the relatively small screen of the Eee PC, I recommend that you install the compact theme for the GTK - Human Compact .

Reading of books
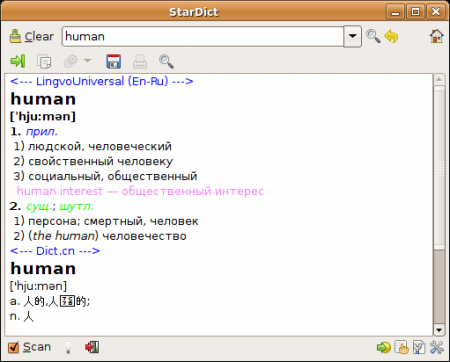
For reading books I can recommend FBReader .


Related Links
DebianEeePC / HowTo / Wifi
Ubuntu 8.04 (Hardy Heron) on the Asus Eee PC
(Un) supported Hardware
Problems with SDHC and their solution
Installing Ubuntu on an Eee PC
Install and configure Ubuntu
Source: Crossposting from my blog - konishchevdmitry.blogspot.com .
Source: https://habr.com/ru/post/27337/
All Articles