Simple Blender. Part 2
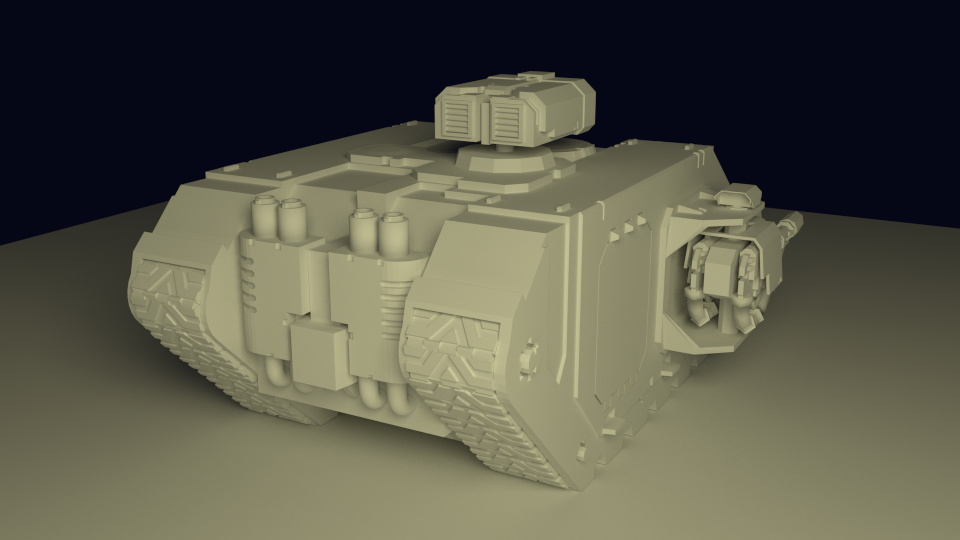
KDPV 2.
The continuation of the story that Blender is easy, written by a non-professional. Here is the beginning of the story .
Modeling techniques
In general, I personally (the person for whom modeling is an episodic hobby) know 4 modeling techniques that are used in various situations:
- Processing a primitive with modifiers.
We make a plane with a large number of polygons, impose on it the Noise / Displase (noise) and Smooth (smoothing) - we get a landscape. - Work at the level of geometry.
My favorite. If you wish, you can do anything. In the limit it looks like this: put an end. Then another, and another, and another, and another, and another. Draw edges and get the frame. Choose a set of edges and stretch a face on it. According to the result - the finished object. The technique is hardcore and not always appropriate (it is easier and faster to do it in another way). - Construction of surfaces on the curves of sections.
If you need a rotation body, we make a curve and simply impose a rotation modifier on it - Lathe (max) or Spin (Blender). So make glasses, bullets, etc. If it is, for example, a boat or a helicopter fuselage, then section curves are drawn and for each adjacent pair a skinning is made — instructing the program to make a surface that fits these curves. - Sculpting
We take and pull out / press in the surface areas of the high poly sphere, for example. As the name implies, this is more creativity than a clear process.
Naturally, in the pure form of any one technique is rarely used, the mixture is usually used. In this post I will tell you how to use the first technique in Blender. In the next - the second.
So, primitives and modifiers. But first - a little more about UI.
')
Work with the program
Upd. As recommended by Leopotam : hotkey presses go to the active area of Blender. In incomprehensible situations - try to move the mouse to the area of interest to you and repeat.
3D area
All work with the geometry is in this area. Once again screen:
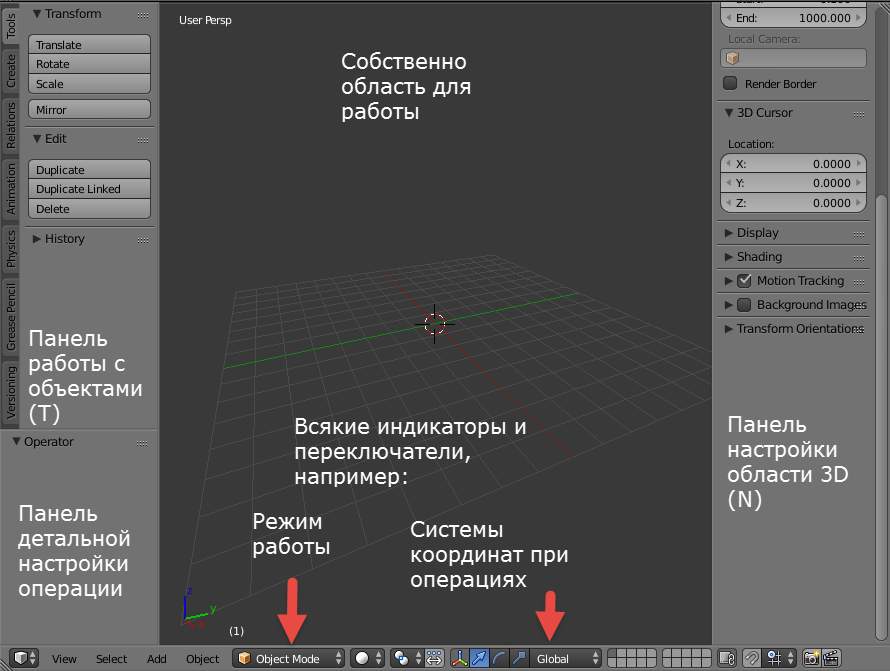
Figure 1. The 3D area.
About the panel
If you need to create an object, rotate it, group it with another, assign a physics (there is such a thing, yes), without using the menu / hotkeys - this is to the left, in the panel for working with objects. Part of this panel is the operation detailed setting panel. The exact starting parameters of the primitives are also assigned there, for example. If you want something to try and not understand where to look - take a look here.
If you need to put a picture on the background (different depending on the projection - very convenient), display the normal, adjust the length of the viewport trim (you will hardly need it at the same time) - it is to the right, and this does not seem to be tied to the hot keys.
3D cursor
As I mentioned earlier, Blender has such a thing as a 3D cursor. They can point to any point in the space of the scene. This point will be used as the origin point for the newly created primitives. You can move by clicks, you can - setting the value (panel, called by N):
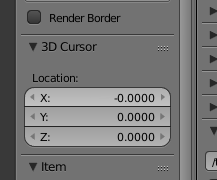
Figure 2. Fields for entering the numerical values of the required coordinates of the 3D cursor.
There is no analogue in the mask - the origin is indicated at the moment of OnMouseDown and disappears with OnMouseUp.
The feature is not bad and not good - just not like in Max.
Hint 1. Hotkeys
These keys are connected with the cursor and help to somehow align the situation with the missing “align to” (move the object to the center of the scene, for example).
Shift-S. Displays the following menu:

Here selection is the selected object, center is the center of coordinates.
Ctrl-Alt-Shift-C. The most palmetlomno combo actively used by me:
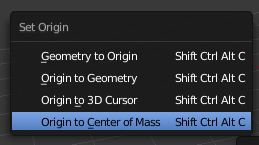
Origin is an analogue of the pivot-point in Max, the point of the object around which it rotates.
Combinations of these commands allow you to somehow alter the behavior of “align to”. BF, wake up, fingers strike.
Shift-S. Displays the following menu:
Here selection is the selected object, center is the center of coordinates.
Ctrl-Alt-Shift-C. The most palmetlomno combo actively used by me:
Origin is an analogue of the pivot-point in Max, the point of the object around which it rotates.
Combinations of these commands allow you to somehow alter the behavior of “align to”. BF, wake up, fingers strike.
Hint 2. Camera and 3D cursor
You can tie the point of view of the camera of the current 3D area, if you explicitly designate such a desire in the settings in the same N panel:
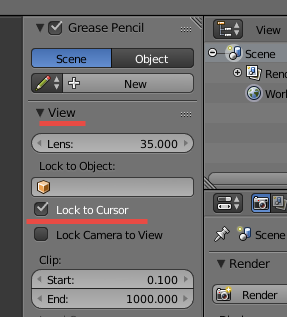
I actively use this opportunity - to click the cursor to the point of interest to me with instant transfer of the camera area. Unfortunately for me, starting from version 2.74 there is no instant transfer anymore - you need to confirm the transition each time with the Home key. Therefore, I am sitting at 2.73. But this is a matter of habit. And they could have shoved into the settings.
I actively use this opportunity - to click the cursor to the point of interest to me with instant transfer of the camera area. Unfortunately for me, starting from version 2.74 there is no instant transfer anymore - you need to confirm the transition each time with the Home key. Therefore, I am sitting at 2.73. But this is a matter of habit. And they could have shoved into the settings.
Creation of primitives
So we got to the actual modeling.
You can create a primitive in 2 ways:
- For beginners - through the T panel (I mentioned this method in the previous part). Go there on the “Create” tab and click what you need:

Figure 3. Create primitives tab. All primitives available in the program are listed here. - For those who know hotkeys - by Shift-A:

Figure 4. The same list as in the previous figure, only translated into drop-down menus.
In the menu, the cursor keys and auto-transition to the underlined letter work (ie, pressing M, P will lead to the transition of Mesh-> Plane and the creation of a plane).
In any case, immediately after creation, the primitive will be automatically highlighted and the interface for entering the start parameters will appear in the detailed settings panel of the operation:

Figure 5. Operation details setup panel immediately after creating a sphere.
As soon as you deselect this primitive, either do any transformation with it, or just switch the operation mode (more on that later), in general, if you disturb it somehow (input the initial parameters are not alarming), the interface will disappear, the primitive will be fully created, re-instruct the starting parameters again will not work. In the next series - I will explain why.
Suzanne
In Max, a teapot is a primitive with a complex geometry. In Blender, the head of a monkey named Suzanne. Located in Mesh-> Monkey:
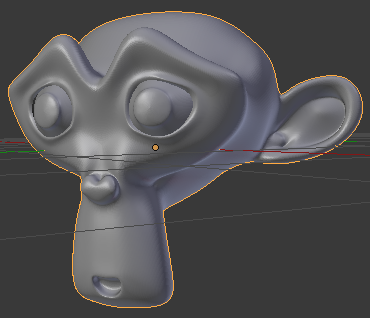
Figure 6. In general, Suzanne is much more quadratic, but for the first acquaintance I smoothed it with a subdivision (see below).
Basic operations on objects
Conceptually - nothing new / unusual (applies to the selected element):
- Rotate - R
- Stretching / compression - S
- Moving - G (mnemonic - the word Grab, as far as I understood. It seems like nonhuman logic, but G is closer to R and S than M, which would have to be pressed with the right hand)
The same operations are available from the UI 3D area, through this control:
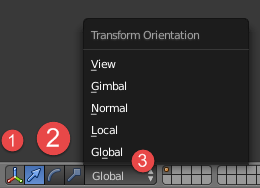
Figure 7. Basic operation buttons (in max, they are at the top, and Blender is at the bottom)
Button 1 turns on / off the display of visual controllers.
Buttons 2 switch operation and controller for it:
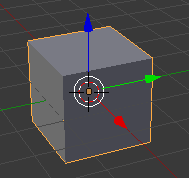
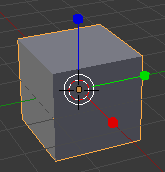
Figure 8. Controllers for moving, rotating, and stretching / compressing.
We pull on the color axis on the controller - we perform the operation strictly relative to the axis of this color (the color of the axes is at the bottom left in the 3D area). We pull for the white ring - we do the operation, without looking at the axis.
Drop-down list 3 allows you to specify the coordinate system in which the operation is done - sometimes it helps.
I note that the call to the hot key operation is triggered, even if the object is outside the viewport. UI, of course, cannot be done this way - no controllers are visible.
Hint
In Blender there is a delightful feature that is available only if you call the base operation via a hot key: entering the limit axis and the numeric value of the operation. I explain. Suppose you want to rotate an object along the X axis by 90 degrees. You select the object and then press: “R” - turn, “X” - around the X axis, “90” - 90 degrees, “Enter” - confirm. Everything. Here is how it is displayed on the interface:

Control of drop against Koreans in explicit form.
Control of drop against Koreans in explicit form.
Parameters and modifiers
A small digression.
As you already know, there is no “main” window / view / etc in Blender. Accordingly, for settings of the object parameters (position, name, textures, applied modifiers and so on) the settings area is used. It is tabulated, and the first 4 tabs are always available (even if there are no objects on the scene). This is because they allow you to customize those things that are always there while there is a scene. These are the tabs of the render, the world and the current scene itself (the textures tab is also always available, but now I’m a little about something else).
As soon as you select an object, tabs related to the object are added to this area. They are saved even if you remove the selection from the object. But if you select an object and delete it, the object's tabs will disappear again:
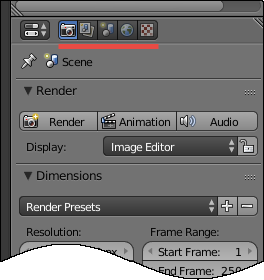
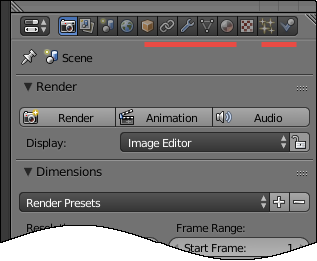
Figure 9. UI settings area. Left - permanent tabs, right - object
Settings Area
Detailed work with object parameters is carried out with tabs marked:
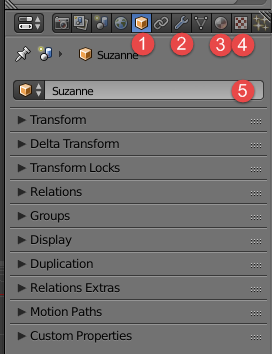
Figure 10. UI settings area. Most popular tabs
The main tabs at the moment, I marked the numbers 1-4:
- An object
- Modifiers
- Materials
- Textures
Each tab is, in fact, an analogue of the “scroll” of Max. Only he does not overtighten, but simply scrolls - just put the mouse pointer over it.
On the screen I turned all the subgroups of the “Object” tab (so as not to insert a sheet in the text) - by default some of them are expanded. The number 5 indicates the field to enter the name of the object.
Modifiers tab
Here is, in fact, an analogue of the Max modifier stack. But with a much more pleasant UI, in my opinion. Here Suzanna, who brought the number of polygons to 126,000 (modifier Subdivision surface), then pulled on the ball (modifier Cast), and then the result cut the number of polygons to indecent 600 (Decimate modifier):
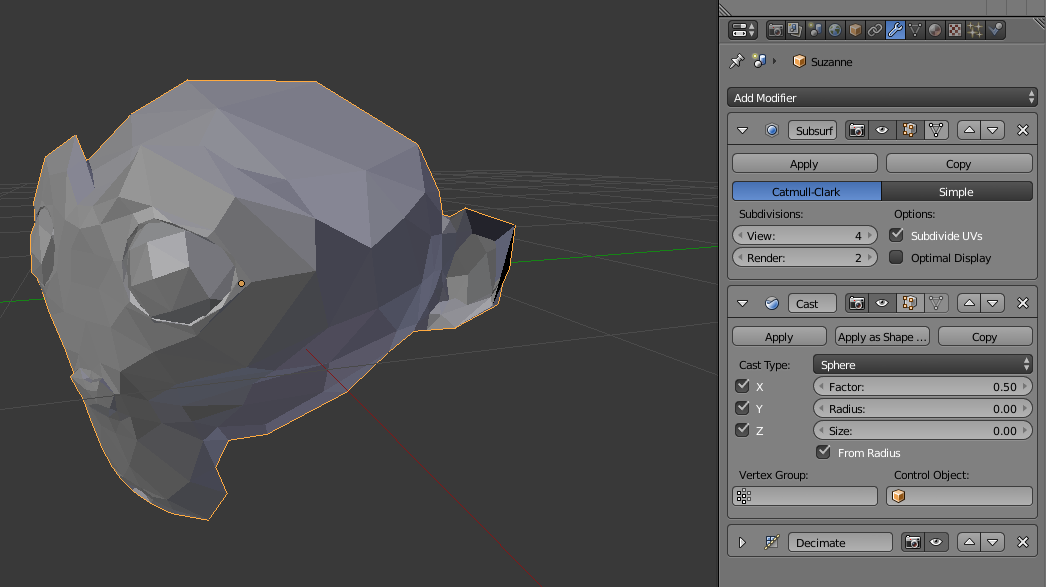
Figure 11. The fate of Suzanne is not easy. But with her and not doing this - google.
The drop-down list allows you to add a modifier, the panels below it are actually the UI of the added modifiers in turn (the topmost one is applied first). Here is a comparison of the Blender and Max stacks:

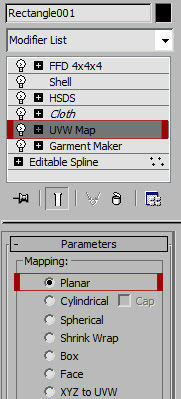
Figure 12. Blendera vs. Stack max stack
As you can see, the UI of the Max modifier stack is the “list form” + “detailed infa for the selected element”, and Blender is the “list of detailed windows”. Each solution has its pros and cons.
And finally
To understand what control drops against Koreans in Blender, try the following. Start Blender, click the mouse in the 3D area, and then ... Then remove your hand from the mouse and simply press the keys written below. If you fail, I recommend starting over.
Letters are driven in without a shift (unless explicitly stated otherwise). The numbers are driven in, if -1.2, then this is “minus”, “1”, “dot”, “2”. Enter is actually the Enter key.
Ctrl-N, Enter,
Shift-A, M, U, Enter,
Shift-A, M, U, S, 1.35, Enter, G, Z, -1.6, Enter,
Shift-A, M, U, S, 0.65, Enter, G, Z, 1.2, Enter,
Shift-A, M, O, S, Shift-Z, 0.2, Enter, G, Z, 1.2, Enter, R, X, 90, Enter, G, Y, -1, Enter, A
I have already described the explanation of almost everything that happened in this series.
In the next series - about the geometry.
Source: https://habr.com/ru/post/272721/
All Articles