Free hosting control panels. "Coin"
There comes a time when virtual hosting is not enough and your project just “asks” to the server. Not always for new tasks you will need a dedicated server right away, but at least you should start with a virtual server . At the same time, many of you start to look for a partner (s) for renting a more productive service to save money. Also, one of the ways to save the budget is to use free software.
After all, not every one of you, for example, will be pleased to sit in the console and install the necessary software, or manage your sites through the same command line. At such times, hosting control panels come to the aid of many webmasters, and how nice it is when this panel is exactly high-quality and free software. Most recently, we have already talked about one free software product, but today we’ll talk about another interesting hosting control panel, namely the "coin" ...

')
I think many of you have guessed that it will be a question of the CentOS Web Panel (CWP). Unlike many other control panels, CWP will automatically deploy a full LAMP stack with caching at the web server level using Varnish Cache - this is a great solution for storing the hot cached content of your web pages in RAM. It will speed up your website, and at the same time reduce the load on the processor.
But back to the panel itself, before installing, I would like to highlight a few of its main advantages:
A complete list of CentOS Web Panel features can be found on the official website of the software product at the following link . As you can see, most commercial server and hosting management systems do not have such a wide range of features, and what can we say about free products?
Regarding the system requirements, according to the developers, we need a server with at least 512 MB of RAM (for a 32-bit OS version) and an installed coin, namely CentOS 6.x. If you want to enjoy all the features of this panel, for example, such as anti-virus mail scanning, then you should have at least 4 GB of RAM on board your typewriter. CWP also supports operating systems such as RedHat 6.x and CloudLinux 6.x.
After the hosting provider has provided a CentOS server, several useful steps must be taken before installing CWP. If you do not have the Wget utility installed - a console program for downloading files over the network, then connect to the “typewriter” via SSH and enter the following command:
Next, update your server with the command:
And do not forget to restart the “typewriter” so that the changes take effect:
Now we are ready to install CentOS Web Panel. Go to the / usr / local / src directory:
Where to download the latest version of the installation files:
If the main link does not work, use the following command:
Then we start the installation itself:
The installation process can take about 30 minutes, so calmly go to the kitchen for a cup of a good drink (everyone has their own tastes). As soon as the panel is installed in the console, you will see the following message:
Do not forget to keep accesses, in particular the password of the MySQL superuser. After that, according to the instructions of the developers themselves, we restart the server using the ENTER button. If this did not work, then we use the reboot command, which we recalled earlier. When you try to reconnect to the server via SSH, you will see the CWP welcome screen, which will display brief information about registered users and the current situation with disk space usage:
Let's go to the panel using your favorite browser, using one of the following links, access is the same as to the server:
After successful authentication, we get to the Dashboard menu page, from here you can manage all the settings of the CWP panel. We will try to briefly tell about each block of the panel:
Next, we will configure several key parameters that we need to work with CWP. To begin with we will configure name servers. To do this, go to the DNS Functions menu section and select the Edit Nameservers IPs item.
Specify our name servers and click Save changes. To read the DNS (BIND) setup instructions, use the following link , which is also available on the Edit Nameservers IPs page.
The next step is to configure the “shared” IP address and mail of the superuser - these are very important steps for hosting sites on your server. As a rule, the server IP is already specified, but to verify this, go to the menu section CWP Settings, and then select Edit Settings.
We see that the IP address of your “typewriter” is most likely in the Shared IP field (if it is not, then specify it), and in the Root Email field you need to specify your email. After specifying all the necessary data, do not forget to click the Save changes button. CWP is now ready to host sites.
You remember, the panel is capable of providing hosting services. In CWP, you have the opportunity to set up any number of tariff plans. To do this, go to the Packages section of the menu and select the Add a Package item. We fill in all the required fields according to the number of server resources that you are ready to provide to your potential client, and as usual, do not forget to apply the changes - in this case, by pressing the Create button.
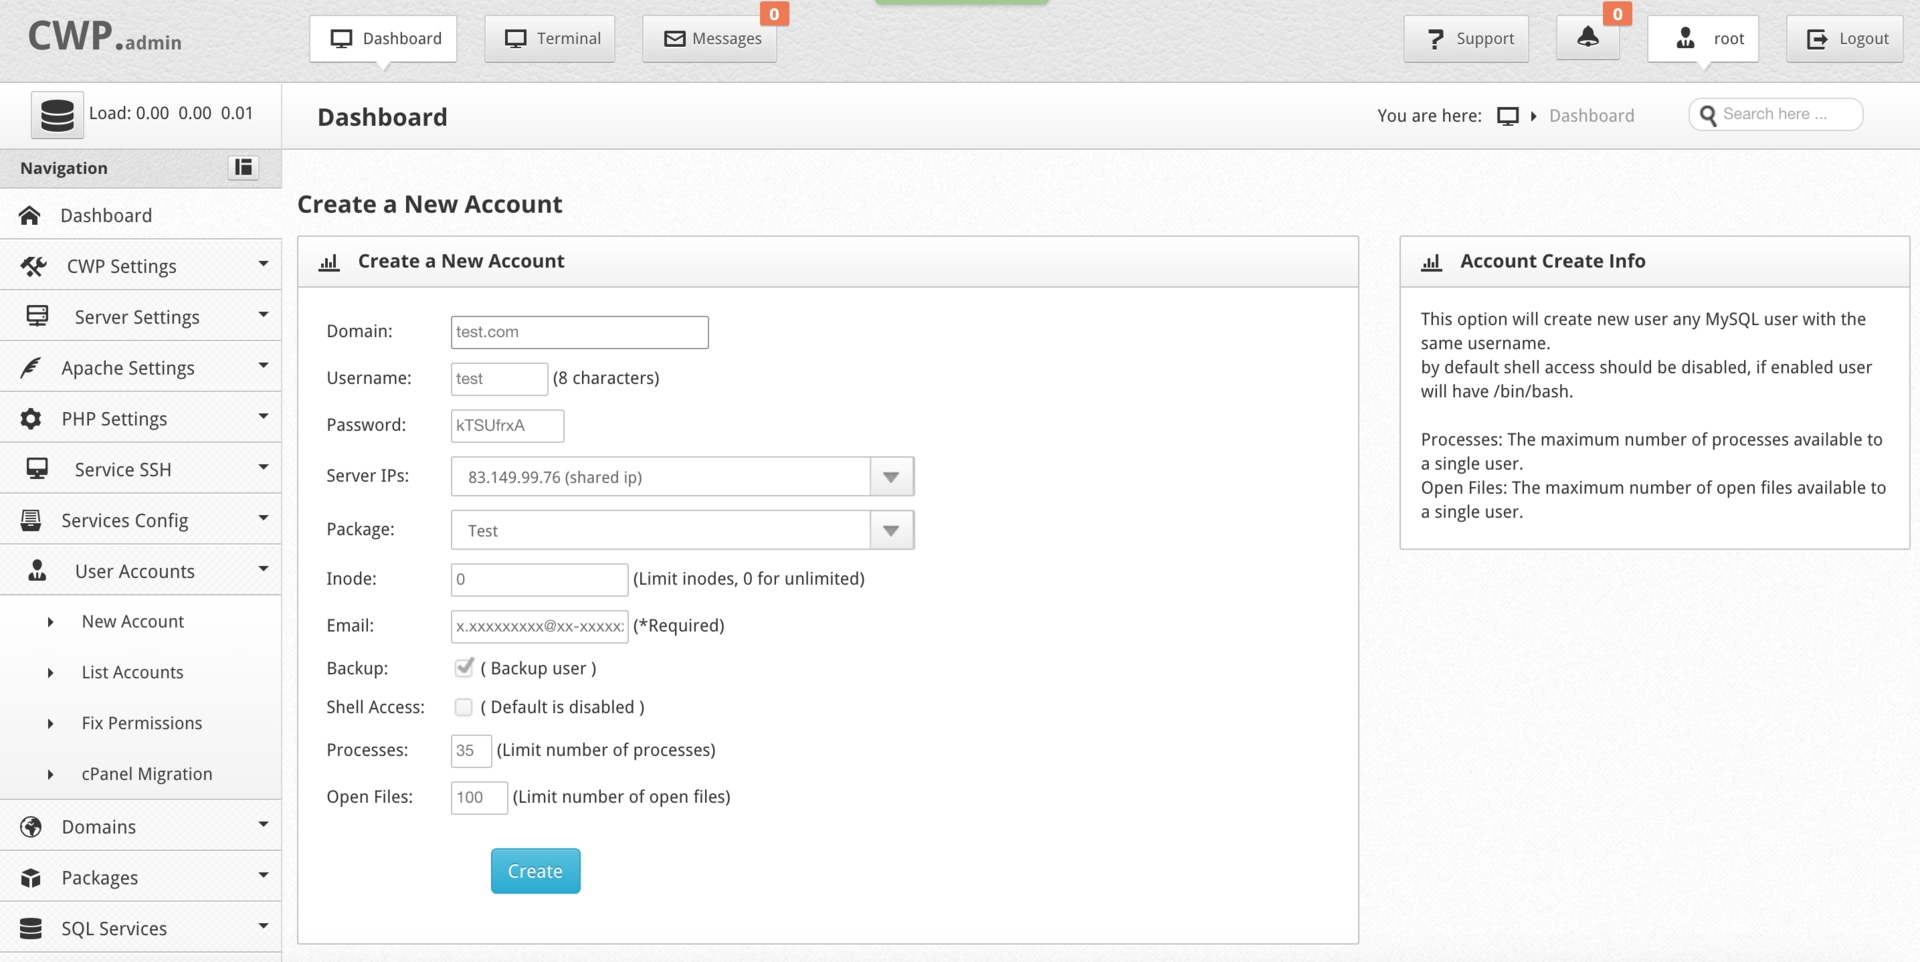
In order to add a domain to the panel, you must have at least one user account. Go to User Accounts, select New Account and create an account. I draw your attention to the fact that by default access to the shell for a newly created user is disabled. I advise you to think a few times before activating this functionality to your customers. Here you can also set inode limits for each user. After you have filled in all the fields, click the Create button.
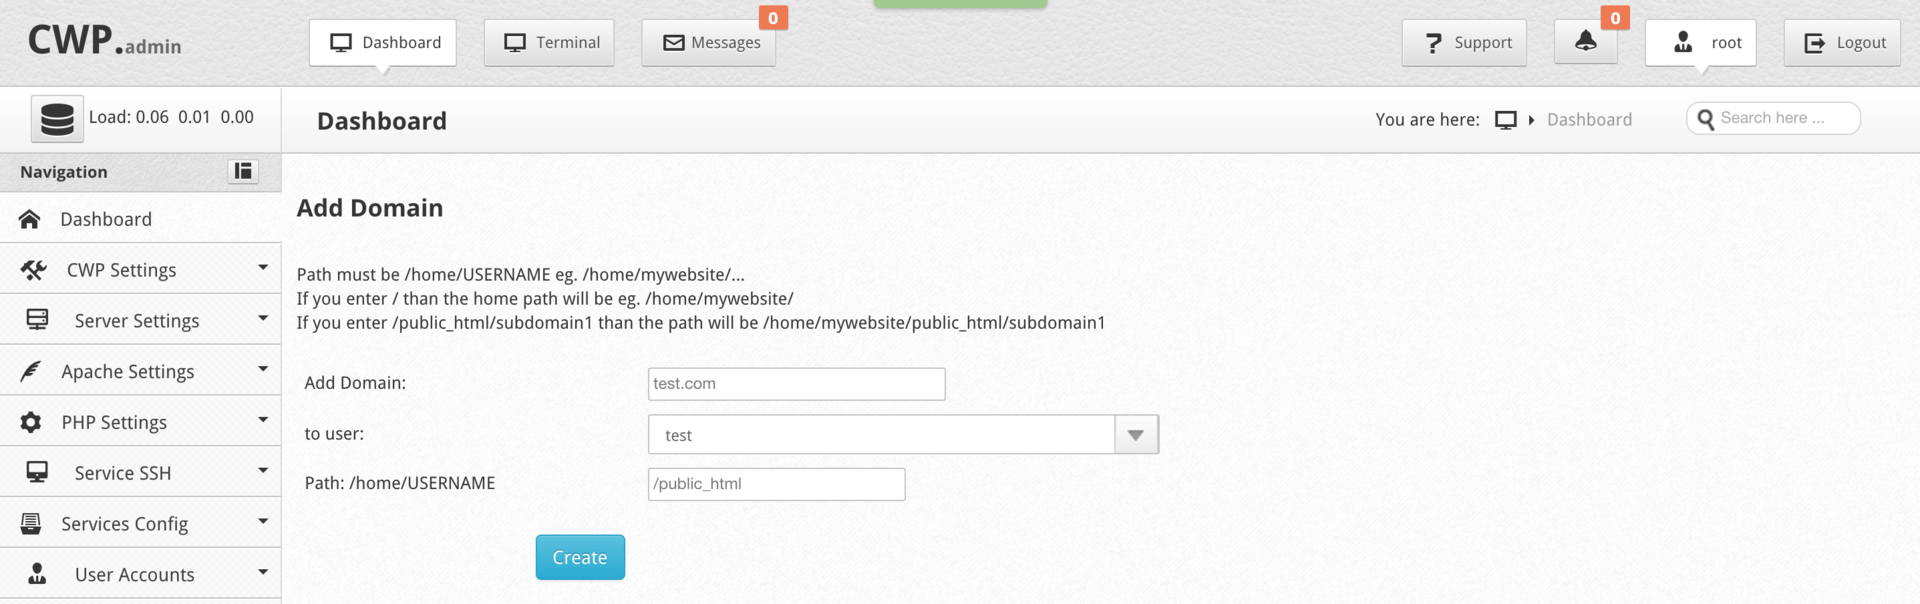
Now let's add a new domain. To do this, go to the Domains menu section and select the Add Domain item. Specify the required domain, assign it to the appropriate user and fix all actions with the Create button.
The standardly configured panel should consume a small amount of resources of your server, let's check it. To check the consumption of RAM, connect to the server via SSH and enter the following command:
On the screen of our "typewriter" this data was displayed:
I think you will have a similar result. As you can see from the total amount of RAM in 1 GB, about half is used - 522 MB, which quite agrees with the developers' statement. This resource consumption is quite low for hosting control panels.
Also, the default installation already contains the latest stable version of PHP with the Zend Optimizer application and the ionCube PHP Loader utility, which is easy to check with the command:
You should see the following information in the console:
If you are loyal to CentOS and about $ 13 per month of your hosting budget (for comparison, we took the cost of the license ISPmanager Business ) are ready to invest in hardware, rather than software, then you should like the CWP panel. Perhaps, right now you are thinking about launching your first hosting server, then why not just send these funds from licensed software to rent a more productive “machine” and thus make your potential customers a little bit happier. Not always what is free is bad. Do not be afraid of something new, at first glance unknown.
Test for health, and you will succeed!
To be continued…
After all, not every one of you, for example, will be pleased to sit in the console and install the necessary software, or manage your sites through the same command line. At such times, hosting control panels come to the aid of many webmasters, and how nice it is when this panel is exactly high-quality and free software. Most recently, we have already talked about one free software product, but today we’ll talk about another interesting hosting control panel, namely the "coin" ...
')
I think many of you have guessed that it will be a question of the CentOS Web Panel (CWP). Unlike many other control panels, CWP will automatically deploy a full LAMP stack with caching at the web server level using Varnish Cache - this is a great solution for storing the hot cached content of your web pages in RAM. It will speed up your website, and at the same time reduce the load on the processor.
Opportunities
But back to the panel itself, before installing, I would like to highlight a few of its main advantages:
- By default, the ability to switch versions of PHP is available - the administrator, on his own side, can install the required version with a few clicks, and the user, in turn, can select the desired PHP revision for their sites;
- the panel is focused both on server management and on providing hosting services (support for tariff plans, restrictions, etc.);
- it is possible to counter small DDoS attacks and block unwanted traffic by using extensions to work with CSF (Config Server Firewall);
- Out of the box, CWP supports CloudLinux, a commercial CentOS extension that focuses primarily on hosting providers;
- fairly convenient hosting projects with streaming video due to the built-in support for ffmpeg ;
- CWP has an integrated anti-spam engine based on AmaVIS , ClamAV , OpenDKIM , RBL checks, SpamAssassin ;
- the panel supports hosting on the server both its own name servers and using FreeDNS;
- availability of built-in monitoring tools.
A complete list of CentOS Web Panel features can be found on the official website of the software product at the following link . As you can see, most commercial server and hosting management systems do not have such a wide range of features, and what can we say about free products?
System requirements
Regarding the system requirements, according to the developers, we need a server with at least 512 MB of RAM (for a 32-bit OS version) and an installed coin, namely CentOS 6.x. If you want to enjoy all the features of this panel, for example, such as anti-virus mail scanning, then you should have at least 4 GB of RAM on board your typewriter. CWP also supports operating systems such as RedHat 6.x and CloudLinux 6.x.
Server preparation
After the hosting provider has provided a CentOS server, several useful steps must be taken before installing CWP. If you do not have the Wget utility installed - a console program for downloading files over the network, then connect to the “typewriter” via SSH and enter the following command:
yum -y install wget Next, update your server with the command:
yum -y update And do not forget to restart the “typewriter” so that the changes take effect:
reboot Installation
Now we are ready to install CentOS Web Panel. Go to the / usr / local / src directory:
cd /usr/local/src Where to download the latest version of the installation files:
wget http://centos-webpanel.com/cwp-latest If the main link does not work, use the following command:
wget http://dl1.centos-webpanel.com/files/cwp-latest Then we start the installation itself:
sh cwp-latest The installation process can take about 30 minutes, so calmly go to the kitchen for a cup of a good drink (everyone has their own tastes). As soon as the panel is installed in the console, you will see the following message:
############################# # CWP Installed # ############################# go to CentOS WebPanel Admin GUI at http://SERVER_IP:2030/ http://xxx.xxx.xxx.xxx:2030 SSL: https://xxx.xxx.xxx.xxx:2031 --------------------- Username: root Password: ssh server root password MySQL root Password: xxxxxxxxxxxx Do not forget to keep accesses, in particular the password of the MySQL superuser. After that, according to the instructions of the developers themselves, we restart the server using the ENTER button. If this did not work, then we use the reboot command, which we recalled earlier. When you try to reconnect to the server via SSH, you will see the CWP welcome screen, which will display brief information about registered users and the current situation with disk space usage:
******************************************** Welcome to CWP (CentOS WebPanel) server Restart CWP using: service cwpsrv restart ******************************************** if you can not access CWP try this command: service iptables stop 15:20:19 up 23 min, 1 user, load average: 0.00, 0.00, 0.00 USER TTY FROM LOGIN@ IDLE JCPU PCPU WHAT root pts/0 78.111.187.112 15:20 1.00s 0.01s 0.01s -bash Filesystem Size Used Avail Use% Mounted on /dev/mapper/vg0-root 33G 1.9G 30G 6% / tmpfs 504M 0 504M 0% /dev/shm /dev/vda1 485M 68M 392M 15% /boot /dev/mapper/vg0-temp 2.0G 369M 1.5G 20% /tmp Interface
Let's go to the panel using your favorite browser, using one of the following links, access is the same as to the server:
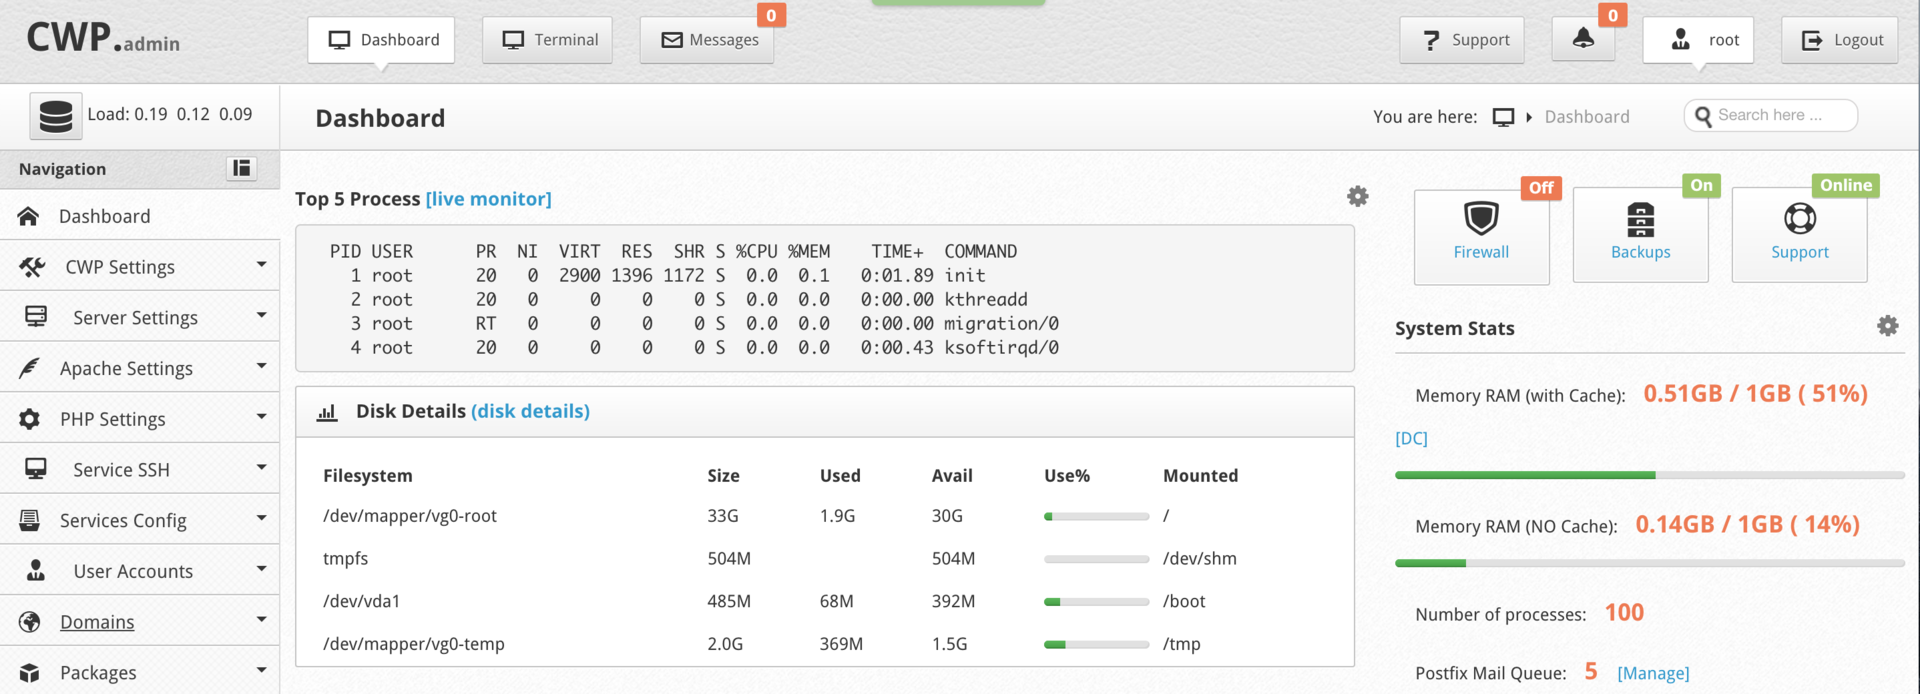
http://xxx.xxx.xxx.xxx:2030 SSL: https://xxx.xxx.xxx.xxx:2031 After successful authentication, we get to the Dashboard menu page, from here you can manage all the settings of the CWP panel. We will try to briefly tell about each block of the panel:
- Navigation - navigation menu for viewing various settings of each service;
- Top 5 Processes - displays in real time the 5 most "voracious" processes on your server;
- Disk Details - this block provides information about the disks of your “typewriter”;
- Service Status - shows the current status of services, and also provides the ability to manage them if necessary (start, stop, etc.);
- System Stats - displays the memory consumption, the number of processes and letters in the queue;
- Application Version - shows the versions of installed applications, such as Apache, PHP, MySQL and FTP;
- System Info - displays information about the processor model, number of cores, their frequency, version of the operating system, server operation time, etc .;
- CWP Info - shows which name servers are configured for your typewriter at the moment, and also displays the server's IP address and panel version.
Standard setting
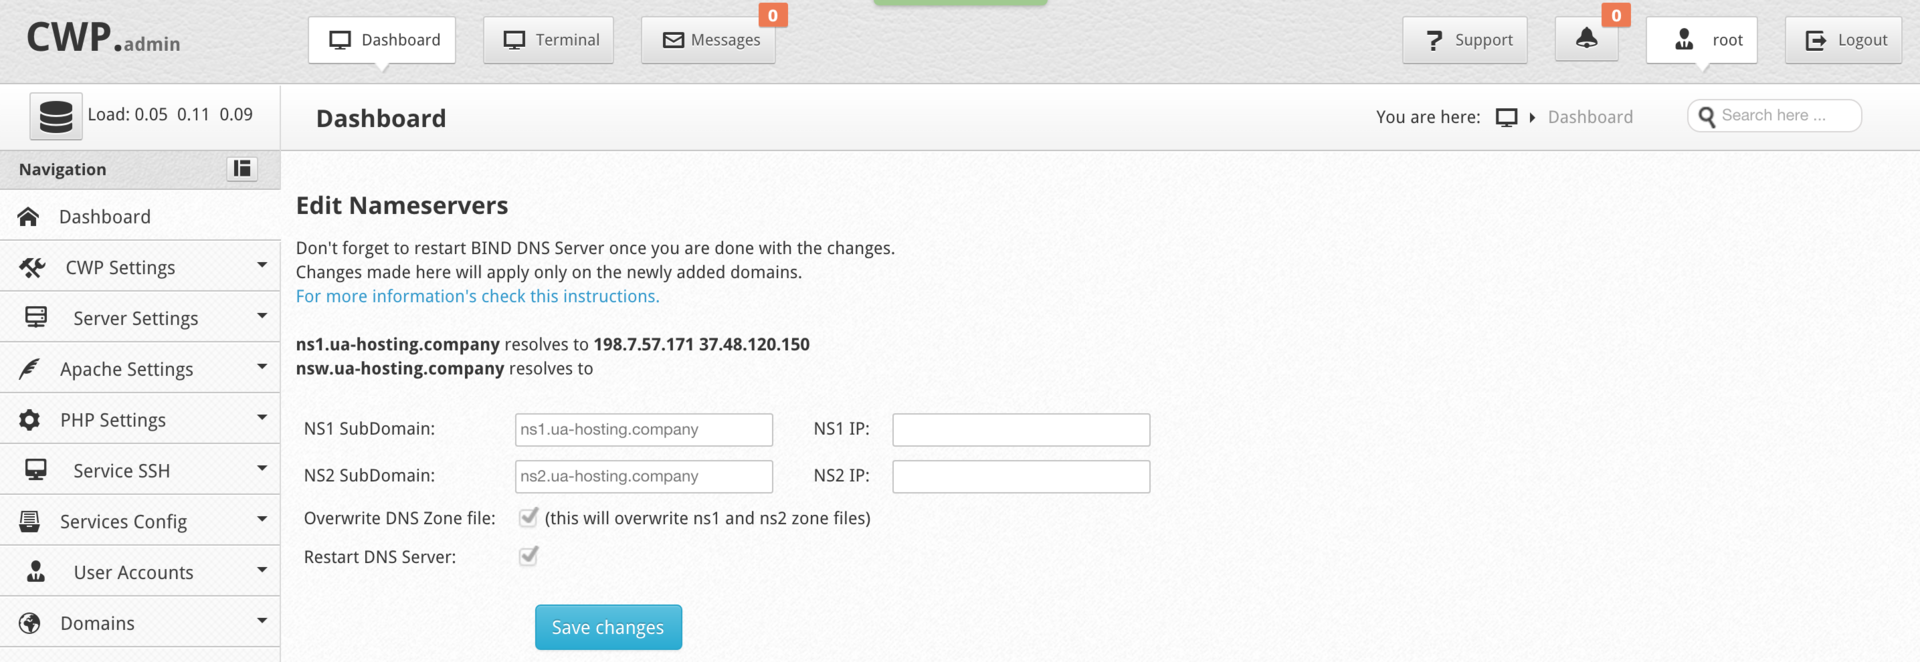
Next, we will configure several key parameters that we need to work with CWP. To begin with we will configure name servers. To do this, go to the DNS Functions menu section and select the Edit Nameservers IPs item.
Specify our name servers and click Save changes. To read the DNS (BIND) setup instructions, use the following link , which is also available on the Edit Nameservers IPs page.
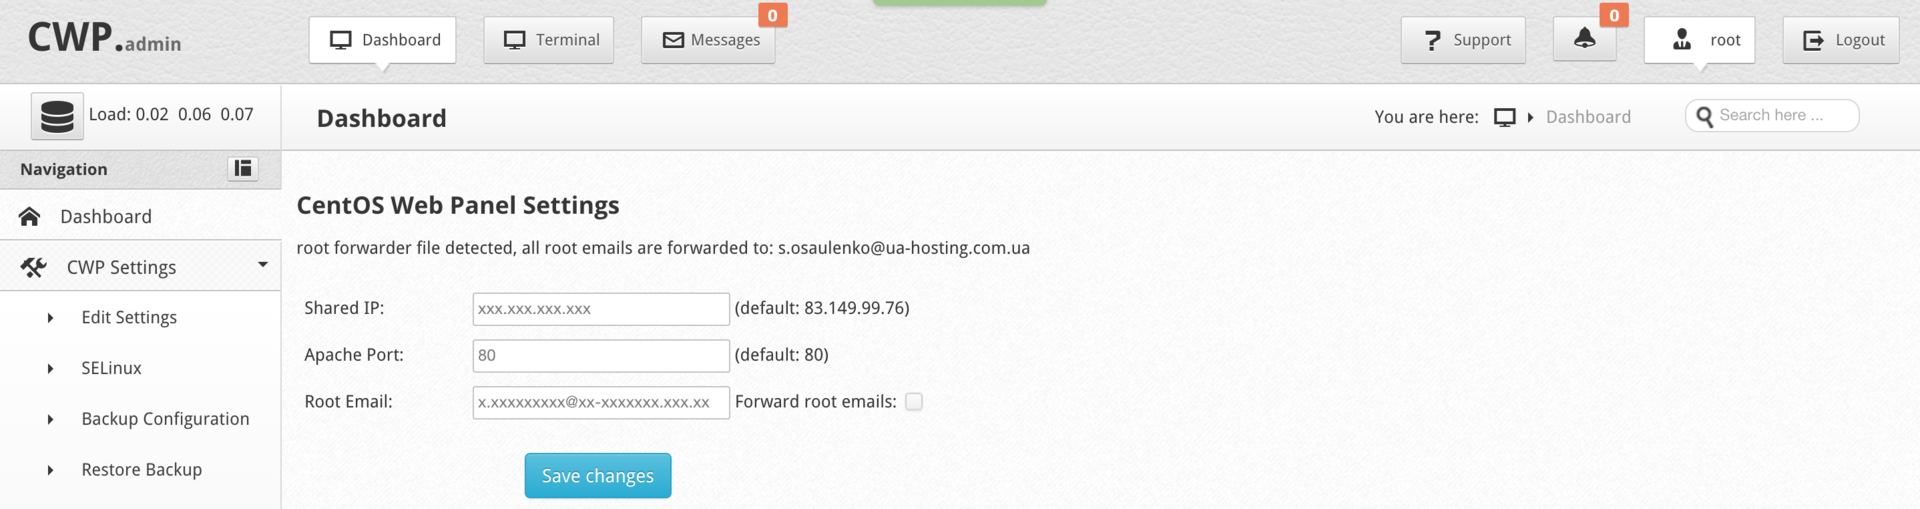
The next step is to configure the “shared” IP address and mail of the superuser - these are very important steps for hosting sites on your server. As a rule, the server IP is already specified, but to verify this, go to the menu section CWP Settings, and then select Edit Settings.
We see that the IP address of your “typewriter” is most likely in the Shared IP field (if it is not, then specify it), and in the Root Email field you need to specify your email. After specifying all the necessary data, do not forget to click the Save changes button. CWP is now ready to host sites.
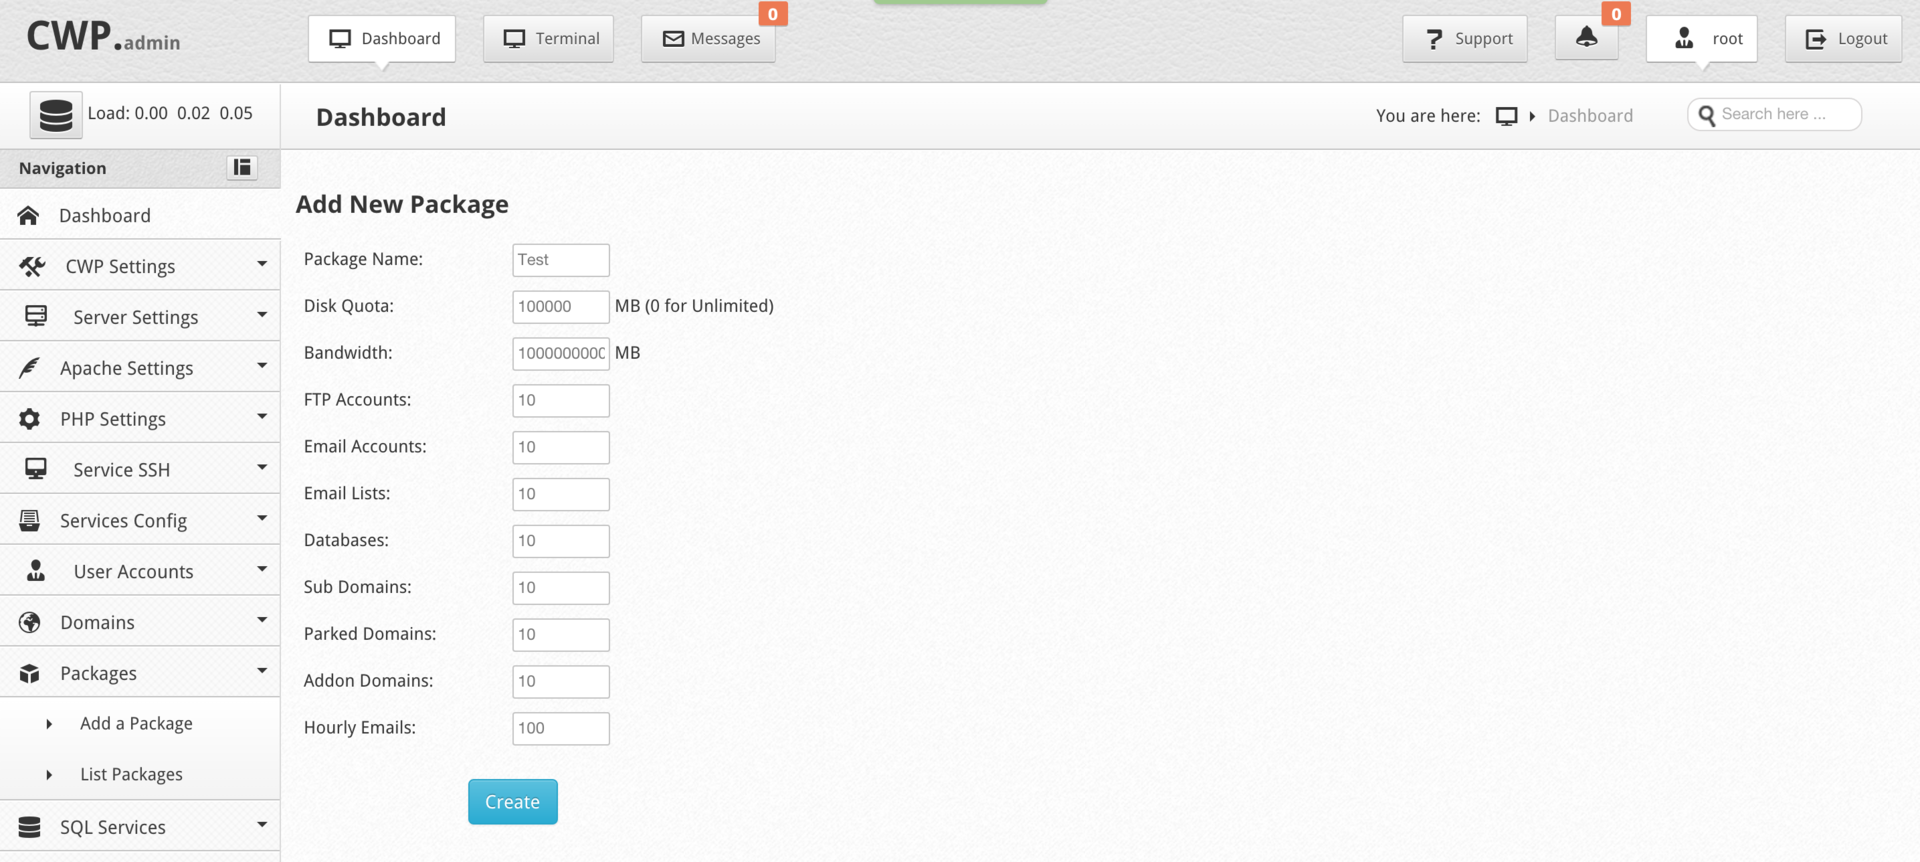
You remember, the panel is capable of providing hosting services. In CWP, you have the opportunity to set up any number of tariff plans. To do this, go to the Packages section of the menu and select the Add a Package item. We fill in all the required fields according to the number of server resources that you are ready to provide to your potential client, and as usual, do not forget to apply the changes - in this case, by pressing the Create button.
In order to add a domain to the panel, you must have at least one user account. Go to User Accounts, select New Account and create an account. I draw your attention to the fact that by default access to the shell for a newly created user is disabled. I advise you to think a few times before activating this functionality to your customers. Here you can also set inode limits for each user. After you have filled in all the fields, click the Create button.
Now let's add a new domain. To do this, go to the Domains menu section and select the Add Domain item. Specify the required domain, assign it to the appropriate user and fix all actions with the Create button.
The standardly configured panel should consume a small amount of resources of your server, let's check it. To check the consumption of RAM, connect to the server via SSH and enter the following command:
free -m On the screen of our "typewriter" this data was displayed:
total used free shared buffers cached Mem: 1006 522 483 0 162 218 -/+ buffers/cache: 142 864 Swap: 4095 0 4095 I think you will have a similar result. As you can see from the total amount of RAM in 1 GB, about half is used - 522 MB, which quite agrees with the developers' statement. This resource consumption is quite low for hosting control panels.
Also, the default installation already contains the latest stable version of PHP with the Zend Optimizer application and the ionCube PHP Loader utility, which is easy to check with the command:
php -v You should see the following information in the console:
PHP 5.4.45 (cli) (built: Dec 5 2015 14:22:25) Copyright (c) 1997-2014 The PHP Group Zend Engine v2.4.0, Copyright (c) 1998-2014 Zend Technologies with the ionCube PHP Loader (enabled) + Intrusion Protection from ioncube24.com (unconfigured) v5.0.19, Copyright (c) 2002-2015, by ionCube Ltd. If you are loyal to CentOS and about $ 13 per month of your hosting budget (for comparison, we took the cost of the license ISPmanager Business ) are ready to invest in hardware, rather than software, then you should like the CWP panel. Perhaps, right now you are thinking about launching your first hosting server, then why not just send these funds from licensed software to rent a more productive “machine” and thus make your potential customers a little bit happier. Not always what is free is bad. Do not be afraid of something new, at first glance unknown.
Test for health, and you will succeed!
To be continued…
Source: https://habr.com/ru/post/272633/
All Articles