Security and microservices

In September of this year, a group of our developers attended the Java conference SpringOne2GX , held in Washington. This is one of the largest such conferences, and we could not pass by. We bring to your attention the story that we learned what was useful and interesting for us as a result of this conference.
The Spring framework provides the programmer with excellent tools for developing applications, it has almost everything you need. Moreover, today Spring sets the vector for the further development of the entire industry. Spring boot and microservices are an example.
In this article, we show how easy it is to use Spring to create your own microservice using OAuth 2.0 and OpenID Connect to authenticate with Google and get information about a user who gives microservice the right to perform some task on his behalf. For the sake of simplicity, an example will be given here only with authentication and viewing of user information, and everything else, including OAuth and OpenID Connect theory, will be omitted. So, let's begin.
')
To begin, create a project. The easiest way to use the Spring Initializer, in our example, is simply the name of the project and the necessary modules. So the Spring Boot application is ready with a maven file that connects all the necessary dependencies created automatically.
Next we need the
@EnableOAuth2Sso annotation. According to the documentation, it allows you to create a single sign on authentication point, while reading the configuration settings itself. Because this example creates a web application, we extend the standard WebSecurityConfigurerAdapter
WebSecurityConfigurerAdapter
. Here is what it looks like: @EnableOAuth2Sso public static class LoginConfigurer extends WebSecurityConfigurerAdapter { @Override public void configure(HttpSecurity http) throws Exception { http.antMatcher("/main/**").authorizeRequests().anyRequest() .authenticated(); } } Here main is the restfull root for our application, all requests to it must be authenticated. Now let's do the configuration for authentication using Google services. To do this, we need to create our own secret code and link it with our client id at the provider. You can do this here: https://console.developers.google.com
Here is the window for creating your Client ID:
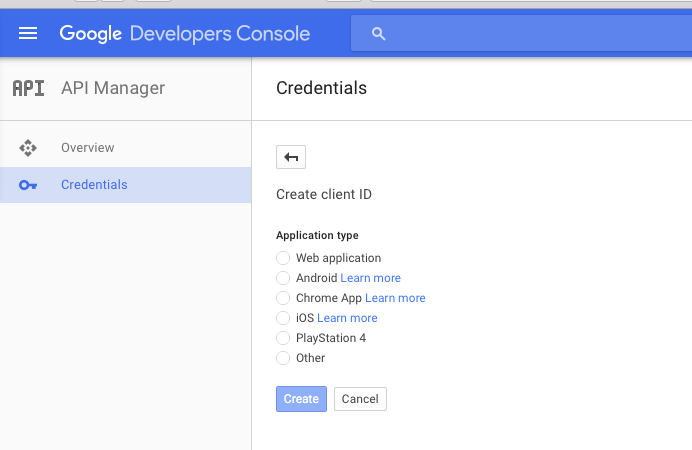
Select a Web application, specify the application name and redirect point after successful authentication, and the following window appears:
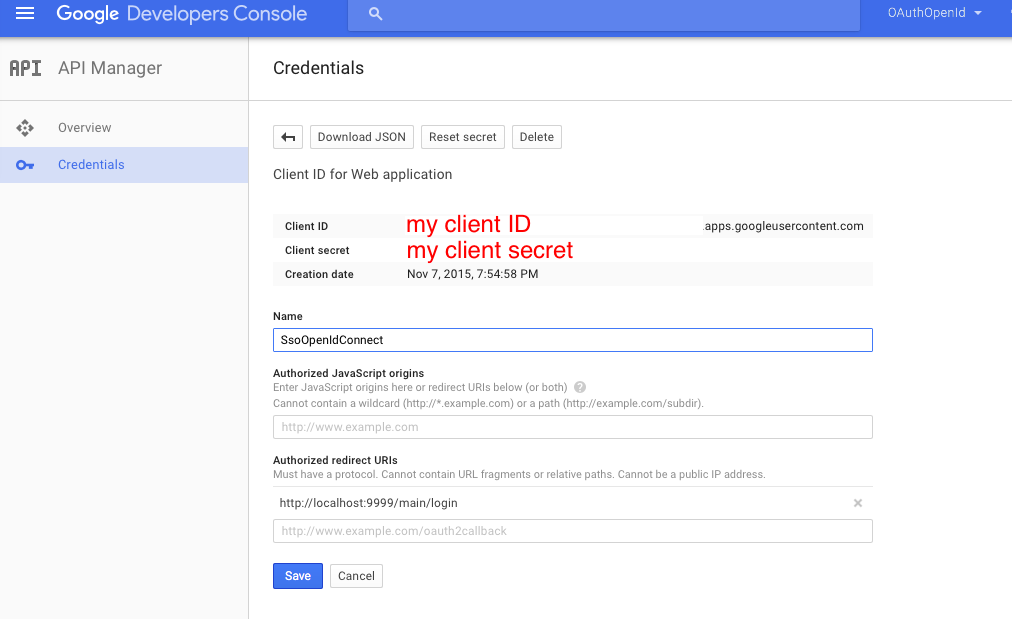
Where my client ID and my client secret are listed, you will see your own ID and secret. Next, create a configuration:
spring: profiles: google security: oauth2: client: clientId: my client ID.apps.googleusercontent.com clientSecret: my client secret accessTokenUri: https://accounts.google.com/o/oauth2/token userAuthorizationUri: https://accounts.google.com/o/oauth2/auth scope: openid profile resource: jwt.keyUri: userInfoUri: https://www.googleapis.com/oauth2/v3/userinfo Please note that the scope indicates not only openid, but also profile - this will allow you to specify at login what exactly the application will be given. Since google has many different services, we can give access to these services simply by adding them to the configuration.
To show the data of the user, on behalf of whom the work with the service will be carried out, it is enough for us to obtain information from the Principal. The easiest way to do this is:
@RequestMapping("/user") public Principal user(Principal user) { return user; } And now, we collect everything in a bunch. Below is a screenshot of the application in the IDE and listings of all files:
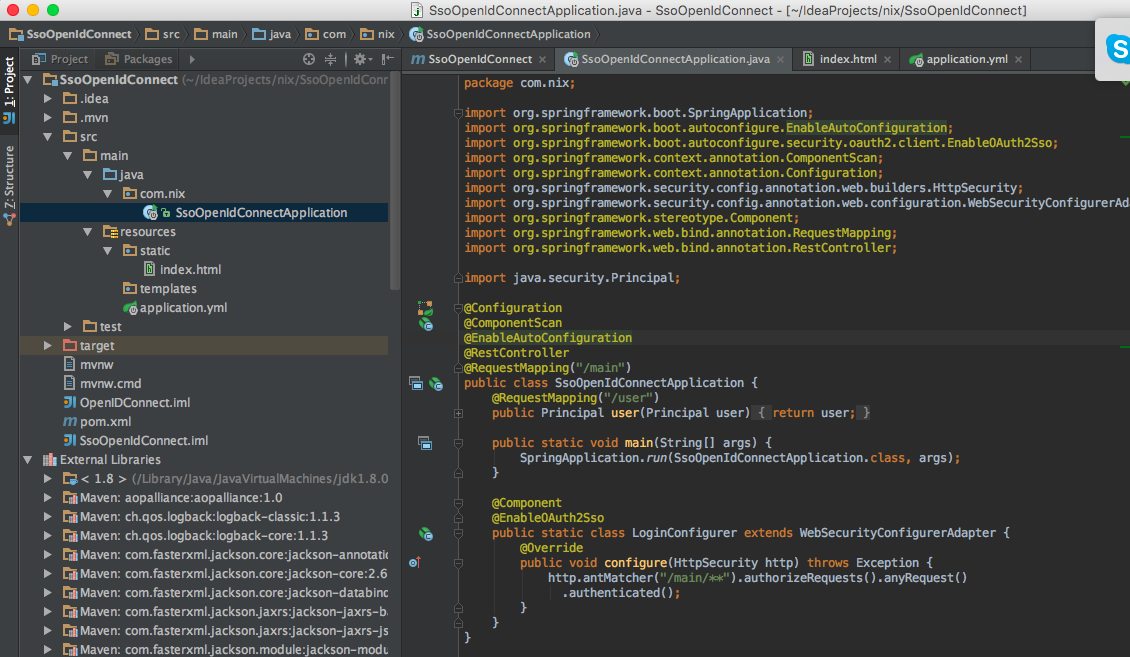
Application:
package com.nix; import org.springframework.boot.SpringApplication; import org.springframework.boot.autoconfigure.EnableAutoConfiguration; import org.springframework.boot.autoconfigure.security.oauth2.client.EnableOAuth2Sso; import org.springframework.context.annotation.ComponentScan; import org.springframework.context.annotation.Configuration; import org.springframework.security.config.annotation.web.builders.HttpSecurity; import org.springframework.security.config.annotation.web.configuration.WebSecurityConfigurerAdapter; import org.springframework.stereotype.Component; import org.springframework.web.bind.annotation.RequestMapping; import org.springframework.web.bind.annotation.RestController; import java.security.Principal; @Configuration @ComponentScan @EnableAutoConfiguration @RestController @RequestMapping("/main") public class SsoOpenIdConnectApplication { @RequestMapping("/user") public Principal user(Principal user) { return user; } public static void main(String[] args) { SpringApplication.run(SsoOpenIdConnectApplication.class, args); } @Component @EnableOAuth2Sso public static class LoginConfigurer extends WebSecurityConfigurerAdapter { @Override public void configure(HttpSecurity http) throws Exception { http.antMatcher("/main/**").authorizeRequests().anyRequest() .authenticated(); } } } Configuration to it (application.yml). When running the configuration in Spring Boot, do not forget to set “google” as the active profile:
server: port: 9999 security: ignored: /,/favicon.ico,/index.html sessions: ALWAYS oauth2: sso: loginPath: /main/login --- spring: profiles: google security: oauth2: client: clientId: my client ID.apps.googleusercontent.com clientSecret: my client secret accessTokenUri: https://accounts.google.com/o/oauth2/token userAuthorizationUri: https://accounts.google.com/o/oauth2/auth scope: openid profile resource: jwt.keyUri: userInfoUri: https://www.googleapis.com/oauth2/v3/userinfo Well, index.html:
<html> <head> <script src="https://ajax.googleapis.com/ajax/libs/jquery/1.11.3/jquery.min.js"></script> <script> $(document).ready(function() { $("#userInfo").click(function(){ $.get("main/user", function(data, status) { if (status === "success") { $("#userData").text(JSON.stringify(data, null, '\t')); } }); }); }); </script> </head> <body> <div> <a href='main/login' id="login">login</a> <button id="userInfo">User info</button> <pre id="userData"></pre> </div> </body> </html> This is what your application authentication will look like at startup:
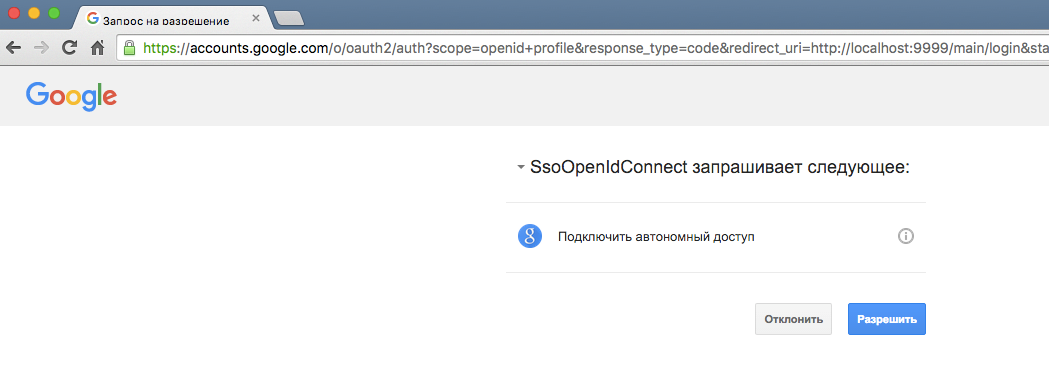
As a result of all the above actions, we got a single sign on capable cloud-based application that uses Google as a provider for OpenID Connect. If you wish, you can create many other microservices that are similarly configured and use the same single sign on. The fact that all configuration on Google lies in configurations allows you to quickly switch to another provider. And despite the seeming difficulty of configuring SSO, this solution is as simple as basic authentication.
Source: https://habr.com/ru/post/272529/
All Articles