Detailing, reflections and post effects in GTA V
From the translator:
This publication is a continuation of the material “How the frame is rendered in GTA V” . Now the author considers the issues of detailing, lighting and post-processing a frame. Enjoy reading.
Level of detail
If we are talking about the absolute advantages of Rockstar over its competitors, then the indicators of the level of detail of the company's products are definitely beyond praise. Los Santos is a whole pleiad of various scenes of different levels of detail / polygonality, all data being broadcast in real time and this does not block the loading screen for a minute. Just breathtaking!
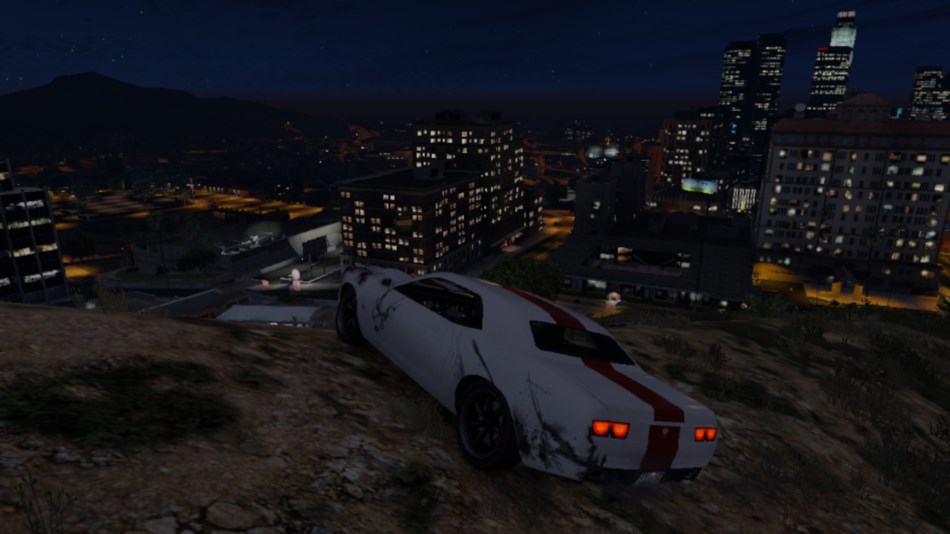
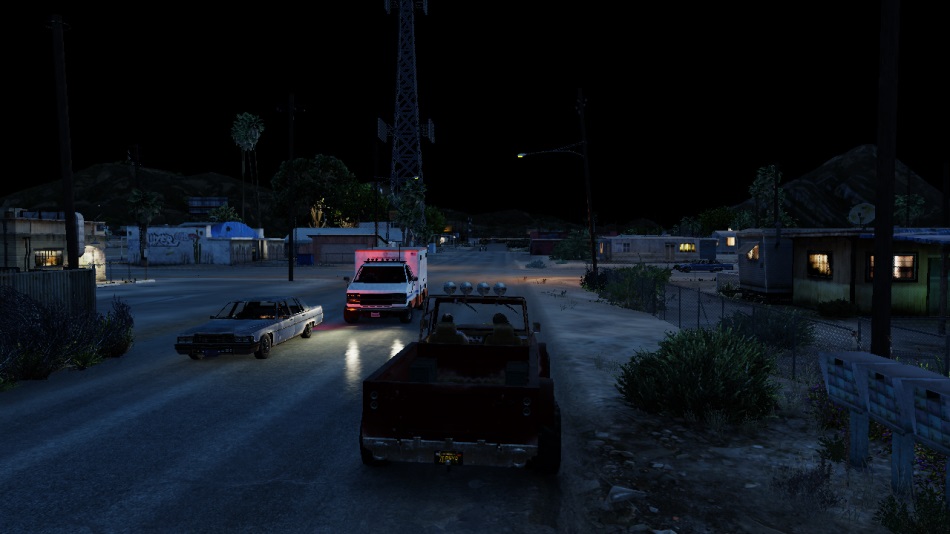
Lights of the night city
All the lights that are visible in the distance are real. You can drive closer and see lights that radiate light in the distance.
It was with such a statement that Aaron Garbut, one of the founders and art directors of Rockstar North, made a speech shortly before the release of the game on PS3.
')
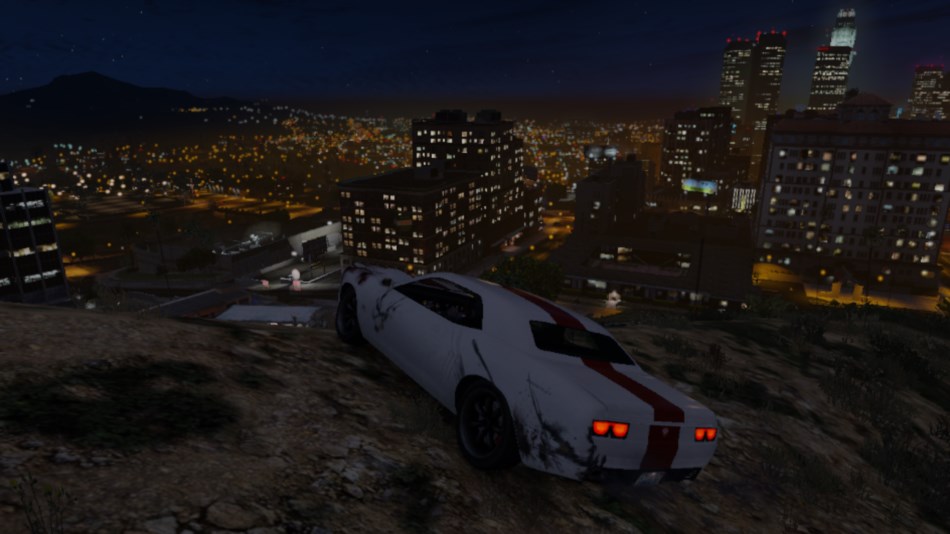
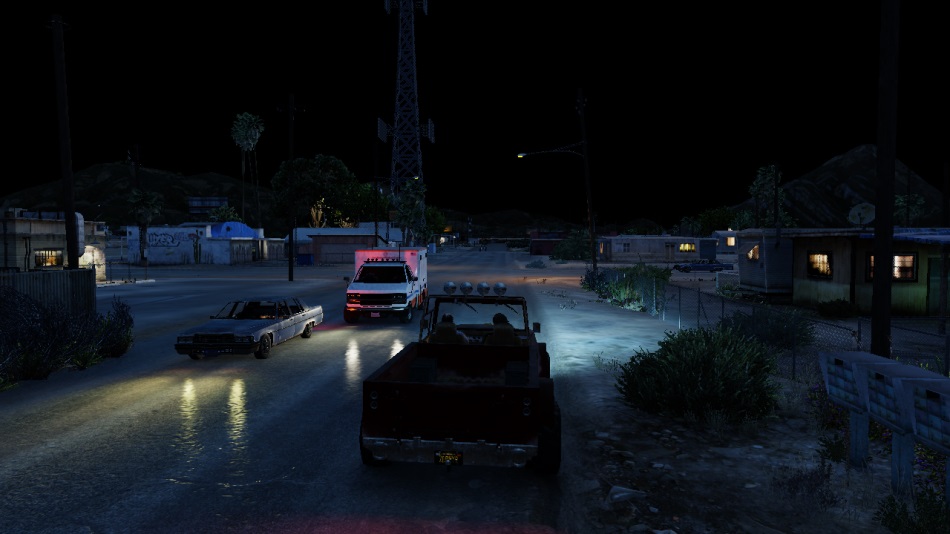
Is it so? Let's take a look at this nightly scene:
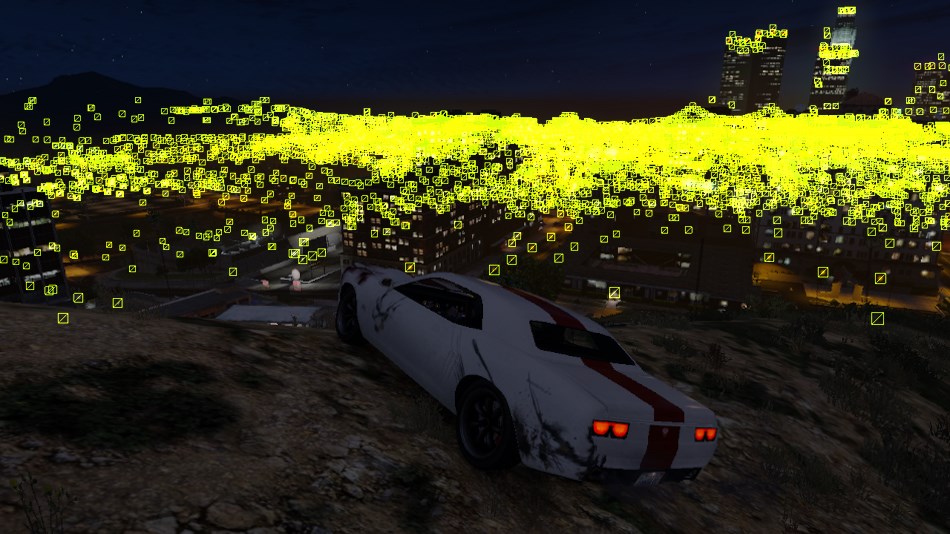
Till lights
Caution! Traffic!
Lights "After"
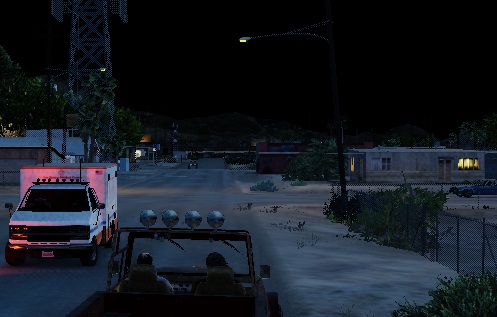
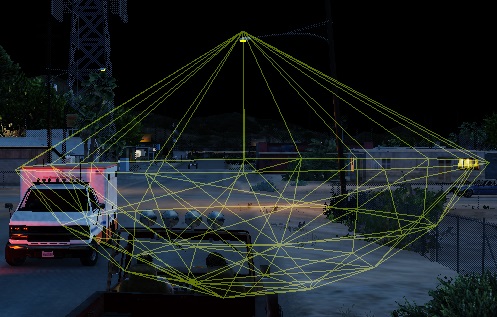
It turns out that it is: every small spot of light is a quad, visualized in the form of a tiny 32x32 texture, like the one you can see below.

All of them are tightly grouped within the framework of the scene geometry, but these are still tens of thousands of polygons with which the graphics processor has to work.
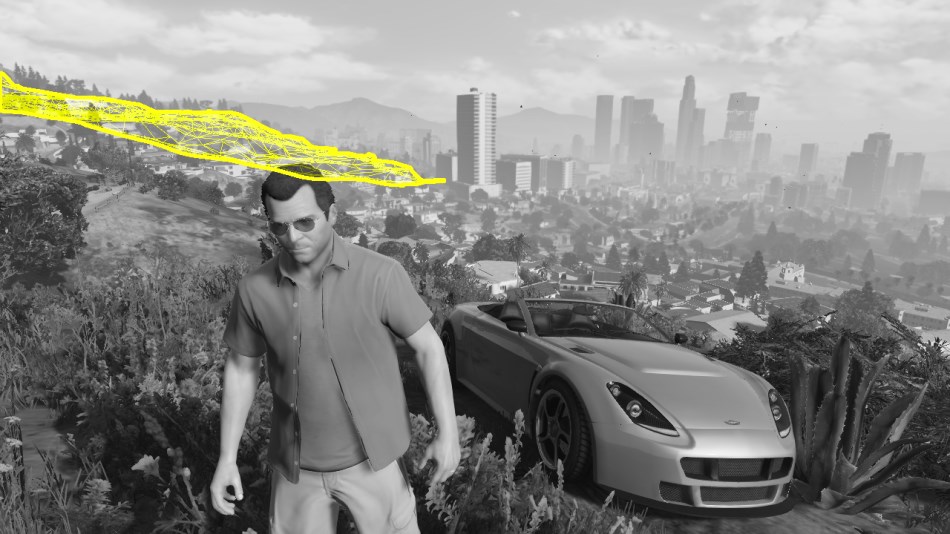
Lights
Blueprint lights

Depth test (passed / failed)
And it's not only about static geometry: the headlights of cars also move along the road - the image is updated in real time. Of course, at a great distance it makes no sense to fully visualize models of cars, and 2 headlights are enough to create the illusion of movement. But if you decide to drive closer to one of the light sources, the level of detail rises and we get a full-fledged image of the car.
Low poly mesh
Let's return to the frame that we analyzed earlier. Some fairly large areas are processed in just one render call. So it was, in particular, in the case of rendering the hill in this image:
Hill for just one draw command
So what is this tiny mound in the distance?
In fact, Winewood Hills is by no means small. This is a large area of several square kilometers with dozens of houses and other buildings.
At the top of the hill are the Galileo Observatory, the theater of Sisyphus, Lake Weinwood. To create all these sights - you can take a closer look or just drive past - it took thousands of draw calls and countless polygons.
But in our case, this zone is far away, and therefore is represented by a low-poly version: only one draw call, which involved some 2500 triangles.
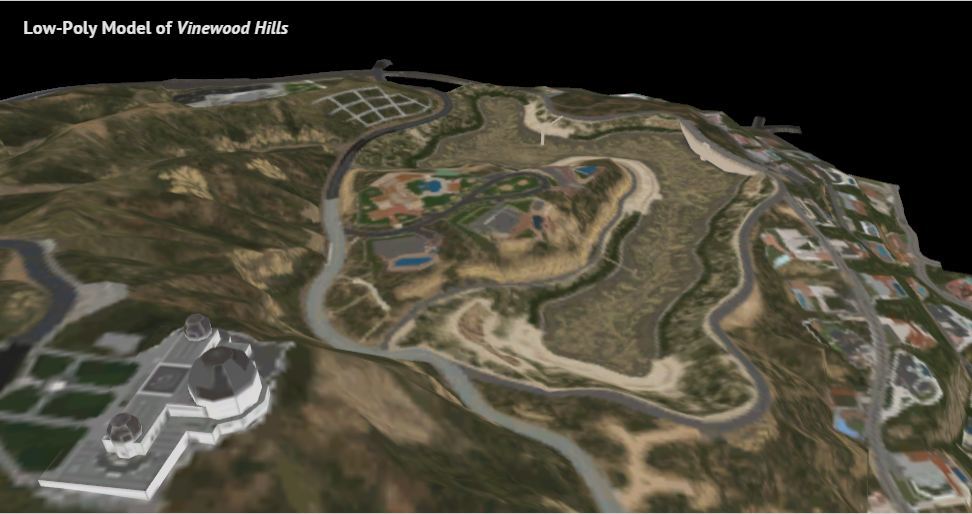
Low poly model Vinewood Hills
Rendering is performed using a single graphic grid processing the diffuse texture data. Even if there is a mechanism for converting the graphic grid into a low-poly version, it is impossible to fully automate the process, and therefore I would not be surprised if Rockstar 3D artists have to spend more than one day to adjust everything manually.
Another example of a similar rendering in a single draw call is the Little Seoul district, which united several city blocks.
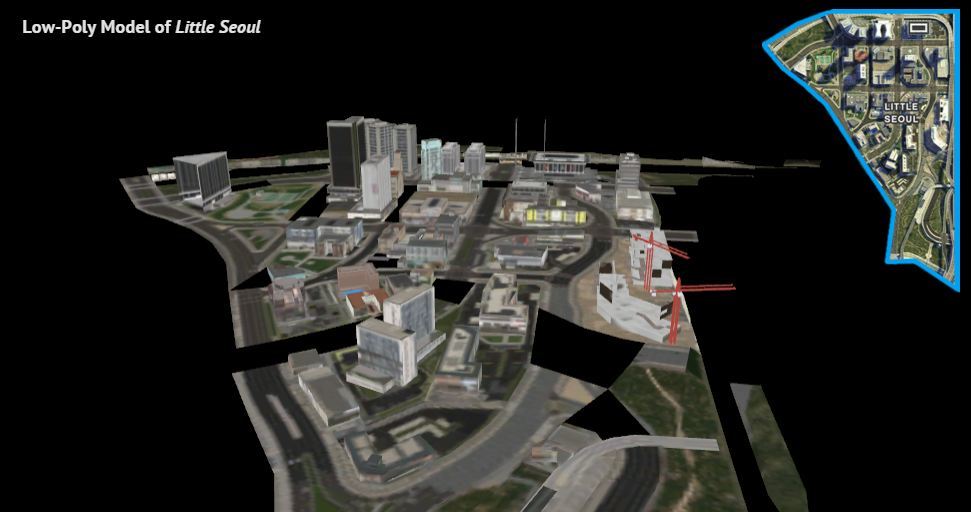
Low poly model of Little Seoul
Having a low-poly model of the virtual world in hand, it is much easier to visualize the texture of reflections, which does not require any detail or high resolution. For games of one level of detail, real-time processing of cubic environmental textures is often very expensive or even completely impossible due to the variety of geometric shapes used.
Providing game resources
Creating multiple versions of the virtual world with different levels of detail, as done in the GTA, is not an easy and very time-consuming task. But even seemingly having reached your goal, you still remain halfway there: you may have gigabytes of models and textures on your hard drive, but they all cost nothing until you find a suitable way to load them into RAM or in memory of the graphics processor.
GTA V provides a gaming resource in real time, uploading / downloading models and textures as you move around the map. Moreover, the ability to use this content in real time while still enjoying the game without interruption is truly impressive.
From a technical point of view, the most difficult thing was to fit the necessary information in the memory of the console so that it still worked as smoothly as we can see [...]. We can translate and compile much more, which allows for a higher level of detail than it was in GTA 4.
Aaron Garbut
Of course, such a data transfer mechanism also has its limitations: for example, when you choose a character, the camera jumps from one part of the map to another, in this case the system is overloaded and, it is logical that it takes 5 seconds to navigate in the new conditions and switch. But in GTA V, such a transition was overplayed very effectively with the approaching / receding animation / translation window, and so the screen loading is not felt at all.
As a rule, when you are driving a car, the movement speed is low enough so that the bandwidth of the data transmission system allows you to gradually load the available updates. Airplanes are another matter: by the standards of streaming systems, they move too fast, and therefore they had to significantly reduce their speed relative to the indicators we are used to in reality. In addition, the level of detail of the graphic grids corresponding to the flight scenes is much lower than in the case of walking / driving, which also facilitates the transfer of data. Although, when a game resource asks for fresh updates, sometimes you have to resort to the above trick. In the settings of the PC version, a special option “High-resolution data transfer during the flight” has been added.
Reflection
Since in the scene that I analyzed earlier, there was little water, let's take a closer look at the visualization of a pool or ocean using the example of the following scene:

Pool
As we have already seen, the scene is rendered according to the standard scheme: a cubic texture of the environment is generated, basically, it is necessary to render objects that reflect the environment.
So the scene looks like before rendering water:
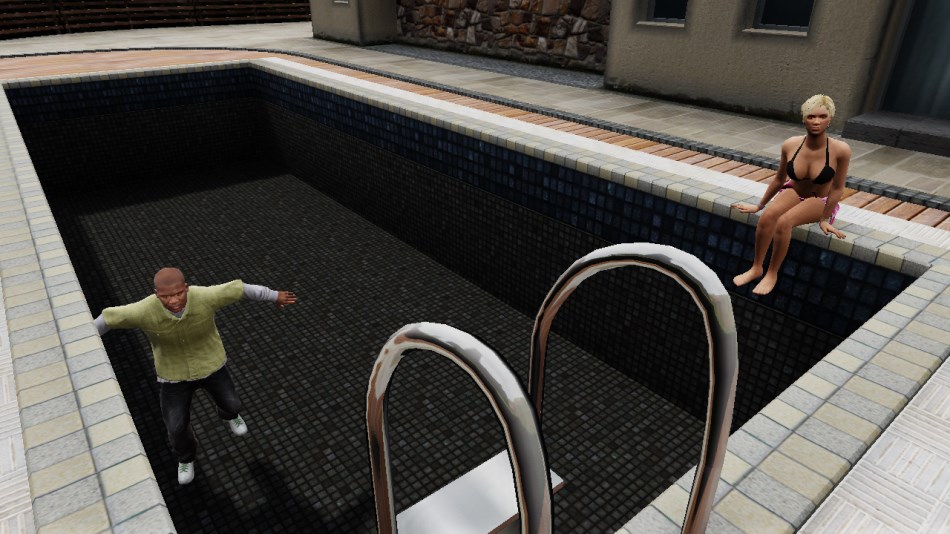
Before rendering water
The visualization of the surface of the water is a separate story that has nothing to do with the creation of a cubic texture.
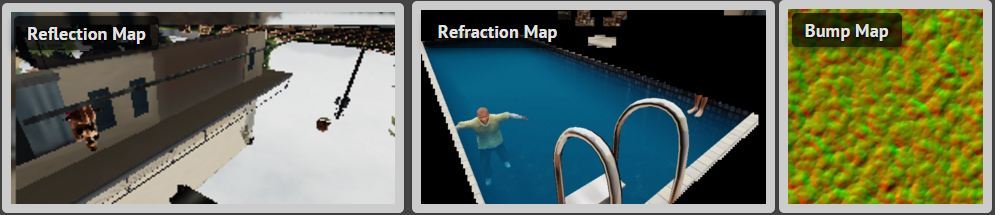
Reflection map
First, the plane reflection map is generated. And with a very low resolution, 240x120, and the process itself is similar to the process of generating a cubic texture, but this time it creates only one buffer, in which there is a ladder and characters.
The scene is visualized as if upside down and only then, after applying symmetry, will it be possible to get the correct reflection.
Refraction map
A part of the image is extracted - areas with a water surface - allowing you to create a refraction map. Due to this, the effect of refraction is subsequently imitated: the glow from under the water.
At this stage, a blue is added to the “water opacity” (the deeper, the more saturated the tint), as well as caustics. The final version of the map is half the size of a similar buffer.
The foundation

Refraction map
Combining
To combine different buffers, a rectangular polygon is drawn, which acts as the surface of the water in the pool. Taking into account the texture of the relief, the polygon normals are shifted pixel by pixel, which imitates light ripples.
For the ocean, however, not the normals are shifted, but the entire graphic grid of an individual frame is drawn with the vertices upward, which imitates the movement of the waves.
Taking into account the normals of individual pixels, the pixel shader analyzes the indicators of the reflection and refraction map at different points, the coordinates are calculated using the Fresnel equations.
Reflection map, refraction map and relief map
Water "Before"
And, as a result, we get the following image:
Water "after"
The result is pleasantly pleased. In combination with a successful ripple effect, the water looks very realistic.
Mirrors
Mirrors are visualized in the same way as water. In this situation, everything is even much simpler, because mirrors only reflect the light and here it is not necessary to take into account its refraction.

Mirror reflection
Unlike water, the surface of the mirror is perfectly flat and motionless, and therefore it is not so easy to hide the very low resolution of the object - texels are seen very well. Increasing the reflection settings in the settings, we get a higher resolution.
To create a reflection map requires an additional stage of rendering the scene, but this is not an easy task. The engine does not allow to start this process if the mirror is not visible in the doorway or the player is too far from it (in this case, the mirror resembles a black square).
Headlights
Remember that in the environment map, which is generated at the beginning of each frame, there are no characters, no cars, but only the main buildings and the landscape?
How, in this case, the headlights of the car in the following screenshot are reflected in the wet asphalt?
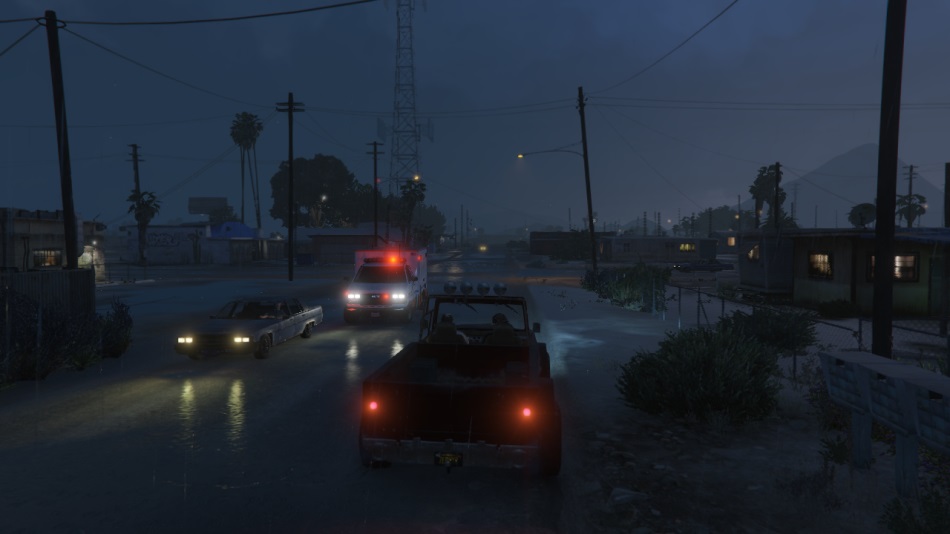
Headlight reflections
In the frame that I analyzed in Part 1 , this was not obvious, since it was day. But, in fact, after combining all the buffers, the headlights are drawn one by one. For each light bulb, the amount of light emitted into other graphic grids is calculated, including strong reflection from glossy surfaces, such as wet asphalt.
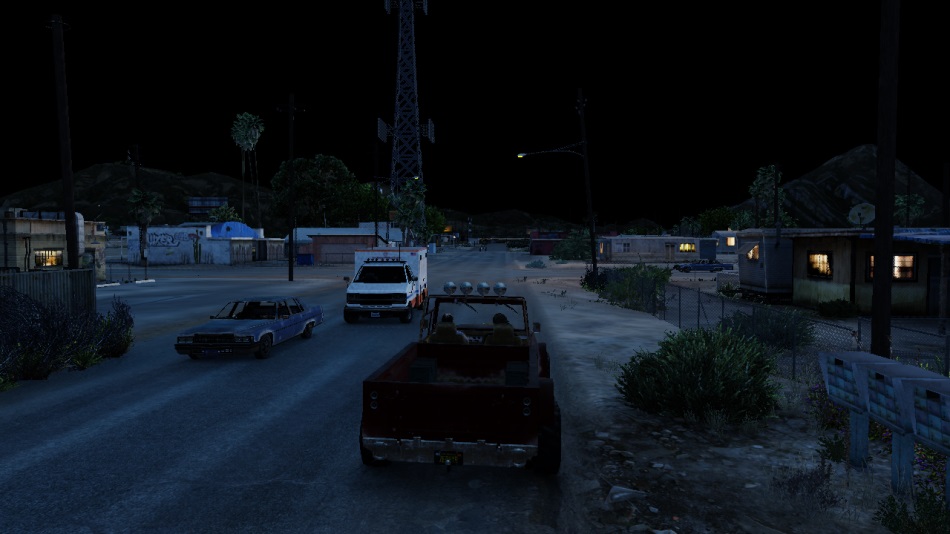
Headlights 0%
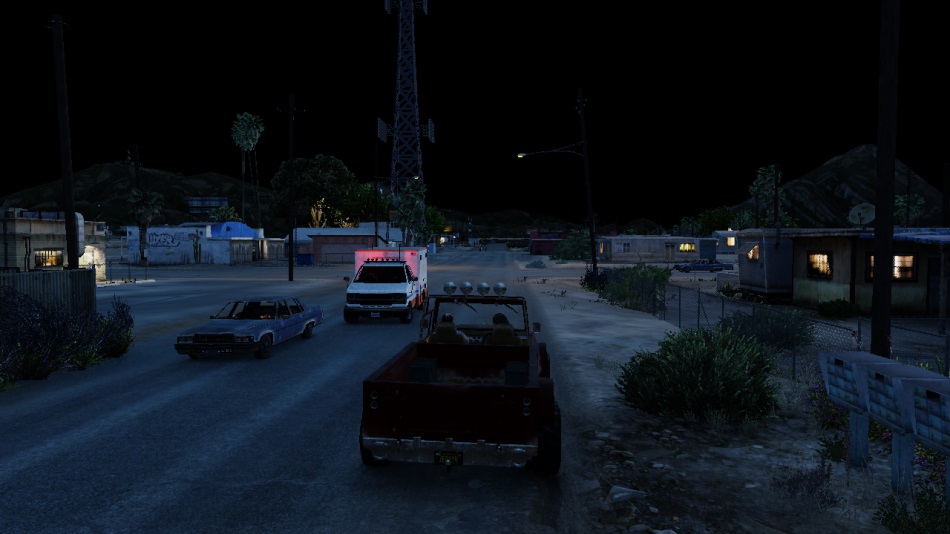
Headlights 50%
Headlights 80%
Headlights 100%
For each light source, its own graphic grid is drawn: initially it looks like a cellular octahedron, but subsequently the vertex shader modifies the grid to match the shape of the light halo.
This graphic grid is not textured, it only helps to group the pixels inside the light halo so that the pixel shader can be applied. The shader will allow you to dynamically calculate the lighting depending on the pixel depth, its distance from light sources, its normals and the presence of specular / glossy properties.
Below you see a blueprint of the graphic grid used to calculate the illumination of the road with a lantern.
Before building a grid
After building the grid
With this consideration, one big advantage of deferred shading becomes obvious compared to the direct one: a large number of light sources can be visualized in a scene, practically without the help of a pixel shader that processes only pixels lit by one or another object. With direct shading, it is necessary to calculate the effect of several light sources on a fragment of a frame at once, even if it is not illuminated or subsequently overlapped by another fragment.
And since you are still reading my review, I propose to proceed to its final part, devoted to post-effects.
Effects of post-processing
Post effects are applied after the scene is rendered to improve the quality of the parts, make adjustments, create a new atmosphere ...
In Part 1, we saw how certain post-effects were superimposed, in particular, glow, anti-aliasing and tonal compression. Today let's talk about other effects found in GTA V.
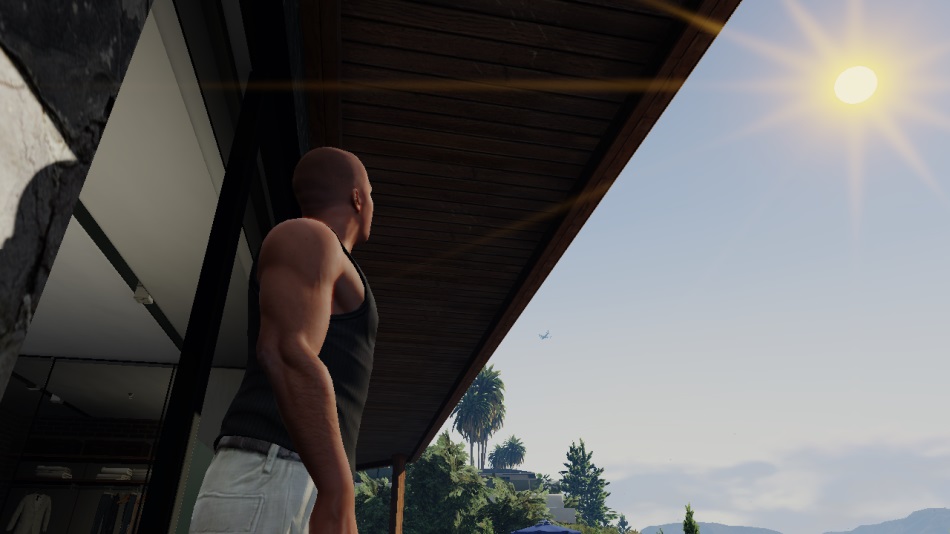
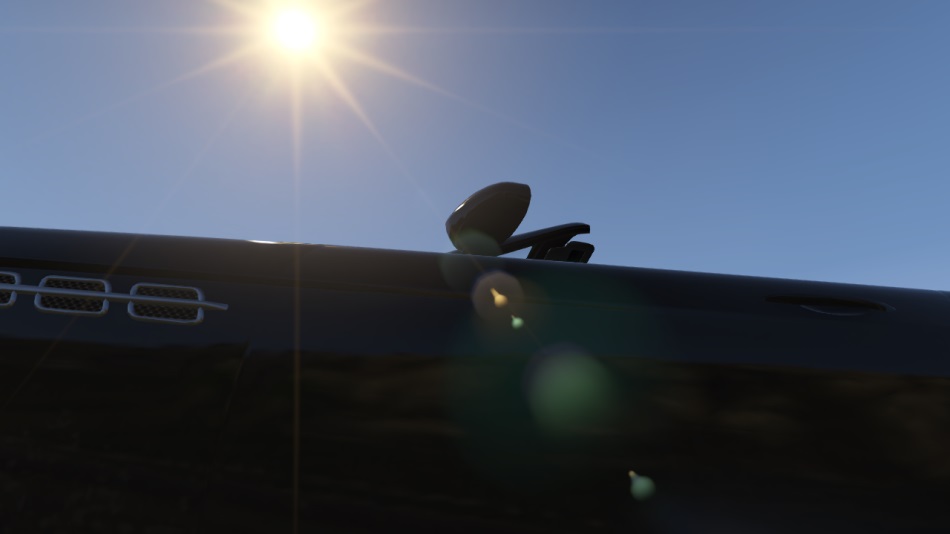
Glare and light streaks
Sometimes, when light passes through a real lens, the scattering and internal refraction of the rays cause their distortion.
In this article, “Glare” I called several bright spots along one axis formed by a bright light source and the center of the screen. There are also "light streaks" - the rays from the light source. This kind of distortion is very common in films, and when they appear in the game, some kind of “cinematic” effect is created.
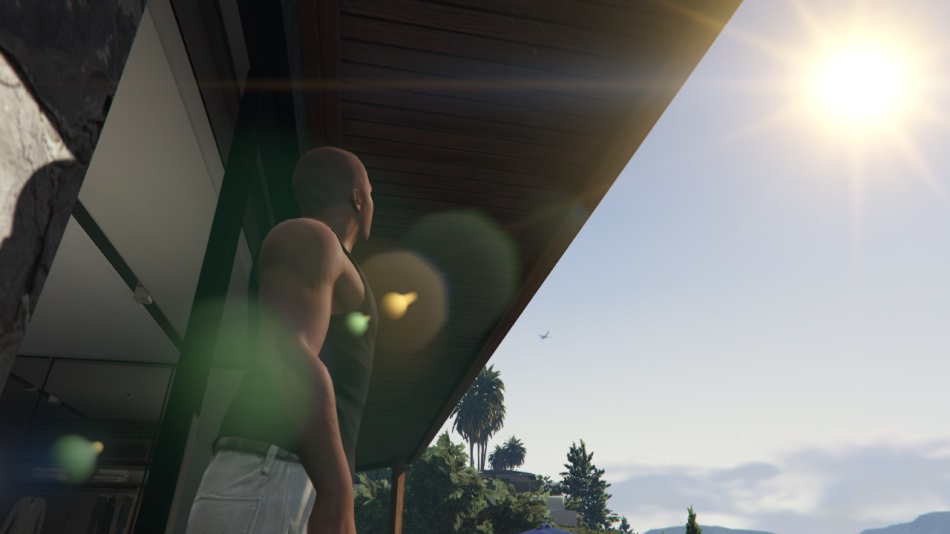
Glare and light streaks
As a rule, 2 ways of visualization of such effects are used:
- On the basis of the image: the brightest areas are highlighted, which are subsequently duplicated and distorted. This option is suitable for any number of bright light sources.
- based on sprites: added textured sprites, the position of which is changed manually. Each light source has to be processed separately, but the artist is given more opportunities to change the shape, color and intensity of glare and light strips ...
Both methods are involved in GTA V: the method using images allows you to add a thin blue halo in the lower left corner of the frame. In fact, this is a symmetrical reflection of the contents of the brightness buffer. But the most noticeable distortions in this scene appear due to manipulations with sprites made with the sun. First, light strips are added by rendering 12 inverted quadrilaterals around the sun. Then 70 sprites are drawn along the "sun - center of the screen" axis for highlights. Effects become more intense when you turn the camera on the sun.

The foundation
Base + streaks of light

Base + light streaks + glare

Base + light streaks + glare (ultra-sensitive blueprint)
The engine uses several sprites to simulate various lens distortion effects:

Distortion effects
And, as a result, we get the following result:
Base image

Base Image + Glare
Base Image + Glare (Blueprint)
In GTA V, much attention is paid to the details, and glare is no exception: their size is proportional to the camera diaphragm. So, if you suddenly look at the sun, the glare will first increase, and then, as soon as the diaphragm narrows, it decreases. The animation below illustrates this feature beautifully.
It is also pleasant that if you switch to the first-person mode, there will practically be no glare, because now you can see everything with the eyes of a person, and not through the camera lens.

Wide aperture
Narrow aperture
Anamorphic lenses
At night or when playing on dark areas of the map, the effect of anamorphic lenses is modeled: long vertical or horizontal, usually blue, stripes. Recently, insignificant bands from anamorphic lenses have become widespread in the practice of Hollywood, because they often appear in new science fiction films.
Here the effect is achieved with the help of sprites, as well as in the case of the sun rays, which we considered earlier. True, it applies only to very bright, as the headlights of the car, the light sources directed directly into the camera.

Anamorphic “Before” effect

Anamorphic “After” effect
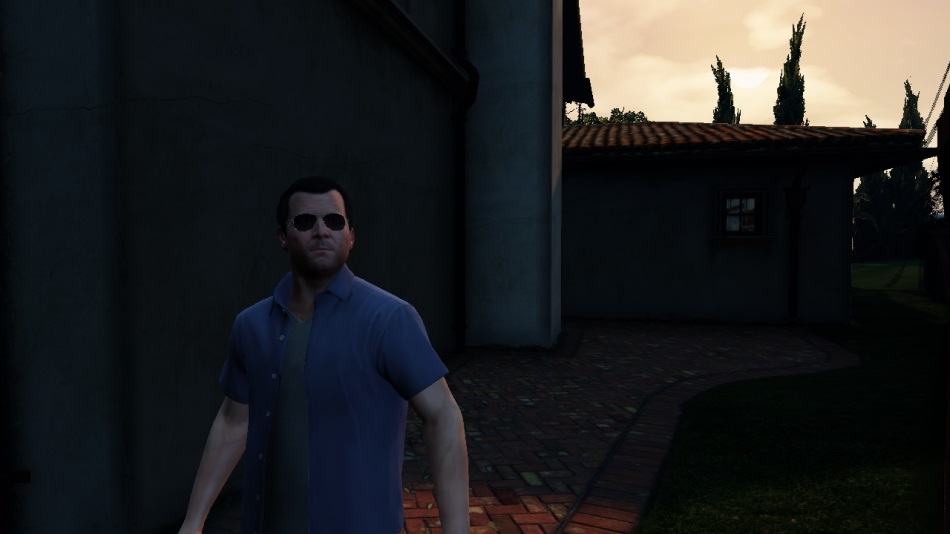
Depth of field
In the cinema, the scene presented below would look a bit “artificial”: everything is too sharp and clear, but in the film the landscape in the background is out of focus, slightly blurred.
Base image
All you need to do is add a depth of field (DoF), blurring out areas of the image that remain out of focus.
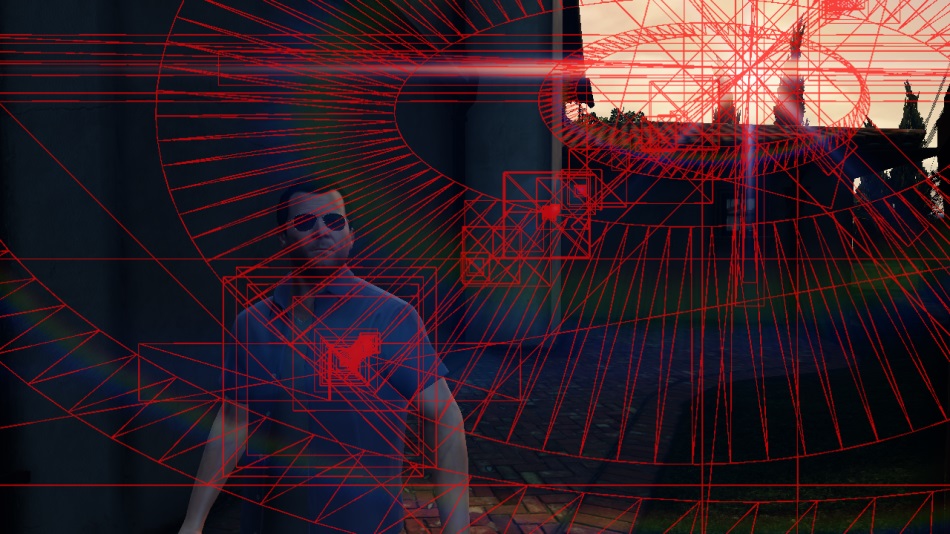
How to do it? First, an unsharp map ( CoC ) is generated based on the depth buffer. It allows you to calculate how the pixels are out of focus, and, accordingly, sets the degree of impending blurring. The CoC value of an individual pixel depends solely on its distance to the camera (depth) and lens parameters.
It is worth noting, however, that in GTA V CoC, a value from -1 to 1 is assigned, so you can find out if the pixel is in front of the lens or behind the focus area. For example, pixels located far beyond the focus limits are assigned to CoC 1, and out-of-focus pixels that fall very close to the camera are assigned a value of -1. Any figure around 0 assumes that the pixel will, practically, not be blurred.
What are numeric values for?
This is because achieving a decent depth of field is not so easy and many factors have to be taken into account when applying a blur effect to the scene.
For example, you do not want the out-of-focus pixel in the background to not overlap the neighboring out-of-focus located in front of it. And what if there is an inverse problem: it is necessary that the blurred foreground pixel overlaps the clear fragment behind it. As soon as it comes to pixel blur, the question is not “how much to blur”, it is also necessary to analyze nearby fragments, which can be both in front of and behind the pixel under investigation, both outside and in focus ... The numeric format of CoC values is noticeable facilitates the task.
On the CoC map below, I used the green channel for CoC> 0 and the red channel for CoC <0, which helps orient.
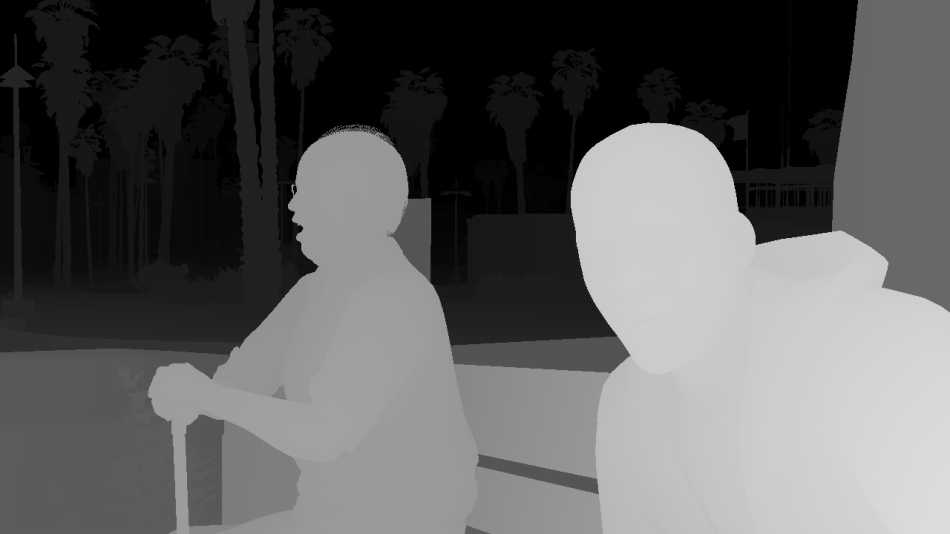
Depth map
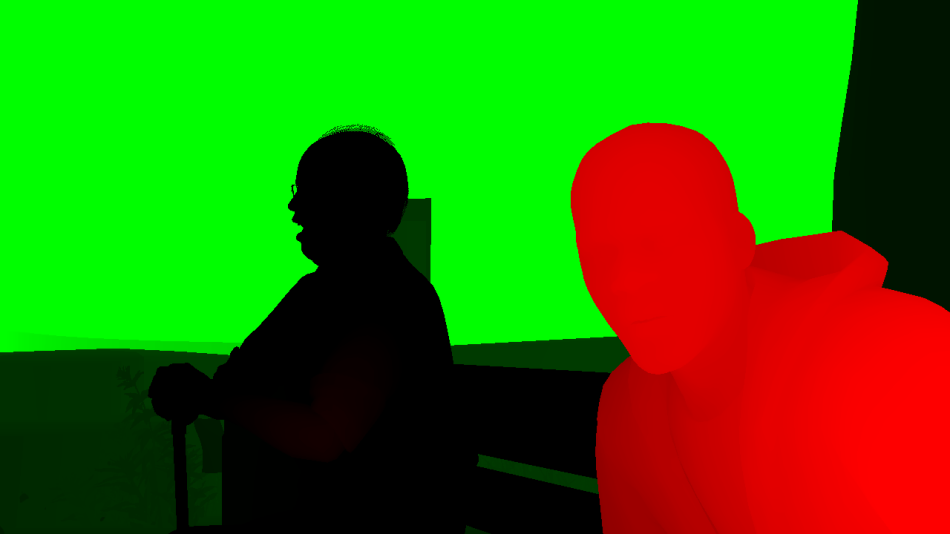
CoC card
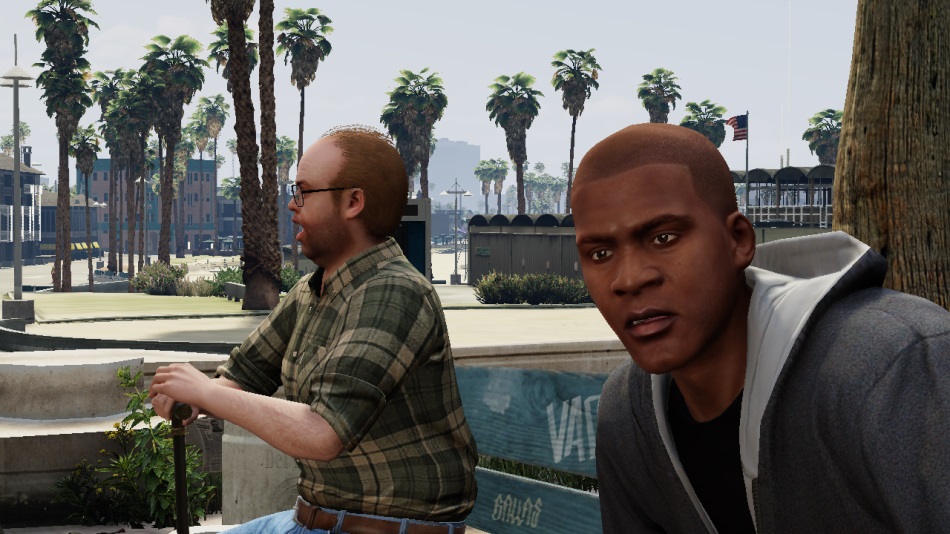
So, after studying the CoC card, it becomes clear that Leicester, highlighted in black, will be in focus, and Franklin in the foreground and the landscape in the background - out of focus.

CoC foreground blur map
Then the engine selects only “out-of-focus foreground areas”: all texels with CoC <0. This CoC foreground map is blurred with a computational shader, first horizontally and then vertically.
Why? Well, the CoC value for Franklin pixels is approximately 0.7, while for the bench right behind it, which came into focus, it is 0. Now that the blur is complete, the image of Franklin looks rather blurry and the bench will remain clear. moreover, the area next to Franklin's right hand looks strange: it turns out a sharp transition from a clearly blurred hand to the extremely clear lines of the bench. The hard borders are very noticeable ... Disorder, the contours should merge smoothly, and the Franklin pixels should slightly overlap the neighboring ones.
This is what a CoC blur card is needed for: to smooth out the roughness of the CoC card and ensure that the out-of-focus foreground pixels are properly superimposed.
Now we have everything we need to calculate the depth of field. Previously, the degree of blurring was calculated using a pixel shader at a lower resolution, separately horizontally and separately vertically, which guaranteed more accurate results. The GTA V team decided to keep the method with 2 phases, but preferred to perform all the necessary operations with the original resolution, and in order to avoid performance degradation, use a computational shader instead of a pixel one.
And this is reasonable, because computational shaders easily adapt to the blurring of large areas . So when calculating the total value of a “blur” of a pixel, its color will depend on a smaller or larger number of neighboring (depending on the CoC pixel) and some of the latter will be excluded if the likelihood of incorrect compilation occurs.

Base, depth, CoC map and CoC blurred foreground map
When using double blur using a computational shader, we obtain the following image:
Depth of field "to"

Depth of Field "After"
This effect gives the frame a completely different perception of dimensions, like in the movies, when the director focuses the camera on a character to draw attention to it.
Conclusion
Of course, there are other post-effects processing that could be considered, but it seems that this series of articles on GTA V was so much more lengthy than I had planned.
There is a heat haze imitation, scattering of light in depth (sometimes bright areas overlap adjacent ones, sometimes corresponding graphical grids are added manually) or motion blur (like a mixed approach, when blur is performed only in the camera’s moving direction, eliminating player pixels due to the template buffer used in as a mask).
The “Wasted” screen, when your character dies, is also a clean post-effect: after the main rendering is completed, the scene is blurred, grayed out, then a vignette is applied, gritiness is added, like in a movie, and finally the familiar text is drawn over it.
Hopefully, I still helped a little to understand how Rockstar managed to create a product that became a true guide in the world of video games. The boundless universe, the specifics of filing and attention to detail, as well as the ability to run the game on the console of the old generation made GTA V an amazing project.
Source: https://habr.com/ru/post/272521/
All Articles