The story of how I wrote OS in Minecraft
Back in 2011, the world saw a game like Minecraft - a voxel sandbox, where everyone creates everything his heart desires. After some time, craftsmen began to write various modifications for her, making the gameplay more diverse. Not so long ago, a mod called “OpenComputers” appeared, adding high-grade computers programmed in the Lua scripting language. And in this article I want to share with you a little experience gained in studying this extremely interesting fashion.
Studying mod
If you set a computer in front of you and install a standard console OS on it from local floppy disks, you may be slightly disappointed in the mod functionality. In fact, at the start we have a command line with a rather nasty looking interface, we have a set of standard commands like ls, edit <file>, remove <file> or mkdir <folder>.
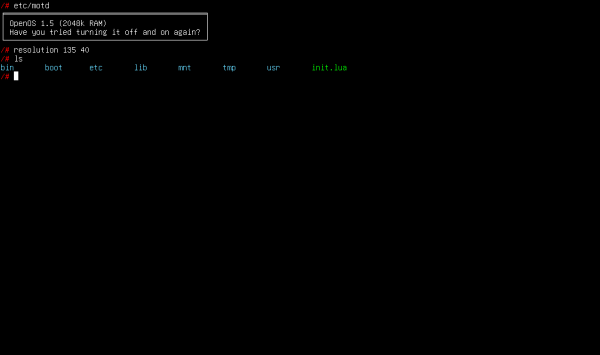
')
The whole thing did not suit me at all, and I decided to add more pleasant colors to the console and Russify the clues for the mod, since the author allowed us to edit the source code of all its developments. The syntax of Lua, its structure and capabilities, I was extremely surprised compared to the same unfriendly to the novice family of the SI family or even more indifferent Java, it has absolutely everything you need out of the box, and the documentation for the fashion is written in a simple popular language. At first I began to write simple scripts a la “Hello world”, and a little later I switched to all sorts of small programs for controlling doors or lighting in a game house, but it all smelled boredom and simplicity. I wanted hardcore!

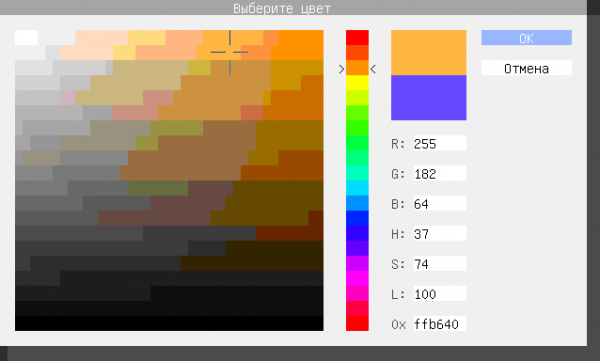
Gradually studying local libraries and Lua features, my friend and I were able to make simple GUI applications. Rummaging through all sorts of wikipedia, we found several algorithms for working with color - for example, to convert colors from RGB to HSB format or to overlay one color over another, taking into account transparency. A little fiddling, we managed to implement these algorithms on Lua, and so our first library for this mod appeared, we called it colorlib, and with its help we were able to create such a nice palette:
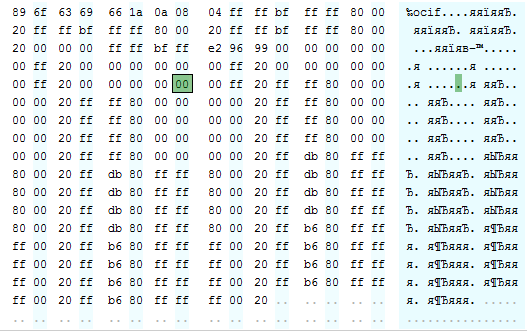
Deciding not to stop there, we thought it would be cool to make a graphic editor for this mod, as well as its own image format. Indeed, why not? So we could easily draw beautiful graphics on the monitor. Having spent a few days, my friend managed to implement a competent file structure of future pictures, which ate very little space on local hard drives, which, by the way, have a limited amount of 4 MB. We denoted the abbreviation of the format as ".pic", and the format itself was called "OpenComputers Image Format", abbreviated "ocif". After all this, we started creating the graphic editor itself, spending about three days on it. As a result, we have this:

The structure of the .pic file in hexadecimal can be seen in this picture:
First of all, we added the most necessary tools to our graphic editor - a brush, an eraser, as well as text to create inscriptions, because in fact we have a console, where each pixel has three parameters: text color, background color and symbol. A little later, a recursive fill algorithm was inserted for more convenient creation of images, and our editor managed to teach the real PNG image format a little later (by the way, using an article from a habr). So, we have a working image format, but do not know where it can be applied. We began to write various applications for this mod, for example, such a nice calendar:

Or an application that generates digital rain from a famous movie:

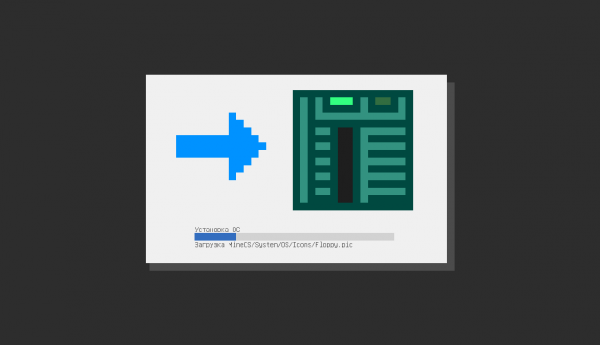
In the end, we had so many different scripts and libraries that we were tired of loading them manually with the standard method through Pastebin.com. Yes, the mod has pastin integration, so we stored all our files initially on it, uploading them to computers as needed. But considering the number of files, we decided to create an installer program that automatically downloads a list of files from our repository to GitHub, and then downloads files from the list to the desired directory. There were quite a few hemorrhoids with transferring files from Pastebin, but after a couple of hours we managed the task and started coding the installer. The result was this:
So, we could already code simple applications with pictures, we had a convenient installer for them, but we wanted something more! The idea of creating an operating system came somehow by itself, and, without thinking twice, I decided to make a few sketches of icons for the future OS. For example, the folder looks like this:

Having drawn the main icons, I started creating the operating system itself, immediately giving it the name “MineOS”. The basic concept is very simple: in the MineOS / Desktop / folder there are files of any type. Using the standard getFileList () function, we get a list of files, get the file format through cropping a string file name, and then draw icons on our screen in accordance with the received format. Something like this came out:

Then I attached the bottom menu in the style of Mac OS, added the menu from the top, nakodil context interaction library - and in the end we already have something worthy of the name "graphical shell", but this is not yet up to the full OS.

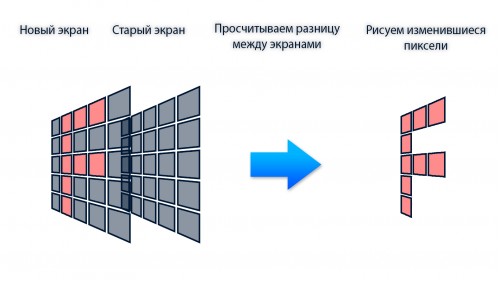
Everything has its drawbacks: the local "video cards" provided by the mod have a limited number of operations that they can do for a gaming tick. By operations we mean changing the text color, background color, setting a character, etc. It is not difficult to imagine how many operations were required to draw our pictures and even more so to draw a desktop. But the biggest sadness was that I needed to redraw the desktop completely, for example, if I opened the context menu or ran a file. But here another comrade came to help me and advised me to write a double image buffering algorithm. For those who do not know, I will briefly explain its essence: in RAM we have two arrays of images: the first contains information about the pixels that are currently displayed on the screen, and the second - information about the pixels that we want to draw. Then, by calling the calculation function, the algorithm compares these two arrays and displays not all the pixels, but only the modified ones. And then assigns the first array the value of the second.
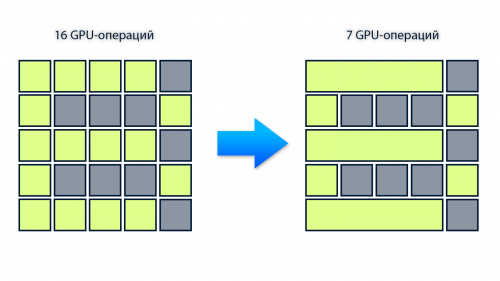
Also, I have built in this library several algorithms to speed up the work of local GPUs, grouping neighboring pixels by color and combining them into one line instead of alternately rendering.
And only now my OS is working as it should! Icons were drawn almost instantly, it became extremely pleasant to interact with the computer. Deciding not to stop there, I added several functions simulating image transparency, and with their help I managed to achieve quite beautiful results.
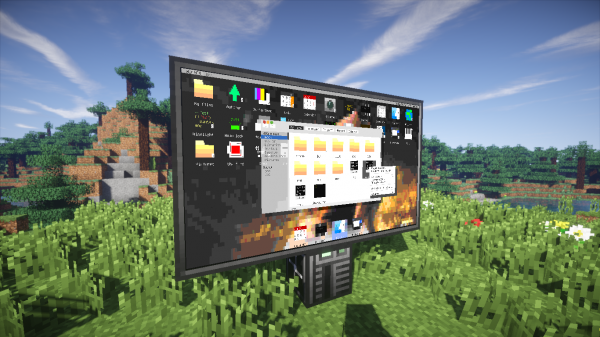
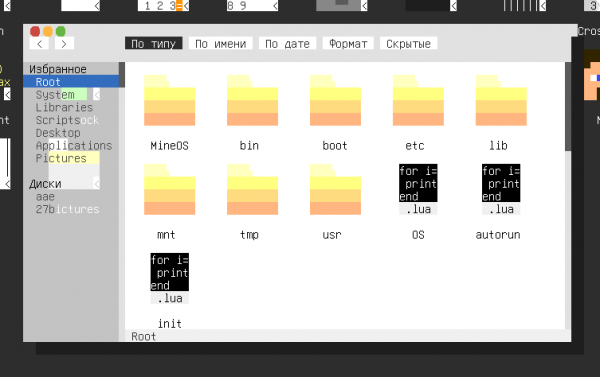
Then I nakodil beautiful file manager in the style of the Finder from the same Mac OS, and integrated it into the system. He also added sorting files by name, type and date of change, added hiding of image format, added “favorites” menu. As a result, we have the following:
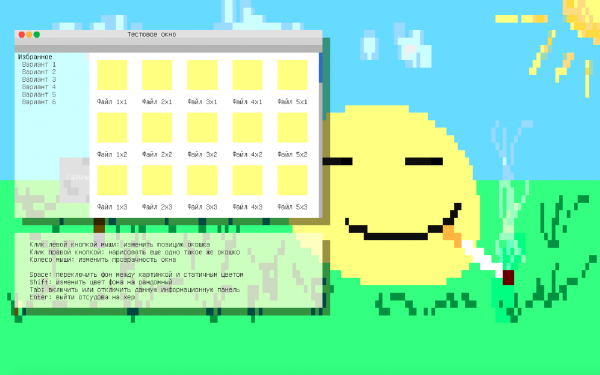
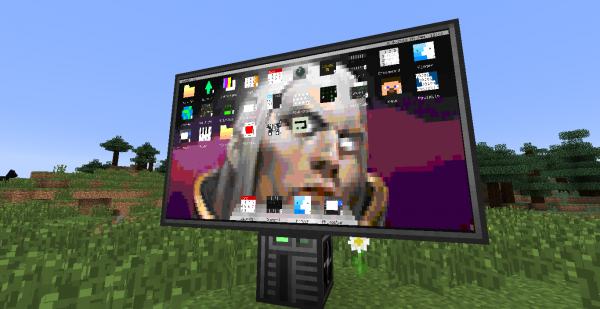
All this already looks pretty good, but behind me there is such a sin as a strong love for good graphics. So I decided to add support for the wallpaper. Here are some examples:


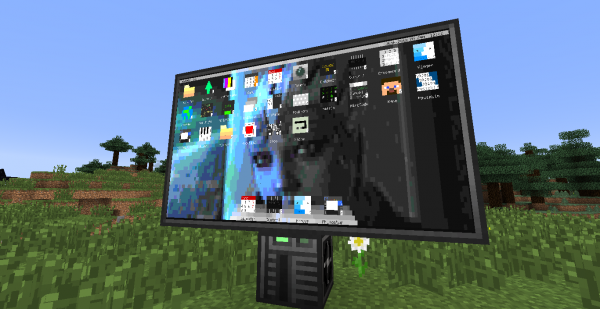
By the way, today I wrote the HEX file editor, since I don’t like to pay for ready-made solutions that are sold on the Internet. This is how it looks in combination with the wallpaper of the working table.

So, our OS is ready! In total, we have about 28 of our own libraries, while some of them have more than 2 thousand lines of code. We also have about 30 high-quality GUI applications. From the beginning of the study of fashion and up to the present time, almost a year has passed, and we programmed far from every day and every week. This is how this operating system was written, and after it this article.
How to download?
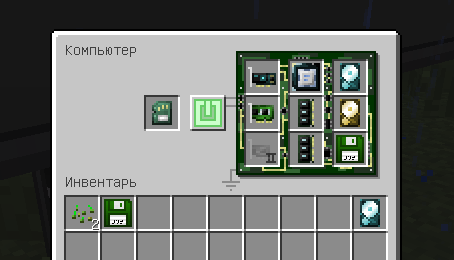
If you want to feel this OS yourself, then please, here is a brief instruction: put the computer case on the ground, attach the monitor to it, and attach the keyboard to the monitor. Then you insert into the case the best video card, processor, RAM, hard disk, Lua-BIOS, standard floppy with OpenOS (mod's scripts), as well as an Internet card (not a network, but the Internet).
Then you turn on the computer, wait for the system to boot from a floppy disk, and then enter the install command on the console. Next, select the number of the hard disk, press enter , and the system is set. Next, restart the computer.
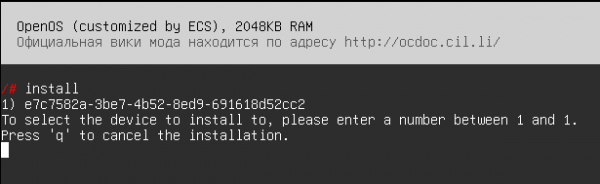
Now your computer is ready to install my operating system. Enter the pastebin run 0nm5b1ju command into the console, press enter and follow the instructions on the screen. I wish you a pleasant use.
Total
Why, in fact, I wrote this article? I wanted to show people that in any language and in any environment you can create a small, I’m not afraid of this word, a masterpiece. A year and a half ago, I was extremely vaguely aware of what a “function”, “array” or “class” is, and now with my friends we are coded with our own mini-OS. The main thing is to have free time and the desire to spend it profitably and with pleasure, for me personally there is no greater buzz than to code all the nonsense in my favorite game. I wish all beginners and not-so-novice programmers creative success!
Sources
If anyone is interested, you can dig in the raw materials , there you will find all the libraries, the OS itself, programs and images.
The authors
Just in case, I want to list the rest of the people who were somehow connected with this OS, who, just like me, were interested in studying this modification, and Lua as a whole.
- Gleb Trifonov is a developer of image format, as well as half of the libraries.
- Jacob (last name unknown) - the developer of the concept of double buffering, assistant in code optimization.
- Maxim Pakin is the author of several OS programs.
- Timofey Shestakov is the moral support of the team, the author of several interesting ideas to speed up the OS.
Source: https://habr.com/ru/post/272391/
All Articles