Air Datepicker, easy and beautiful date selection
I want to share with you the experience of writing a date picker for a text field.
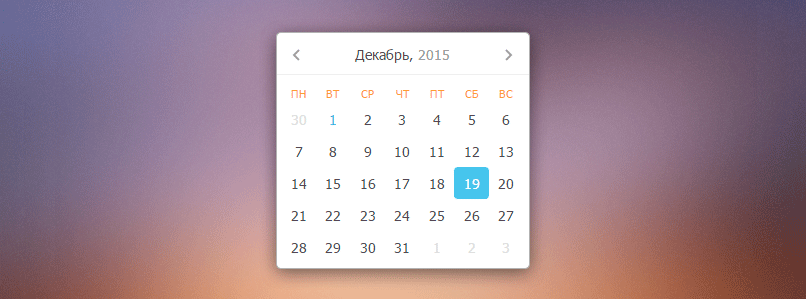
The result of the work can be found here: Air Datepicker .
While working on the latest project, it became necessary to add a calendar to the application with the ability to select a specific month. All the popular plug-ins provide this opportunity, my choice was Zebra Datepicker - small, functional, everything is great. But some things still lacked:
')
How many did not have to work with the date, it is almost always in the source data it was stored in unix format , and it remains a mystery to me why in many plugins when setting, for example, the minimum possible date, you need to pass a line: you need to get the date, then remake string and then later pass to the plugin, instead of simply giving the new Date (time) .
As for the cumbersome markup, then a table layout is added to it, to the cells of which, without unnecessary problems, do not add position: relative; .
And finally, I still want to be able to add a small animation, and due to the fact that many popular calendars use the .show () method, which uses the display property, smooth transitions (transition) add time-consuming.
I divided the calendar into three parts:
When there are any events in the body or navigation, they report this to the main part, and the calendar updates its state in accordance with these events.
In this task getters and setters helped me. For example, when a month is changed, a new displayed date is simply assigned with a changed month number, and the body redrawing and calendar navigation method is called inside the getter. In spite of the fact that it would be possible to do without them, this approach seems to me more beautiful. For example, this is how the transition to the next month, year or decade looks like, depending on the current type:
In turn, inside the getter there is a call to draw the calendar elements (simplified):
In the same way, the transition to a different view is very simple:
The basis for the calendar is as follows:
Without tables and hint of them. The cell is a simple <div> ... </ div> , which makes it possible to add pseudo elements to them and position the content inside them as you like.
I do not see much point in the division into rows of cells, as this is an additional unnecessary element. All dates go one after another, they have a relative width, which allows you to move to another line at the right time.
To generate the correct HTML, you need to know how many days in the month. To do this, use a small trick with the transfer of the next month and zero date (in Date (), the date of the month begins with one).
When you initialize the calendar, you can set the day from which the week starts. It seemed to me interesting to show how you can create a markup with the names of days using recursion:
For positioning inside the calendar I use flexbox . It allows you to easily center content inside cells, it will be centered in all browsers ( which support this technology ) and on different operating systems, as opposed to the height setting technique and the same line spacing.
Plus it allows you to place elements at an equidistant distance from each other with just one line:
No need to worry about different widths, everything will be calculated automatically.
You can also mention the buttons "Today" and "Clear":
If there are two of them, they occupy 50% of the entire width, if one, then it occupies the entire width. This can also be achieved in one line:
This means that the element, if necessary, can either increase in size or decrease, but the dimensions of all the neighbors will be the same. When the button is single, it expands to the full width, when two, they are proportionally reduced and occupy 50% each, and so on. You can add as many elements as you like, they will all have the same size, and in total they will occupy the entire width of the parent.
As a result, we get the ease of positioning content as when using tables, but at the same time we maintain the purity and validity of the markup.
The position of the element is given by two values:
If you need to arrange the calendar on the top right, then the value will look like:
In order to add “drive up” animation to the text field, I added helper classes that tell which side to start the animation. In this case, this class would look like.-From-top- . Css transition and css transform are responsible for the animation. This allows you to achieve smoothness, as well as add custom transitions.
As I mentioned at the beginning, I do not quite understand the situation when instead of a date object I need to pass a string. Perhaps this is convenient for automatic initialization, when parameters need to be passed through data attributes, but for me it’s still more convenient to just pass a new Date (). Moreover, the record type new Date (2015, 11, 17) is not particularly difficult '2015-12-17'. Therefore, in all parameters where the date is set, I need to pass new Date ().
I like the practice of automatic initialization of plugins, so to initialize the calendar to the text field is enough to add the class 'datepicker-here' and everything will work.
Options can be passed through data attributes.
The Air Datepicker has the ability to completely change the contents of the cells. This allows you to add, for example, event names or some kind of auxiliary content to the cells. To do this, use the onRenderCell () option:
In the end, I can say that I got a good experience, improved my skills in working with dates and writing documentation. The calendar turned out to be small: only 20kb ( minified js file ), but quite functional, at least for me, it performs its tasks. I would be glad if he or this article will help someone.
Thanks for attention.
The result of the work can be found here: Air Datepicker .
Introduction
While working on the latest project, it became necessary to add a calendar to the application with the ability to select a specific month. All the popular plug-ins provide this opportunity, my choice was Zebra Datepicker - small, functional, everything is great. But some things still lacked:
')
- passing Date () objects to parameters instead of strings
- less bulky markup
- flexible item positioning
- animation on appearance
How many did not have to work with the date, it is almost always in the source data it was stored in unix format , and it remains a mystery to me why in many plugins when setting, for example, the minimum possible date, you need to pass a line: you need to get the date, then remake string and then later pass to the plugin, instead of simply giving the new Date (time) .
As for the cumbersome markup, then a table layout is added to it, to the cells of which, without unnecessary problems, do not add position: relative; .
And finally, I still want to be able to add a small animation, and due to the fact that many popular calendars use the .show () method, which uses the display property, smooth transitions (transition) add time-consuming.
Development
I divided the calendar into three parts:
// Datepicker // Datepicker.Body // Datepicker.Navigation When there are any events in the body or navigation, they report this to the main part, and the calendar updates its state in accordance with these events.
In this task getters and setters helped me. For example, when a month is changed, a new displayed date is simply assigned with a changed month number, and the body redrawing and calendar navigation method is called inside the getter. In spite of the fact that it would be possible to do without them, this approach seems to me more beautiful. For example, this is how the transition to the next month, year or decade looks like, depending on the current type:
next: function() { var d = this.parsedDate; switch (this.view) { case 'days': this.date = new Date(d.year, d.month + 1, 1); break; case 'months': this.date = new Date(d.year + 1, d.month, 1); break; case 'years': this.date = new Date(d.year + 10, 0, 1); break; } } In turn, inside the getter there is a call to draw the calendar elements (simplified):
set date (val) { this.currentDate = val; this.currentView._render(); this.nav._render(); } In the same way, the transition to a different view is very simple:
this.view = 'months'; Markup generation
The basis for the calendar is as follows:
<div class="datepicker"> <i class="datepicker--pointer"></i> <nav class="datepicker--nav"></nav> <div class="datepicker--content"></div> </div> Without tables and hint of them. The cell is a simple <div> ... </ div> , which makes it possible to add pseudo elements to them and position the content inside them as you like.
I do not see much point in the division into rows of cells, as this is an additional unnecessary element. All dates go one after another, they have a relative width, which allows you to move to another line at the right time.
Calculate the total number of days in a month
To generate the correct HTML, you need to know how many days in the month. To do this, use a small trick with the transfer of the next month and zero date (in Date (), the date of the month begins with one).
Datepicker.getDaysCount = function (date) { // , , , . // - , 1, 0, , // 31 , 31 . return new Date(date.getFullYear(), date.getMonth() + 1, 0).getDate(); }; Formation of the names of days
When you initialize the calendar, you can set the day from which the week starts. It seemed to me interesting to show how you can create a markup with the names of days using recursion:
/** * @param firstDay - , * @param [curDay] - , * @param [html] - html * @param [i] - */ _getDayNamesHtml: function (firstDay, curDay, html, i) { curDay = curDay != undefined ? curDay : firstDay; html = html ? html : ''; i = i != undefined ? i : 0; // 7 , html if (i > 7) return html; // , 7, if (curDay == 7) return this._getDayNamesHtml(firstDay, 0, html, ++i); html += '<div class="datepicker--day-name' + (this.isWeekend(curDay) ? " -weekend-" : "") + '">' + this.localization.daysMin[curDay] + '</div>'; return this._getDayNamesHtml(firstDay, ++curDay, html, ++i); }, Using flexbox
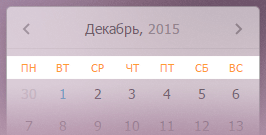
For positioning inside the calendar I use flexbox . It allows you to easily center content inside cells, it will be centered in all browsers ( which support this technology ) and on different operating systems, as opposed to the height setting technique and the same line spacing.
Plus it allows you to place elements at an equidistant distance from each other with just one line:
.datepicker--nav { justify-content: space-between; } No need to worry about different widths, everything will be calculated automatically.
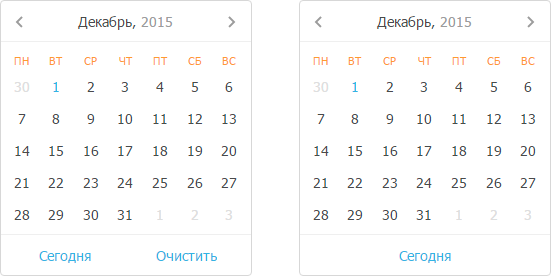
You can also mention the buttons "Today" and "Clear":
If there are two of them, they occupy 50% of the entire width, if one, then it occupies the entire width. This can also be achieved in one line:
.datepicker--button { flex: 1; } This means that the element, if necessary, can either increase in size or decrease, but the dimensions of all the neighbors will be the same. When the button is single, it expands to the full width, when two, they are proportionally reduced and occupy 50% each, and so on. You can add as many elements as you like, they will all have the same size, and in total they will occupy the entire width of the parent.
As a result, we get the ease of positioning content as when using tables, but at the same time we maintain the purity and validity of the markup.
Positioning
The position of the element is given by two values:
- side with which the calendar will appear
- position on this side
If you need to arrange the calendar on the top right, then the value will look like:
{ position: 'top left' } In order to add “drive up” animation to the text field, I added helper classes that tell which side to start the animation. In this case, this class would look like.-From-top- . Css transition and css transform are responsible for the animation. This allows you to achieve smoothness, as well as add custom transitions.
As for the date ()
As I mentioned at the beginning, I do not quite understand the situation when instead of a date object I need to pass a string. Perhaps this is convenient for automatic initialization, when parameters need to be passed through data attributes, but for me it’s still more convenient to just pass a new Date (). Moreover, the record type new Date (2015, 11, 17) is not particularly difficult '2015-12-17'. Therefore, in all parameters where the date is set, I need to pass new Date ().
A few words about using
I like the practice of automatic initialization of plugins, so to initialize the calendar to the text field is enough to add the class 'datepicker-here' and everything will work.
<input type="text" class="datepicker-here" data-position="top right" data-min-view='months'/> Options can be passed through data attributes.
Custom cell content
The Air Datepicker has the ability to completely change the contents of the cells. This allows you to add, for example, event names or some kind of auxiliary content to the cells. To do this, use the onRenderCell () option:
$('#datepicker').datepicker({ // 31 . onRenderCell: function (date, cellType) { if (cellType == 'day' && date.getDate() == 31 && date.getMonth() == 11) { return { classes: '-ny-', html: ' !' } } } }) Conclusion
In the end, I can say that I got a good experience, improved my skills in working with dates and writing documentation. The calendar turned out to be small: only 20kb ( minified js file ), but quite functional, at least for me, it performs its tasks. I would be glad if he or this article will help someone.
Thanks for attention.
Source: https://habr.com/ru/post/272173/
All Articles