Customize voice messages in 3CX

Often the question is how to change a particular file and most importantly where it is located, so I was encouraged to write this mini review, how and where to change the sound files.
Let's start with the simple.
')
If for any reason your version of 3CX does not want to speak Russian, then most likely you have not installed a sound package or been damaged. For the decision we do some simple manipulations:
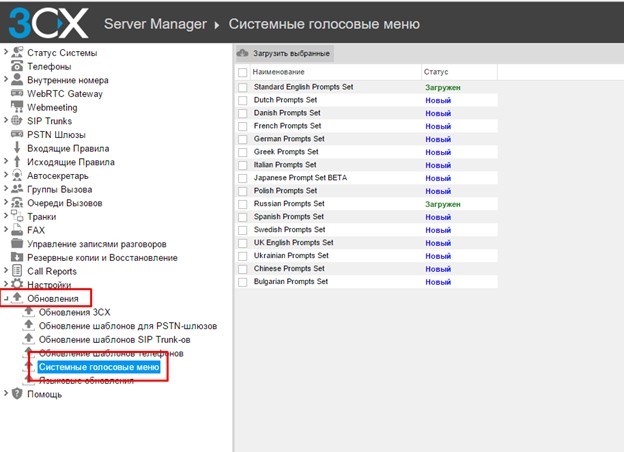
1. Install the audio package. You can install from the 3CX web interface, section " Update / System Voice Messages ":
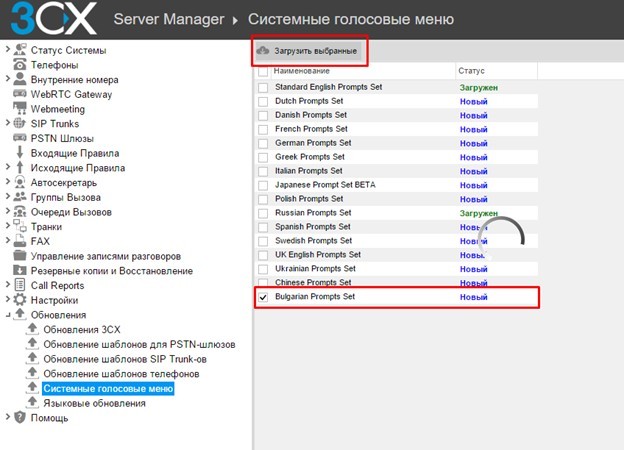
Next, select the desired language (in my example, the Russian language is already loaded, so we will use Bulgarian) and click on the button " Download selected ":
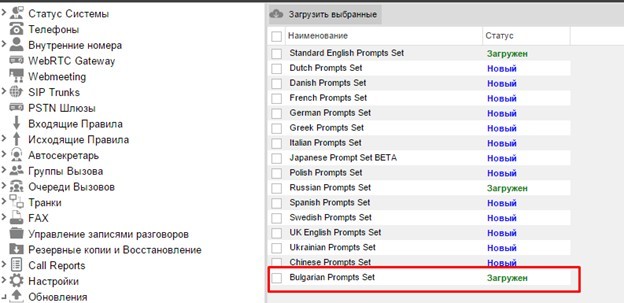
At the end of the download, the status changes from “New” to “Downloaded”:
2. Application of changes. In order to change the language of voice messages, go to the web interface in the Settings / Voice Mail menu :
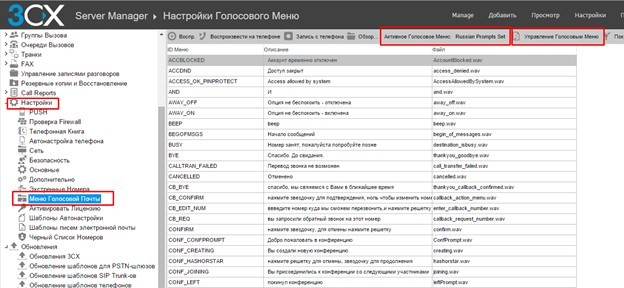
In addition, you can see here which current language is used:

To change the language, you must click on the " Voice menu control " button and select the desired one from the drop-down list:
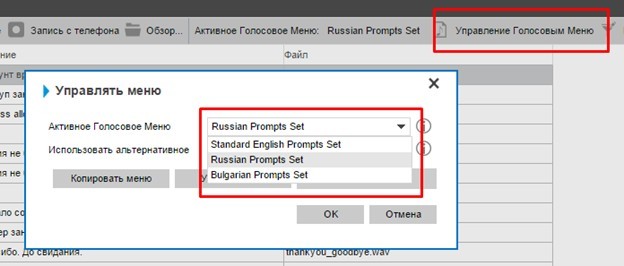
Here you can do some file manipulations:
- Copy menu - a complete copy of the voice files for the selected menu is created. In the future, a copy can be used.
- Delete menu - completely deletes the sound files of the selected menu.
- Assign menu — select the current language to use for voicemail.
So now we have a sound menu for our language.
If it becomes necessary to change some phrases or voice messages completely, then to solve this task, go to the web interface in the “ Settings / Voice Mail Menu” menu and see the table with all the available voice messages:
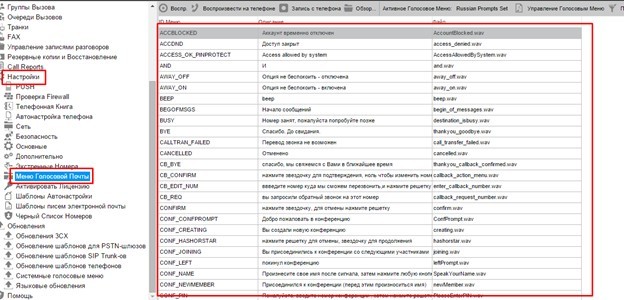
Table fields:
- Menu ID - internal audio file identifier.
- Description - a description of the phrase that will be pronounced. The description language depends on the selected language.
- File - the name of the file that is used. When replacing a sound file, it is also not necessary to call it.
To change, we find the necessary string with the phrase, for the search, you can use the filter:

Enter the desired phrase, and the system will find it.
Further, the file can be downloaded, played on the phone (listen on the phone with the answer to the call) or replaced.
To replace, select the line we need and click on the “ Browse ” button:

Select the file (the file should be in the format wav, Sampla Rate: 22050, Sample Type: 16bit, Mono ), which we want to replace:
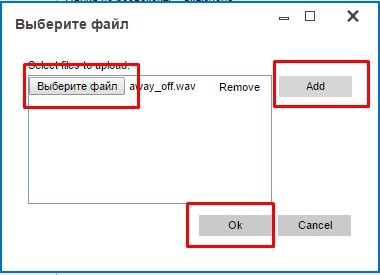
And save the changes.
After these manipulations, you can listen to the new file using the " Play " and " Play on the phone " buttons:

In addition, you can change its description if the phrase that was used differs from the loaded phrase.
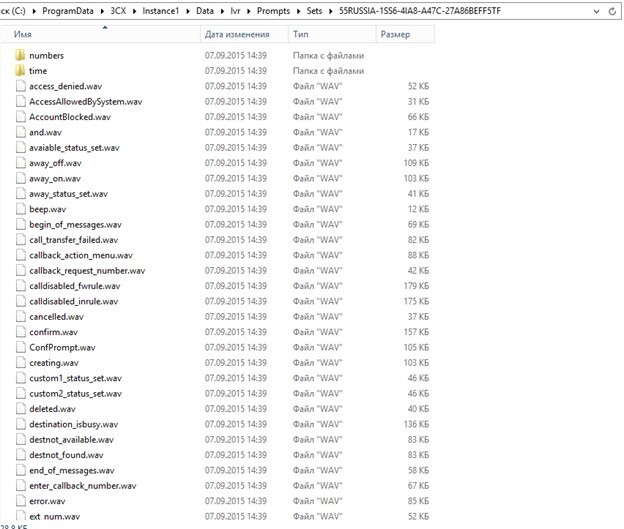
To do this, go to C: \ ProgramData \ 3CX \ Instance1 \ Data \ Ivr \ Prompts \ Sets \ , then in the root there will be several folders like:

From the title it is clear which folder is responsible for which language. Go to the folder with the Russian language " 55RUSSIA-1SS6-4IA8-A47C-27A86BEFF5TF " and look for the file " SetInfo.xml ". This file contains the name (Menu ID) and the description of the file, i.e. just the text that is displayed in the web interface:

The description tag is responsible for the description , changing the description inside this tag accordingly will change the description in the web interface. To change, you will need to restart 3CX services.
In addition, here you can upload new files bypassing the web interface:
If files are replaced with a straight line, it is recommended to leave the original name, since the file name is tied to “Menu ID” in the “ SetInfo.xml ” file with the tag “ prompt id ”. Otherwise, you will need to open this “SetInfo.xml” file for editing and change the “Menu ID” binding to the file name, ie:
“Prompt id =” ID Menu ”file =” filename ”
Thus, you can completely change voice messages to messages that you like.
Source: https://habr.com/ru/post/271869/
All Articles