Deploy Drupal 8 with Docker
In honor of the long-awaited release of Drupal 8, today I will tell you how to install it using Docker .
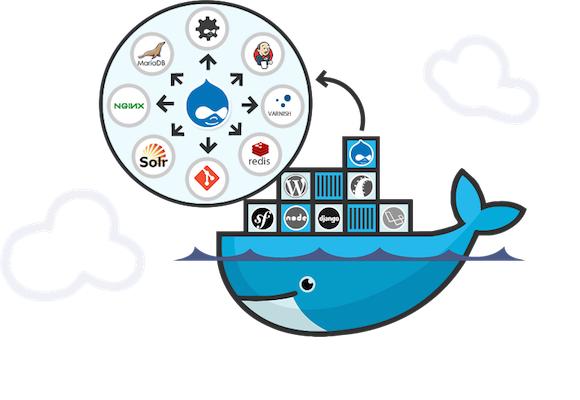
First, why briefly do it at all, what advantages does it give:
A short remark for those who are not familiar with drupal: any experienced drupist (I have been working with drupal for 6 years already) knows that the flexibility and architectural beauty of drupal has to be paid for with performance, so all this talk about the need for optimization, scaling and caching did not appear flat spot
')
Well, let's start. Since the eight does not have normal modules for integration with redis / memcached (for storing the internal cache) and varnish (cache reversing proxy server), we will assemble the environment without them, we will manage with only two containers: a web server (php + apache2) and database (mariadb aka fork mysql).
For the demonstration, we will raise the smallest droplet (VPS) on DigitalOcean with Ubuntu 14.04 x64.
We connect to the virtual machine via ssh under the root, for ease of demonstration, we chop off the default ufw firewall in order to avoid its configuration:
Install the docker:
Check that everything is OK:
Here we see that not a single container has been launched yet, not a single image has been downloaded, the docker version and so on. By default, the AUFS file system is used , which allows the docker to use the versioning of his images as a gita. Those. When you update the image, you will not download everything from scratch, but only a new layer will be downloaded.
We go further, now we need to download our images. If you do not specify an absolute path, then by default the image will be searched on hub.docker.com , download the official mariadb image . Since we do not specify a tag (version), the latest tag is used.
In the output, you will see how all the layers (versions) of the image are downloaded:

Now we download the official image of the drupal , indicating the tag we need. According to the Dockerfile from which the image is assembled, we see that the image is taken as the basis of the official php 5.6 image with Apache , then additional libraries and php extensions are installed, such as gd, pdo and opcache. Then the recommended opcache settings are set and the drupal itself is downloaded.
See the list of docker images:
They weigh quite a lot, because both images are compiled under Debian Jessie with their APT package system, which pulls in a lot of heavy dependencies.
Now we start the container with mariadb, with the key v (--volume) we tell the docker to create a mounted partition from the host node where the database data will be stored, by default if this is not done, the data will be stored inside the container and lost when the container is rebuilt (this can will need to apply new mariadb updates). In response to the command launch, the hash (identifier) of the running container is displayed.
Now we start the drupal with a link to the mariadb just launched and binding to port 80. A link is essentially an entry in / etc / hosts, pointing to the IP of the container with mariadb in the virtual network created by the docker during installation.
Check out docker ps to make sure that both containers are running:

Go to our IP address in the browser and see the Drupal installer:

There should be no problems with the installation, the only thing is that on the settings page of the database you need to specify mysql instead of localhost in the place of the host, by this name we created a binding above.

Hooray! Enjoying a freshly installed drupal.

First, why briefly do it at all, what advantages does it give:
- Independence from the host. If you need to migrate the site to another hosting, it will be much easier to do, because in fact, the whole site is a set of containers, which no matter where they are launched
- Cloning. If you need to create a new instance of the site, for example for development or testing, it will be enough to clone the containers.
- Compatibility of the server environment. Often, the difference in package versions or the absence of some kind of extension on different environments leads to non-obvious bugs. Using the same containers in different environments helps to avoid this.
- Insulation. Isolation of the docker by design is useful when you have several sites or instances of a site on one server (a high load on one site will not affect the others). Although it is somewhat peculiar
- Optimum server environment . It's not a secret that the same nginx, php and mysql / mariadb need to be able to optimally configure, in the case of the docker you can find public containers on the docker hub , collected by other people specifically for your version of drupal
- Scaling . Each container can be scaled both vertically (add resources) and horizontally (clone and distribute the load via load balancer)
A short remark for those who are not familiar with drupal: any experienced drupist (I have been working with drupal for 6 years already) knows that the flexibility and architectural beauty of drupal has to be paid for with performance, so all this talk about the need for optimization, scaling and caching did not appear flat spot
')
Well, let's start. Since the eight does not have normal modules for integration with redis / memcached (for storing the internal cache) and varnish (cache reversing proxy server), we will assemble the environment without them, we will manage with only two containers: a web server (php + apache2) and database (mariadb aka fork mysql).
For the demonstration, we will raise the smallest droplet (VPS) on DigitalOcean with Ubuntu 14.04 x64.
We connect to the virtual machine via ssh under the root, for ease of demonstration, we chop off the default ufw firewall in order to avoid its configuration:
root@drupal8-docker:~# ufw disable Firewall stopped and disabled on system startup Install the docker:
root@drupal8-docker:~# wget -qO- https://get.docker.com/ | sh Check that everything is OK:
root@drupal8-docker:~# docker -D info Containers: 0 Images: 0 Server Version: 1.9.1 Storage Driver: aufs Root Dir: /var/lib/docker/aufs Backing Filesystem: extfs Dirs: 0 Dirperm1 Supported: false Execution Driver: native-0.2 Logging Driver: json-file Kernel Version: 3.13.0-68-generic Operating System: Ubuntu 14.04.3 LTS CPUs: 1 Total Memory: 490 MiB Name: drupal8-docker ID: GUMM:PUBZ:VJOF:52B7:ZIEN:UCJC:4QA2:BSP5:UGSW:FGPV:AZY6:ASZD WARNING: No swap limit support Here we see that not a single container has been launched yet, not a single image has been downloaded, the docker version and so on. By default, the AUFS file system is used , which allows the docker to use the versioning of his images as a gita. Those. When you update the image, you will not download everything from scratch, but only a new layer will be downloaded.
We go further, now we need to download our images. If you do not specify an absolute path, then by default the image will be searched on hub.docker.com , download the official mariadb image . Since we do not specify a tag (version), the latest tag is used.
root@drupal8-docker:~# docker pull mariadb In the output, you will see how all the layers (versions) of the image are downloaded:
Now we download the official image of the drupal , indicating the tag we need. According to the Dockerfile from which the image is assembled, we see that the image is taken as the basis of the official php 5.6 image with Apache , then additional libraries and php extensions are installed, such as gd, pdo and opcache. Then the recommended opcache settings are set and the drupal itself is downloaded.
root@drupal8-docker:~# docker pull drupal:8.0.0 See the list of docker images:
root@drupal8-docker:~# docker images REPOSITORY TAG IMAGE ID CREATED VIRTUAL SIZE drupal 8.0.0 ddddc055c2c2 5 days ago 570.9 MB mariadb latest b8ba0befc716 6 days ago 302.1 MB They weigh quite a lot, because both images are compiled under Debian Jessie with their APT package system, which pulls in a lot of heavy dependencies.
Now we start the container with mariadb, with the key v (--volume) we tell the docker to create a mounted partition from the host node where the database data will be stored, by default if this is not done, the data will be stored inside the container and lost when the container is rebuilt (this can will need to apply new mariadb updates). In response to the command launch, the hash (identifier) of the running container is displayed.
root@drupal8-docker:~# docker run -e MYSQL_ROOT_PASSWORD=admin -e MYSQL_DATABASE=drupal8 -e MYSQL_USER=drupal8 -e MYSQL_PASSWORD=drupal8 -v mariadb:/var/lib/mysql -d --name mariadb mariadb 5a288bef768a000a28c0e482b8424007c606e8d0967703099f967ff6617ceb34 Now we start the drupal with a link to the mariadb just launched and binding to port 80. A link is essentially an entry in / etc / hosts, pointing to the IP of the container with mariadb in the virtual network created by the docker during installation.
docker run --name drupal8 --link mariadb:mysql -p 80:80 -d drupal:8.0.0 Check out docker ps to make sure that both containers are running:
Go to our IP address in the browser and see the Drupal installer:
There should be no problems with the installation, the only thing is that on the settings page of the database you need to specify mysql instead of localhost in the place of the host, by this name we created a binding above.
Hooray! Enjoying a freshly installed drupal.
Source: https://habr.com/ru/post/271751/
All Articles