Blend4Web. Event system
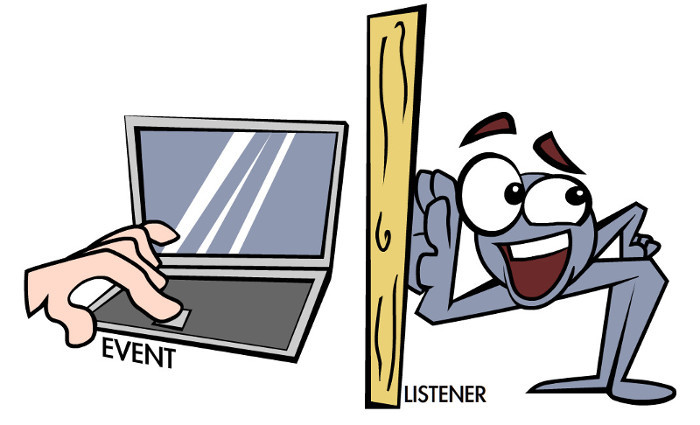
Creating an interactive application is unthinkable without event handling, whether it's keyboard polling or timer operation. The implementation of these important actions depends on the platform, programming language. In this article I want to talk about some of the features of using events for the Blend4Web WebGL engine. Unfortunately, there is very little information on this topic.
In any application there is a main loop, which, for example, polls the keyboard, performs certain logical actions or is responsible for the movement of objects. So, in the popular Unity engine there is a special Update () event, which developers use for most of the above tasks. Moreover, if we continue to consider the approaches of the Unity developers to this issue, then the paradigm “object - event” will be the most important, i.e. when for each object in the scene there are control scripts and an individual “subscription“ to events.
Blend4Web offers a similar approach. However, it is more based on an event model, which can also be tied to specific objects in the scene.
')
Let us return to the beginning of the article and consider the mechanism of the “main cycle”.
For those who do not want to study the event model, there is the simplest option - the append_loop_cb () function from the main module.
It is easy to use. Call this function, for example, after initializing the engine and specify the name of the handler as a parameter:
Now the cb_update () function will be called every frame. Moreover, this event is not tied to any object. It can be used for logical constructions, but not for polling input devices, as one would expect. In general, a survey of the keyboard, mouse, and the like is a separate topic, which I will discuss a little later.
The append_loop_cb () function is easy to use and is suitable for simple logic. Actually, it is considered obsolete and left in the API for compatibility with previously created applications. Now there is a steeper mechanism based on events.
The event model Blend4Web requires reflection and some getting used to. But this is only at the beginning. The main thing is to understand the principles of its work, then everything becomes clear and convenient.
At its core is the concept of "sensor". A sensor is a separate program unit responsible for generating an event for a specific action. So, there are keyboard, mouse, timer, physics, etc. sensors. To create each sensor has its own function. By the way, the whole story of the event model is contained in the module controls.
Let's continue consideration of creating a closed loop, but with the help of events. For this, the set of sensors has a special function create_elapsed_sensor () . For example, you can issue its call:
The entity is created, but there is no sense. And rightly so, because you still need to subscribe to the event. The API engine has one, universal function, with a large number of parameters: create_sensor_manifold (obj, id, type, sensors, logic_fun, callback, callback_param) .
All code in its entirety:
After that, each frame will call the main_cb function, where you can place the necessary logic. The result is reminiscent of append_loop_cb, isn’t it? That just looks like this action is somewhat more complicated, but do not rush to conclusions ...
All the highlight of working with events lies in the parameters that are passed to create_sensor_manifold . Let us analyze the key points of the above code:
So what we have. And we have three very powerful levers for working with events. First, events can be tied to a specific object in the scene. Secondly, each object can be subscribed to several different events. That is why the link to the created sensor is transmitted as an array unit. Third, you can control the type of event generation. In fact, there are not two of them mentioned above, but much more. In addition, there is a special mechanism to use complex logical constructions to respond to events.
The best way to learn something new is practical work. You can shake the air as much as you like by theory, but the result should be tangible. I have always been touched by the immediacy of young talents who ask on the forums: “which game engine to choose, which is the best programming language, how much can you earn ...” Advice - sit down and do it. There is nothing more valuable than personally buried cones.
Here and in this case, I preferred to test the theory in practice. To fully explore the possibilities of the Blend4Web event model, it was decided to create a simple application and make the most of these opportunities. But the work was so interesting that the result was a cute mini-game / Christmas card, which I even posted on the main page of my site with games. At the end of the article you will find links to the application and all sources. Use on health.
The idea of a New Year postcard is simple and inspired by childhood memories. Remember the key phrase “One, two, three - herringbone burn”? Something like this, I decided to bring to life. There are three buttons, each of which lights the bulbs on the tree of the corresponding color. In this case, the sound of a certain pitch. The task is to find the correct sequence of switching on the lamps. After pressing the buttons, the program checks the result and displays a message: either a hint or a transition to the final. Since this is still more of a New Year card than a game, after several unsuccessful attempts, the correct version is given.

The Blend4Web engine does not have a built-in GUI, so two options are offered: use objects in Blender or work through standard HTML features. It's easier for me to work with Blender. In the editor, planes with button textures were created and “exit” animations added to them. You can open the project file and see how it is done.
The API engine has a special sensor create_selection_sensor , which is able to generate an event when an object is selected with the mouse. For example, you can use this code to track clicks:
Here, the sel_sensor sensor has been added to the btRed object (a button that turns on red light). Event generation is limited to the CT_SHOT type , i.e. happens once. Now, with each mouse click on the button, the sel_sensor_cb () handler function will be called, in which all the magic is concentrated: the animation of the button, the activation of the backlight around it, the activation of lamps in the scene.
Someone, probably, has already noticed that the proposed code has one major drawback - this event is only a selection of the object, so the button always turns on. Of course, there are no special problems. It is enough to add a trigger variable to the program and switch ON / OFF modes depending on its value. But the task is a bit different. You need to press the button once and then lock it. But after the user clicks all the buttons in the scene, you need to check the correct order and decide whether to give him another chance (turn off the lights and buttons) or turn on the final stage.
This is where another powerful tool of the event model comes to the rescue - a logic function:
In the previous examples in its place was null. Thus, the coming event always caused the callback handler. In fact, this behavior is determined by the result of the operation of the logic function in conjunction with the selected type. And since several sensors can be in the same manifold at once, then with this tool you can create very interesting behaviors.
The API includes a lot of ready-made sensors, but there is one, the meaning of which is to store a certain variable: create_custom_sensor (value) . The user with the help of special functions can change and control the value value at any time. For example, it does not cost anything to create an event on its basis that will be generated when an explosion occurs. In this case, the variable will store some important value, the same force of the explosion. And already on the basis of the received data, the subscribing objects can react in one way or another. In addition, the value value can be taken into account when building a logical function. I used this property to block the execution of the create_selection_sensor sensor at the right time.
The idea is that after the button is selected , the event handler is invoked only if the value of custom_sensor is zero. One has only to change it to another digit and the handler is blocked.
Creating a custom_sensor is no different from the previously discussed sensors. In this case, you must immediately specify the initial value value:
Since it is also necessary to monitor the selection sensor, the initialization design becomes somewhat different - all sensors are combined into an array:
And the array is transferred to the manifold:
All the action is contained in the logic function logic_fun (it must be described before calling in the code):
The call to the sensor_cb handler will occur if the logic_fun function returns both sensor results as true. The logic function runs continuously and is bound to the frame update. Therefore, the reading of sensor parameters occurs continuously. If the user selects a button object on the screen, the sensor s [0] returns true. However, as long as the equality s [1] == 0 is invalid, the handler will not be executed.
Consider another example of using sensors in an application. So, the user pressed all three buttons on the screen. The program must decide whether this was done in the sequence and how to respond.
I decided to assign a letter (string) to each button and store the sum of these letters in a special variable. It is clear that the addition of letters leads to unique combinations, where only one is correct. Thus, the program learns about the sequence of keystrokes. But this logic itself is executed in a special handler, which is called when certain requirements are met.
Previously, the code for blocking buttons on the screen using the custom_sensor sensor was shown . To do this, it was enough to change the sensor value to something else in the handler using a special function:
Thus, the sensors of all buttons received the value 1, which in fact blocked the selection of objects in the future. But these same values are taken into account further.
In the Blender scene, several objects were created containing hints, in case the player incorrectly guesses the combination of sounds. It is they who “expect” the setting of custom_sensor buttons to 1, after which their own handler is triggered, which displays hints on the screen.
Here is the code that is responsible for checking:
It uses only custom_sensor. When initialized, its value is set to false, which allows you to turn on a kind of standby mode. The logic_wrong function checks the pressing of all buttons on the screen (summed up the value of the object sensors), and also compares the sequence of pressing the buttons with the “ABC” standard. And only when all the requirements are met, the logic function returns true to the manifold, which in turn will launch the wrong_cb handler.
If, when studying these examples, you got used to the idea that everything is clear with the event model b4w, then I hasten to “rejoice” - there are several other nuances that need to be taken into account.
In the examples of creating a manifold, you have already encountered the type parameter. I usually used the CT_SHOT or CT_CONTINUOUS values. There are five options for them in Blend4Web. However, the main thing here is that they work in conjunction with a logic function. So, just above, the function with the CT_SHOT type called the st_btWrong handler only if the logic function logic_wrong returned true.
The list of possible values of type and their response to the result returned by a logic function:
As you can see, the event model Blend4Web is very flexible and allows you to cost very complex logical structures. In one article it is impossible to cover all aspects of working with it, but the basic features were disclosed. To get acquainted with the full capabilities of the event model, I advise you to look into the official API documentation .
Link to the application
Source archive
Simple approach
In any application there is a main loop, which, for example, polls the keyboard, performs certain logical actions or is responsible for the movement of objects. So, in the popular Unity engine there is a special Update () event, which developers use for most of the above tasks. Moreover, if we continue to consider the approaches of the Unity developers to this issue, then the paradigm “object - event” will be the most important, i.e. when for each object in the scene there are control scripts and an individual “subscription“ to events.
Blend4Web offers a similar approach. However, it is more based on an event model, which can also be tied to specific objects in the scene.
')
Let us return to the beginning of the article and consider the mechanism of the “main cycle”.
For those who do not want to study the event model, there is the simplest option - the append_loop_cb () function from the main module.
It is easy to use. Call this function, for example, after initializing the engine and specify the name of the handler as a parameter:
var m_main= b4w.require ("main"); m_main. append_loop_cb(update_cb); … function update_cb() { // } Now the cb_update () function will be called every frame. Moreover, this event is not tied to any object. It can be used for logical constructions, but not for polling input devices, as one would expect. In general, a survey of the keyboard, mouse, and the like is a separate topic, which I will discuss a little later.
The append_loop_cb () function is easy to use and is suitable for simple logic. Actually, it is considered obsolete and left in the API for compatibility with previously created applications. Now there is a steeper mechanism based on events.
The event model Blend4Web requires reflection and some getting used to. But this is only at the beginning. The main thing is to understand the principles of its work, then everything becomes clear and convenient.
At its core is the concept of "sensor". A sensor is a separate program unit responsible for generating an event for a specific action. So, there are keyboard, mouse, timer, physics, etc. sensors. To create each sensor has its own function. By the way, the whole story of the event model is contained in the module controls.
Let's continue consideration of creating a closed loop, but with the help of events. For this, the set of sensors has a special function create_elapsed_sensor () . For example, you can issue its call:
var m_ct= b4w.require ("controls"); var _elapsed_sensor = m_ctl.create_elapsed_sensor(); The entity is created, but there is no sense. And rightly so, because you still need to subscribe to the event. The API engine has one, universal function, with a large number of parameters: create_sensor_manifold (obj, id, type, sensors, logic_fun, callback, callback_param) .
All code in its entirety:
var m_ct= b4w.require ("controls"); // var elapsed_sensor = m_ctl.create_elapsed_sensor(); //”” m_ctl.create_sensor_manifold(null, "MAIN", m_ctl.CT_CONTINUOUS, [elapsed_sensor], null, main_cb); … // function main_cb () { // } After that, each frame will call the main_cb function, where you can place the necessary logic. The result is reminiscent of append_loop_cb, isn’t it? That just looks like this action is somewhat more complicated, but do not rush to conclusions ...
All the highlight of working with events lies in the parameters that are passed to create_sensor_manifold . Let us analyze the key points of the above code:
- null The first parameter is the object that “subscribes” to the event. Null is specified here, i.e. the object is the whole scene.
- “MAIN”. A unique identifier that is assigned to the created set.
- m_ctl.CT_CONTINUOUS. Type of event generation. There are several options and in this case means that the event will be generated continuously. For example, if you specify m_ctl.CT_SHOT, then it will occur once (simplified, further there will be explanations).
- [_elapsed_sensor]. Previously created sensor.
- main_cb. Handler function called when an event occurs.
So what we have. And we have three very powerful levers for working with events. First, events can be tied to a specific object in the scene. Secondly, each object can be subscribed to several different events. That is why the link to the created sensor is transmitted as an array unit. Third, you can control the type of event generation. In fact, there are not two of them mentioned above, but much more. In addition, there is a special mechanism to use complex logical constructions to respond to events.
Events in action
The best way to learn something new is practical work. You can shake the air as much as you like by theory, but the result should be tangible. I have always been touched by the immediacy of young talents who ask on the forums: “which game engine to choose, which is the best programming language, how much can you earn ...” Advice - sit down and do it. There is nothing more valuable than personally buried cones.
Here and in this case, I preferred to test the theory in practice. To fully explore the possibilities of the Blend4Web event model, it was decided to create a simple application and make the most of these opportunities. But the work was so interesting that the result was a cute mini-game / Christmas card, which I even posted on the main page of my site with games. At the end of the article you will find links to the application and all sources. Use on health.
The idea of a New Year postcard is simple and inspired by childhood memories. Remember the key phrase “One, two, three - herringbone burn”? Something like this, I decided to bring to life. There are three buttons, each of which lights the bulbs on the tree of the corresponding color. In this case, the sound of a certain pitch. The task is to find the correct sequence of switching on the lamps. After pressing the buttons, the program checks the result and displays a message: either a hint or a transition to the final. Since this is still more of a New Year card than a game, after several unsuccessful attempts, the correct version is given.
The Blend4Web engine does not have a built-in GUI, so two options are offered: use objects in Blender or work through standard HTML features. It's easier for me to work with Blender. In the editor, planes with button textures were created and “exit” animations added to them. You can open the project file and see how it is done.
The API engine has a special sensor create_selection_sensor , which is able to generate an event when an object is selected with the mouse. For example, you can use this code to track clicks:
m_ctr = b4w.require("controls"); ... sel_sensor = m_ctr.create_selection_sensor(_btRed, true); m_ctr.create_sensor_manifold (_btRed, "btRed", m_ctr.CT_SHOT, [sel_sensor],null, sel_sensor_cb, null); function sel_sensor_cb () { // } Here, the sel_sensor sensor has been added to the btRed object (a button that turns on red light). Event generation is limited to the CT_SHOT type , i.e. happens once. Now, with each mouse click on the button, the sel_sensor_cb () handler function will be called, in which all the magic is concentrated: the animation of the button, the activation of the backlight around it, the activation of lamps in the scene.
Someone, probably, has already noticed that the proposed code has one major drawback - this event is only a selection of the object, so the button always turns on. Of course, there are no special problems. It is enough to add a trigger variable to the program and switch ON / OFF modes depending on its value. But the task is a bit different. You need to press the button once and then lock it. But after the user clicks all the buttons in the scene, you need to check the correct order and decide whether to give him another chance (turn off the lights and buttons) or turn on the final stage.
This is where another powerful tool of the event model comes to the rescue - a logic function:
create_sensor_manifold(obj, id, type, sensors, LOGIC_FUN, callback) In the previous examples in its place was null. Thus, the coming event always caused the callback handler. In fact, this behavior is determined by the result of the operation of the logic function in conjunction with the selected type. And since several sensors can be in the same manifold at once, then with this tool you can create very interesting behaviors.
The API includes a lot of ready-made sensors, but there is one, the meaning of which is to store a certain variable: create_custom_sensor (value) . The user with the help of special functions can change and control the value value at any time. For example, it does not cost anything to create an event on its basis that will be generated when an explosion occurs. In this case, the variable will store some important value, the same force of the explosion. And already on the basis of the received data, the subscribing objects can react in one way or another. In addition, the value value can be taken into account when building a logical function. I used this property to block the execution of the create_selection_sensor sensor at the right time.
The idea is that after the button is selected , the event handler is invoked only if the value of custom_sensor is zero. One has only to change it to another digit and the handler is blocked.
Creating a custom_sensor is no different from the previously discussed sensors. In this case, you must immediately specify the initial value value:
m_ctr.create_custom_sensor(0); Since it is also necessary to monitor the selection sensor, the initialization design becomes somewhat different - all sensors are combined into an array:
var m_ctr = b4w.require("controls"); ... var sel_sensor = m_ctr.create_selection_sensor(_btRed, true); _st_sens1= m_ctr.create_custom_sensor(0); var sens = new Array (); sens = [sel_sensor, _st_sens1]; And the array is transferred to the manifold:
m_ctr.create_sensor_manifold (_btRed, "btRed", m_ctr.CT_SHOT, sens, logic_fun, sensor_cb, null); All the action is contained in the logic function logic_fun (it must be described before calling in the code):
var logic_fun = function(s) { return s[0]&& s[1]==0 } The call to the sensor_cb handler will occur if the logic_fun function returns both sensor results as true. The logic function runs continuously and is bound to the frame update. Therefore, the reading of sensor parameters occurs continuously. If the user selects a button object on the screen, the sensor s [0] returns true. However, as long as the equality s [1] == 0 is invalid, the handler will not be executed.
Consider another example of using sensors in an application. So, the user pressed all three buttons on the screen. The program must decide whether this was done in the sequence and how to respond.
I decided to assign a letter (string) to each button and store the sum of these letters in a special variable. It is clear that the addition of letters leads to unique combinations, where only one is correct. Thus, the program learns about the sequence of keystrokes. But this logic itself is executed in a special handler, which is called when certain requirements are met.
Previously, the code for blocking buttons on the screen using the custom_sensor sensor was shown . To do this, it was enough to change the sensor value to something else in the handler using a special function:
m_ctr.set_custom_sensor(_st_sens1 , 1); Thus, the sensors of all buttons received the value 1, which in fact blocked the selection of objects in the future. But these same values are taken into account further.
In the Blender scene, several objects were created containing hints, in case the player incorrectly guesses the combination of sounds. It is they who “expect” the setting of custom_sensor buttons to 1, after which their own handler is triggered, which displays hints on the screen.
Here is the code that is responsible for checking:
var _result_buttons = “”; ... var logic_wrong= function(s) { var sum = m_ctr.get_custom_sensor(_st_sens1)+m_ctr.get_custom_sensor(_st_sens2)+m_ctr.get_custom_sensor(_st_sens3); s[0] = false; if (sum==3 && _result_buttons !="ABC") s[0] = true; return s[0]; } st_btWrong = m_ctr.create_custom_sensor(false); m_ctr.create_sensor_manifold (_btWrong, "btWrong", m_ctr.CT_SHOT, [st_btWrong], logic_wrong, wrong_cb, null); function wrong_cb () { // } It uses only custom_sensor. When initialized, its value is set to false, which allows you to turn on a kind of standby mode. The logic_wrong function checks the pressing of all buttons on the screen (summed up the value of the object sensors), and also compares the sequence of pressing the buttons with the “ABC” standard. And only when all the requirements are met, the logic function returns true to the manifold, which in turn will launch the wrong_cb handler.
If, when studying these examples, you got used to the idea that everything is clear with the event model b4w, then I hasten to “rejoice” - there are several other nuances that need to be taken into account.
In the examples of creating a manifold, you have already encountered the type parameter. I usually used the CT_SHOT or CT_CONTINUOUS values. There are five options for them in Blend4Web. However, the main thing here is that they work in conjunction with a logic function. So, just above, the function with the CT_SHOT type called the st_btWrong handler only if the logic function logic_wrong returned true.
The list of possible values of type and their response to the result returned by a logic function:
- CT_SHOT and CT_CONTINUOUS are triggered by changing the value returned by the logic function from false to true.
- CT_LEVEL will constantly call the handler with pulse = 1 when the logic function returns true.
- CT_TRIGGER will call the handler if the function has changed its value from false to true (returns pulse = 1) or vice versa (then pulse = -1). In other cases, the handler is not called.
- CT_CHANGE generates a pulse at any change in the value of the sensor, without taking into account the results of the logic function.
As you can see, the event model Blend4Web is very flexible and allows you to cost very complex logical structures. In one article it is impossible to cover all aspects of working with it, but the basic features were disclosed. To get acquainted with the full capabilities of the event model, I advise you to look into the official API documentation .
Link to the application
Source archive
Source: https://habr.com/ru/post/271625/
All Articles