Introduction to 3D Touch
With the release of the iPhone 6s and iPhone 6s Plus, Apple introduced us to a completely new way to interact with our phones: a hard-pressing gesture. As you know, this feature is already available on the Apple Watch and MacBook and in the MacBook Pro called Force Touch. This - literally - added a new concept to the user interface.
If you are wondering why the Force Touch has been renamed to 3D Touch for iPhone, then you are not alone. Shortly after Craig Federighi , who was also clearly puzzled by the name, introduced this new feature, a lot of speculation arose. What did not suit the name Force Touch? Too many Star Wars jokes?
But there is a difference! Obviously, Force Touch can only recognize a hard press, while the 3D Touch function is more sensitive and can highlight several levels of pressure based on how hard you press.
')
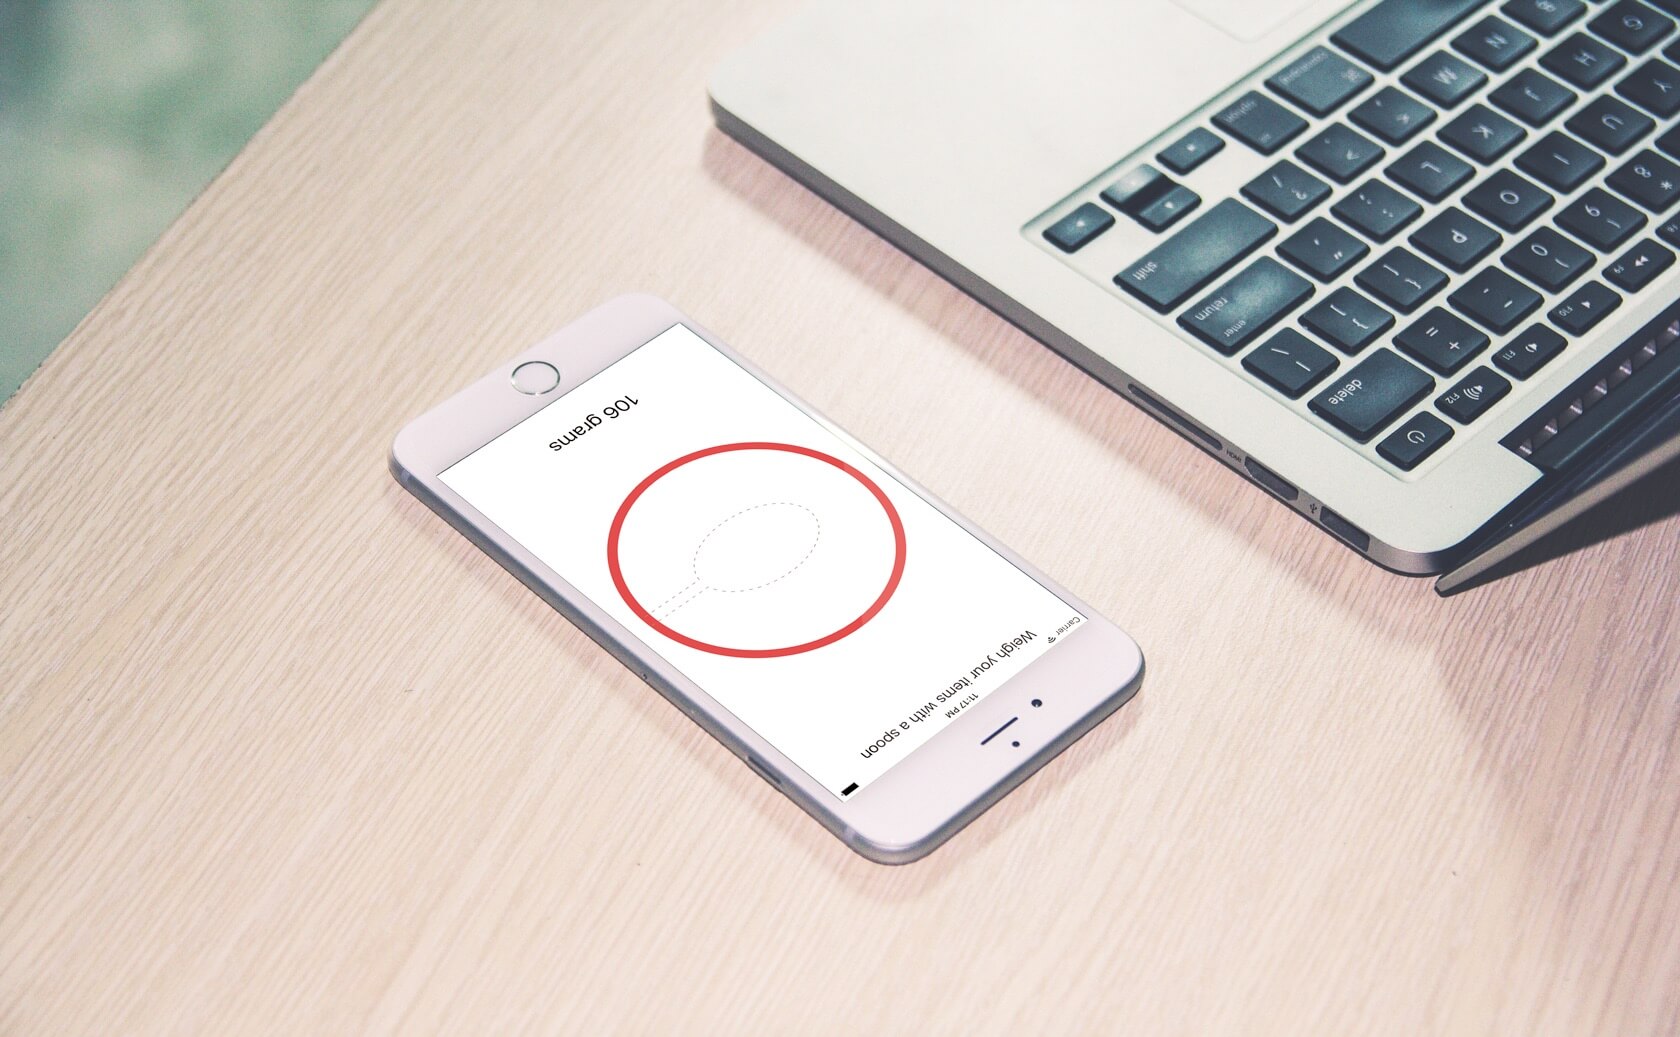
Although the changes may seem minor, they allow developers to make measurements on the iPhone more accurate. Take this Gravity app, for example, which turns your iPhone into a digital scale using Force Touch. Although it was rejected by Apple for unclear reasons, the idea is remarkable. So, to show you how 3D Touch works, let's try to make a similar application!
To get started, download this project template that I created. In fact, this is just an empty creation application based on the Single View iPhone application . I created a project posted (UILabels & UIImage) and connected IBOutlets to ViewController.swift .
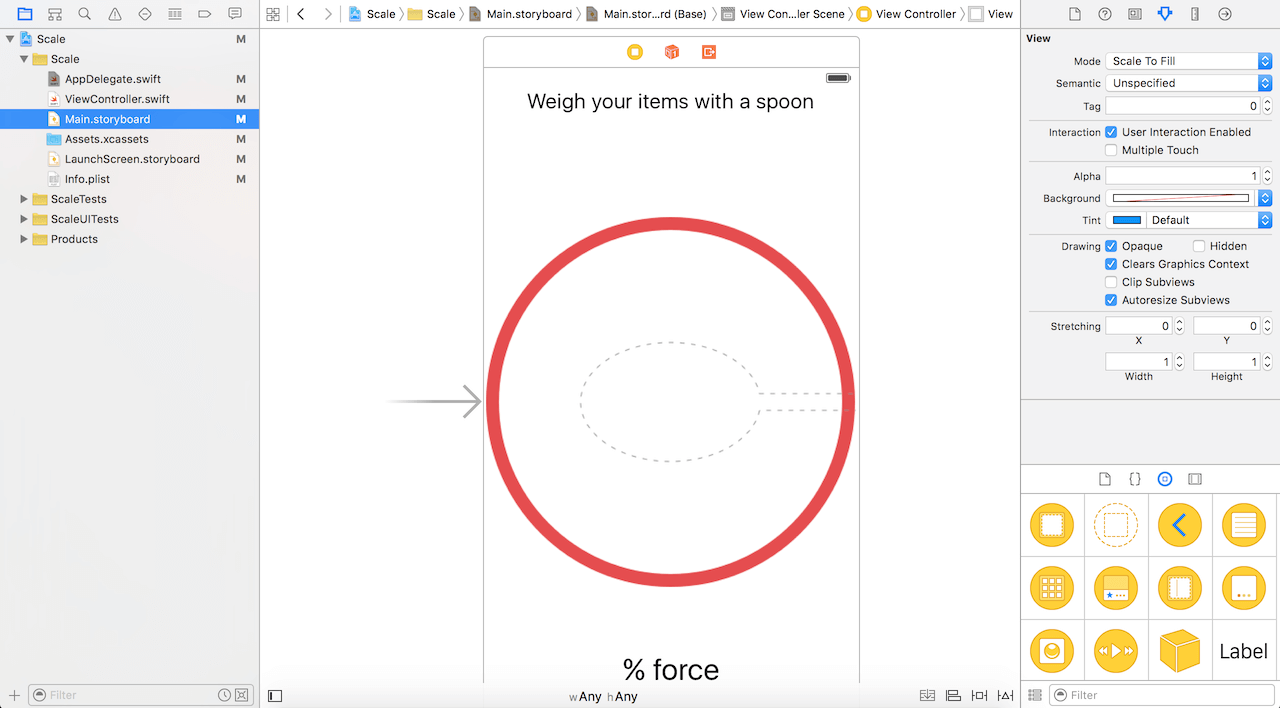
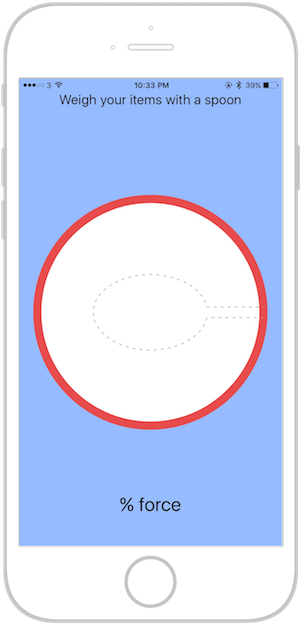
The design of our application is quite simple: we have one controller with 2 labels: one is the title and the second is the label that shows the percentage of pressing force on the iPhone screen.
Let's start the development! On the iPhone 6s and 6s Plus, UITouch objects have two new properties like CGFloat, called force and maximumPossibleForce . Force represents how strong the touch is, where 1.0 is the average touch. MaximumPossibleForce shows maximum touch strength.
Whenever a user clicks on a sensor, the touchesBegan method is called, and then touchesMoved, if the user moves his finger across the screen, then touchedCancelled or TouchesEnded is called, depending on the situation. For our purposes, the touchesMoved method is the only way we need. TouchesMoved has two parameters: touches and events. Tangencies is a collection (an unordered collection of different objects) of UITouch objects. To touch, there must be exactly one UITouch object, but we may not be careful enough, so it is strongly recommended to check whether touches.first (the first UITouch object of the sensor set) is equal to nil using the additional anchor. Insert the following method in ViewController.swift :
Using the if statement, we check if the device supports 3D Touch. This part is optional if you are doing this project for fun. However, if you are going to publish the app in the App Store, this is a mandatory requirement, validation, as older devices such as the iPhone 6 do not support 3D Touch.
Please note that I also checked whether the device is running on iOS 9.0 or later. I do this with the new #available syntax introduced in Swift 2.0. If you want to learn more about the new features and capabilities in Swift 2.0, I recommend that you read this article. Again this check is optional if your target platform is for application 9.0 or higher.
To get the push force as a percentage, simply divide the touch force by the maximum force (i.e. touch.maximumPossibleForce), which is the maximum pressing force. Then update the label text. You can update the method as follows:
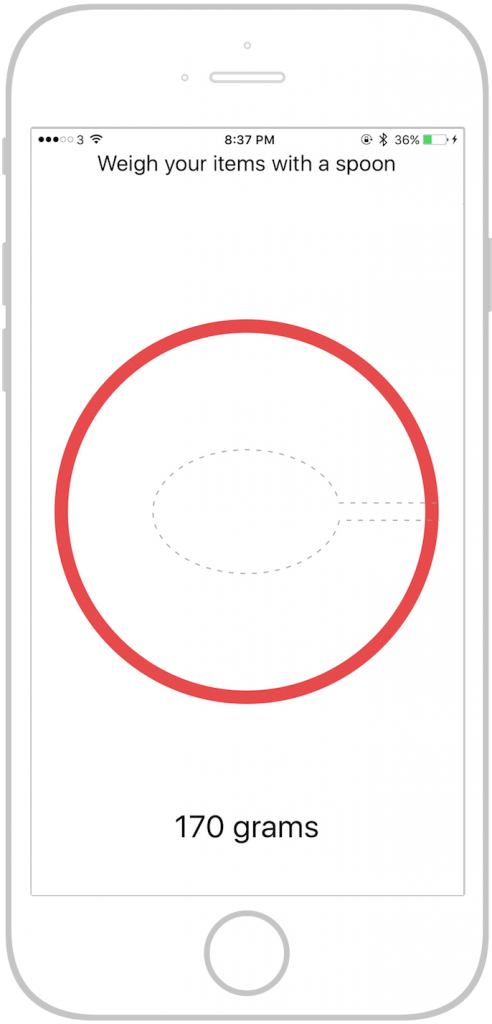
If you run the application on iPhone 6s / 6s Plus, it should show the pressing force in percent when you tap the screen. However, since we are making a scale, you may want to add the number of grams that you weigh on your iPhone. According to Ryan MacLead , the sensor will weigh a maximum weight of ~ 385g. Thus, the maximumPossibleForce corresponds to 385 grams (approximately 3.8 Newtons ). By simple calculations, you can convert% force to grams. All we need to do is multiply the percentage of pressing force by 385. For objects weighing 385 grams or more, we simply change the label to “385+ grams”.
Now update the method using the following code snippet:
Cool! You have made your Digital Scale application.
At the moment, the application does not drop the weight to zero after you remove the item or stop touching your screen. You can implement the touchesEnded method to reset the label.
Another great use of 3D Touch is the quick action on the main screen. Quick Actions give users a menu to go to the directory of your application directly. Just press the program icon hard and you will see a menu. With the advent of 3D Touch technology, applications like Twitter and Instagram and some other applications have shown how to use this new feature.
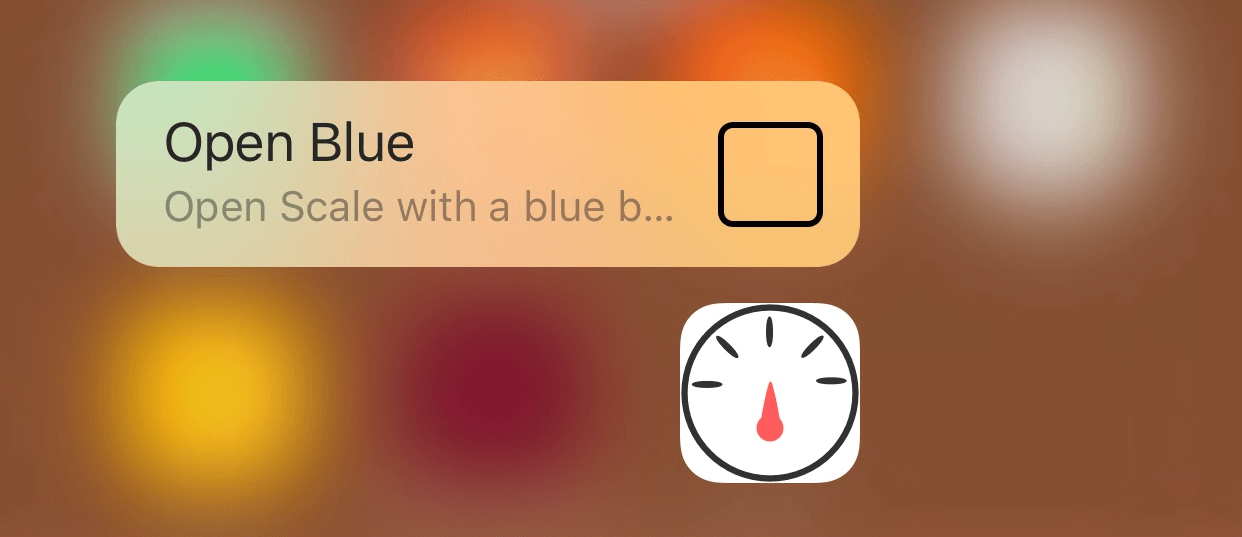
Let's add Quick Actions for our application we just made, with which we will open the application with a blue background instead of white. To add Quick Actions, open your project's info.plist file (Click the Scale workspace in the project navigator, select the Scale target, and go to the Info tab). In the file, add the 'UIApplicationShortcutItems' type select array (Array). Each element of the array is a dictionary containing the properties of one quick action:
In the array, we define four elements to configure the Quick Action "OpenBlue". Now info.plist should look like this:

Please note that I used ' $ (PRODUCT_BUNDLE_IDENTIFIER) ' instead of ' com.appcoda.Scale ' or any other identifier that you use. This is for security reasons: if, for any reason, I change the Bundle ID to 'General', the whole project will be affected and the identifier will be changed everywhere. Otherwise, I will have to change it everywhere manually. In your info.plist file, you can see that the Bundle Identifier key uses the same approach: ' $ (PRODUCT_BUNDLE_IDENTIFIER) ' describes the path to your project identifier.
The last thing left to do is implement Quick action when the user starts it. Main work is handled in the AppDelegate.swift method in performActionForShortcutItem . When Quick Action is activated, the method will be called. Therefore, you must implement this method to handle quick actions:
As expected, call the handler and pass a zero value to it, depending on the success / failure of the fast action. Here we create a separate handleQuickAction function to process the action. A great way to represent multiple instances of Quick Action is to use enums with ' UIApplicationShortcutItemType ' as the raw value. Declare the enumeration and implement the handleQuickAction method, as shown below, to set the background color to blue when the application is launched through quick action:
It is quite simple. If you now launch the app and launch it through quick actions, the background will turn blue.
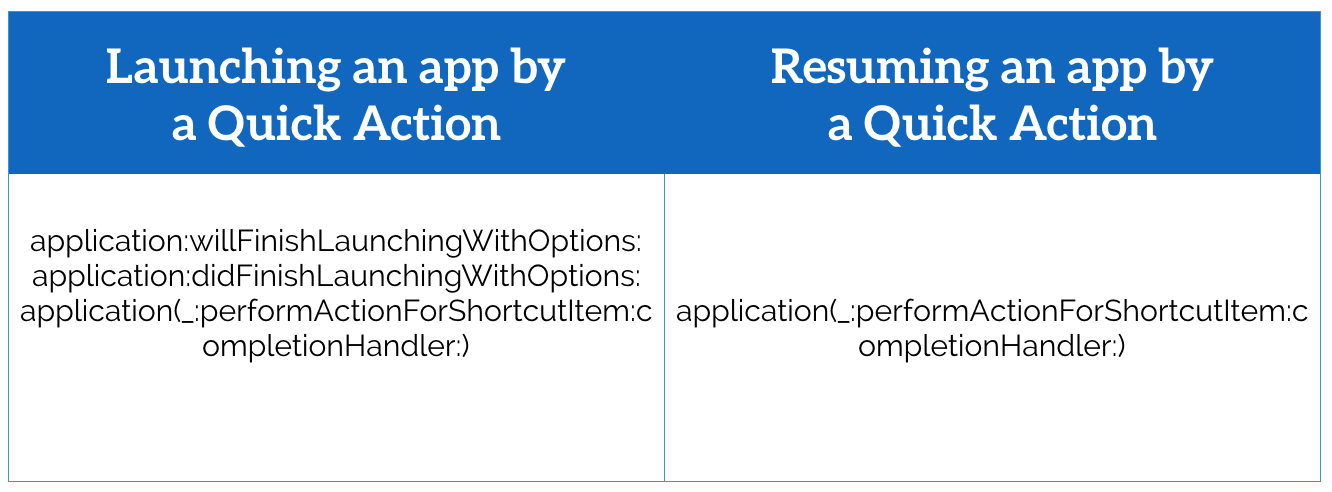
There is one point that should be considered. From the point of view of the startup sequence, there is a difference between an application that is launched and an application that is restarted using the Quick Action. As you know, when the application is launched, the willFinishLaunchingWithOptions methods are called, then the anddidFinishLaunchingWithOptions method. But when the application is resumed by Quick Actions, it only provokes the execution of the performActionForShortcutItem method.
If you look at the didFinishLaunchingWithOptions method, then you will see that we have a line of code to set the background color to white. It is used when the application starts normally, through the application icon.
This is where the problem comes from: when you start an application using a quick action, willFinish , didFinish are called , and then performActionForShortcutItem . Therefore, the white background color is set first, and then changed to blue. Obviously, you do not want to set the background color to white when the user starts the application using quick actions.
To solve this problem, we need to check in the didFinishLaunchingWithOptions method:
To determine if an application is running via Quick Action, you can check the launch softkey UIApplicationLaunchOptionsShortcutItemKey . The UIApplicationShortcutItem object is available as a launch softkey value. If the application is launched via Quick Action, we simply call handleQuickAction to change the background to blue.
Since we have already processed the fast action in didFinishLaunchingWithOptions , we do not want to call performActionForShortcutItem to perform handleQuickAction again. Therefore, we return false, telling the system not to call the performActionForShortcutItem method.
That's all! You can now test the application. Quick Action should work fine.
3D Touch is a great way to add convenient and enjoyable features to your application. However, you should know that not all devices support 3D Touch, although this may change in the future.
After reading this article, you can add Quick Actions to your iOS application and determine the touch strength.
For comparison, you can download the full Xcode project . Do not forget to share your thoughts in the comments about this manual and 3D Touch.
If you are wondering why the Force Touch has been renamed to 3D Touch for iPhone, then you are not alone. Shortly after Craig Federighi , who was also clearly puzzled by the name, introduced this new feature, a lot of speculation arose. What did not suit the name Force Touch? Too many Star Wars jokes?
But there is a difference! Obviously, Force Touch can only recognize a hard press, while the 3D Touch function is more sensitive and can highlight several levels of pressure based on how hard you press.
')
Although the changes may seem minor, they allow developers to make measurements on the iPhone more accurate. Take this Gravity app, for example, which turns your iPhone into a digital scale using Force Touch. Although it was rejected by Apple for unclear reasons, the idea is remarkable. So, to show you how 3D Touch works, let's try to make a similar application!
let's start
To get started, download this project template that I created. In fact, this is just an empty creation application based on the Single View iPhone application . I created a project posted (UILabels & UIImage) and connected IBOutlets to ViewController.swift .
The design of our application is quite simple: we have one controller with 2 labels: one is the title and the second is the label that shows the percentage of pressing force on the iPhone screen.
Let's start the development! On the iPhone 6s and 6s Plus, UITouch objects have two new properties like CGFloat, called force and maximumPossibleForce . Force represents how strong the touch is, where 1.0 is the average touch. MaximumPossibleForce shows maximum touch strength.
Whenever a user clicks on a sensor, the touchesBegan method is called, and then touchesMoved, if the user moves his finger across the screen, then touchedCancelled or TouchesEnded is called, depending on the situation. For our purposes, the touchesMoved method is the only way we need. TouchesMoved has two parameters: touches and events. Tangencies is a collection (an unordered collection of different objects) of UITouch objects. To touch, there must be exactly one UITouch object, but we may not be careful enough, so it is strongly recommended to check whether touches.first (the first UITouch object of the sensor set) is equal to nil using the additional anchor. Insert the following method in ViewController.swift :
override func touchesMoved(touches: Set<UITouch>, withEvent event: UIEvent?) { if let touch = touches.first { if #available(iOS 9.0, *) { if traitCollection.forceTouchCapability == UIForceTouchCapability.Available { // 3D Touch capable } } } } Using the if statement, we check if the device supports 3D Touch. This part is optional if you are doing this project for fun. However, if you are going to publish the app in the App Store, this is a mandatory requirement, validation, as older devices such as the iPhone 6 do not support 3D Touch.
Please note that I also checked whether the device is running on iOS 9.0 or later. I do this with the new #available syntax introduced in Swift 2.0. If you want to learn more about the new features and capabilities in Swift 2.0, I recommend that you read this article. Again this check is optional if your target platform is for application 9.0 or higher.
To get the push force as a percentage, simply divide the touch force by the maximum force (i.e. touch.maximumPossibleForce), which is the maximum pressing force. Then update the label text. You can update the method as follows:
override func touchesMoved(touches: Set<UITouch>, withEvent event: UIEvent?) { if let touch = touches.first { if #available(iOS 9.0, *) { if traitCollection.forceTouchCapability == UIForceTouchCapability.Available { // 3D Touch capable let force = touch.force/touch.maximumPossibleForce forceLabel.text = "\(force)% force" } } } } If you run the application on iPhone 6s / 6s Plus, it should show the pressing force in percent when you tap the screen. However, since we are making a scale, you may want to add the number of grams that you weigh on your iPhone. According to Ryan MacLead , the sensor will weigh a maximum weight of ~ 385g. Thus, the maximumPossibleForce corresponds to 385 grams (approximately 3.8 Newtons ). By simple calculations, you can convert% force to grams. All we need to do is multiply the percentage of pressing force by 385. For objects weighing 385 grams or more, we simply change the label to “385+ grams”.
Now update the method using the following code snippet:
override func touchesMoved(touches: Set<UITouch>, withEvent event: UIEvent?) { if let touch = touches.first { if #available(iOS 9.0, *) { if traitCollection.forceTouchCapability == UIForceTouchCapability.Available { if touch.force >= touch.maximumPossibleForce { forceLabel.text = "385+ grams" } else { let force = touch.force/touch.maximumPossibleForce let grams = force * 385 let roundGrams = Int(grams) forceLabel.text = "\(roundGrams) grams" } } } } } Cool! You have made your Digital Scale application.
At the moment, the application does not drop the weight to zero after you remove the item or stop touching your screen. You can implement the touchesEnded method to reset the label.
override func touchesEnded(touches: Set<UITouch>, withEvent event: UIEvent?) { forceLabel.text = "0 gram" } Quick actions on the main screen
Another great use of 3D Touch is the quick action on the main screen. Quick Actions give users a menu to go to the directory of your application directly. Just press the program icon hard and you will see a menu. With the advent of 3D Touch technology, applications like Twitter and Instagram and some other applications have shown how to use this new feature.
Let's add Quick Actions for our application we just made, with which we will open the application with a blue background instead of white. To add Quick Actions, open your project's info.plist file (Click the Scale workspace in the project navigator, select the Scale target, and go to the Info tab). In the file, add the 'UIApplicationShortcutItems' type select array (Array). Each element of the array is a dictionary containing the properties of one quick action:
- UIApplicationShortcutItemType ( required ): a string that identifies the quick action. Note that this string must be unique, specifically for the application. A good idea is to add a prefix with your id or some other tricks to make a unique string.
- UIApplicationShortcutItemTitle ( required ): a string that represents the header for the Quick Action that is shown to the user. An example would be “Show last picture taken”.
- UIApplicationShortcutItemSubtitle ( optional ): a string for the name of your Quick Action. An example would be “Last picture taken yesterday”. If you want to add an icon for Quick Action, you have two options: a system icon from Apple or a custom icon.
- UIApplicationShortcutItemIconType ( optional ): a string indicating which system icon will be displayed next to the Quick Action.
- UIApplicationShortcutItemIconFile ( optional ): a string indicating which custom icon will be displayed next to the Quick Action.
- UIApplicationShortcutItemUserInfo ( optional ): A dictionary containing some additional information that you want to perform using the Quick Action.
In the array, we define four elements to configure the Quick Action "OpenBlue". Now info.plist should look like this:
Please note that I used ' $ (PRODUCT_BUNDLE_IDENTIFIER) ' instead of ' com.appcoda.Scale ' or any other identifier that you use. This is for security reasons: if, for any reason, I change the Bundle ID to 'General', the whole project will be affected and the identifier will be changed everywhere. Otherwise, I will have to change it everywhere manually. In your info.plist file, you can see that the Bundle Identifier key uses the same approach: ' $ (PRODUCT_BUNDLE_IDENTIFIER) ' describes the path to your project identifier.
The last thing left to do is implement Quick action when the user starts it. Main work is handled in the AppDelegate.swift method in performActionForShortcutItem . When Quick Action is activated, the method will be called. Therefore, you must implement this method to handle quick actions:
func application(application: UIApplication, performActionForShortcutItem shortcutItem: UIApplicationShortcutItem, completionHandler: (Bool) -> Void) { // Handle quick actions completionHandler(handleQuickAction(shortcutItem)) } As expected, call the handler and pass a zero value to it, depending on the success / failure of the fast action. Here we create a separate handleQuickAction function to process the action. A great way to represent multiple instances of Quick Action is to use enums with ' UIApplicationShortcutItemType ' as the raw value. Declare the enumeration and implement the handleQuickAction method, as shown below, to set the background color to blue when the application is launched through quick action:
enum Shortcut: String { case openBlue = "OpenBlue" } func handleQuickAction(shortcutItem: UIApplicationShortcutItem) -> Bool { var quickActionHandled = false let type = shortcutItem.type.componentsSeparatedByString(".").last! if let shortcutType = Shortcut.init(rawValue: type) { switch shortcutType { case .openBlue: self.window?.backgroundColor = UIColor(red: 151.0/255.0, green: 187.0/255.0, blue: 255.0/255.0, alpha: 1.0) quickActionHandled = true } } return quickActionHandled } It is quite simple. If you now launch the app and launch it through quick actions, the background will turn blue.
What you need not forget?
There is one point that should be considered. From the point of view of the startup sequence, there is a difference between an application that is launched and an application that is restarted using the Quick Action. As you know, when the application is launched, the willFinishLaunchingWithOptions methods are called, then the anddidFinishLaunchingWithOptions method. But when the application is resumed by Quick Actions, it only provokes the execution of the performActionForShortcutItem method.
If you look at the didFinishLaunchingWithOptions method, then you will see that we have a line of code to set the background color to white. It is used when the application starts normally, through the application icon.
func application(application: UIApplication, didFinishLaunchingWithOptions launchOptions: [NSObject: AnyObject]?) -> Bool { // Override point for customization after application launch. self.window?.backgroundColor = UIColor.whiteColor() return true } This is where the problem comes from: when you start an application using a quick action, willFinish , didFinish are called , and then performActionForShortcutItem . Therefore, the white background color is set first, and then changed to blue. Obviously, you do not want to set the background color to white when the user starts the application using quick actions.
To solve this problem, we need to check in the didFinishLaunchingWithOptions method:
func application(application: UIApplication, didFinishLaunchingWithOptions launchOptions: [NSObject: AnyObject]?) -> Bool { print("didFinishLaunchingWithOptions called") var isLaunchedFromQuickAction = false // Check if it's launched from Quick Action if let shortcutItem = launchOptions?[UIApplicationLaunchOptionsShortcutItemKey] as? UIApplicationShortcutItem { isLaunchedFromQuickAction = true // Handle the sortcutItem handleQuickAction(shortcutItem) } else { self.window?.backgroundColor = UIColor.whiteColor() } // Return false if the app was launched from a shortcut, so performAction... will not be called. return !isLaunchedFromQuickAction } To determine if an application is running via Quick Action, you can check the launch softkey UIApplicationLaunchOptionsShortcutItemKey . The UIApplicationShortcutItem object is available as a launch softkey value. If the application is launched via Quick Action, we simply call handleQuickAction to change the background to blue.
Since we have already processed the fast action in didFinishLaunchingWithOptions , we do not want to call performActionForShortcutItem to perform handleQuickAction again. Therefore, we return false, telling the system not to call the performActionForShortcutItem method.
That's all! You can now test the application. Quick Action should work fine.
Total
3D Touch is a great way to add convenient and enjoyable features to your application. However, you should know that not all devices support 3D Touch, although this may change in the future.
After reading this article, you can add Quick Actions to your iOS application and determine the touch strength.
For comparison, you can download the full Xcode project . Do not forget to share your thoughts in the comments about this manual and 3D Touch.
Source: https://habr.com/ru/post/271291/
All Articles