Testing a web service on Go
In this article I would like to share one of the ways of simple and convenient integration testing of the http service written on Go. Integration tests can be difficult to create in such a way as to avoid complex scripts, but Docker, the package from the standard httptest library and build tags, will come to our aid. For example, we will use a MySQL database with migrations managed by the goose package. The final goal is to get simple and convenient cross-platform integration testing by simply running the go test command, be it a working laptop or a Continuous Integration server.
So, for a start, let's remember how Go relates to testing. Since the authors of Go emphasize that Go promotes good practices - and testing is one of perhaps the best practices for programmers in general, testing in Go is an integral part of the toolkit and comes out of the box. In addition, to use it, you need to remember the very minimum .
Here is the minimum:
')
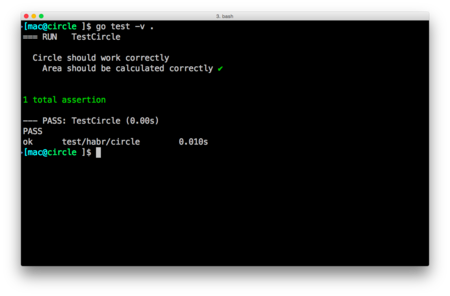
Say, if you wrote a function to calculate the area of a circle, the Go test will look like this:
Of course, for those who are accustomed to smart assertions and testing wrappers that simplify testing, such code may seem too verbose. But the “smart comparison” of different types is not such a trivial task, and is completely left to third-party packages, which I will discuss below. The same minimalistic approach allows you to start writing tests with or without a reason with a minimum entry threshold. Many even claim that they love TDD (Testing Driven Development) in Go. However, there are no excuses for not writing tests - it has become too easy.
At the same time, so that you understand, quite complicated things happen under the hood. go test takes your code, puts it in a temporary directory, modifies it so that you get a self-contained program that runs the tests, compiles, runs and displays the results with a time count. All this happens in a fraction of a second, and this approach became possible and convenient only thanks to a simple grammar of the language and super-fast compilation.
go test can do much more out of the box, including recording coverage (coverage), memory profiling and a processor, the same simple benchmarks (func BenchmarkXxx), parallel execution, flight detector and many other things. You can find out everything by running the go help test and go help testflag commands .
Of course, for large programs, it makes sense to use more powerful testing methods. For Go, there are many frameworks that easily and simply connect to your tests, and are compatible with the go test command. I like GoConvey most of all, adding DSL-like syntax for BDD tests. The above example would look like this with GoConvey:

GoConvey can do a lot of assertions , including for a deep comparison of structures and complex types, can work with time and so on. If you start to use it, be sure to read about the order of execution of the nested Convey-functions - this is an important feature.
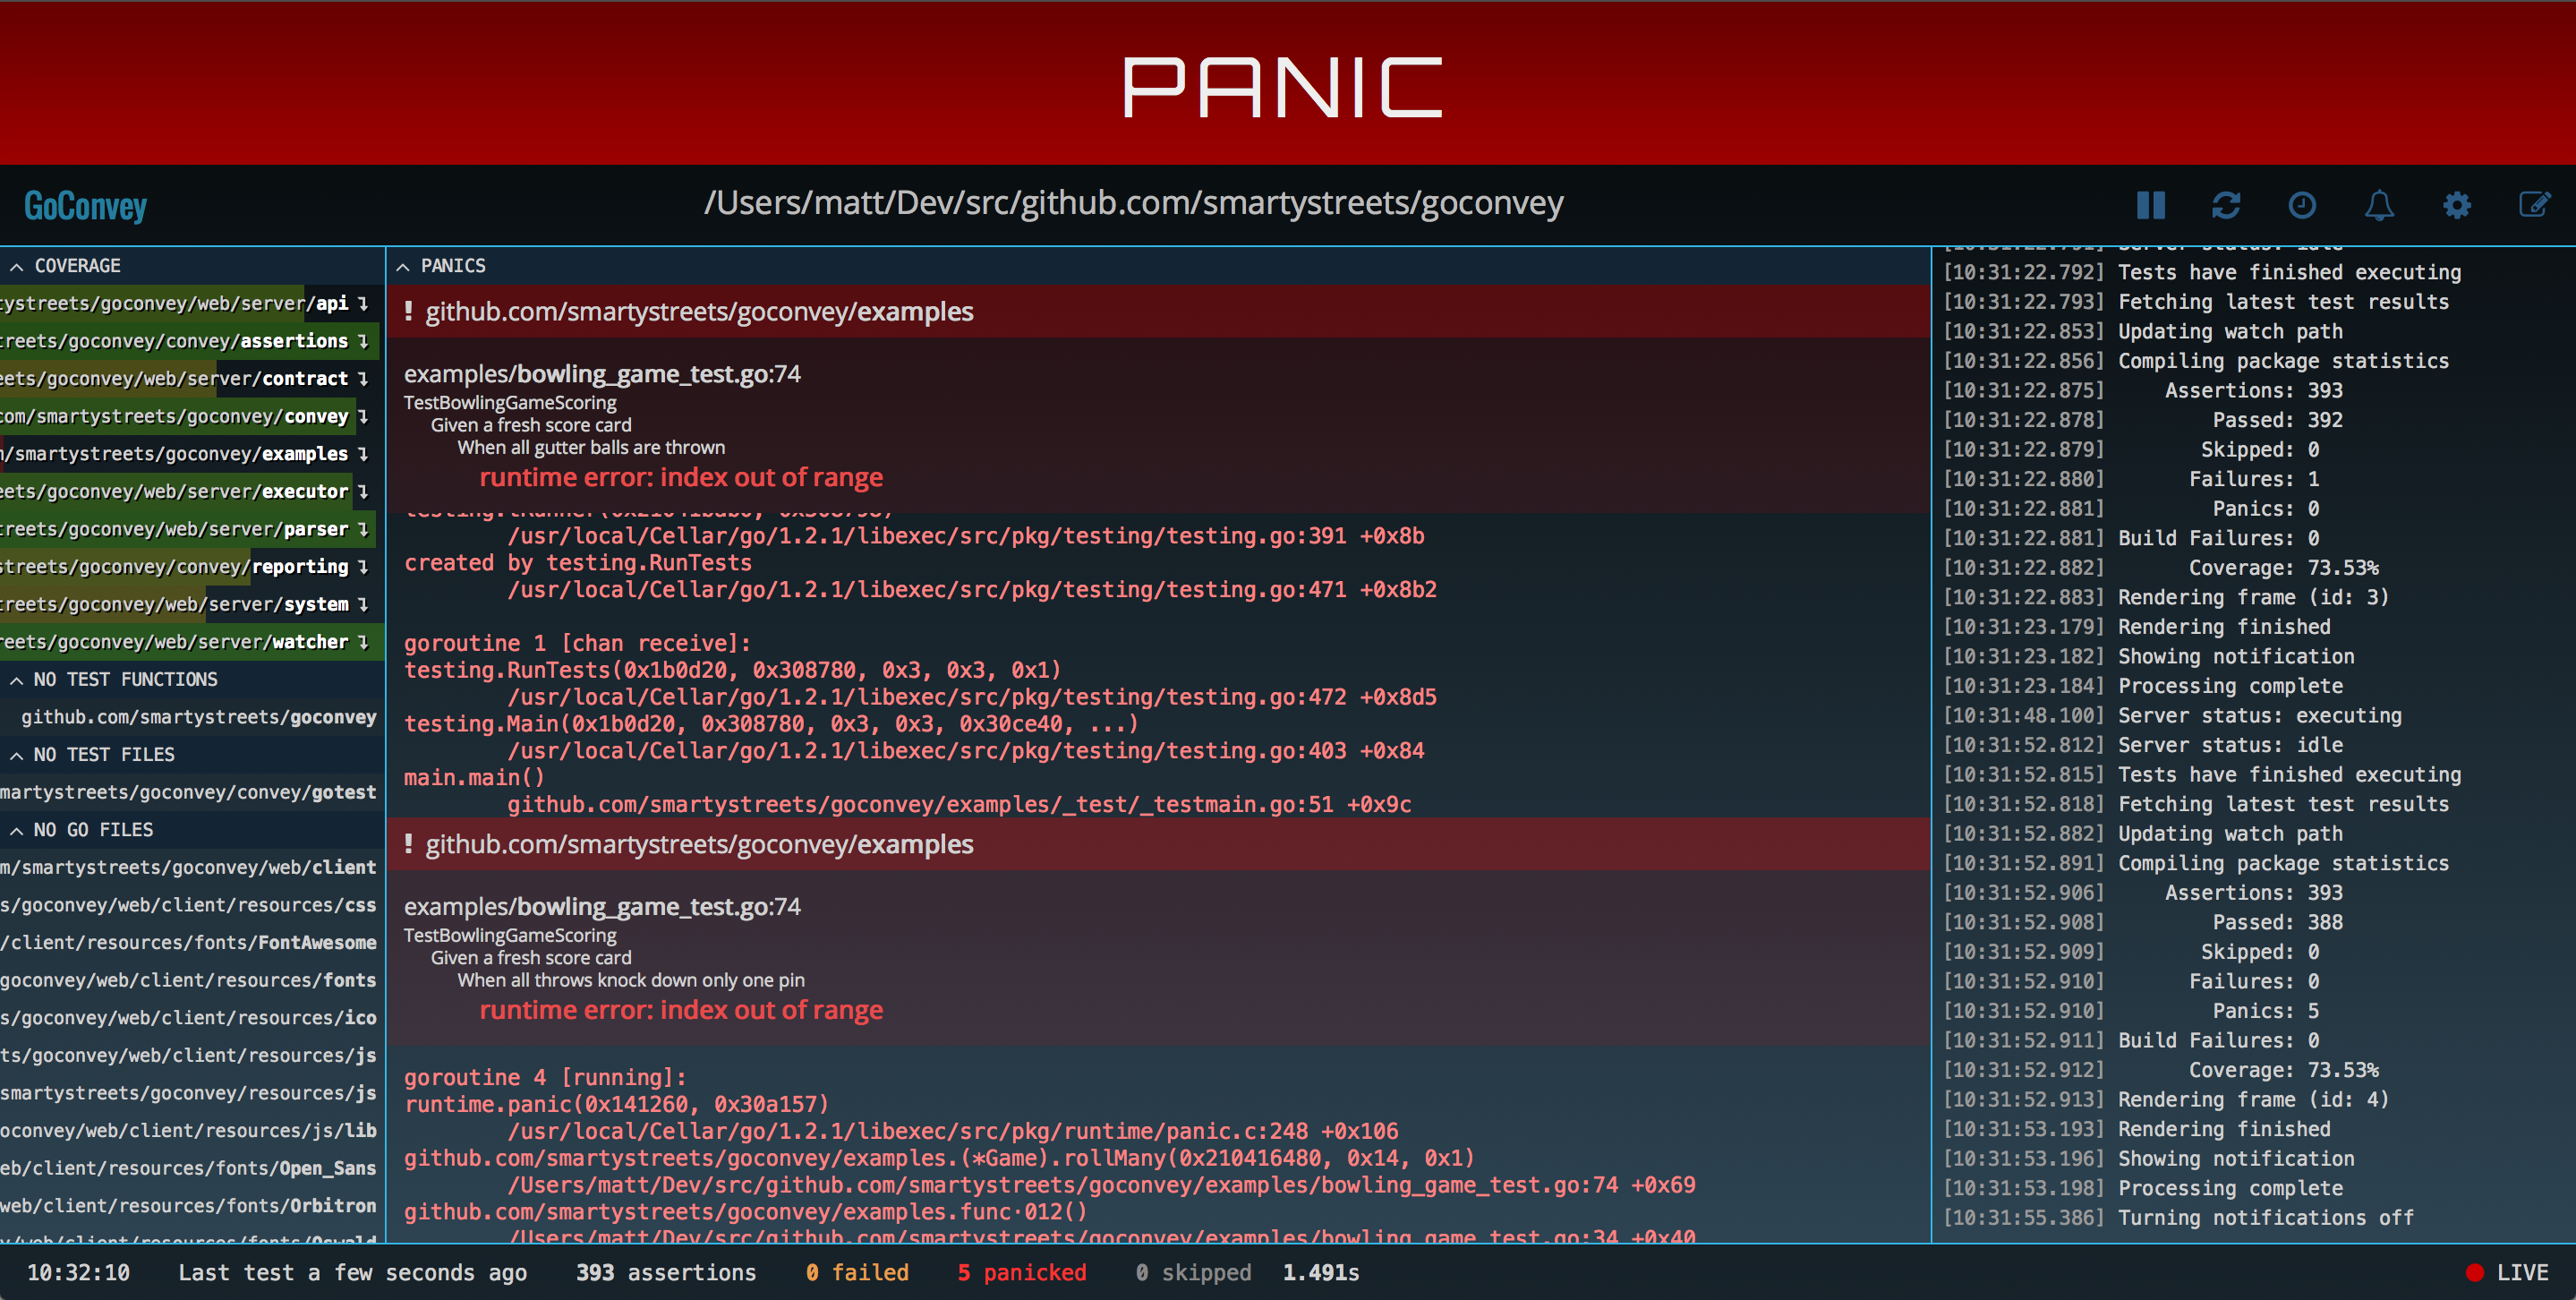
As a bonus, Goconvey has a fancy web UI that can monitor changes in the code and restart tests, send Desktop notifications and, in general, looks like a shuttle launch control panel. Very cool in fact, it is convenient to bring to the second monitor. How many respond, GoConvey will make you love testing even more :)

There are also popular frameworks like Ginkgo , testify , gocheck , Agouti , GoMega and others. Here is a good comparison .
As you can see, the Go approach on the principle “the most necessary is out of the box, everything else is at the mercy of the community” justifies itself in testing as well as possible.
As noted above, integration tests, which involve testing the entire system as a whole, rather than individual parts of the code, can be a daunting task. Often they require complex scripts that are far from always cross-platform, take a lot of time and so on. But even with Go, such tasks become much easier.
I will consider the following example:
This can be either a typical REST backend, or any service that follows the principles of the 12-factor app , there can be much more dependencies and services. Now the goal is to show the approach.
For external services (in this case, MySQL databases), I will use, however trite it may be, Docker. While the whole world tells each other that Docker is not a panacea and you don’t need to use it where you don’t need it (and the truth says the same), using containers to quickly raise dependencies in integration tests is the very thing.
First, we will deal with the non-Go part, namely the writing of the Dockerfile, and we will figure out how to work with the migrations.
goose is a binary file that, when launched, searches for the db / directory, and in it:
The yaml file describes various database configurations with which goose can work, and in the migrations / folder, the SQL code created using goose create. On the page of the project it is described in more detail, I will not dwell in detail.
Our task is to create a container with MySQL, with the build of the container, start it, bring up migrations to the latest version using the goose up command, and prepare the container for further work.
Dockerfile might look like this:
We collect the container with the command “docker build -t mydb_test.” Now, when you start docker run -p 3306: 3306 mydb_test - we will get the newly-launched database, with the latest migrations and in the fresh state.
To begin with, put a build tag so that this test does not run every time, but only when we are forced to ask to run “integration tests”.
Let's start our service_test.go:
Now, the usual call go test will not touch this particular test, but go test -tag = integration will. By the way, in go test there is a -short mode - you can use it, only it, on the contrary, is turned off by default:
First of all, we will want to lift our Docker container at the start of the test. For Docker there are convenient Go-libraries, I will use the client from fsouza, which I have been using for more than 1.5 years. To start the container, you need to perform three steps:
createOptions () returns a structure with parameters for a container creation operation. This is where we specify the name of our container that will be used for testing - mydb_test.
All we have to do is write the code that will wait for the database to be raised, and return the IP address or the formatted DSN immediately for use with the Go mysql driver.
The code is not very interesting, so I will also hide it under the spoiler:
All this is enough to move on, but there is one thing - I want this code to work on both MacOS X and Windows, which means that you need to be able to distinguish Linux and non-Linux environments, and be able to support docker-machine or boot2docker (if someone has not moved to the docker-machine yet).
Fortunately, this is also a trivial task - you need only a few functions. In order to find the IP address of the virtual machine in which Docker is running. You can use the following code:
You will also have to pass the port forwarding parameters to CreateContainerOptions.
As a result, it will be more convenient to put all this code in a separate package, in a separate subdirectory. In order not to make this package available outside, I will put it in the internal subdirectory - this ensures that only my package can (re) use it.
The complete code for this package is: pastebin.com/faUUN0M1
Now it can be safely imported into our project, into the code for testing and with one function to get a ready-made DSN for connection.
And transfer db to a further code that will work with the database. Please note that we call the deferFn () function as expected, but we don’t even have a clue what it does - it’s on the conscience of the dockertest package that knows how to clean it and remove the container.
The next step is to check HTTP requests - whether they return the necessary error codes, return the expected data, transfer the necessary headers and the like. Of course, you can start a real service, and run “outside” curl requests, but this is awkward, inconvenient and ugly. Go has a great way to test http handlers - this is the net / http / httptest package.
httptest was probably one of the first moments that had a wow effect on me in Go. The very architecture of building http applications in Go can already cause a similar effect, but it was completely successful here. How the net / http package is arranged I will not talk about in this article, this is material for a separate article, but in short - there is a standard http.Handler interface that any type that has the ServeHttp method (http.ResponseWriter, * http.Request) satisfies :
The gin web framework, as befits all civilized http frameworks in Go, implements these interfaces, so to test it we can easily construct arbitrary objects satisfying http.ResponseWriter (this is also the interface), send the desired Request and look at the answer! You do not need to open any external ports, everything will happen in the address space of the test program. And this is very cool.
This is how it looks (I will immediately use the GoConvey described above):
Now you can add more calls, and check the status — say, add a user, and check the list again:
And so on, for any other stateful or not so requests.
As you see, Go not only simplifies writing unit tests, creating an incentive to write them at every step, and turning Go programmers into BDD and TDD methodologies, but also opens up new possibilities for more complex integration and acceptance tests.
The example given in the article serves only as a demonstration, although it is based on real code, which has been tested in this way for more than 1.5 years in production. On my Macbook, in which the docker runs inside the virtual machine (through the docker-machine), the entire test (compile the code for the test, pick up the container, drive ~ 35 http requests) takes three seconds. As for me, it is quite good for this level of test, given the almost complete isolation from the system and cross-platform. On Linux, this, of course, will be even faster.
Of course, different services require different testing scenarios, but this example does not try to answer all cases (remark specifically for the main lair habrrollroll), but is a demonstration of how you can use the Go potential to speed up the integration testing cycle.
So, write tests! With Go, it's so simple that there are no more excuses not to write.
The basics
So, for a start, let's remember how Go relates to testing. Since the authors of Go emphasize that Go promotes good practices - and testing is one of perhaps the best practices for programmers in general, testing in Go is an integral part of the toolkit and comes out of the box. In addition, to use it, you need to remember the very minimum .
Here is the minimum:
- command to run tests - go test
- tests are in the * _test.go files. The code in these files is not used in the assembly, only in tests.
- a function called TestXxx (t * testing.T) will be launched during testing
- in the standard testing library package there is everything necessary for tests
')
Say, if you wrote a function to calculate the area of a circle, the Go test will look like this:
package main import ( "math" "testing" ) func TestCircle(t *testing.T) { area := CircleArea(10) want := 100 * math.Pi if area != want { t.Fatalf("Want %v, but got %v", want, area) } } Of course, for those who are accustomed to smart assertions and testing wrappers that simplify testing, such code may seem too verbose. But the “smart comparison” of different types is not such a trivial task, and is completely left to third-party packages, which I will discuss below. The same minimalistic approach allows you to start writing tests with or without a reason with a minimum entry threshold. Many even claim that they love TDD (Testing Driven Development) in Go. However, there are no excuses for not writing tests - it has become too easy.
At the same time, so that you understand, quite complicated things happen under the hood. go test takes your code, puts it in a temporary directory, modifies it so that you get a self-contained program that runs the tests, compiles, runs and displays the results with a time count. All this happens in a fraction of a second, and this approach became possible and convenient only thanks to a simple grammar of the language and super-fast compilation.
go test can do much more out of the box, including recording coverage (coverage), memory profiling and a processor, the same simple benchmarks (func BenchmarkXxx), parallel execution, flight detector and many other things. You can find out everything by running the go help test and go help testflag commands .
Testing frameworks
Of course, for large programs, it makes sense to use more powerful testing methods. For Go, there are many frameworks that easily and simply connect to your tests, and are compatible with the go test command. I like GoConvey most of all, adding DSL-like syntax for BDD tests. The above example would look like this with GoConvey:
package main import ( "math" "testing" . "github.com/smartystreets/goconvey/convey" ) func TestCircle(t *testing.T) { Convey("Circle should work correctly", t, func() { Convey("Area should be calculated correctly", func() { area := CircleArea(10) So(area, ShouldEqual, 100 * math.Pi) }) }) } GoConvey can do a lot of assertions , including for a deep comparison of structures and complex types, can work with time and so on. If you start to use it, be sure to read about the order of execution of the nested Convey-functions - this is an important feature.
As a bonus, Goconvey has a fancy web UI that can monitor changes in the code and restart tests, send Desktop notifications and, in general, looks like a shuttle launch control panel. Very cool in fact, it is convenient to bring to the second monitor. How many respond, GoConvey will make you love testing even more :)
There are also popular frameworks like Ginkgo , testify , gocheck , Agouti , GoMega and others. Here is a good comparison .
As you can see, the Go approach on the principle “the most necessary is out of the box, everything else is at the mercy of the community” justifies itself in testing as well as possible.
Integration tests
As noted above, integration tests, which involve testing the entire system as a whole, rather than individual parts of the code, can be a daunting task. Often they require complex scripts that are far from always cross-platform, take a lot of time and so on. But even with Go, such tasks become much easier.
I will consider the following example:
- web backend using gin framework
- data for the service - in the MySQL database
- base scheme is built using migration utility - goose
This can be either a typical REST backend, or any service that follows the principles of the 12-factor app , there can be much more dependencies and services. Now the goal is to show the approach.
For external services (in this case, MySQL databases), I will use, however trite it may be, Docker. While the whole world tells each other that Docker is not a panacea and you don’t need to use it where you don’t need it (and the truth says the same), using containers to quickly raise dependencies in integration tests is the very thing.
Migrations and Dockerfile
First, we will deal with the non-Go part, namely the writing of the Dockerfile, and we will figure out how to work with the migrations.
goose is a binary file that, when launched, searches for the db / directory, and in it:
- dbconf.yml file
- folder migrations /
The yaml file describes various database configurations with which goose can work, and in the migrations / folder, the SQL code created using goose create. On the page of the project it is described in more detail, I will not dwell in detail.
Our task is to create a container with MySQL, with the build of the container, start it, bring up migrations to the latest version using the goose up command, and prepare the container for further work.
Dockerfile might look like this:
Dockerfile
FROM debian
ENV DEBIAN_FRONTEND noninteractive
RUN apt-get update
RUN apt-get install -y mysql-server
RUN sed -i -e "s / ^ bind-address \ s * = \ s * 127.0.0.1 / bind-address = 0.0.0.0/" /etc/mysql/my.cnf
RUN apt-get install -y golang git ca-certificates gcc
ENV GOPATH / root
RUN go get bitbucket.org/liamstask/goose/cmd/goose
ADD. / db
RUN \
service mysql start && \
sleep 10 && \
while true; do mysql -e "SELECT 1" &> / dev / null; [$? -eq 0] && break; echo -n "."; sleep 1; done && \
mysql -e "GRANT ALL ON *. * to 'root' @ '%'; FLUSH PRIVILEGES; "&& \
mysql -e "CREATE DATABASE mydb DEFAULT COLLATE utf8_general_ci;" && \
/ root / bin / goose -env = default up && \
service mysql stop
EXPOSE 3306
Cmd ["mysqld_safe"]
We collect the container with the command “docker build -t mydb_test.” Now, when you start docker run -p 3306: 3306 mydb_test - we will get the newly-launched database, with the latest migrations and in the fresh state.
We write Go tests
To begin with, put a build tag so that this test does not run every time, but only when we are forced to ask to run “integration tests”.
Let's start our service_test.go:
// +build integration package main import ( "testing" ) Now, the usual call go test will not touch this particular test, but go test -tag = integration will. By the way, in go test there is a -short mode - you can use it, only it, on the contrary, is turned off by default:
if testing.Short() { t.Skip("skipping test in short mode.") } We lift the Docker-container from tests
First of all, we will want to lift our Docker container at the start of the test. For Docker there are convenient Go-libraries, I will use the client from fsouza, which I have been using for more than 1.5 years. To start the container, you need to perform three steps:
client, err := docker.NewClientFromEnv() if err != nil { t.Fatalf("Cannot connect to Docker daemon: %s", err) } c, err := client.CreateContainer(createOptions()) if err != nil { t.Fatalf("Cannot create Docker container: %s", err) } defer func() { if err := client.RemoveContainer(docker.RemoveContainerOptions{ ID: c.ID, Force: true, }); err != nil { t.Fatalf("cannot remove container: %s", err) } }() err = client.StartContainer(c.ID, &docker.HostConfig{}) if err != nil { t.Fatalf("Cannot start Docker container: %s", err) } createOptions () returns a structure with parameters for a container creation operation. This is where we specify the name of our container that will be used for testing - mydb_test.
code of these functions
func reateOptions() docker.CreateContainerOptions { ports := make(map[docker.Port]struct{}) ports["3306"] = struct{}{} opts := docker.CreateContainerOptions{ Config: &docker.Config{ Image: "mydb_test", ExposedPorts: ports, }, } return opts } All we have to do is write the code that will wait for the database to be raised, and return the IP address or the formatted DSN immediately for use with the Go mysql driver.
// wait for container to wake up if err := waitStarted(client, c.ID, 5*time.Second); err != nil { t.Fatalf("Couldn't reach MySQL server for testing, aborting.") } c, err = client.InspectContainer(c.ID) if err != nil { t.Fatalf("Couldn't inspect container: %s", err) } // determine IP address for MySQL ip = strings.TrimSpace(c.NetworkSettings.IPAddress) // wait MySQL to wake up if err := waitReachable(ip+":3306", 5*time.Second); err != nil { t.Fatalf("Couldn't reach MySQL server for testing, aborting.") } // pass IP to DB connect code The code is not very interesting, so I will also hide it under the spoiler:
wait code
// waitReachable waits for hostport to became reachable for the maxWait time. func waitReachable(hostport string, maxWait time.Duration) error { done := time.Now().Add(maxWait) for time.Now().Before(done) { c, err := net.Dial("tcp", hostport) if err == nil { c.Close() return nil } time.Sleep(100 * time.Millisecond) } return fmt.Errorf("cannot connect %v for %v", hostport, maxWait) } // waitStarted waits for container to start for the maxWait time. func waitStarted(client *docker.Client, id string, maxWait time.Duration) error { done := time.Now().Add(maxWait) for time.Now().Before(done) { c, err := client.InspectContainer(id) if err != nil { break } if c.State.Running { return nil } time.Sleep(100 * time.Millisecond) } return fmt.Errorf("cannot start container %s for %v", id, maxWait) } All this is enough to move on, but there is one thing - I want this code to work on both MacOS X and Windows, which means that you need to be able to distinguish Linux and non-Linux environments, and be able to support docker-machine or boot2docker (if someone has not moved to the docker-machine yet).
Fortunately, this is also a trivial task - you need only a few functions. In order to find the IP address of the virtual machine in which Docker is running. You can use the following code:
// DockerMachineIP returns IP of docker-machine or boot2docker VM instance. // // If docker-machine or boot2socker is running and has IP, it will be used to // connect to dockerized services (MySQL, etc). // // Basically, it adds support for MacOS X and Windows. func DockerMachineIP() string { // Docker-machine is a modern solution for docker in MacOS X. // Try to detect it, with fallback to boot2docker var dockerMachine bool machine := os.Getenv("DOCKER_MACHINE_NAME") if machine != "" { dockerMachine = true } var buf bytes.Buffer var cmd *exec.Cmd if dockerMachine { cmd = exec.Command("docker-machine", "ip", machine) } else { cmd = exec.Command("boot2docker", "ip") } cmd.Stdout = &buf if err := cmd.Run(); err != nil { // ignore error, as it's perfectly OK on Linux return "" } return buf.String() } You will also have to pass the port forwarding parameters to CreateContainerOptions.
As a result, it will be more convenient to put all this code in a separate package, in a separate subdirectory. In order not to make this package available outside, I will put it in the internal subdirectory - this ensures that only my package can (re) use it.
The complete code for this package is: pastebin.com/faUUN0M1
Now it can be safely imported into our project, into the code for testing and with one function to get a ready-made DSN for connection.
// start db in docker container dsn, deferFn, err := dockertest.StartMysql() if err != nil { t.Fatalf("cannot start mysql in container for testing: %s", err) } defer deferFn() db, err := sql.Open("mysql", dsn) if err != nil { t.Fatalf("Couldn't connect to test database: %s", err) } defer db.Close() And transfer db to a further code that will work with the database. Please note that we call the deferFn () function as expected, but we don’t even have a clue what it does - it’s on the conscience of the dockertest package that knows how to clean it and remove the container.
Testing http requests
The next step is to check HTTP requests - whether they return the necessary error codes, return the expected data, transfer the necessary headers and the like. Of course, you can start a real service, and run “outside” curl requests, but this is awkward, inconvenient and ugly. Go has a great way to test http handlers - this is the net / http / httptest package.
httptest was probably one of the first moments that had a wow effect on me in Go. The very architecture of building http applications in Go can already cause a similar effect, but it was completely successful here. How the net / http package is arranged I will not talk about in this article, this is material for a separate article, but in short - there is a standard http.Handler interface that any type that has the ServeHttp method (http.ResponseWriter, * http.Request) satisfies :
type Handler interface { ServeHTTP(ResponseWriter, *Request) } The gin web framework, as befits all civilized http frameworks in Go, implements these interfaces, so to test it we can easily construct arbitrary objects satisfying http.ResponseWriter (this is also the interface), send the desired Request and look at the answer! You do not need to open any external ports, everything will happen in the address space of the test program. And this is very cool.
This is how it looks (I will immediately use the GoConvey described above):
func NewServer(db *sql.DB) *gin.Engine { r := gin.Default() r.Use(cors.Middleware(cors.Options{})) // more middlewares ... // Health check r.GET("/ping", ping) // CRUD resources usersRes := &UsersResource{db: db} // Define routes api := r.Group("/api") { v1 := api.Group("/v1") { rest.CRUD(v1, "/users", usersRes) } } return r } ... r := NewServer(db) Convey("Users endpoints should respond correctly", t, func() { Convey("User should return empty list", func() { // it's safe to ignore error here, because we're manually entering URL req, _ := http.NewRequest("GET", "http://localhost/api/v1/users", nil) w := httptest.NewRecorder() r.ServeHTTP(w, req) So(w.Code, ShouldEqual, http.StatusOK) body := strings.TrimSpace(w.Body.String()) So(body, ShouldEqual, "[]") }) }) Now you can add more calls, and check the status — say, add a user, and check the list again:
Convey("Create should return ID of newly created user", func() { user := &User{Name: "Test user"} data, err := json.Marshal(user) So(err, ShouldBeNil) buf := bytes.NewBuffer(data) req, err := http.NewRequest("POST", "http://localhost/api/v1/users", buf) So(err, ShouldBeNil) w := httptest.NewRecorder() r.ServeHTTP(w, req) So(w.Code, ShouldEqual, http.StatusOK) body := strings.TrimSpace(w.Body.String()) So(body, ShouldEqual, "1") }) Convey("List should return one user with name 'Test user'", func() { req, _ := http.NewRequest("GET", "http://localhost/api/v1/users", nil) w := httptest.NewRecorder() r.ServeHTTP(w, req) So(w.Code, ShouldEqual, http.StatusOK) body := w.Body.Bytes() var users []*User err := json.Unmarshal(body, &users) So(err, ShouldBeNil) user := &User{ ID: 1, Name: "Test user", } So(len(users), ShouldEqual, 1) So(users[0], ShouldResemble, user) }) And so on, for any other stateful or not so requests.
findings
As you see, Go not only simplifies writing unit tests, creating an incentive to write them at every step, and turning Go programmers into BDD and TDD methodologies, but also opens up new possibilities for more complex integration and acceptance tests.
The example given in the article serves only as a demonstration, although it is based on real code, which has been tested in this way for more than 1.5 years in production. On my Macbook, in which the docker runs inside the virtual machine (through the docker-machine), the entire test (compile the code for the test, pick up the container, drive ~ 35 http requests) takes three seconds. As for me, it is quite good for this level of test, given the almost complete isolation from the system and cross-platform. On Linux, this, of course, will be even faster.
Of course, different services require different testing scenarios, but this example does not try to answer all cases (remark specifically for the main lair habrrollroll), but is a demonstration of how you can use the Go potential to speed up the integration testing cycle.
So, write tests! With Go, it's so simple that there are no more excuses not to write.
Source: https://habr.com/ru/post/271239/
All Articles