AllcountJS and ionic: Mobile application for CRM in 30 minutes
UPDATE
The result can be viewed as follows: Download the Allcountjs application on the Google Play Market or the Apple App Store . Launch CRM Demo. And in the mobile application to insert a link to the generated memory.
True, this application is universal and does not contain custom client logic and interfaces, so there will be no kanban board in it. But on the other hand, it is possible to launch any AllcountJS application, for example, something else from the demo gallery .
Now, in most software development projects, it is required to simultaneously have both a web and a mobile version of the application. Usually it is quite difficult, but with AllcountJS this task is simplified many times. In the previous article, we created a simple CRM that allows you to track the status of sales to customers on a visual kanban board.
In this article we will create a mobile application for this CRM. In addition to the AllcountJS framework, we will also use the ionic framework, about which we have already written here and here on the habr.
If you have completed all the steps from the previous article, then CRM should be available at http: // localhost: 9080 .
Otherwise, install AllcountJS:
And create a CRM from the template:
During initialization, the directory name for the application will be requested first. I am using crm-app-allcountjs. Next, install all the proposed dependencies and run the application:
If everything went well, then CRM will be available at http: // localhost: 9080 .
Now install ionic and create an empty mobile application.
If necessary, you can take a look at Getting Started with Ionic .
Create an ionic application from the template:
If everything went well, you will see the ionic mobile application template. Now install bower and allcountjs-ionic
Now open crm-app-allcountjs / www / index.html and add the allcountjs dependency right after ionic.bundle.js
Still need to insert inside
As a result, our index.html should look like this:
')
Now we’ll change crm-app-allcountjs / www / js / app.js. First, add the allcount-mobile dependency:
Then we need to set the address of our server via lcApiConfig in the run () method:
It now remains to prescribe the standard path AllcountJS adding a call to config ()
As a result, app.js should look like this:
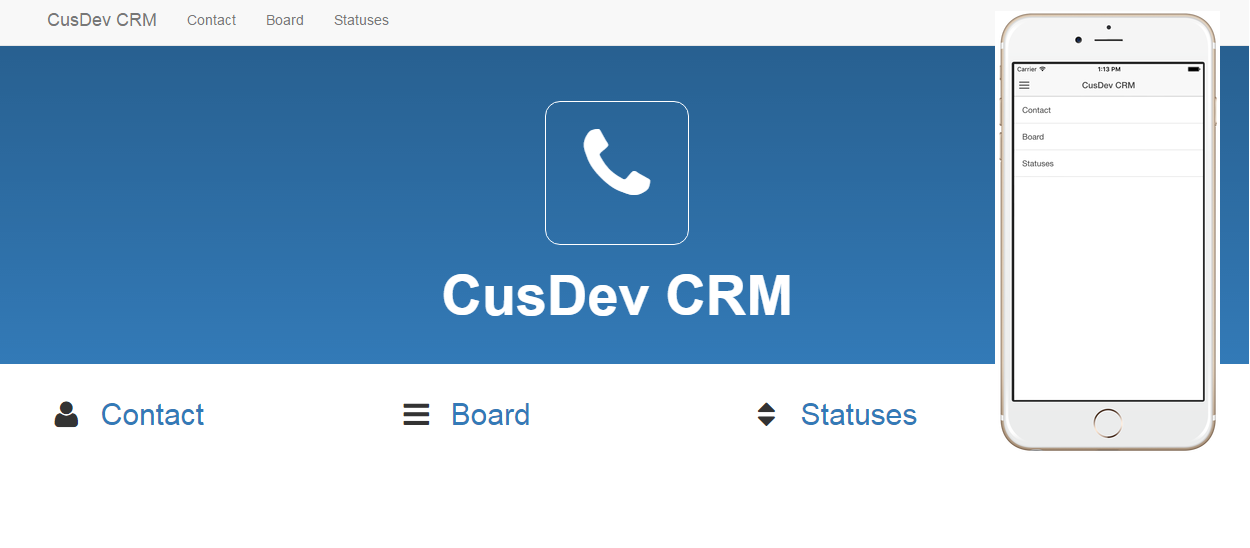
Now check the result by running ionic serve in the crm-app-allcountjs directory. You should see a login window in the system. Administrator login and password by default admin / admin. After entering you will see the application menu.

It would seem that the application is ready. But, if you remember, our CPM had a kanban board. Let's make it an analogue for a mobile application. In general, client logic and some special interfaces will have to be written separately for the mobile application.
Create a web view for our FlowBoard (www / flow-board.html):
Add a FlowBoardController to the end of www / js / app.js (do not forget to remove “;” at the end)
And we will register the new app.flowBoard state in the config () in www / js / app.js immediately after setupStandardAllcountMainState ():
What have we done? We used the lc-list directive in our view to load entity copies into FlowBoard, ng-repeat to display them as cards (look at the card class for the instance), and ion-infinite-scroll in FlowBoardController for an infinite scroll. The trickiest thing here is that the app.flowBoard route overrides the standard app.entity route. This is necessary in order to change the display for the FlowBoard entity from the standard to the view we just made.
Already not bad, but this is not kanban board. Now we will load our statuses. In order to navigate through the columns with statuses and filter entries by the corresponding status, we wrap the lc-list in the ion-slide repeated for each status in the ion-slide-box.
As a result, our modified www / flow-board.html will look like this:
And www / js / app.js with the changes in the controller:
Before launching the application, you need to change the url of your server to that of the emulator. For example, you can use the IP address in the local network. Change /www/js/app.js
Now let's compile and look at the result. I use iOS, but you can use Android.
If you are also creating an iOS application, then it is worthwhile to stop at the new security policy for iOS 9. In order to use unprotected http endpoints, you must first add to platforms / ios / crm-app-allcountjs / crm-app-allcountjs-Info. plist after the first tag the following text:
Details can be viewed at stackoverflow .
Now, using the ionic framework, we quickly packed our web application into a mobile one. The only thing you need to spend time on is creating an analogue of kanban boards. But if the web application does not require any special client logic or interfaces, then creating a web interface, a REST API and a mobile application with AllcountJS becomes really fast. Who is interested and wants to know the details - welcome to Allcountjs.com
The result can be viewed as follows: Download the Allcountjs application on the Google Play Market or the Apple App Store . Launch CRM Demo. And in the mobile application to insert a link to the generated memory.
True, this application is universal and does not contain custom client logic and interfaces, so there will be no kanban board in it. But on the other hand, it is possible to launch any AllcountJS application, for example, something else from the demo gallery .
Now, in most software development projects, it is required to simultaneously have both a web and a mobile version of the application. Usually it is quite difficult, but with AllcountJS this task is simplified many times. In the previous article, we created a simple CRM that allows you to track the status of sales to customers on a visual kanban board.
In this article we will create a mobile application for this CRM. In addition to the AllcountJS framework, we will also use the ionic framework, about which we have already written here and here on the habr.
Installation Tools and Initial Settings
If you have completed all the steps from the previous article, then CRM should be available at http: // localhost: 9080 .
Otherwise, install AllcountJS:
$ npm install -g allcountjs-cli And create a CRM from the template:
$ allcountjs init --template cusdev-crm During initialization, the directory name for the application will be requested first. I am using crm-app-allcountjs. Next, install all the proposed dependencies and run the application:
$ cd crm-app-allcountjs && npm install $ allcountjs run If everything went well, then CRM will be available at http: // localhost: 9080 .
Now install ionic and create an empty mobile application.
$ npm install -g cordova ionic If necessary, you can take a look at Getting Started with Ionic .
Create an ionic application from the template:
$ ionic start crm-app-allcountjs blank $ ionic serve If everything went well, you will see the ionic mobile application template. Now install bower and allcountjs-ionic
$ npm install -g bower $ bower install allcountjs-ionic --save Mobile app
Now open crm-app-allcountjs / www / index.html and add the allcountjs dependency right after ionic.bundle.js
<script src="lib/underscore/underscore.js"></script> <script src="lib/jquery/dist/jquery.js"></script> <script src="lib/jquery.inputmask/dist/jquery.inputmask.bundle.js"></script> <script src="lib/allcountjs-angular-base/allcount-base.js"></script> <script src="lib/allcountjs-ionic/allcount-mobile.js"></script> Still need to insert inside
<body ng-app="starter"></body> the string <ion-nav-view></ion-nav-view> As a result, our index.html should look like this:
<!DOCTYPE html> <html> <head> <meta charset="utf-8"> <meta name="viewport" content="initial-scale=1, maximum-scale=1, user-scalable=no, width=device-width"> <title></title> <link href="lib/ionic/css/ionic.css" rel="stylesheet"> <link href="css/style.css" rel="stylesheet"> <!-- IF using Sass (run gulp sass first), then uncomment below and remove the CSS includes above <link href="css/ionic.app.css" rel="stylesheet"> --> <!-- ionic/angularjs js --> <script src="lib/ionic/js/ionic.bundle.js"></script> <script src="lib/underscore/underscore.js"></script> <script src="lib/jquery/dist/jquery.js"></script> <script src="lib/jquery.inputmask/dist/jquery.inputmask.bundle.js"></script> <script src="lib/allcountjs-angular-base/allcount-base.js"></script> <script src="lib/allcountjs-ionic/allcount-mobile.js"></script> <!-- cordova script (this will be a 404 during development) --> <script src="cordova.js"></script> <!-- your app's js --> <script src="js/app.js"></script> </head> <body ng-app="starter"> <ion-nav-view></ion-nav-view> </body> </html> ')
Now we’ll change crm-app-allcountjs / www / js / app.js. First, add the allcount-mobile dependency:
angular.module('starter', ['ionic', 'allcount-mobile']) Then we need to set the address of our server via lcApiConfig in the run () method:
.run(function($ionicPlatform, lcApiConfig) { lcApiConfig.setServerUrl('http://localhost:9080'); ... }) It now remains to prescribe the standard path AllcountJS adding a call to config ()
.config(function ($stateProvider, $urlRouterProvider) { $stateProvider .setupStandardAllcountMainState('app', 'lib/allcountjs-ionic/templates') .setupStandardAllcountStates('app', 'lib/allcountjs-ionic/templates'); $urlRouterProvider.otherwise('/app/main'); }); As a result, app.js should look like this:
angular.module('starter', ['ionic', 'allcount-mobile']) .run(function($ionicPlatform, lcApiConfig) { lcApiConfig.setServerUrl('http://localhost:9080'); $ionicPlatform.ready(function() { // Hide the accessory bar by default (remove this to show the accessory bar above the keyboard // for form inputs) if(window.cordova && window.cordova.plugins.Keyboard) { cordova.plugins.Keyboard.hideKeyboardAccessoryBar(true); } if(window.StatusBar) { StatusBar.styleDefault(); } }); }) .config(function ($stateProvider, $urlRouterProvider) { $stateProvider .setupStandardAllcountMainState('app', 'lib/allcountjs-ionic/templates') .setupStandardAllcountStates('app', 'lib/allcountjs-ionic/templates'); $urlRouterProvider.otherwise('/app/main'); }); Now check the result by running ionic serve in the crm-app-allcountjs directory. You should see a login window in the system. Administrator login and password by default admin / admin. After entering you will see the application menu.
Kanban board
It would seem that the application is ready. But, if you remember, our CPM had a kanban board. Let's make it an analogue for a mobile application. In general, client logic and some special interfaces will have to be written separately for the mobile application.
Create a web view for our FlowBoard (www / flow-board.html):
<ion-view view-title="{{title}}"> <ion-nav-buttons side="right"> <a class="button button-icon icon ion-ios-plus-empty" ng-href="#/app/entity/{{mainEntityTypeId}}/new"></a> </ion-nav-buttons> <ion-content> <ion-list lc-list="mainEntityTypeId" paging="{start: 0, count: 20}" publish-methods="viewState.gridMethods" infinite-scroll-end="viewState.infiniteScrollEnd" > <ion-item ng-repeat="item in items" ng-href="#/app/entity/{{mainEntityTypeId}}/{{item.id}}" class="card"> <h2>{{item.name}} from {{item.company}}</h2> <p>{{item.lastContactDate | date}}</p> </ion-item> <p ng-if="items && !items.length" class="padding" style="text-align: center"><b lc-message="No records"></b></p> </ion-list> <ion-infinite-scroll ng-if="!viewState.infiniteScrollEnd" on-infinite="loadNextItems()" distance="1%" immediate-check="true"> </ion-infinite-scroll> </ion-content> </ion-view> Add a FlowBoardController to the end of www / js / app.js (do not forget to remove “;” at the end)
.controller('FlowBoardController', function ($scope) { $scope.viewState = {}; $scope.mainEntityTypeId = 'FlowBoard'; $scope.$on('$ionicView.enter', function () { $scope.viewState.gridMethods.updateGrid(); } ); $scope.loadNextItems = function () { $scope.viewState.gridMethods.infiniteScrollLoadNextItems().then(function () { $scope.$broadcast('scroll.infiniteScrollComplete'); }) }; }); And we will register the new app.flowBoard state in the config () in www / js / app.js immediately after setupStandardAllcountMainState ():
.config(function ($stateProvider, $urlRouterProvider) { $stateProvider .setupStandardAllcountMainState('app', 'lib/allcountjs-ionic/templates') .state('app.flowBoard', { url: "/entity/FlowBoard", views: { 'menuContent': { templateUrl: "flow-board.html", controller: 'FlowBoardController' } } }) .setupStandardAllcountStates('app', 'lib/allcountjs-ionic/templates'); $urlRouterProvider.otherwise('/app/main'); }) What have we done? We used the lc-list directive in our view to load entity copies into FlowBoard, ng-repeat to display them as cards (look at the card class for the instance), and ion-infinite-scroll in FlowBoardController for an infinite scroll. The trickiest thing here is that the app.flowBoard route overrides the standard app.entity route. This is necessary in order to change the display for the FlowBoard entity from the standard to the view we just made.
Already not bad, but this is not kanban board. Now we will load our statuses. In order to navigate through the columns with statuses and filter entries by the corresponding status, we wrap the lc-list in the ion-slide repeated for each status in the ion-slide-box.
As a result, our modified www / flow-board.html will look like this:
<ion-view view-title="{{title}}"> <ion-nav-buttons side="right"> <a class="button button-icon icon ion-ios-plus-empty" ng-href="#/app/entity/{{mainEntityTypeId}}/new"></a> </ion-nav-buttons> <ion-slide-box on-slide-changed="updateTitle($index)" style='height:100%'> <ion-slide ng-repeat="column in boardColumns"> <ion-content> <ion-list lc-list="mainEntityTypeId" paging="{start: 0, count: 20}" filtering="columnFiltering(column)" publish-methods="column.gridMethods" infinite-scroll-end="column.infiniteScrollEnd" > <ion-item ng-repeat="item in items" ng-href="#/app/entity/{{mainEntityTypeId}}/{{item.id}}" class="card"> <h2>{{item.name}} from {{item.company}}</h2> <p>{{item.lastContactDate | date}}</p> </ion-item> <p ng-if="items && !items.length" class="padding" style="text-align: center"><b lc-message="No records"></b></p> </ion-list> <ion-infinite-scroll ng-if="!column.infiniteScrollEnd" on-infinite="column.loadNextItems()" distance="1%" immediate-check="true"> </ion-infinite-scroll> </ion-content> </ion-slide> </ion-slide-box> </ion-view> And www / js / app.js with the changes in the controller:
angular.module('starter', ['ionic', 'allcount-mobile']) .run(function($ionicPlatform, lcApiConfig) { lcApiConfig.setServerUrl('http://localhost:9080'); $ionicPlatform.ready(function() { // Hide the accessory bar by default (remove this to show the accessory bar above the keyboard // for form inputs) if(window.cordova && window.cordova.plugins.Keyboard) { cordova.plugins.Keyboard.hideKeyboardAccessoryBar(true); } if(window.StatusBar) { StatusBar.styleDefault(); } }); }) .config(function ($stateProvider, $urlRouterProvider) { $stateProvider .setupStandardAllcountMainState('app', 'lib/allcountjs-ionic/templates') .state('app.flowBoard', { url: "/entity/FlowBoard", views: { 'menuContent': { templateUrl: "flow-board.html", controller: 'FlowBoardController' } } }) .setupStandardAllcountStates('app', 'lib/allcountjs-ionic/templates'); $urlRouterProvider.otherwise('/app/main'); }) .controller('FlowBoardController', function ($scope, lcApi, $ionicSlideBoxDelegate) { $scope.mainEntityTypeId = 'FlowBoard'; $scope.$on('$ionicView.enter',function () { $scope.boardColumns && $scope.boardColumns.forEach(function (column) { column.gridMethods.updateGrid(); }) }); lcApi.getFieldDescriptions($scope.mainEntityTypeId).then(function (descriptions) { var statusFieldDescription = _.find(descriptions, function (d) { return d.field === 'status'; }); return lcApi.referenceValues(statusFieldDescription.fieldType.referenceEntityTypeId); }).then(function (statusReferenceValues) { $scope.boardColumns = statusReferenceValues; $scope.boardColumns = _.filter($scope.boardColumns, function (obj) { return !!obj.id; }) $scope.boardColumns.forEach(function (column) { column.loadNextItems = function () { column.gridMethods.infiniteScrollLoadNextItems().then(function () { $scope.$broadcast('scroll.infiniteScrollComplete'); }) }; }) $ionicSlideBoxDelegate.update(); $scope.updateTitle(0); }); $scope.updateTitle = function (columnIndex) { $scope.title = $scope.boardColumns[columnIndex].name; } $scope.columnFiltering = function (column) { return {filtering: {status: column.id}}; } }); Running the application in the emulator
Before launching the application, you need to change the url of your server to that of the emulator. For example, you can use the IP address in the local network. Change /www/js/app.js
lcApiConfig.setServerUrl('http://192.168.0.16:9080') Now let's compile and look at the result. I use iOS, but you can use Android.
$ ionic platform add ios $ ionic build ios $ ionic emulate ios If you are also creating an iOS application, then it is worthwhile to stop at the new security policy for iOS 9. In order to use unprotected http endpoints, you must first add to platforms / ios / crm-app-allcountjs / crm-app-allcountjs-Info. plist after the first tag the following text:
<key>NSAppTransportSecurity</key> <dict> <key>NSAllowsArbitraryLoads</key> <true/> </dict> Details can be viewed at stackoverflow .
Mobile apps with AllcountJS - it’s just
Now, using the ionic framework, we quickly packed our web application into a mobile one. The only thing you need to spend time on is creating an analogue of kanban boards. But if the web application does not require any special client logic or interfaces, then creating a web interface, a REST API and a mobile application with AllcountJS becomes really fast. Who is interested and wants to know the details - welcome to Allcountjs.com
Source: https://habr.com/ru/post/271111/
All Articles