Little OS from scratch in C ++ and assembler
Immediately I say, do not close the article with the thoughts "Damn, another Popov." He just has Ubuntu lapped, and I have everything from scratch, including the kernel and applications. So, the continuation under the cut.
OS group: here .
First I will give you one screenshot.

There are no more of them, but now I’ll go into more detail about why I am writing it.
')
It was a warm April evening, Thursday. Since childhood I dreamed of writing an OS, when I suddenly thought: “Now I know the advantages and advantages, why not realize my dream?”. Googled sites on this topic and found an article from Habr: " How to start and not stop writing the OS ." Thanks to the author for the link to the OSDev Wiki below. I went there and started work. There were in one article all the data on the minimum OS. I started to collect cross-gcc and binutils, and then rewrote everything from there. You would see my joy when I saw the inscription “Hello, kernel World!” I jumped right off the chair and realized that I would not give up. I wrote “console” (in quotes, I did not have access to the keyboard), but then I decided to write a window system. In the end, she earned, but I did not have access to the keyboard. And then I decided to invent a name based on the X Window System. Googled Y Window System - it is. As a result, he called Z Window System 0.1, which is included in OS365 pre-alpha 0.1. And yes, nobody saw her but me. Then I understood how to implement keyboard support. The screen of the very first version, when there was nothing yet, even the window system:

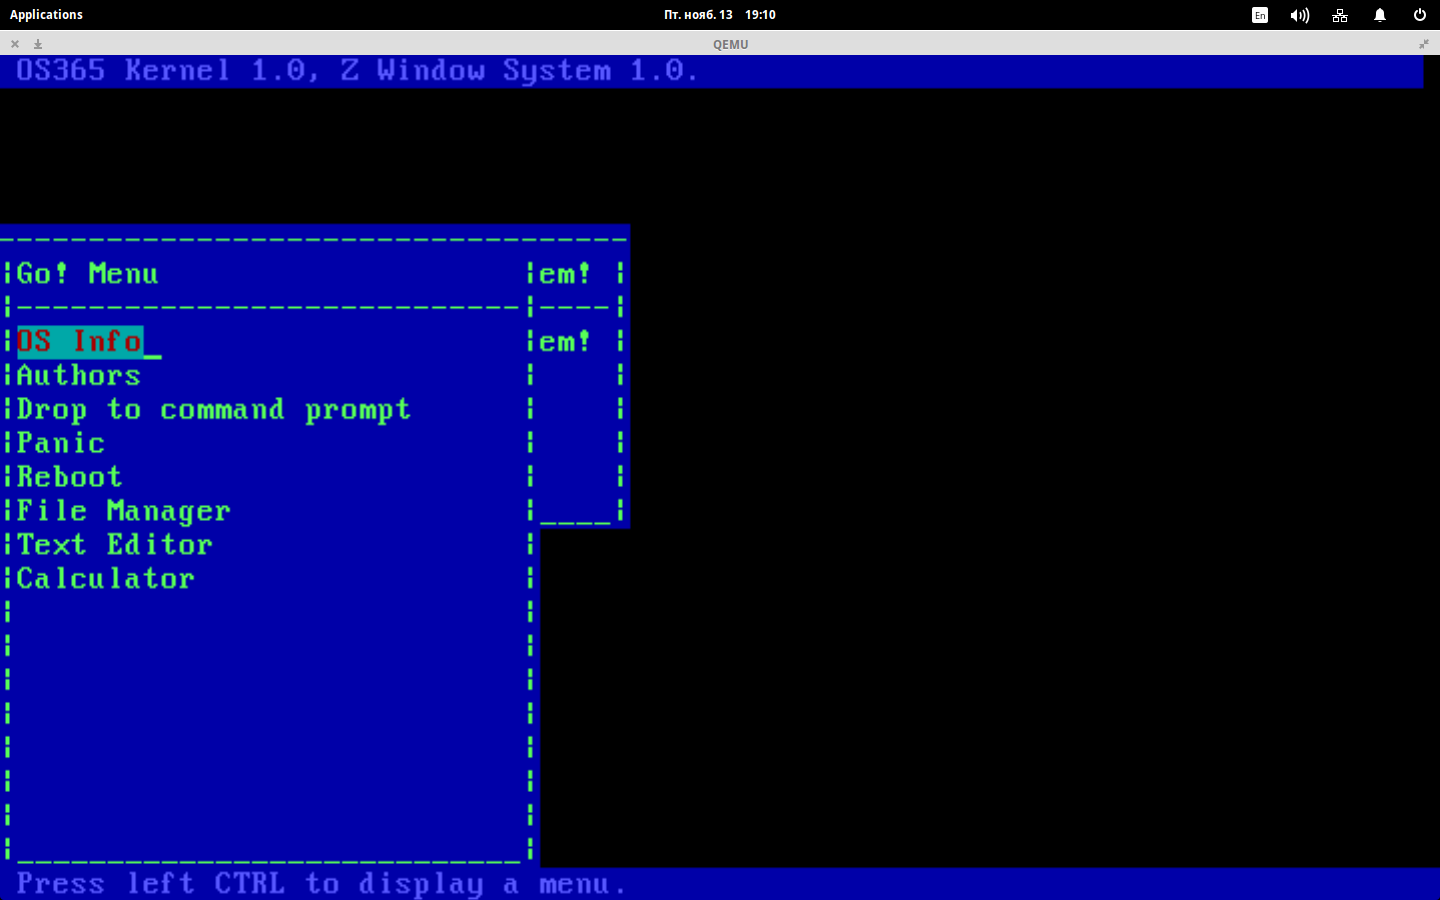
It did not even move the text cursor, as you can see. Then I wrote a couple of simple Z-based applications. And here is the release 1.0.0 alpha. There were a lot of things there, even the menu system. A file manager and calculator just did not work.
Further 1.0.1 with text editor, 1.0.2 sec. mode 640x480, 1.0.3 with a desktop, 1.0.4 with the Russian language, 1.0.5 with fixes and something else, 1.0.6 with a clock, but let's stop at 1.1 in more detail.
I was directly terrorized by a friend for whom only beautiful ones are important (Mitrofan, sorry). He said: “They washed down VBE-mode 1024 * 768 * 32, washed it down, washed it down! Well, drink it down! ". Well, I was already tired of listening to him and still washed it down. About the implementation below.
I did everything with my bootloader, namely GRUB. With it, you can set the graphics mode without complications by adding a few magic lines to the Multiboot header.
And then from the Multiboot information structure, I take the address of the framebuffer and the screen resolution and write pixels there. VESA did everything very confusingly - RGB colors should be entered in the reverse order (not RGB, but BGR). I did not understand for several days - why the pixels are not displayed!? As a result, I realized that I forgot to change the values of 16 color constants from 0 ... 15 to their RGB equivalents. As a result, relish, at the same time gash gradient background. Then I made a console, 2 applications and released 1.2. Oh yeah, I almost forgot - you can download the OS on the site (habraeffekt, it lies) .
And yes, you will not believe, but I am 11 years old.
To be continued…
OS group: here .
First I will give you one screenshot.
There are no more of them, but now I’ll go into more detail about why I am writing it.
')
It was a warm April evening, Thursday. Since childhood I dreamed of writing an OS, when I suddenly thought: “Now I know the advantages and advantages, why not realize my dream?”. Googled sites on this topic and found an article from Habr: " How to start and not stop writing the OS ." Thanks to the author for the link to the OSDev Wiki below. I went there and started work. There were in one article all the data on the minimum OS. I started to collect cross-gcc and binutils, and then rewrote everything from there. You would see my joy when I saw the inscription “Hello, kernel World!” I jumped right off the chair and realized that I would not give up. I wrote “console” (in quotes, I did not have access to the keyboard), but then I decided to write a window system. In the end, she earned, but I did not have access to the keyboard. And then I decided to invent a name based on the X Window System. Googled Y Window System - it is. As a result, he called Z Window System 0.1, which is included in OS365 pre-alpha 0.1. And yes, nobody saw her but me. Then I understood how to implement keyboard support. The screen of the very first version, when there was nothing yet, even the window system:
It did not even move the text cursor, as you can see. Then I wrote a couple of simple Z-based applications. And here is the release 1.0.0 alpha. There were a lot of things there, even the menu system. A file manager and calculator just did not work.
Further 1.0.1 with text editor, 1.0.2 sec. mode 640x480, 1.0.3 with a desktop, 1.0.4 with the Russian language, 1.0.5 with fixes and something else, 1.0.6 with a clock, but let's stop at 1.1 in more detail.
I was directly terrorized by a friend for whom only beautiful ones are important (Mitrofan, sorry). He said: “They washed down VBE-mode 1024 * 768 * 32, washed it down, washed it down! Well, drink it down! ". Well, I was already tired of listening to him and still washed it down. About the implementation below.
I did everything with my bootloader, namely GRUB. With it, you can set the graphics mode without complications by adding a few magic lines to the Multiboot header.
.set ALIGN, 1<<0 .set MEMINFO, 1<<1 .set GRAPH, 1<<2 .set FLAGS, ALIGN | MEMINFO | GRAPH .set MAGIC, 0x1BADB002 .set CHECKSUM, -(MAGIC + FLAGS) .align 4 .long MAGIC .long FLAGS .long CHECKSUM .long 0, 0, 0, 0, 0 .long 0 # 0 = set graphics mode .long 1024, 768, 32 # Width, height, depth And then from the Multiboot information structure, I take the address of the framebuffer and the screen resolution and write pixels there. VESA did everything very confusingly - RGB colors should be entered in the reverse order (not RGB, but BGR). I did not understand for several days - why the pixels are not displayed!? As a result, I realized that I forgot to change the values of 16 color constants from 0 ... 15 to their RGB equivalents. As a result, relish, at the same time gash gradient background. Then I made a console, 2 applications and released 1.2. Oh yeah, I almost forgot - you can download the OS on the site (habraeffekt, it lies) .
And yes, you will not believe, but I am 11 years old.
To be continued…
Source: https://habr.com/ru/post/270939/
All Articles