Sublime Text as IDE for ARM using STM32 as an example
This article will explain how to create a Sublime Text assembly with additional programs that can be used as a development environment for microcontrollers, in particular the STM32F10x. So, we have a task to do with the help of Sublime Text - IDE, which includes: static analysis and code completion at the moment of its writing, project building system using makefile, compiler, linker, microcontroller firmware and debugging. In addition, the assembly will work without installation.
Creating the directory structure and bat file startup:
First you need to download the necessary programs:
1. Actually Sublime Text 3 portable
2. Gul ARM Embedded tulchain (archived)
3. Clang (LLVM) for static code analysis
4. Make to automate project build, firmware and debugging
5. OpenOCD for flashing and debugging
')
Next, create a directory for our assembly and unpack each program into previously created directories. For Clang, you first need to install the downloaded LLVM, and then just copy the directory from LLVM from the installation path to the directory of our assembly.
Create a bat file in the root of the build directory. It should look like this:

A bat file is needed in order for Sublime Text to start with the PATH variable containing the paths of additional programs. In the bat file we write the following:
:: DEVELOP_ROOT, () bat- set DEVELOP_ROOT=%~dp0 :: PATH PATH %DEVELOP_ROOT%GCC ARM none eabi\bin;%DEVELOP_ROOT%LLVM\bin;%DEVELOP_ROOT%make;%DEVELOP_ROOT%openOCD\bin;%PATH% :: Sublime Text start "" "%DEVELOP_ROOT%Sublime Text\sublime_text.exe" Install and configure the necessary plugins:
Install Package Control: Start Sublime Text, go to the Package Control website in the browser Link , insert the Package Control installation line into the console (Ctrl + ~) Sublime Text, reboot Sublime Text.
In Sublime Text, install the necessary plugins (using Ctrl + Shift + P, then write Install Pakage):
- Sublimelinter
- SublimeLinter-contrib-clang
- SublimeGDB
- Terminal
- All autocomplete
- ARM Assembly
All Autocomplete - plugin for code autocompletion on the fly. Offers suitable combinations of files that are opened in Sublime Text tabs.
ARM Assembly - to highlight the syntax of the assembler.
Next, you need to register the settings for these plugins. Settings are below:
Preferences-> Package Settings-> SublimeLinter-> Settings - User:
{ "user": { "debug": true, "delay": 0.25, "error_color": "D02000", "gutter_theme": "Packages/SublimeLinter/gutter-themes/Default/Default.gutter-theme", "gutter_theme_excludes": [], "lint_mode": "background", "linters": { "clang": { "@disable": false, "args": [], "excludes": [], "extra_flags": "", "include_dirs": [] } }, "mark_style": "outline", "no_column_highlights_line": false, "passive_warnings": false, "paths": { "linux": [], "osx": [], "windows": [] }, "python_paths": { "linux": [], "osx": [], "windows": [] }, "rc_search_limit": 3, "shell_timeout": 10, "show_errors_on_save": false, "show_marks_in_minimap": true, "syntax_map": { "html (django)": "html", "html (rails)": "html", "html 5": "html", "javascript (babel)": "javascript", "php": "html", "python django": "python" }, "warning_color": "DDB700", "wrap_find": true } } Preferences-> Package Settings-> SublimeGDB-> Settings - User:
{ "file_group": 0, "session_group": 1, "session_open": true, "console_group": 1, "console_open": true, "variables_group": 1, "variables_open": true, "callstack_group": 2, "callstack_open": true, "registers_group": 2, "registers_open": true, "disassembly_group": 1, "disassembly_open": true, "threads_group": 3, "threads_open": true, "breakpoints_group": 3, "breakpoints_open": true } Preferences-> Package Settings-> Terminal-> Settings - User:
{ "terminal": "cmd" } Configure project file:
At this stage, you can already open a test project for the STM32F10x . Below is the content of the test project file (* .sublime-project):
{ "build_systems": [ { "cmd": ["make"], "name": "ARM build", "working_dir": "${project_path}", "file_regex": "^(^\\S.*\\.\\w+):(\\d+):(\\d+): (\\w+ ?\\w+?): (.*)$" } ], "folders": [ { "follow_symlinks": true, "path": "." } ], // "SublimeLinter": { "linters": { "clang": { // , , "include_dirs": [ "${project}/CMSIS", "${project}/StdPeriphLib", "${project}/user-code", "${project}/user-code/FatFs" ], // Clang "extra_flags":"-DSTM32F10X_MD_VL" } } }, "settings": { "sublimegdb_workingdir": "${project_path:out/hex/}", "sublimegdb_commandline": "arm-none-eabi-gdb --interpreter=mi *.elf" } } We will analyze this file in more detail. Define the command that will be launched when building the project (Ctrl + B):
"cmd": ["make"] The name of the build_system (can be any):
"name": "ARM build" The working directory of the project, relative to this path, runs the command in the "cmd" field:
"working_dir": "${project_path}" Regular expression for quick transitions by message in the project build log (for F4, Shift + F4):
"file_regex": "^(^\\S.*\\.\\w+):(\\d+):(\\d+): (\\w+ ?\\w+?): (.*)$" The paths to the directories of the project with the source code are written in the makefile, but since Clang does not remove them from the makefile, in the project settings in the section “SublimeLinter” -> “linters” -> “clang” -> “include_dirs” - you need to set the paths to these directories that will be passed to Clang for source code analysis. Otherwise, we get an error from Clang of the form "such a plug-in header file was not found."
The same applies to the preprocessor directives, in our case it is "-DSTM32F10X_MD_VL". This directive is written in a makefile, but we still need to add it to the project settings for Clang: “SublimeLinter” -> “linters” -> “clang” -> “extra_flags”. Otherwise, Clang will not be able to verify this type of code (in the stm32f10x.h file):
#if !defined (STM32F10X_LD) && !defined (STM32F10X_LD_VL) && !defined (STM32F10X_MD) && !defined (STM32F10X_MD_VL) && !defined (STM32F10X_HD) && !defined (STM32F10X_HD_VL) && !defined (STM32F10X_XL) && !defined (STM32F10X_CL) #error "Please select first the target STM32F10x device used in your application (in stm32f10x.h file)" #endif Next in the project settings there is a section “settings” - here are the project settings for the SublimeGDB plugin:
Path to elf firmware file:
"sublimegdb_workingdir": "${project_path:out/hex/}", The command to start the debugger:
"sublimegdb_commandline": "arm-none-eabi-gdb --interpreter=mi *.elf" At this stage we can already build the project. Press Ctrl + B and see the build log.
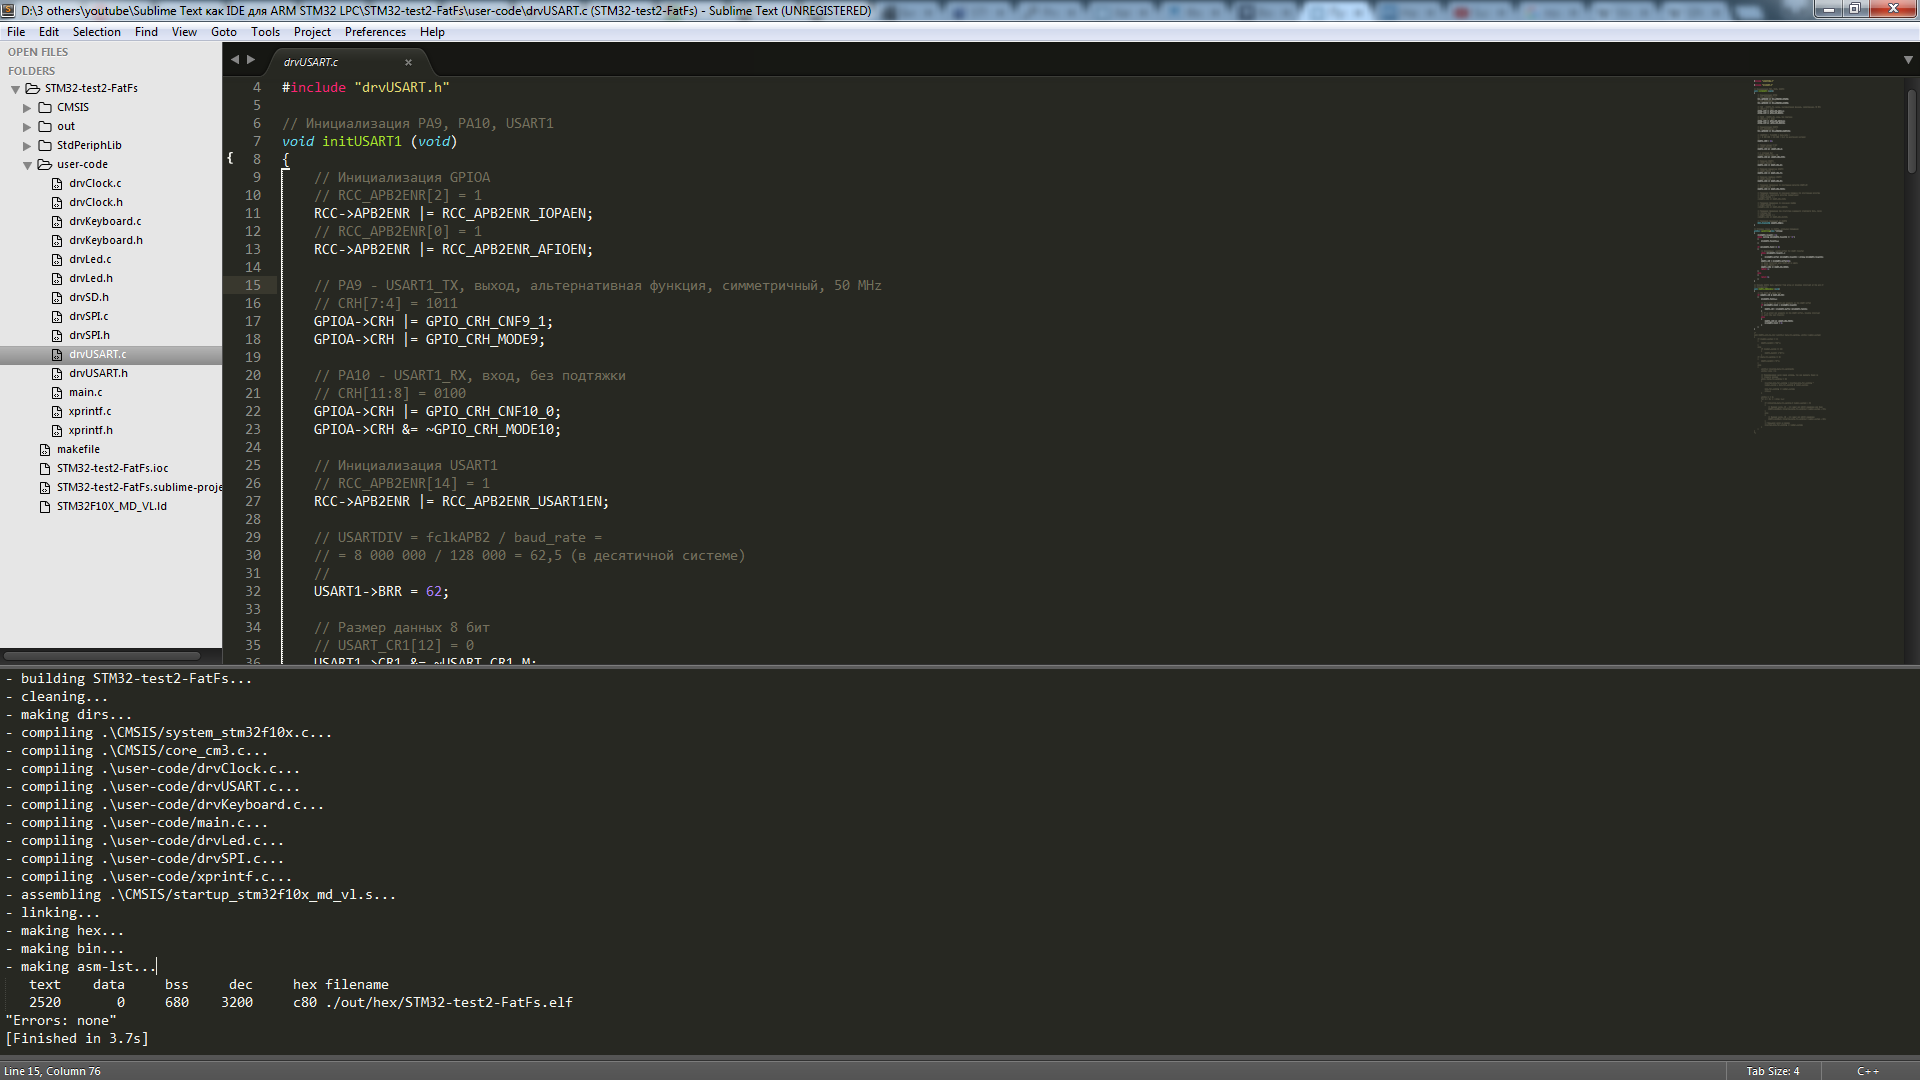
We also see that in the project directory the “out” directory has been created anew, and in it in the corresponding directories are the firmware files, the listing and the object files.
Firmware:
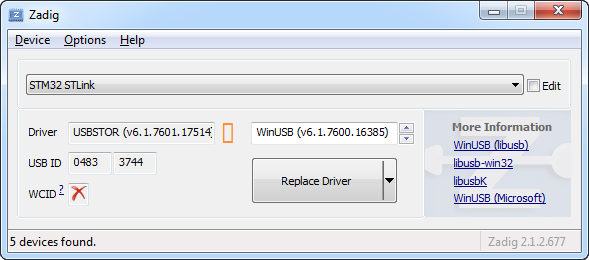
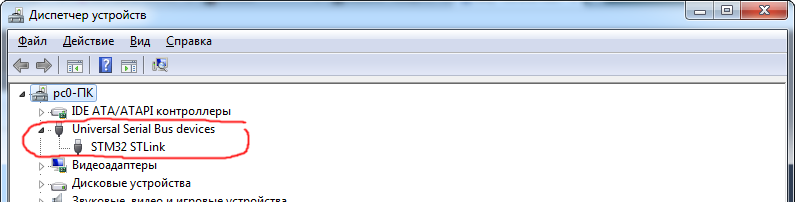
We will flash the microcontroller using openOCD. There is a feature here: openOCD does not work with standard ST-LINK programmer drivers. By default, ST-LINK is defined as “USB storage device”, that is, we need to replace the USBSTOR driver with WinUSB using the Zadig program. Download, run, select “List All Devices” in the options, select the “STM32 STLink” device and click on the “Replace Driver” button.
Done! To flash the microcontroller, you need to connect the programmer, open the terminal in the folder with makefile and execute the “make program” (you can select the project folder directly in Sublime Text and press Ctrl + Shift + T to quickly open the terminal).
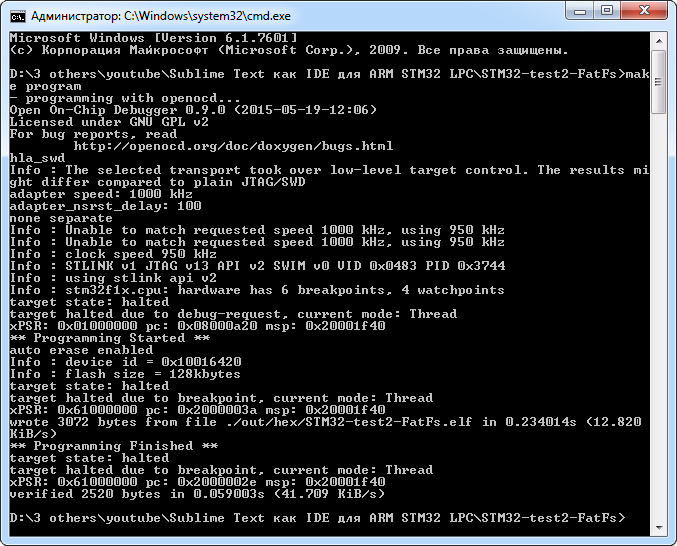
To use another programmer, you need to change the corresponding lines in the makefile.
It is not always convenient, but if you want the microcontroller to flash automatically when building a project, you need to uncomment the line in the makefile:
# $(MAKE) program So, it remains to deal with debugging.
Debugging:
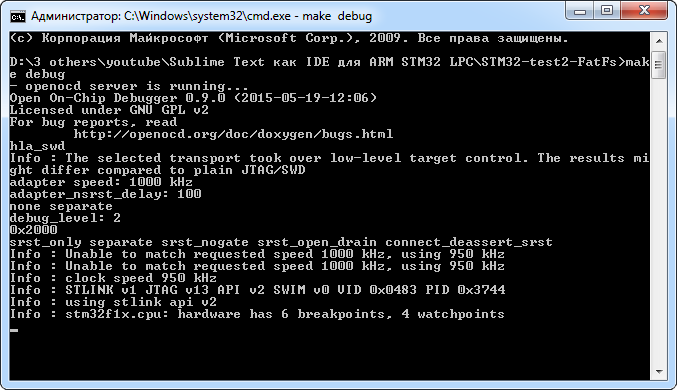
We start the GDB server: we open the terminal in the directory with the makefile and execute “make debug” in it
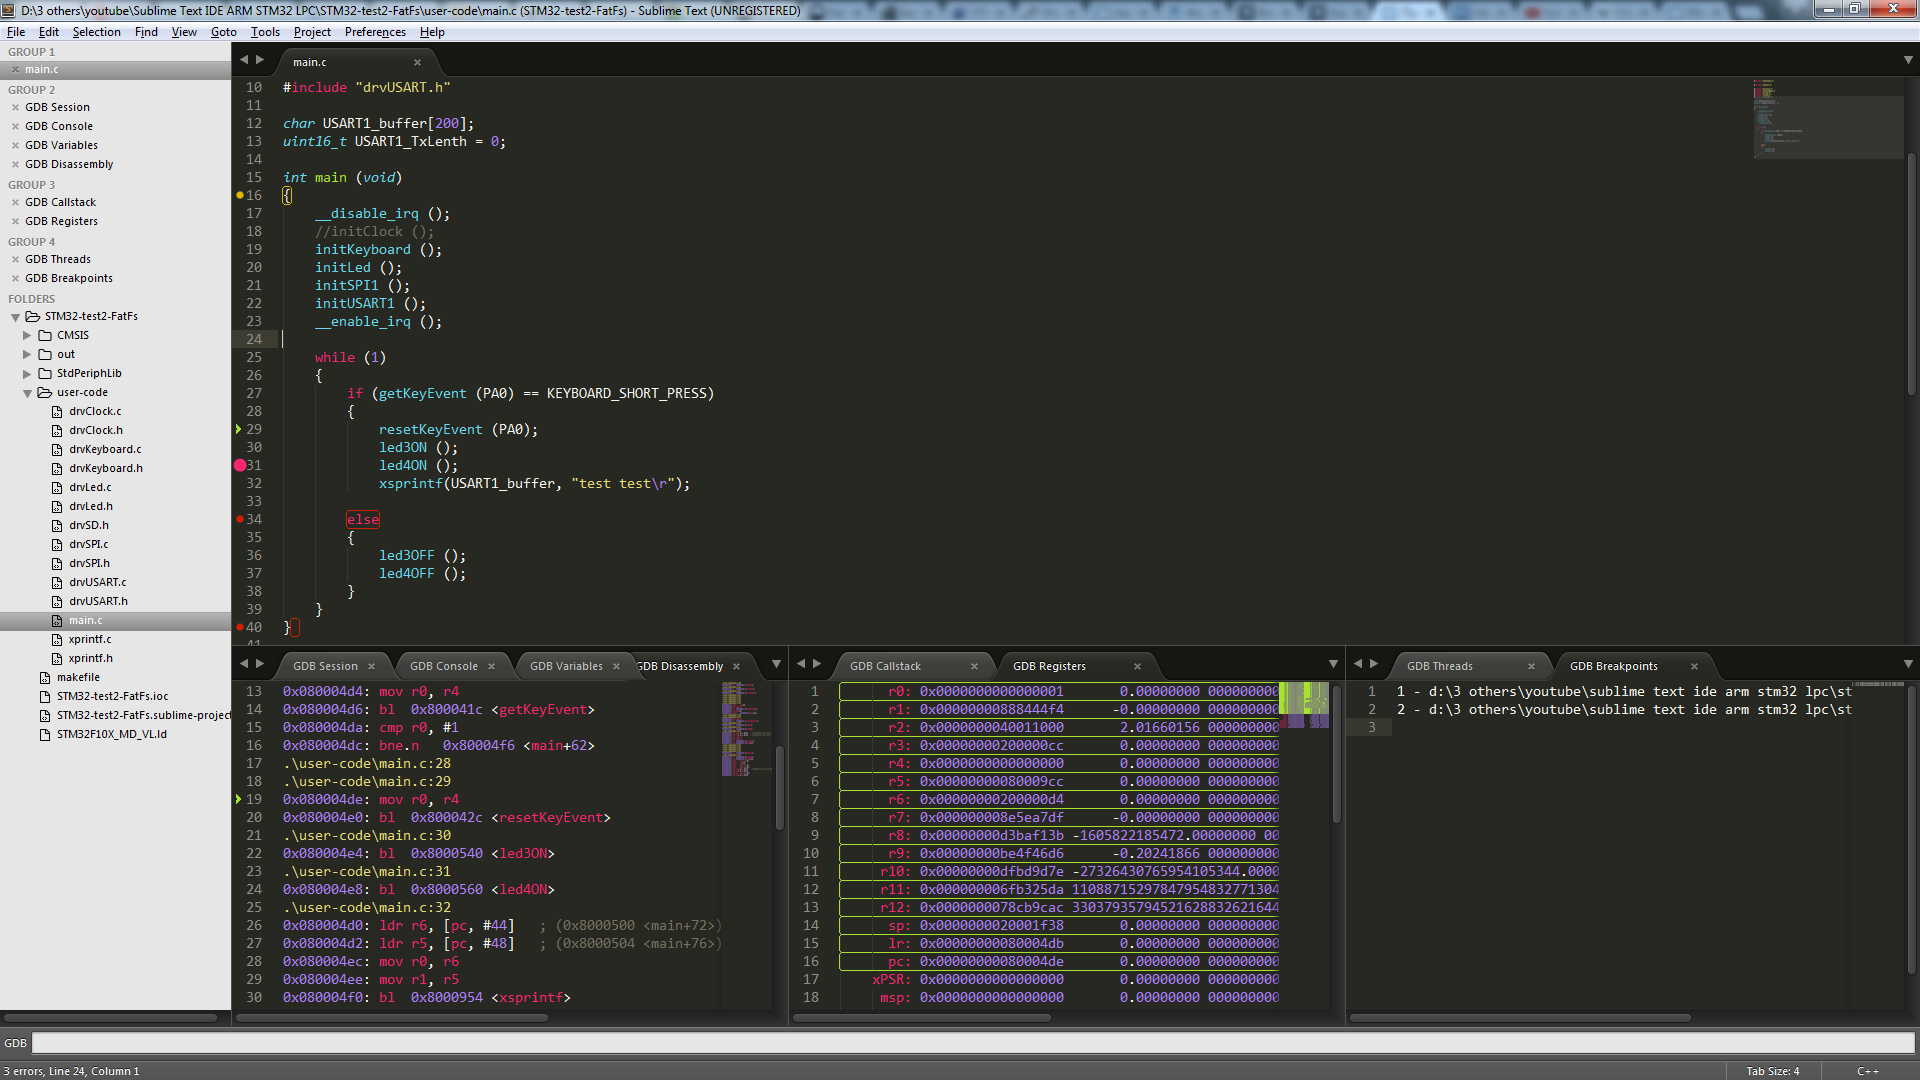
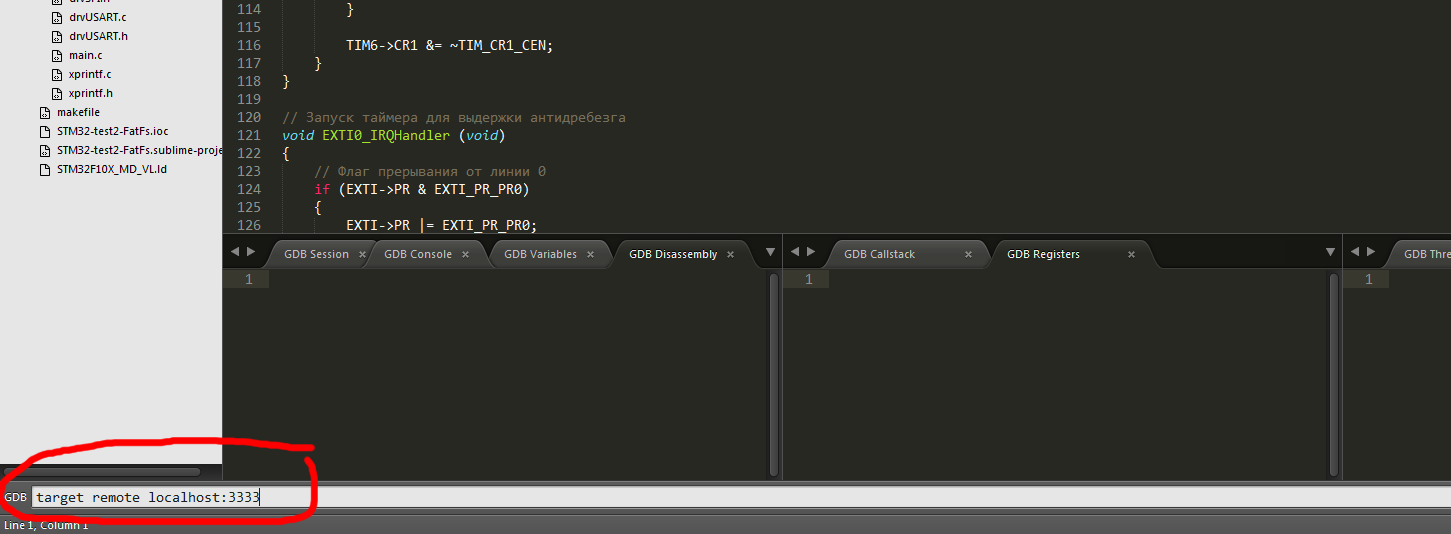
Now in Sublime Text just press F5 (you can change it in the settings of SublimeGDB), the interface of the SublimeGDB plugin will open and in the command line enter the following:
target remote localhost:3333
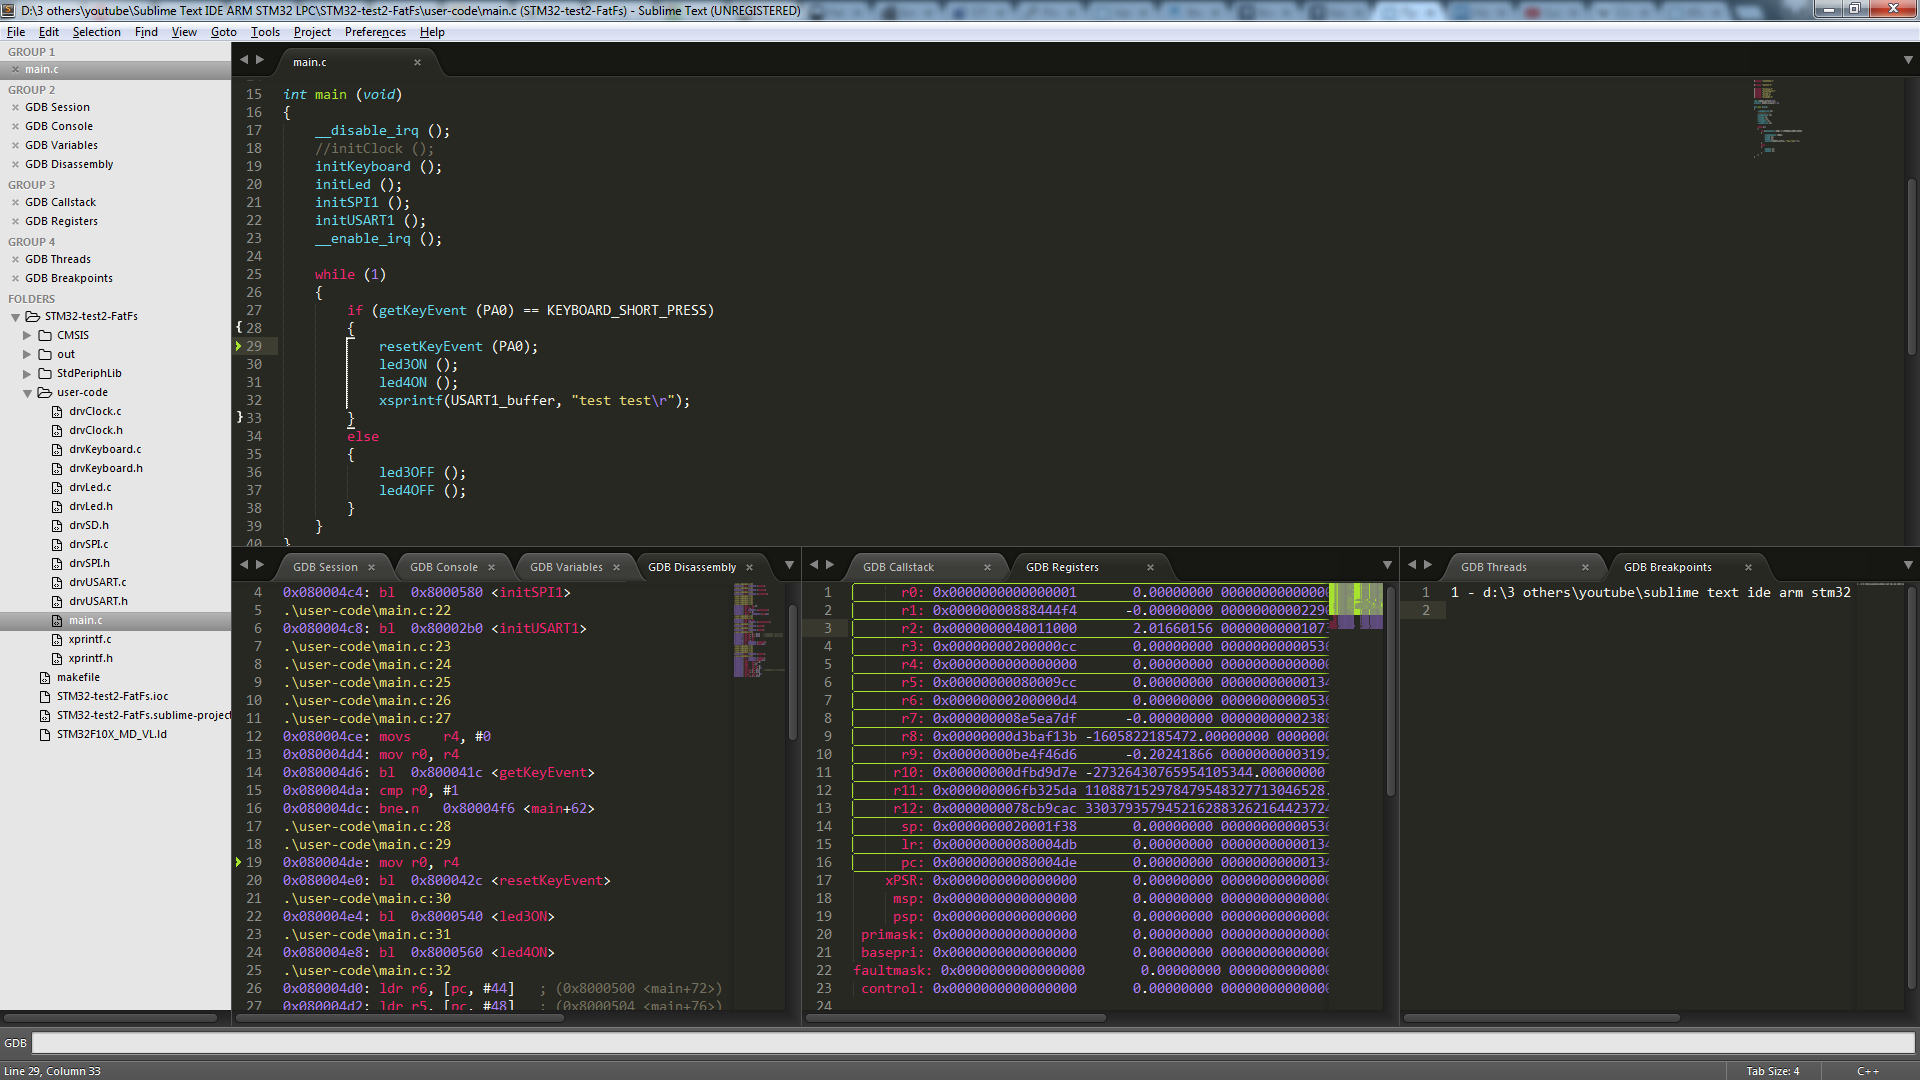
Is done. Now you can use debugging. Here it is worth clarifying: at the moment only the registers of the ARM poison itself are available for viewing, but not the periphery. I am in search of a solution to this issue, as well as bringing the values of the core registers to a normal form. All hotkeys for debugging can be changed in the settings of the SublimeGDB plugin.
To finish debugging in Sublime Text, press Ctrl + F5 (you can also change it in the settings)
Creating a new project:
To create a new project based on the existing one, you need:
1. Copy the existing project directory with the new project name;
2. Rename the project file * .sublime-project to the name of the new project;
3. In the makefile, change the value of the TARGET variable to the name of the new project:
# : TARGET = STM32-test2-FatFs If you need to change the project directory structure, simply change the value of the SRCDIR variable in the makefile:
# : SRCDIR = $(BASE) SRCDIR += $(BASE)\CMSIS SRCDIR += $(BASE)\StdPeriphLib SRCDIR += $(BASE)\user-code SRCDIR += $(BASE)\user-code\FatFs And the “include_dirs” field in the project settings (* .sublime-project).
Video explaining all of the above:
Link for downloading a customized Sublime Text with additional programs.
Link to download the test project discussed in this article.
UDP 1. In Linux for openocd to work with ST-Link, you need to add a rule for a USB device as follows: from the / usr / share / openocd / contrib directory copy the file “99-openocd.rules” to the /etc/udev/rules.d directory . Then restart the system.
UDP 2. Projects have been added for:
STM32F4 ,
MSP430 ,
ESP8266 .
Source: https://habr.com/ru/post/270789/
All Articles