Creating site tips with EnjoyHint
My friends! From time to time, each of us is faced with a situation where, hitting a new site for yourself, you have to think carefully about a minute or two to understand how everything is arranged. Approximately in the same position you can find yourself by discovering radical (or not so) changes in the appearance of your favorite sites, be it last.fm or Film Search. There are different ways to reconcile users with the new design: from gradual acquaintance with the innovations introduced (“Try the beta version of the updated website right now!”) To create a step-by-step guide on new features. We will talk about the last version today.

The purpose of this article is to talk about the process of creating interactive tips for a site using EnjoyHint . First we create a hint for an individual item. Then let's see how you can create a sequence of prompts that will be launched one after another. Thus, we will have an interactive guide on the main features of our site. As an example, we used a small search engine pattern written using Bootstrap .
One of the dependencies is jQuery version 1.7 or higher. His other dependency is KineticJS version 5.10, but since this library is already included in EnjoyHint, you should not worry about it once again.
')
Those who can not wait to find out how the resulting guide will look like in the end can watch this demo .
With EnjoyHint, you can create a sequence of interactive hints that will help the user navigate through the many elements of your site, along the way telling him which of them are intended for. This can be useful in the case of a complex web application with a large number of elements.
You can select, for example, a separate button and tell you what it is for. You can also take a visitor by the hand and lead him through the entire site, along the way explaining what and what to use. In this case, you can apply your own styles to the texts of hints and change the shape and borders of the selected area.
Main features:
On this, perhaps, the theoretical part can be completed and go directly to writing code.
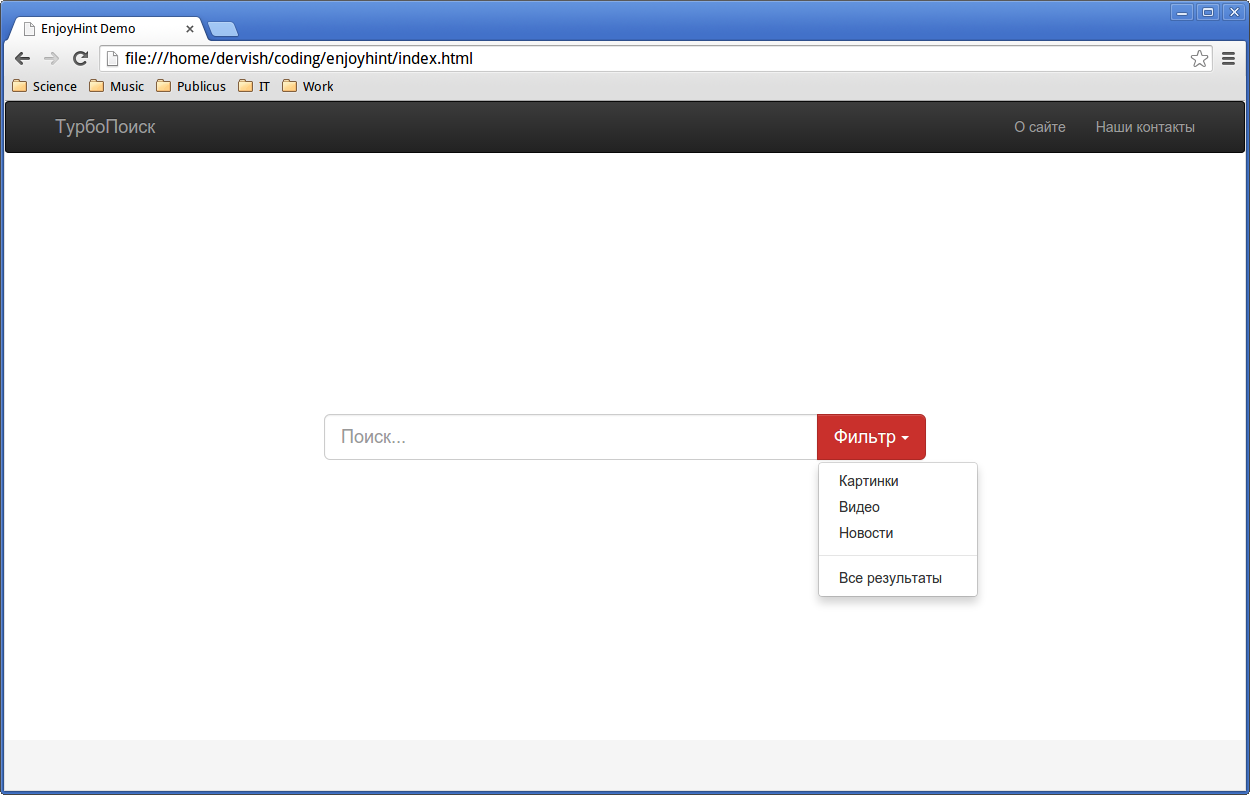
As an example, I made just such a small search engine model:
So let's get started. First, prepare the necessary files. You can install EnjoyHint using the Bower package manager:
Or download it from this page on github . As an example, we use the second option.
Add jQuery and the necessary js and css files from the EnjoyHint archive:
I put all the code needed to create hints in a separate `hint-sequence.js` file:
First you need to create a new instance of the EnjoyHint object:
Now we can create a description for the tooltip:
Or, if you need to create a sequence of several hints:
Next, using the `set` method, we select the created sequence as a configuration:
All is ready. Now you can run our script:
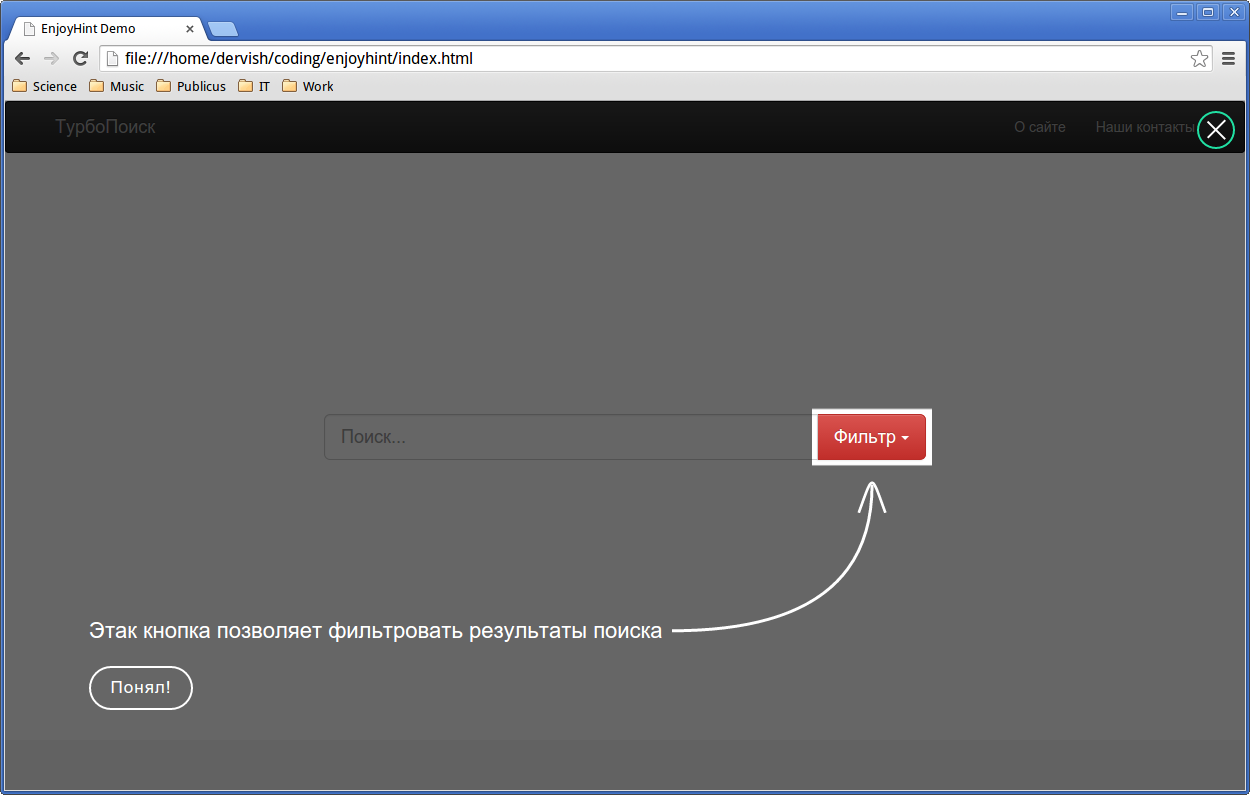
As a first example, we will create a hint that tells the site visitor about the purpose of the Filter button:
The result is shown below:

Here is how it works. `click` is the event that will trigger the next hint. In this case, pressing the button. Select the page element that will be highlighted and for which a prompt will appear using the selector. In our case, this element is the “Filter” button with the value of the `class = btn` attribute. Next, after the colon, the text of the prompt follows.
Since we are creating a single hint, after we click on the Filter button or on the Skip button, it will disappear. The “Skip” button appears by default. But, since all of our leadership consists of a single step, it looks a bit out of place. In this example, there is simply nothing to miss. EnjoyHint allows you to add your own CSS classes and titles to your elements, which will be useful if you want to add a description to a single element of your page.
You can change the label on the button using the `skipButton` property:
This code will also add the `mySkip` CSS class to it. Using, for example, the following CSS code:
You can change the color of the button:
If the “Skip” button seems unnecessary to you, you can remove it altogether using the `showSkip: false` property.
So, we know how to create a separate hint. Now you can create a sequence of prompts that will be launched one after the other. Thus, we get an interactive guide.
To write our site guide, we will create a description of the tips from scratch.
To create the first event, use the following code:
This time, the `next` event was used and this is what we got as a result:

As you can see, the site title is now highlighted. This time we have two buttons: “Next”, which will launch the next hint and “Skip”, which will interrupt the script. You can change the “Next” button in much the same way as the “Skip” button from the previous example:
Here is what you get as a result:
Let's hope that site visitors decide to view the entire guide. So, you need to create the following hint.
This step of the tutorial will tell the user how to use the search string. To do this, we use the `key` event. It will launch the following prompt after pressing a specific key:
Note that in this case, the value of the `<id = mySearchButton>` attribute was used as the selector. The `keyCode` property determines the code of the key, pressing of which will launch the next prompt. In this case, this is the Enter key code.
Let's look at the result:

After pressing the key, the following prompt will appear.
As a third step, we use the example already familiar to us for the “Filter” button:
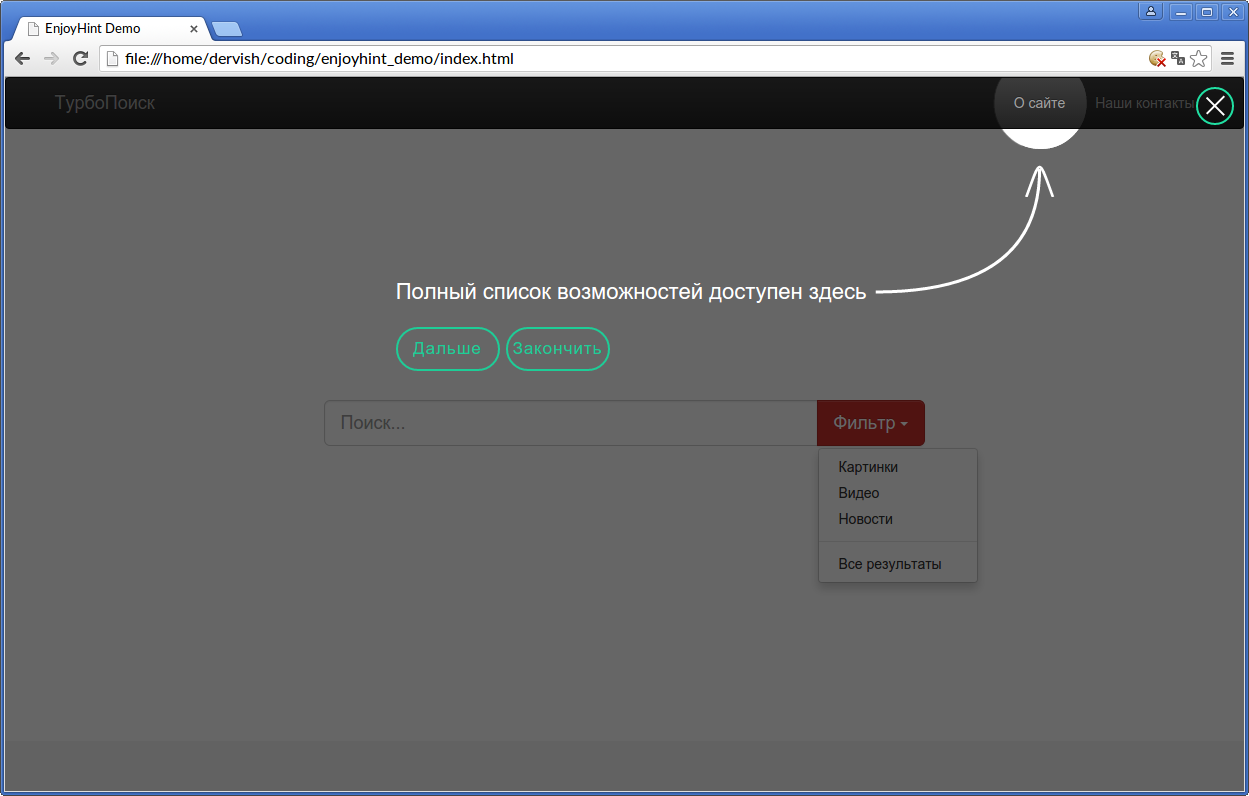
After pressing the button, the fourth prompt will be called. And this time we will change the shape of the selected area to a circle. To do this, use the `shape` property:
As a result, the link "About the site" will be highlighted as shown in the screenshot:
EnjoyHint copes with the illumination of elements of different sizes. But if the size of the selected area does not suit you by default, you can change it using the `radius` property. Now we will create the last hint using this feature. Since this is the last step of our tutorial, we no longer need the Skip button. You can remove it using the `showSkip: false` property.
So, the code for the last hint:
Result: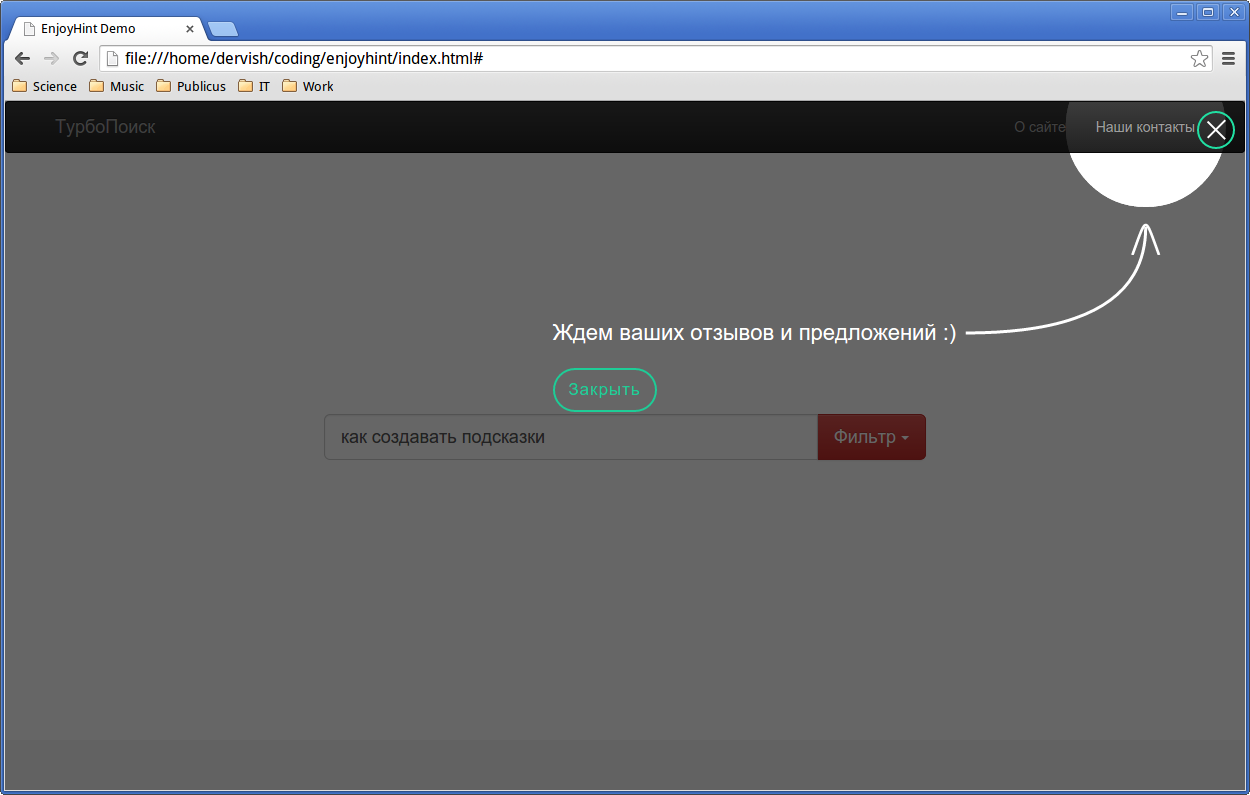
Last for today. Callbacks. To call them, you can use the script events `onStart` and` onEnd`. The `onStart` event starts at the very beginning of work, before the first hint. The `onEnd` event starts after the last prompt. For example:
An event is also available for a separate `onBeforeStart` prompt. It starts before the on-screen hint appears:
With EnjoyHint, you can quickly add single tips or a step-by-step guide to the main elements to the site. In order to add a hint, you just need to bind it to the desired selector, and you can use HTML tags to describe the hint itself. Download EnjoyHint, as well as read the instructions containing a description of the available features here .
The purpose of this article is to talk about the process of creating interactive tips for a site using EnjoyHint . First we create a hint for an individual item. Then let's see how you can create a sequence of prompts that will be launched one after another. Thus, we will have an interactive guide on the main features of our site. As an example, we used a small search engine pattern written using Bootstrap .
One of the dependencies is jQuery version 1.7 or higher. His other dependency is KineticJS version 5.10, but since this library is already included in EnjoyHint, you should not worry about it once again.
')
Those who can not wait to find out how the resulting guide will look like in the end can watch this demo .
EnjoyHint. Some theory
With EnjoyHint, you can create a sequence of interactive hints that will help the user navigate through the many elements of your site, along the way telling him which of them are intended for. This can be useful in the case of a complex web application with a large number of elements.
You can select, for example, a separate button and tell you what it is for. You can also take a visitor by the hand and lead him through the entire site, along the way explaining what and what to use. In this case, you can apply your own styles to the texts of hints and change the shape and borders of the selected area.
Main features:
- Auto focus and highlight of selected area
- Changing the shape and borders of the selected area
- The ability to ask the prompt delay
- The ability to continue the interrupted sequence of prompts
- Cross-browser support (Chrome, FireFox, IE10 +, Safari)
- Support for touch-screen devices running Android, iOS and Windows
On this, perhaps, the theoretical part can be completed and go directly to writing code.
Creating a tooltip
As an example, I made just such a small search engine model:
So let's get started. First, prepare the necessary files. You can install EnjoyHint using the Bower package manager:
bower install enjoyhint Or download it from this page on github . As an example, we use the second option.
Add jQuery and the necessary js and css files from the EnjoyHint archive:
<script src="http://code.jquery.com/jquery-1.11.3.min.js"></script> <script src="enjoyhint/enjoyhint.min.js"></script> <link href="enjoyhint/enjoyhint.css" rel="stylesheet"> I put all the code needed to create hints in a separate `hint-sequence.js` file:
<script src="hint-sequence.js"></script> Initialize EnjoyHint
First you need to create a new instance of the EnjoyHint object:
var enjoyhint_instance = new EnjoyHint({}); Now we can create a description for the tooltip:
var enjoyhint_script_steps = [ { /* */ } ]; Or, if you need to create a sequence of several hints:
var enjoyhint_script_steps = [ { /* */ }, { /* */ } ]; Next, using the `set` method, we select the created sequence as a configuration:
enjoyhint_instance.set(enjoyhint_script_steps); All is ready. Now you can run our script:
enjoyhint_instance.run(); Tooltip description
As a first example, we will create a hint that tells the site visitor about the purpose of the Filter button:
var enjoyhint_script_steps = [ { 'click .btn' : ' ' } ]; enjoyhint_instance.set(enjoyhint_script_steps); enjoyhint_instance.run(); The result is shown below:
Here is how it works. `click` is the event that will trigger the next hint. In this case, pressing the button. Select the page element that will be highlighted and for which a prompt will appear using the selector. In our case, this element is the “Filter” button with the value of the `class = btn` attribute. Next, after the colon, the text of the prompt follows.
Since we are creating a single hint, after we click on the Filter button or on the Skip button, it will disappear. The “Skip” button appears by default. But, since all of our leadership consists of a single step, it looks a bit out of place. In this example, there is simply nothing to miss. EnjoyHint allows you to add your own CSS classes and titles to your elements, which will be useful if you want to add a description to a single element of your page.
You can change the label on the button using the `skipButton` property:
'click .btn' : /* */, 'skipButton' : {className: "mySkip", text: "!"} This code will also add the `mySkip` CSS class to it. Using, for example, the following CSS code:
.mySkip { color: white; border-color: white; } You can change the color of the button:
If the “Skip” button seems unnecessary to you, you can remove it altogether using the `showSkip: false` property.
So, we know how to create a separate hint. Now you can create a sequence of prompts that will be launched one after the other. Thus, we get an interactive guide.
Hint sequence
To write our site guide, we will create a description of the tips from scratch.
The first hint. 'Next' event
To create the first event, use the following code:
'next .navbar-brand' : /* */ This time, the `next` event was used and this is what we got as a result:
As you can see, the site title is now highlighted. This time we have two buttons: “Next”, which will launch the next hint and “Skip”, which will interrupt the script. You can change the “Next” button in much the same way as the “Skip” button from the previous example:
'nextButton' : {className: "myNext", text: "!"}, 'skipButton' : {className: "mySkip", text: ""} Here is what you get as a result:
Let's hope that site visitors decide to view the entire guide. So, you need to create the following hint.
The second hint. 'Key' event
This step of the tutorial will tell the user how to use the search string. To do this, we use the `key` event. It will launch the following prompt after pressing a specific key:
'key #mySearchButton' : /* */, 'keyCode' : 13 Note that in this case, the value of the `<id = mySearchButton>` attribute was used as the selector. The `keyCode` property determines the code of the key, pressing of which will launch the next prompt. In this case, this is the Enter key code.
Let's look at the result:
After pressing the key, the following prompt will appear.
The third and fourth tips. Change shape
As a third step, we use the example already familiar to us for the “Filter” button:
'click .btn' : /* */ After pressing the button, the fourth prompt will be called. And this time we will change the shape of the selected area to a circle. To do this, use the `shape` property:
'next .about' : /* */, 'shape': 'circle' As a result, the link "About the site" will be highlighted as shown in the screenshot:
Last step. Change the size
EnjoyHint copes with the illumination of elements of different sizes. But if the size of the selected area does not suit you by default, you can change it using the `radius` property. Now we will create the last hint using this feature. Since this is the last step of our tutorial, we no longer need the Skip button. You can remove it using the `showSkip: false` property.
So, the code for the last hint:
'next .contact' : ' :)', 'shape': 'circle', 'radius': 80, 'showSkip' : false, 'nextButton' : {className: "myNext", text: ""} Result:
Callbacks
Last for today. Callbacks. To call them, you can use the script events `onStart` and` onEnd`. The `onStart` event starts at the very beginning of work, before the first hint. The `onEnd` event starts after the last prompt. For example:
var enjoyhint_instance = new EnjoyHint({ onStart:function(){ // }, onEnd:function(){ // } }); An event is also available for a separate `onBeforeStart` prompt. It starts before the on-screen hint appears:
var enjoyhint_script_steps = [ { /* */ onBeforeStart:function(){ // } } ]; Conclusion
With EnjoyHint, you can quickly add single tips or a step-by-step guide to the main elements to the site. In order to add a hint, you just need to bind it to the desired selector, and you can use HTML tags to describe the hint itself. Download EnjoyHint, as well as read the instructions containing a description of the available features here .
Source: https://habr.com/ru/post/270665/
All Articles