Retrieving deleted data in iOS. Part 2
This is a continuation of the article , which is the author's translation of Chapter 6 Retrieving remote data from the book iOS7 in Action .
So far we have only used the GET method, but other methods are available:
We will focus on the two most popular methods: GET and POST.
GET is the simplest HTTP request method, and it is the browser that uses it to load web pages. It is used to request content located at a specific URL. The content may be, for example, a web page, a drawing or an audio file. By convention, GET requests are read only and, in accordance with the W3C standard, should not be used in operations that change the server side. For example, we will not use a GET request to send a form or send a photo, because these operations require some changes on the server side (we will use POST in these cases).
')
POST sends data for further processing to the URL. Parameters are included in the body of the request, using the same format as GET. For example, if we want to post a form that contains two fields, a name and an age, then we will send something similar to name = Martin & age = 29 in the request body.
This method of sending parameters is widely used in web pages. The most popular cases are forms. When we fill out the form on the site and click Submit, most likely the request will be POST.
Let's go back to our application and use some of the knowledge gained. Namely, let's use POST for rating jokes. We will send votes (or +1 or -1) to a remote server.
First we write the necessary interface. Add two buttons for voting voteUp and voteDown, which respectively will raise or lower the rating of the current joke. We will also add the “Chuck Who?” Button, which we will fill with functionality in the section about web view. In THSViewController + Interface.h we will add declarations of these methods.
THSViewController + Interface.h
In THSViewController + Interface.m we implement these methods.
THSViewController + Interface.m
In THSViewController.h we add action declarations for these buttons. voteUp for addButtonVoteUp, voteDown for addButtonVoteDown and chuckWho for addButtonChuckWho.
THSViewController.h
In THSViewController.m add stubs of these methods.
THSViewController.m
Finally, in the viewDidLoad method of THSViewController.m, we call methods that implement our interface.
THSViewController.m
We start our application and see the interface as in Fig. one
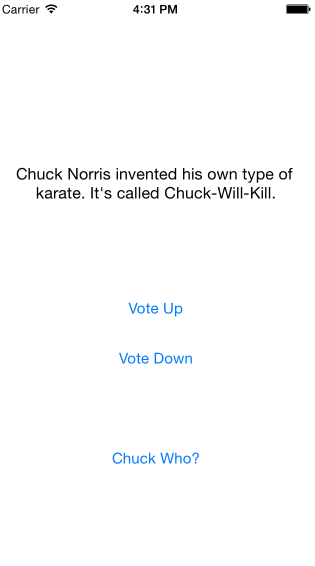
Pic.1 Interface of our application with added voting buttons
Now we implement the necessary functionality.
First, we implement the functionality for making POST requests in the class responsible for all our HTTP operations: THSHTTPCommunication class. To do this, we will add a new postURL: params: successBlock method to THSHTTPCommunication.m, which is similar to the previous retrieveURL: successBlock method.
THSHTTPCommunication.m
POST request data can be structured using different formats. Parameters are usually formatted in accordance with the form-url-coding standards (in accordance with the W3C HTML standard). This format is default and is widely used in many browsers. Our method takes an NSDictionary as an argument, but we cannot send an NSDictionary over an HTTP connection, because it is an internal Objective-C type. To send over an HTTP connection, we need to create a recognizable dictionary representation. It is like communicating with a foreigner. We translate our message into a universal language, and it translates from a universal language into its native language as shown in Fig. 2. The universal language in HTTP is the W3C standard, our language is Objective-C, the language of the recipient is unknown to us.
The W3C standard defines rules that define what a recognizable representation means for each case. In our case, we need to provide the parameters following the form-url-coded part of the standard (for example, param1 = var1¶m2 = var2).
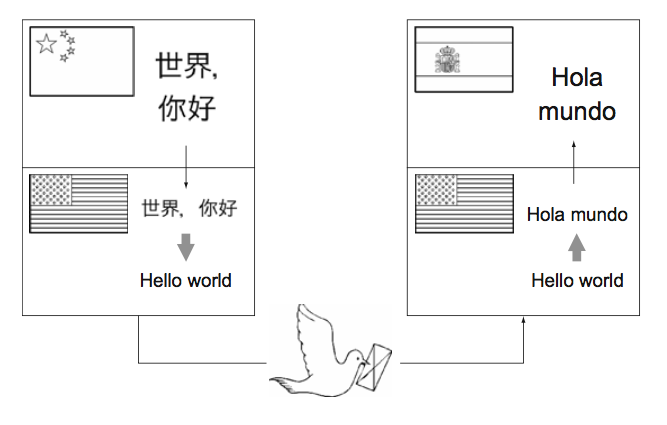
Fig.2 Message Metaphor
Let's return to our method and see how you can translate all of the above into code. First, we will create an array containing all the key-value pairs, which we then connect using &. The resulting string converted to an instance of the NSData class is what we send to the server responsible for storing the vote. To perform a POST request using an instance of the NSURLRequest class, we will set the HTTPMethod to POST in the same way as the content-type.
We need to make this method available in order to use it in the THSViewController class.
THSHTTPCommunication.h
Now the THSHTTPCommunication class includes a method for performing a POST request, we need to call it from the main THSViewController. It is time to implement the methods of raising or lowering the rating, as shown in the following listing.
THSViewController.m
Create an NSURL object with a url, which will be used in the request. Create a THSHTTPCommunication object. We define the parameters for the request. Make a POST request and set the successBlock callback.
These functions are very similar to each other. First, we define the full URL that we will use for the request, and then create an instance of the THSHTTPCommunication class. We did the same thing before the GET request. Now we create an NSDictionary for storing parameters. We translate these parameters into the previously studied format (for example, joke_id = & vote = 1) in order to be able to include them in the POST request. As we saw earlier, the method responsible for this transformation is postURL: params: successBlock from an instance of the THSHTTPCommunication class. And make the request by calling this method.
We launch our application and check that when voting for a joke or against it, the console displays messages:
or
indicating a successful POST request to the server.
We wrote an application to get jokes using the icndb API and the HTTP verb GET. We were able to show these jokes on UIView and every joke can be appreciated. These actions send a POST request to the remote server, which should save our evaluation.
We learned to make requests to a remote server. This is what browsers do before displaying a web page. The only difference is in the content of the answer. Web pages are formatted using the HTML standard, which defines a set of rules on how to graphically define various markup tags. These rules seem simple, but displaying the whole page, following the W3C standard is a complex task. Fortunately, iOS has a built-in UIWebView component that uses the well-known WebKit engine and interprets HTML / CSS / JavaScript and displays entire web pages within UIView.
Let's return to our application. We will add a webView to display the Wake page on Chuck Norris. She gets tangled by pressing a button.
First, create the THSWebViewController class, which is a subclass of UIViewController.
THSWebViewController.h
THSWebViewController.m
Create a category THSWebViewController + Interface, into which we brought the code to implement the web view interface:
THSWebViewController + Interface.h
THSWebViewController + Interface.m
Now in THSViewController.m we add the implementation of the chuckWho method, the declaration of which we made earlier. Do not forget to also import the THSWebViewController.h file.
THSViewController.m
Now, when clicking on the Chuck Who button, we see an empty web view as in Fig.3.
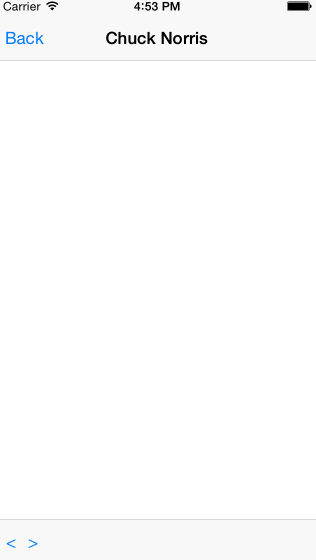
Fig.3. Empty web view in modal window
We fill it with functionality. To do this, add the following code to the viewDidLoad class THSWebViewController.
THSWebViewController.m
As before, we created an NSURLRequest object, but instead of sending a request using NSURLSession, we use the loadRequest method of the UIWebView class, which does all the work for us.
Finally, it remains to implement the functional methods dismissView, back and forward.
THSWebViewController.m
Now that everything is complete, it is important to know a few more things about UIWebView.
There are several cases where you want to control the flow of navigation. For example, you want to know when certain content or a specific URL is loaded.
Or maybe you are implementing a safe browser for children, you want to block the user from loading pages that fall under certain criteria, like sex or drugs. For all these types of customization, you create an instance of a class that implements the UIWebViewDelegate protocol as a delegate to the UIWebView. You can implement the following methods:
With the first method, you can control the flow of navigation by allowing or blocking specific requests. The other three methods are informational events (method names will give you a good idea of the event).
That's all! Fig. 4 demonstrates how the web view should look like in your application.
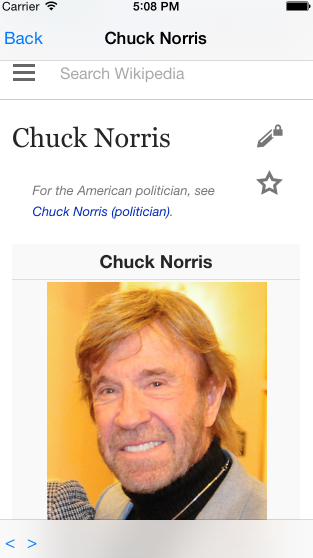
Fig. 4. The final view of our web view
Advanced HTTP requests
So far we have only used the GET method, but other methods are available:
- POST
- PUT
- DELETE
- OPTIONS
- HEAD
- TRACE
- CONNECT
We will focus on the two most popular methods: GET and POST.
GET is the simplest HTTP request method, and it is the browser that uses it to load web pages. It is used to request content located at a specific URL. The content may be, for example, a web page, a drawing or an audio file. By convention, GET requests are read only and, in accordance with the W3C standard, should not be used in operations that change the server side. For example, we will not use a GET request to send a form or send a photo, because these operations require some changes on the server side (we will use POST in these cases).
')
POST sends data for further processing to the URL. Parameters are included in the body of the request, using the same format as GET. For example, if we want to post a form that contains two fields, a name and an age, then we will send something similar to name = Martin & age = 29 in the request body.
This method of sending parameters is widely used in web pages. The most popular cases are forms. When we fill out the form on the site and click Submit, most likely the request will be POST.
Let's go back to our application and use some of the knowledge gained. Namely, let's use POST for rating jokes. We will send votes (or +1 or -1) to a remote server.
First we write the necessary interface. Add two buttons for voting voteUp and voteDown, which respectively will raise or lower the rating of the current joke. We will also add the “Chuck Who?” Button, which we will fill with functionality in the section about web view. In THSViewController + Interface.h we will add declarations of these methods.
THSViewController + Interface.h
#import "THSViewController.h" @interface THSViewController (Interface) - (void)addLabel; - (void)addButtonVoteUp; - (void)addButtonVoteDown; - (void)addButtonChuckWho; @end In THSViewController + Interface.m we implement these methods.
THSViewController + Interface.m
- (void) addButtonVoteUp { UIButton *voteUpButton = [UIButton buttonWithType:UIButtonTypeSystem]; [voteUpButton setTitle:@"Vote Up" forState:UIControlStateNormal]; CGFloat x = self.view.frame.size.width / 2.0 - 50.0f; CGFloat y = self.view.frame.size.height / 2.0 + 0.0f; voteUpButton.frame = CGRectMake(x, y, 100.0f, 50.0f); [voteUpButton addTarget:self action:@selector(voteUp) forControlEvents:UIControlEventTouchUpInside]; [self.view addSubview:voteUpButton]; } -(void) addButtonVoteDown { UIButton *voteDownButton = [UIButton buttonWithType:UIButtonTypeSystem]; [voteDownButton setTitle:@"Vote Down" forState:UIControlStateNormal]; CGFloat x = self.view.frame.size.width / 2.0 - 50.0f; CGFloat y = self.view.frame.size.height / 2.0 + 50.0f; voteDownButton.frame = CGRectMake(x, y, 100.0f, 50.0f); [voteDownButton addTarget:self action:@selector(voteDown) forControlEvents:UIControlEventTouchUpInside]; [self.view addSubview:voteDownButton]; } - (void)addButtonChuckWho { UIButton *chuckWhoButton = [UIButton buttonWithType:UIButtonTypeSystem]; [chuckWhoButton setTitle:@"Chuck Who?" forState:UIControlStateNormal]; CGFloat x = self.view.frame.size.width / 2.0 - 50.0f; CGFloat y = self.view.frame.size.height / 2.0 + 150.0f; chuckWhoButton.frame = CGRectMake(x, y, 100.0f, 50.0f); [chuckWhoButton addTarget:self action:@selector(chuckWho) forControlEvents:UIControlEventTouchUpInside]; [self.view addSubview:chuckWhoButton]; } In THSViewController.h we add action declarations for these buttons. voteUp for addButtonVoteUp, voteDown for addButtonVoteDown and chuckWho for addButtonChuckWho.
THSViewController.h
#import <UIKit/UIKit.h> @interface THSViewController : UIViewController @property (nonatomic, strong) UILabel *jokeLabel; - (void)voteUp; - (void)voteDown; - (void)chuckWho; @end In THSViewController.m add stubs of these methods.
THSViewController.m
- (void)voteUp { } - (void)voteDown { } - (void)chuckWho { } Finally, in the viewDidLoad method of THSViewController.m, we call methods that implement our interface.
THSViewController.m
- (void)viewDidLoad { [super viewDidLoad]; [self addLabel]; [self addButtonVoteUp]; [self addButtonVoteDown]; [self addButtonChuckWho]; [self retrieveRandomJokes]; } We start our application and see the interface as in Fig. one
Pic.1 Interface of our application with added voting buttons
Now we implement the necessary functionality.
First, we implement the functionality for making POST requests in the class responsible for all our HTTP operations: THSHTTPCommunication class. To do this, we will add a new postURL: params: successBlock method to THSHTTPCommunication.m, which is similar to the previous retrieveURL: successBlock method.
THSHTTPCommunication.m
- (void)postURL:(NSURL *)url params:(NSDictionary *)params successBlock:(void(^)(NSData *))successBlock { self.successBlock = successBlock; // POST NSMutableArray *paramsArray = [NSMutableArray arrayWithCapacity:[params count]]; // key=value for (NSString *key in params) { [paramsArray addObject:[NSString stringWithFormat:@"%@=%@", key, params[key]]]; } // , , & NSString *postBodyString = [paramsArray componentsJoinedByString:@"&"]; // NSString NSData , NSData *postBodyData = [NSData dataWithBytes:[postBodyString UTF8String] length:[postBodyString length]]; NSMutableURLRequest *request = [[NSMutableURLRequest alloc] initWithURL:url]; // POST [request setHTTPMethod:@"POST"]; // content-type form encoded [request setValue:@"application/x-www-form-urlencoded" forHTTPHeaderField:@"content-type"]; // POST [request setHTTPBody:postBodyData]; NSURLSessionConfiguration *conf = [NSURLSessionConfiguration defaultSessionConfiguration]; NSURLSession *session = [NSURLSession sessionWithConfiguration:conf delegate:self delegateQueue:nil]; NSURLSessionDownloadTask *task = [session downloadTaskWithRequest:request]; [task resume]; } POST request data can be structured using different formats. Parameters are usually formatted in accordance with the form-url-coding standards (in accordance with the W3C HTML standard). This format is default and is widely used in many browsers. Our method takes an NSDictionary as an argument, but we cannot send an NSDictionary over an HTTP connection, because it is an internal Objective-C type. To send over an HTTP connection, we need to create a recognizable dictionary representation. It is like communicating with a foreigner. We translate our message into a universal language, and it translates from a universal language into its native language as shown in Fig. 2. The universal language in HTTP is the W3C standard, our language is Objective-C, the language of the recipient is unknown to us.
The W3C standard defines rules that define what a recognizable representation means for each case. In our case, we need to provide the parameters following the form-url-coded part of the standard (for example, param1 = var1¶m2 = var2).
Fig.2 Message Metaphor
Let's return to our method and see how you can translate all of the above into code. First, we will create an array containing all the key-value pairs, which we then connect using &. The resulting string converted to an instance of the NSData class is what we send to the server responsible for storing the vote. To perform a POST request using an instance of the NSURLRequest class, we will set the HTTPMethod to POST in the same way as the content-type.
We need to make this method available in order to use it in the THSViewController class.
THSHTTPCommunication.h
@interface THSHTTPCommunication : NSObject <NSURLSessionDownloadDelegate> - (void)retrieveURL:(NSURL *)url successBlock:(void(^)(NSData *))successBlock; - (void)postURL:(NSURL *)url params:(NSDictionary *)params successBlock:(void(^)(NSData *))successBlock; @end Now the THSHTTPCommunication class includes a method for performing a POST request, we need to call it from the main THSViewController. It is time to implement the methods of raising or lowering the rating, as shown in the following listing.
THSViewController.m
- (void)voteUp { NSURL *url = [NSURL URLWithString:@"http://example.com/rater/vote"]; THSHTTPCommunication *http = [[THSHTTPCommunication alloc] init]; NSDictionary *params = @{@"joke_id":jokeID, @"vote":@(1)}; [http postURL:url params:params successBlock:^(NSData *response) { NSLog(@"Voted Up"); }]; } - (void)voteDown { NSURL *url = [NSURL URLWithString:@"http://example.com/rater/vote"]; THSHTTPCommunication *http = [[THSHTTPCommunication alloc] init]; NSDictionary *params = @{@"joke_id":jokeID, @"vote":@(-1)}; [http postURL:url params:params successBlock:^(NSData *response) { NSLog(@"Voted Down"); }]; } Create an NSURL object with a url, which will be used in the request. Create a THSHTTPCommunication object. We define the parameters for the request. Make a POST request and set the successBlock callback.
These functions are very similar to each other. First, we define the full URL that we will use for the request, and then create an instance of the THSHTTPCommunication class. We did the same thing before the GET request. Now we create an NSDictionary for storing parameters. We translate these parameters into the previously studied format (for example, joke_id = & vote = 1) in order to be able to include them in the POST request. As we saw earlier, the method responsible for this transformation is postURL: params: successBlock from an instance of the THSHTTPCommunication class. And make the request by calling this method.
We launch our application and check that when voting for a joke or against it, the console displays messages:
2015-11-08 14:51:20.724 Test[1248:80442] Voted Up
or
2015-11-08 14:51:57.896 Test[1273:81833] Voted Down
indicating a successful POST request to the server.
We wrote an application to get jokes using the icndb API and the HTTP verb GET. We were able to show these jokes on UIView and every joke can be appreciated. These actions send a POST request to the remote server, which should save our evaluation.
Using web views to display remote pages
We learned to make requests to a remote server. This is what browsers do before displaying a web page. The only difference is in the content of the answer. Web pages are formatted using the HTML standard, which defines a set of rules on how to graphically define various markup tags. These rules seem simple, but displaying the whole page, following the W3C standard is a complex task. Fortunately, iOS has a built-in UIWebView component that uses the well-known WebKit engine and interprets HTML / CSS / JavaScript and displays entire web pages within UIView.
Let's return to our application. We will add a webView to display the Wake page on Chuck Norris. She gets tangled by pressing a button.
First, create the THSWebViewController class, which is a subclass of UIViewController.
THSWebViewController.h
#import <UIKit/UIKit.h> @interface THSWebViewController : UIViewController @property (nonatomic, strong) UIWebView *webView; - (void)dismissView; // - (void)back; // - (void)forward; // @end THSWebViewController.m
#import "THSWebViewController.h" #import "THSWebViewController+Interface.h" @interface THSWebViewController () @end @implementation THSWebViewController - (void)viewDidLoad { [super viewDidLoad]; [self addWebView]; [self addNavBar]; [self addTabBar]; } - (void)dismissView { // } - (void)back { // } - (void)forward { // } @end Create a category THSWebViewController + Interface, into which we brought the code to implement the web view interface:
THSWebViewController + Interface.h
#import "THSWebViewController.h" @interface THSWebViewController (Interface) - (void)addWebView; - (void)addNavBar; - (void)addTabBar; @end THSWebViewController + Interface.m
#import "THSWebViewController+Interface.h" @implementation THSWebViewController (Interface) - (void)addWebView { self.webView = [[UIWebView alloc] initWithFrame:self.view.frame]; [self.view addSubview:self.webView]; } - (void)addNavBar { CGFloat width = self.view.frame.size.width; CGRect frame = CGRectMake(0.0f, 0.0f, width, 64.0f); UINavigationBar *navBar = [[UINavigationBar alloc] initWithFrame:frame]; self.navigationItem.title = @"Chuck Norris"; [navBar pushNavigationItem:self.navigationItem animated:NO]; self.navigationItem.leftBarButtonItem = [[UIBarButtonItem alloc] initWithTitle:@"Back" style:UIBarButtonItemStylePlain target:self action:@selector(dismissView)]; [self.view addSubview:navBar]; } - (void)addTabBar { CGFloat width = self.view.frame.size.width; CGRect frame = CGRectMake(0.0f, self.view.frame.size.height - 44.0f, width, 44.0f); UIToolbar *toolBar = [[UIToolbar alloc] initWithFrame:frame]; frame = CGRectMake(0.0f, 0.0f, 50.0f, 30.0f); UIBarButtonItem *backBtn = [[UIBarButtonItem alloc] initWithTitle:@"<" style:UIBarButtonItemStylePlain target:self action:@selector(back)]; UIBarButtonItem *forwardBtn = [[UIBarButtonItem alloc] initWithTitle:@">" style:UIBarButtonItemStylePlain target:self action:@selector(forward)]; [toolBar setItems:@[backBtn, forwardBtn]]; [self.view addSubview:toolBar]; } @end Now in THSViewController.m we add the implementation of the chuckWho method, the declaration of which we made earlier. Do not forget to also import the THSWebViewController.h file.
THSViewController.m
#import "THSViewController.h" #import "THSViewController+Interface.h" #import "THSHTTPCommunication.h" #import "THSWebViewController.h" … - (void)chuckWho { THSWebViewController *webViewController = [[THSWebViewController alloc] init]; [self presentViewController:webViewController animated:YES completion:nil]; } Now, when clicking on the Chuck Who button, we see an empty web view as in Fig.3.
Fig.3. Empty web view in modal window
We fill it with functionality. To do this, add the following code to the viewDidLoad class THSWebViewController.
THSWebViewController.m
- (void)viewDidLoad { [super viewDidLoad]; [self addWebView]; [self addNavBar]; [self addTabBar]; // NSURLRequest URL NSURLRequest *request = [NSURLRequest requestWithURL: [NSURL URLWithString:@"http://en.wikipedia.org/wiki/Chuck_Norris"]]; // webView [self.webView loadRequest:request]; } As before, we created an NSURLRequest object, but instead of sending a request using NSURLSession, we use the loadRequest method of the UIWebView class, which does all the work for us.
Finally, it remains to implement the functional methods dismissView, back and forward.
THSWebViewController.m
- (void)dismissView { // webView , close [self dismissViewControllerAnimated:YES completion:nil]; } - (void)back { // , back [self.webView goBack]; } - (void)forward { // , forward [self.webView goForward]; } Now that everything is complete, it is important to know a few more things about UIWebView.
There are several cases where you want to control the flow of navigation. For example, you want to know when certain content or a specific URL is loaded.
Or maybe you are implementing a safe browser for children, you want to block the user from loading pages that fall under certain criteria, like sex or drugs. For all these types of customization, you create an instance of a class that implements the UIWebViewDelegate protocol as a delegate to the UIWebView. You can implement the following methods:
webView:shouldStartLoadWithRequest:navigationType:
webViewDidStartLoad:
webViewDidFinishLoad:
webView:didFailLoadWithError:
With the first method, you can control the flow of navigation by allowing or blocking specific requests. The other three methods are informational events (method names will give you a good idea of the event).
That's all! Fig. 4 demonstrates how the web view should look like in your application.
Fig. 4. The final view of our web view
Source: https://habr.com/ru/post/270429/
All Articles