Thinstation Server Overview
When Thinstation switched to the fifth version, it became possible to download the distribution package and install the system for building and distributing download images for thin clients using PXE . This option allows you to deploy a server with TFTP and HTTP services on the local network, plus get a customized Thinstation constructor without Linux configuration skills.
Three years ago, out of curiosity, I took the subject, it was damp and there were a lot of glitches, I decided to take a look at how much the developers have advanced in their desire to make life easier for the project users.
Download the latest build of the Thinstation OS image.
The installation of the axis itself is extremely simple and practically does not depend on the user's skills.
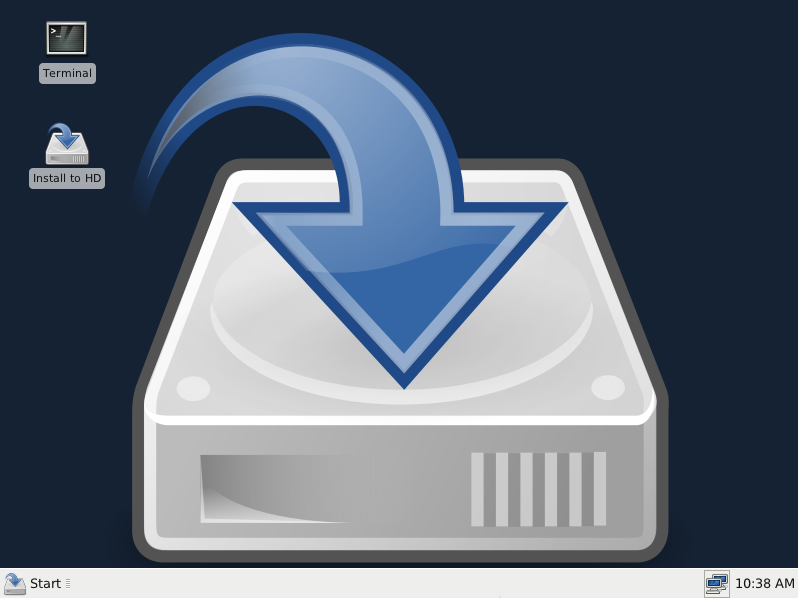
We cut the image to disk, boot from it.
XFCE4 will start from the disk with the main button " Install to HD ", click it.
The installer will offer to select the time zone and localization, promise to save everything on the hard disk, if you agree with this, but there are simply no other options, then the disk configuration will go automatically and the system will start booting from the Thinstation project on sourceforge.net . Approximately 1.5 GB will be downloaded, installation of the system and the TS constructor on the hard drive will begin.
')
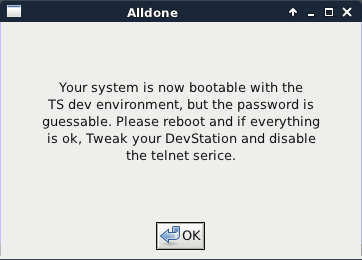
At the end, a pair of information windows will appear:

The first reports the readiness of the station for distributing images on PXE and the path ( not correct , must be boot / pxelinux / pxelinux.0 ), which must be specified in the option ( filename or 67 ) of the DHCP server.
The second one warns you about a simple root password and recommends disabling access to the server via telnet after a reboot.
Then you will be prompted to remove the bootable CD and restart the computer.
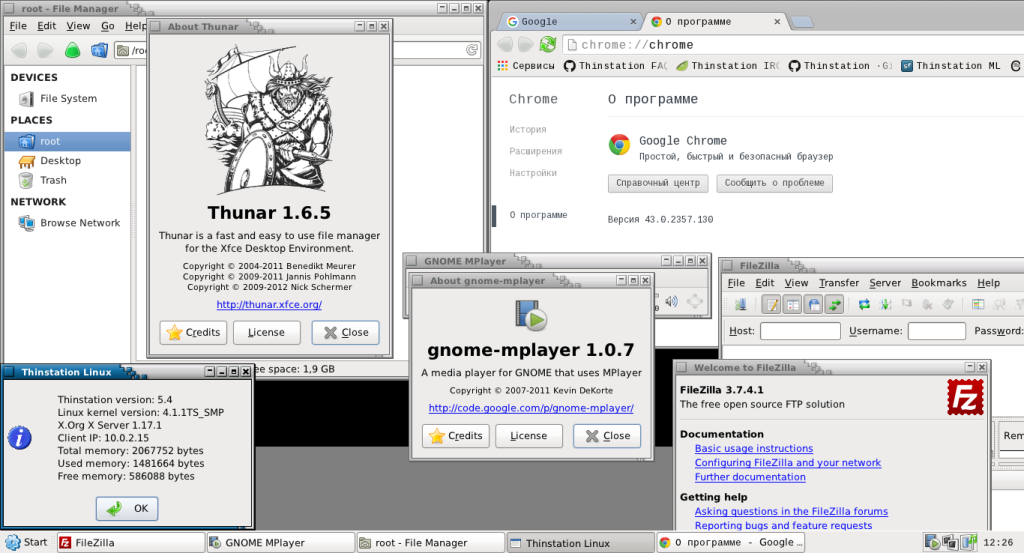
After rebooting, we’ll get a workstation with XFCE4 as a desktop manager and all sorts of useful programs. In Google Chrome, to make life easier, links to the mailing list, home page, Thinstation FAQ and to the local PXE distribution file have already been placed on the bookmarks bar:
In the menu the minimum set of settings and programs:
Well, the most necessary section of the menu:
Top down:
All usable, critical glitches during the tests have been identified. The best option for those who can not or do not want to bother with the settings of the Linux server, but wants to use thin clients with Thinstation. To use of course, you still need to figure out how to configure TS , but this is “only” two configuration files.
As expected, no gui was ever invented to configure the image assembly, everything is configured in a text editor.
After installation, we get a fully functional Thinstation network boot server, and support for downloading images and configuration files via TFTP and HTTP.
A few notes:
Well, as it were, and looked at ... :-)
Three years ago, out of curiosity, I took the subject, it was damp and there were a lot of glitches, I decided to take a look at how much the developers have advanced in their desire to make life easier for the project users.
Download the latest build of the Thinstation OS image.
The installation of the axis itself is extremely simple and practically does not depend on the user's skills.
We cut the image to disk, boot from it.
XFCE4 will start from the disk with the main button " Install to HD ", click it.
The installer will offer to select the time zone and localization, promise to save everything on the hard disk, if you agree with this, but there are simply no other options, then the disk configuration will go automatically and the system will start booting from the Thinstation project on sourceforge.net . Approximately 1.5 GB will be downloaded, installation of the system and the TS constructor on the hard drive will begin.
')
At the end, a pair of information windows will appear:
The first reports the readiness of the station for distributing images on PXE and the path ( not correct , must be boot / pxelinux / pxelinux.0 ), which must be specified in the option ( filename or 67 ) of the DHCP server.
The second one warns you about a simple root password and recommends disabling access to the server via telnet after a reboot.
Then you will be prompted to remove the bootable CD and restart the computer.
After rebooting, we’ll get a workstation with XFCE4 as a desktop manager and all sorts of useful programs. In Google Chrome, to make life easier, links to the mailing list, home page, Thinstation FAQ and to the local PXE distribution file have already been placed on the bookmarks bar:
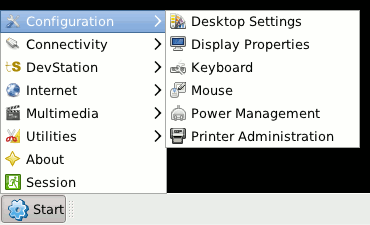
In the menu the minimum set of settings and programs:
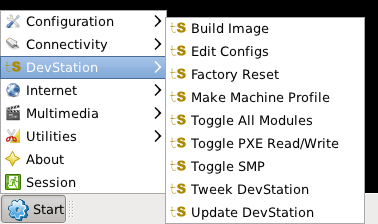
Well, the most necessary section of the menu:
Top down:
- Build Image - starts the build image TS.
- Edit Configs - opens in the text editor file thinstation.conf.sample with explanations of options, build.conf and thinstation.conf.buildtime files for editing the build configuration.
- Factory Reset - resets all build settings to default.
- Make Machine Profile - creates a profile for a specific station, after its loading on an image compiled with the --allmodules option and executing the hwlister.sh command .
- Toggle All Modules - enables / disables the --allmodules option before building .
- Toggle PXE Read / Write - enables / disables writing to a TFTP server, must be enabled when the hwlister.sh command is executed on the client.
- Toggle SMP - enables / disables SMP support in a TS image.
- Tweek DevStation - opens the server configuration file, it disables access to the server via telnet .
- Update DevStation - launches update designer TS.
All usable, critical glitches during the tests have been identified. The best option for those who can not or do not want to bother with the settings of the Linux server, but wants to use thin clients with Thinstation. To use of course, you still need to figure out how to configure TS , but this is “only” two configuration files.
As expected, no gui was ever invented to configure the image assembly, everything is configured in a text editor.
After installation, we get a fully functional Thinstation network boot server, and support for downloading images and configuration files via TFTP and HTTP.
A few notes:
- To download images via HTTP, in the DHCP server options, change the path to the PXE bootloader from boot / pxelinux / pxelinux.0 to boot / lpxelinux / lpxelinux.0 .
- To load the configuration via HTTP, you need to create the /thinstation/build/boot-images/pxe/ts5.4 folder and put the network configs into it, change the variable NET_FILE_METHOD to wget in thinstation.conf.builtime and write your baseurl parameter to build.conf .
- Network Manager does not want to save the static configuration, according to this for the server you need to register the statics in DHCP.
Well, as it were, and looked at ... :-)
Source: https://habr.com/ru/post/270421/
All Articles