Metronome IM and Jappix: a multi-functional Jabber, without difficulty in setting up

What if I tell you how to effortlessly raise my own jabber server with all the newfangled features, such as: archiving, synchronization of messages between clients, read notifications, public chats and much more ...
I will also share with you a wonderful Jabber-client that is no less interesting, it supports audio and video calls, has a good interface and works directly from the browser.
You will get both for free, as both the server and the client are licensed under a free license.
It's about Metronome IM and Jappix .
It is worth taking into account that both projects can work independently of each other, to Metronome IM, you can still connect with any Jabber client, and Jappix can be used for any other Jabber server that supports BOSH.
')

Metronome IM
Author: Marco Cirillo
Site: lightwitch.org/metronome
License: MIT
Written in: Lua
And so, let's start with the server part.
Metronome IM is a Jabber server, fork of the well-known Prosody IM , which was already written on Habré more than once. Unlike Prosody, Metronome was created primarily to support various social features, such as pubsub , user activity , mood , and others, but we are not the ones who are interested in them.
A complete list of all XEPs that work out of the box can be found on this page . Agree, the list is quite impressive!
Among all XEP there are: the Message archive (message archiving), and Carbons (synchronization of messages between clients), and Offline Messages (offline messages) ... For those who do not know, in many other jabber servers, by default, all this works quite mediocre and requires modification file.
In Metronome IM, all XEP work correctly right out of the box and on most Jabber clients.
From practice, I can say that you most likely will no longer have such unpleasant glitches when your message is lost somewhere, duplicated, or displayed in one client, and the other one does not even see it.
Plus, the server is written in lua, it has many modules and a fairly simple to understand configuration.
Also, most of the modules from Prosody IM will do with it after a short dope, but I am sure that you, in most cases, will not even need it.
Installation
By default, Metronome IM is not supplied as ready-made packages, so we will build it from source , you can also install it using Docker
First, let's install the dependencies:
Ubuntu / Debian:
apt-get update apt-get -y install libssl-dev libidn11-dev build-essentials lua5.1 liblua5.1-dev liblua5.1-bitop-dev liblua5.1-expat-dev liblua5.1-event-dev lua5.1-posix-dev lua5.1-sec-dev lua5.1-socket-dev lua5.1-filesystem-dev CentOS:
yum -y install epel-release yum -y install gcc lua-devel openssl-devel libidn-devel lua-expat lua-socket lua-filesystem lua-sec lua-dbi lua-event # Install lua-zlib module curl https://codeload.github.com/brimworks/lua-zlib/tar.gz/v0.4 | tar xzv -C /usr/src/ cd /usr/src/lua-zlib-0.4/ make linux make install # Install lua-bitop module curl http://bitop.luajit.org/download/LuaBitOp-1.0.2.tar.gz | tar xzv -C /usr/src/ cd /usr/src/LuaBitOp-1.0.2 make make install Download the source code, collect and install them:
useradd -r -s /sbin/nologin -d /var/lib/metronome metronome curl -L https://github.com/maranda/metronome/archive/v3.7.tar.gz | tar xz -C /usr/src/ cd /usr/src/metronome* ./configure --prefix=/usr --sysconfdir=/etc/prosody --datadir=/var/lib/prosody --require-config --ostype=debian # --ostype=linux make && make install mkdir /var/log/metronome /var/run/metronome chown metronome: /var/lib/metronome /var/log/metronome /var/run/metronome Create a unit for systemd: /etc/systemd/system/metronome.service
[Unit] Description=XMPP (Jabber) Server After=network.target [Service] Type=forking PIDFile=/run/metronome/metronome.pid ExecStart=/usr/bin/metronomectl start ExecStop=/usr/bin/metronomectl stop [Install] WantedBy=multi-user.target Installation completed
Customization
Download the metronome.cfg.lua config courtesy of the jappix.com service.
After minor edits, I got about this config:
metronome.cfg.lua
-- Prosody XMPP Server Configuration -- -- Information on configuring Prosody can be found on our -- website at http://metronome.im/doc/configure -- -- Tip: You can check that the syntax of this file is correct -- when you have finished by running: metronomectl check config -- If there are any errors, it will let you know what and where -- they are, otherwise it will keep quiet. -- -- Good luck, and happy Jabbering! ---------- Server-wide settings ---------- -- Settings in this section apply to the whole server and are the default settings -- for any virtual hosts -- This is a (by default, empty) list of accounts that are admins -- for the server. Note that you must create the accounts separately -- (see http://metronome.im/doc/creating_accounts for info) -- Example: admins = { "user1@example.com", "user2@example.net" } admins = { } -- Required for init scripts and metronomectl pidfile = "/var/run/metronome/metronome.pid" -- ulimit metronome_max_files_soft = 200000 metronome_max_files_hard = 200000 -- HTTP server http_ports = { 5280 } http_interfaces = { "0.0.0.0", "::" } https_ports = { 5281 } https_interfaces = { "0.0.0.0", "::" } -- Enable IPv6 use_ipv6 = true -- This is the list of modules Prosody will load on startup. -- It looks for mod_modulename.lua in the plugins folder, so make sure that exists too. -- Documentation on modules can be found at: http://metronome.im/doc/modules modules_enabled = { -- Generally required --"roster"; -- Allow users to have a roster. Recommended ;) "saslauth"; -- Authentication for clients and servers. Recommended if you want to log in. "tls"; -- Add support for secure TLS on c2s/s2s connections "dialback"; -- s2s dialback support "disco"; -- Service discovery "extdisco"; -- External Service Discovery -- Not essential, but recommended --"private"; -- Private XML storage (for room bookmarks, etc.) --"vcard"; -- Allow users to set vCards -- These are commented by default as they have a performance impact "compression"; -- Stream compression (requires the lua-zlib package installed) -- Nice to have "version"; -- Replies to server version requests "uptime"; -- Report how long server has been running "time"; -- Let others know the time here on this server "ping"; -- Replies to XMPP pings with pongs --"pep"; -- Enables users to publish their mood, activity, playing music and more --"register"; -- Allow users to register on this server using a client and change passwords -- Admin interfaces "admin_adhoc"; -- Allows administration via an XMPP client that supports ad-hoc commands --"admin_telnet"; -- Opens telnet console interface on localhost port 5582 -- HTTP modules "bosh"; -- Enable BOSH clients, aka "Jabber over HTTP" "websocket"; -- Enable WebSocket clients --"http_files"; -- Serve static files from a directory over HTTP -- Other specific functionality "posix"; -- POSIX functionality, sends server to background, enables syslog, etc. "bidi"; -- Bidirectional Streams for S2S connections "stream_management"; -- Stream Management support --"groups"; -- Shared roster support --"announce"; -- Send announcement to all online users --"welcome"; -- Welcome users who register accounts --"watchregistrations"; -- Alert admins of registrations --"motd"; -- Send a message to users when they log in "legacyauth"; -- Legacy authentication. Only used by some old clients and bots. "log_auth"; } -- These modules are auto-loaded, but should you want -- to disable them then uncomment them here: modules_disabled = { -- "offline"; -- Store offline messages -- "c2s"; -- Handle client connections -- "s2s"; -- Handle server-to-server connections } -- Discovery items disco_items = { { "muc.example.org" }, { "proxy.example.org" }, { "pubsub.example.org" }, { "vjud.example.org" } }; -- External Service Discovery (mod_extdisco) external_services = { ["stun.example.org"] = { [1] = { port = "3478", transport = "udp", type = "stun" }, [2] = { port = "3478", transport = "tcp", type = "stun" } } }; -- Bidirectional Streams configuration (mod_bidi) bidi_exclusion_list = { "jabber.org" } -- BOSH configuration (mod_bosh) bosh_max_inactivity = 30 consider_bosh_secure = true cross_domain_bosh = true -- WebSocket configuration (mod_websockets) consider_websockets_secure = true cross_domain_websockets = true -- Disable account creation by default, for security allow_registration = false -- Ignore priority settings ignore_presence_priority = true -- These are the SSL/TLS-related settings. If you don't want -- to use SSL/TLS, you may comment or remove this ssl = { key = "/etc/metronome/certs/localhost.key"; certificate = "/etc/metronome/certs/localhost.cert"; options = { "no_sslv2", "no_sslv3", "no_ticket", "no_compression", "cipher_server_preference" }; } -- Force clients to use encrypted connections? This option will -- prevent clients from authenticating unless they are using encryption. c2s_require_encryption = true -- Force servers to use encrypted connections? This option will -- prevent servers from connecting unless they are using encryption. s2s_require_encryption = true -- Allow servers to use an unauthenticated encryption channel s2s_allow_encryption = true -- Don't require encryption for listed servers s2s_encryption_exceptions = { "cisco.com", "gmail.com" } -- Logging configuration -- For advanced logging see http://metronome.im/doc/logging log = { info = "/var/log/metronome/metronome.log"; -- Change 'info' to 'debug' for verbose logging error = "/var/log/metronome/metronome.err"; -- "*syslog"; -- Uncomment this for logging to syslog -- "*console"; -- Log to the console, useful for debugging with daemonize=false } activity_log_dir = "/var/log/metronome/activity_log" -- For the "sql" backend, you can uncomment *one* of the below to configure: sql = { driver = "SQLite3", database = "metronome.sqlite" } -- Default. 'database' is the filename. --sql = { driver = "MySQL", database = "metronome", username = "metronome", password = "password", host = "localhost" } --sql = { driver = "PostgreSQL", database = "metronome", username = "metronome", password = "secret", host = "localhost" } ----------- Virtual hosts ----------- -- You need to add a VirtualHost entry for each domain you wish Prosody to serve. -- Settings under each VirtualHost entry apply *only* to that host. VirtualHost "example.org" enabled = true default_storage = "sql" modules_enabled = { -- Generally required "roster"; -- Allow users to have a roster. Recommended ;) -- Not essential, but recommended "private"; -- Private XML storage (for room bookmarks, etc.) "vcard"; -- Allow users to set vCards -- These are commented by default as they have a performance impact "mam"; -- Message Archive Management "privacy"; -- Support privacy lists -- Nice to have "lastactivity"; -- Logs the user last activity timestamp "pep"; -- Enables users to publish their mood, activity, playing music and more "message_carbons"; -- Allow clients to keep in sync with messages send on other resources --"register"; -- Allow users to register on this server using a client and change passwords --"register_redirect"; -- Redirects users registering to the registration form "public_service"; -- Provides some information about the XMPP server --"log_activity"; -- Activity log, module from https://github.com/jappix/jappix-xmppd-modules "groups"; -- Shared groups -- Admin interfaces --"admin_adhoc"; -- Allows administration via an XMPP client that supports ad-hoc commands } groups_file = "/etc/metronome/groups.txt" resources_limit = 10 no_registration_whitelist = true registration_url = "https://example.org/" registration_text = "Please register your account on Jappix itself (open example.org in your Web browser). Then you'll be able to use it anywhere you want." public_service_vcard = { name = "Jappix XMPP service", url = "https://example.org/", foundation_year = "2010", country = "RU", email = "admin@example.org", admin_jid = "admin@example.org", geo = "48.87,2.33", ca = { name = "StartSSL", url = "https://www.startssl.com/" }, oob_registration_uri = "https://example.org/" } VirtualHost "anonymous.example.org" enabled = true authentication = "anonymous" allow_anonymous_multiresourcing = true allow_anonymous_s2s = true anonymous_jid_gentoken = "Jappix Anonymous User" anonymous_randomize_for_trusted_addresses = { "127.0.0.1", "::1" } ------ Components ------ -- You can specify components to add hosts that provide special services, -- like multi-user conferences, and transports. ---Set up a MUC (multi-user chat) room server on muc.example.org: Component "muc.example.org" "muc" name = "Jappix Chatrooms" modules_enabled = { "muc_limits"; "muc_log"; "muc_log_http"; "pastebin"; } muc_event_rate = 0.5 muc_burst_factor = 10 muc_log_http_config = { url_base = "logs"; theme = "metronome"; } pastebin_url = "https://muc.example.org/paste/" pastebin_path = "/paste/" pastebin_expire_after = 0 pastebin_trigger = "!paste" ---Set up a PubSub server Component "pubsub.example.org" "pubsub" name = "Jappix Publish/Subscribe" --unrestricted_node_creation = true -- Anyone can create a PubSub node (from any server) ---Set up a VJUD service Component "vjud.example.org" "vjud" ud_disco_name = "Jappix User Directory" synchronize_to_host_vcards = "example.org" ---Set up a BOSH service ( https://bind.example.org:5281/http-bind ) Component "bind.example.org" "http" modules_enabled = { "bosh" } ---Set up a WebSocket service Component "websocket.example.org" "http" modules_enabled = { "websocket" } ---Set up a BOSH + WebSocket service Component "me.example.org" "http" modules_enabled = { "bosh", "websocket" } ---Set up a statistics service Component "stats.example.org" "http" modules_enabled = { "server_status" } server_status_basepath = "/xmppd/" server_status_show_hosts = { "example.org", "anonymous.example.org" } server_status_show_comps = { "muc.example.org", "proxy.example.org", "pubsub.example.org", "vjud.example.org" } -- Set up a SOCKS5 bytestream proxy for server-proxied file transfers: Component "proxy.example.org" "proxy65" proxy65_acl = { "example.org", "anonymous.example.org" } The config is very well-commented and I do not see much point in leaving additional comments on my part.
Let me just say that if you plan to install jappix or any other web client, then you will need the BOSH component. It is through him that your web client will communicate with your server.
You can learn more about configuring the server and see examples on the official project website .
Do not forget to register the necessary DNS records on our DNS server:
xmpp IN A 1.2.3.4 muc IN CNAME xmpp pubsub IN CNAME xmpp vjud IN CNAME xmpp bind IN CNAME xmpp websocket IN CNAME xmpp me IN CNAME xmpp stats IN CNAME xmpp proxy IN CNAME xmpp anonymous IN CNAME xmpp _xmpp-client._tcp.example.org. IN SRV 0 5 5222 xmpp.example.org. _xmpp-server._tcp.example.org. IN SRV 0 5 5269 xmpp.example.org. We start the service:
systemctl enable metronome systemctl start metronome Check the logs.
If everything is ok, create a user:
prosodyctl adduser me@example.com And try to connect.
Our server is ready!

Jappix
Author: Valérian Saliou, Julien Barrier
Site: jappix.org
License: AGPL
Written in: JavaScript
Demo: jappix.com
As I said, Jappix is a Jabber-client that has a very good interface, supports audio and video calls, also supports most popular XEP and works directly from the browser window.
The client looks like this:
Hidden text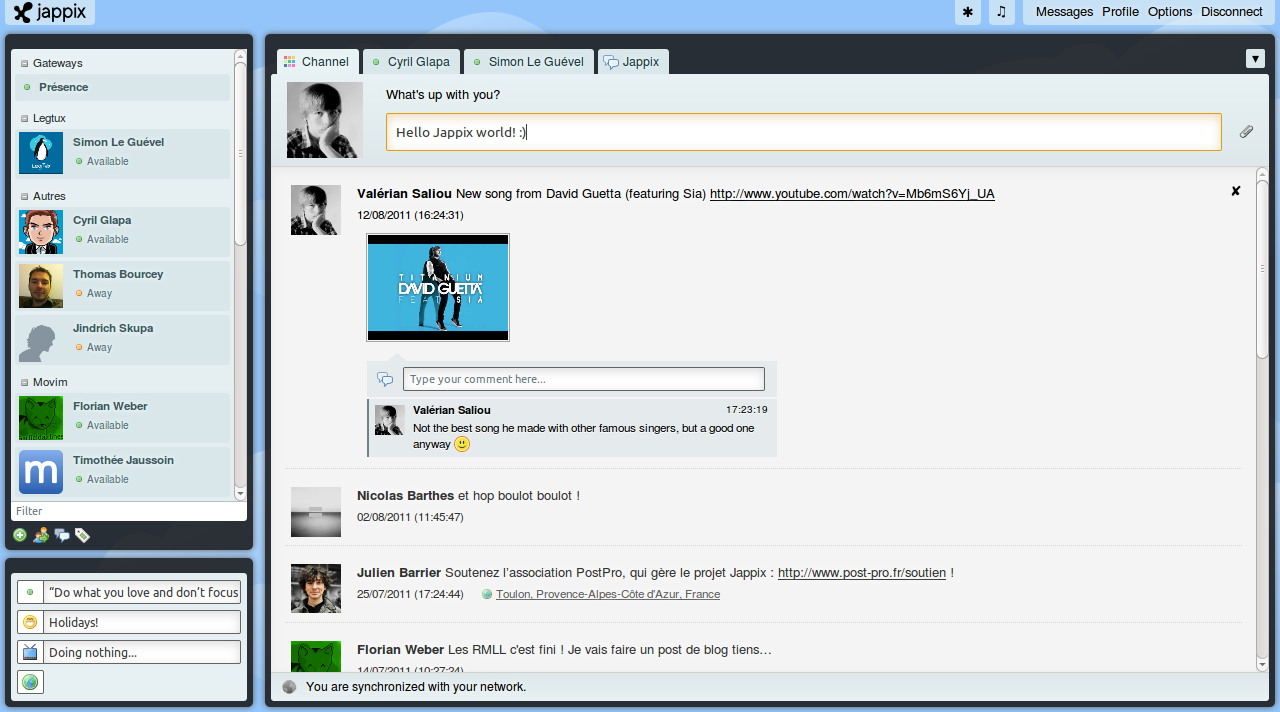
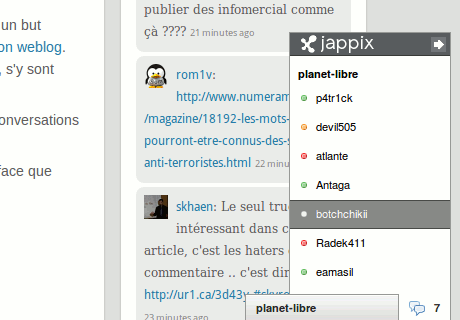
It also has a smaller version, for embedding on the website:
Hidden text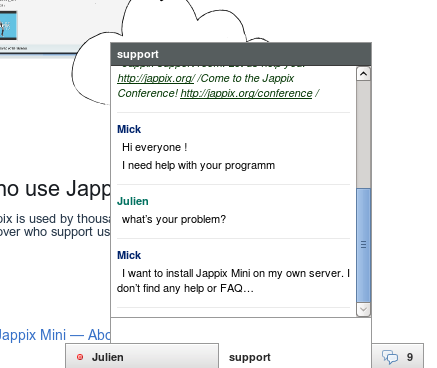
Installation
It's time to install our client.
The installation is not something that is not trivial. All actions boil down to copying the project files to your web server directory. But all of you can also install Jappix using Docker .
And so we will start, we will establish dependences:
Debian / Ubuntu:
apt-get install php5-gd php5-curl CentOS:
yum install php-mbstring Now download jappix-1.1.6-primo.tar.bz2 and unpack it in / var / www
curl -L https://download.jappix.org/1.1.6/jappix-1.1.6-primo.tar.bz2 | tar xvj -C /var/www Let's write a config for our web server, for example for nginx it will look something like this:
jappix.conf
server { listen 80; server_name jappix.example.org; return 301 https://jappix.example.org$request_uri; } server { listen 443 ssl; server_name jappix.example.org; root /var/www/jappix; index index.html index.php; access_log /var/log/nginx/jappix-access.log; error_log /var/log/nginx/jappix-error.log; # Configuration SSL # Support du HSTS (HTTP Strict Transport Security) add_header Strict-Transport-Security "max-age=315360000; includeSubdomains"; # Configuration SSL ssl_certificate /etc/nginx/certificates/common-ssl.cert; ssl_certificate_key /etc/nginx/certificates/common-ssl.key; ssl_protocols TLSv1 TLSv1.1 TLSv1.2; ssl_prefer_server_ciphers on; ssl_ciphers "EECDH+ECDSA+AESGCM EECDH+aRSA+AESGCM EECDH+ECDSA+SHA384 EECDH+ECDSA+SHA256 EECDH+aRSA+SHA384 EECDH+aRSA+SHA256 EECDH EDH+aRSA !RC4 !aNULL !eNULL !LOW !3DES !MD5 !EXP !PSK !SRP !DSS"; location / { try_files $uri $uri/ /index.php?$args; } location ~ \.php$ { try_files $uri =404; fastcgi_index index.php; fastcgi_pass php5-fpm-sock; fastcgi_param SCRIPT_FILENAME $document_root$fastcgi_script_name; include /etc/nginx/fastcgi_params; fastcgi_param PHP_VALUE "upload_max_filesize = 25M \n post_max_size = 25M \n max_execution_time = 600"; } location ~ /(app|i18n|log|test|tmp|tools)/ { deny all; } } + aRSA + AESGCM EECDH + ECDSA + SHA384 EECDH + ECDSA + SHA256 EECDH + aRSA + SHA384 EECDH + aRSA + SHA256 EECDH EDH + aRSA! RC4! aNULL! eNULL! LOW! 3DES! MD5! EXP server { listen 80; server_name jappix.example.org; return 301 https://jappix.example.org$request_uri; } server { listen 443 ssl; server_name jappix.example.org; root /var/www/jappix; index index.html index.php; access_log /var/log/nginx/jappix-access.log; error_log /var/log/nginx/jappix-error.log; # Configuration SSL # Support du HSTS (HTTP Strict Transport Security) add_header Strict-Transport-Security "max-age=315360000; includeSubdomains"; # Configuration SSL ssl_certificate /etc/nginx/certificates/common-ssl.cert; ssl_certificate_key /etc/nginx/certificates/common-ssl.key; ssl_protocols TLSv1 TLSv1.1 TLSv1.2; ssl_prefer_server_ciphers on; ssl_ciphers "EECDH+ECDSA+AESGCM EECDH+aRSA+AESGCM EECDH+ECDSA+SHA384 EECDH+ECDSA+SHA256 EECDH+aRSA+SHA384 EECDH+aRSA+SHA256 EECDH EDH+aRSA !RC4 !aNULL !eNULL !LOW !3DES !MD5 !EXP !PSK !SRP !DSS"; location / { try_files $uri $uri/ /index.php?$args; } location ~ \.php$ { try_files $uri =404; fastcgi_index index.php; fastcgi_pass php5-fpm-sock; fastcgi_param SCRIPT_FILENAME $document_root$fastcgi_script_name; include /etc/nginx/fastcgi_params; fastcgi_param PHP_VALUE "upload_max_filesize = 25M \n post_max_size = 25M \n max_execution_time = 600"; } location ~ /(app|i18n|log|test|tmp|tools)/ { deny all; } } Restart the web server.
More information about the installation can be found in the official project wiki .
Customization
Jappix has a graphical installer. Go to the link:
https://jappix.example.org/?m=install We create an administrator, answer other questions, enter addresses to our server.
This is what the server settings bug looks like:
Hidden text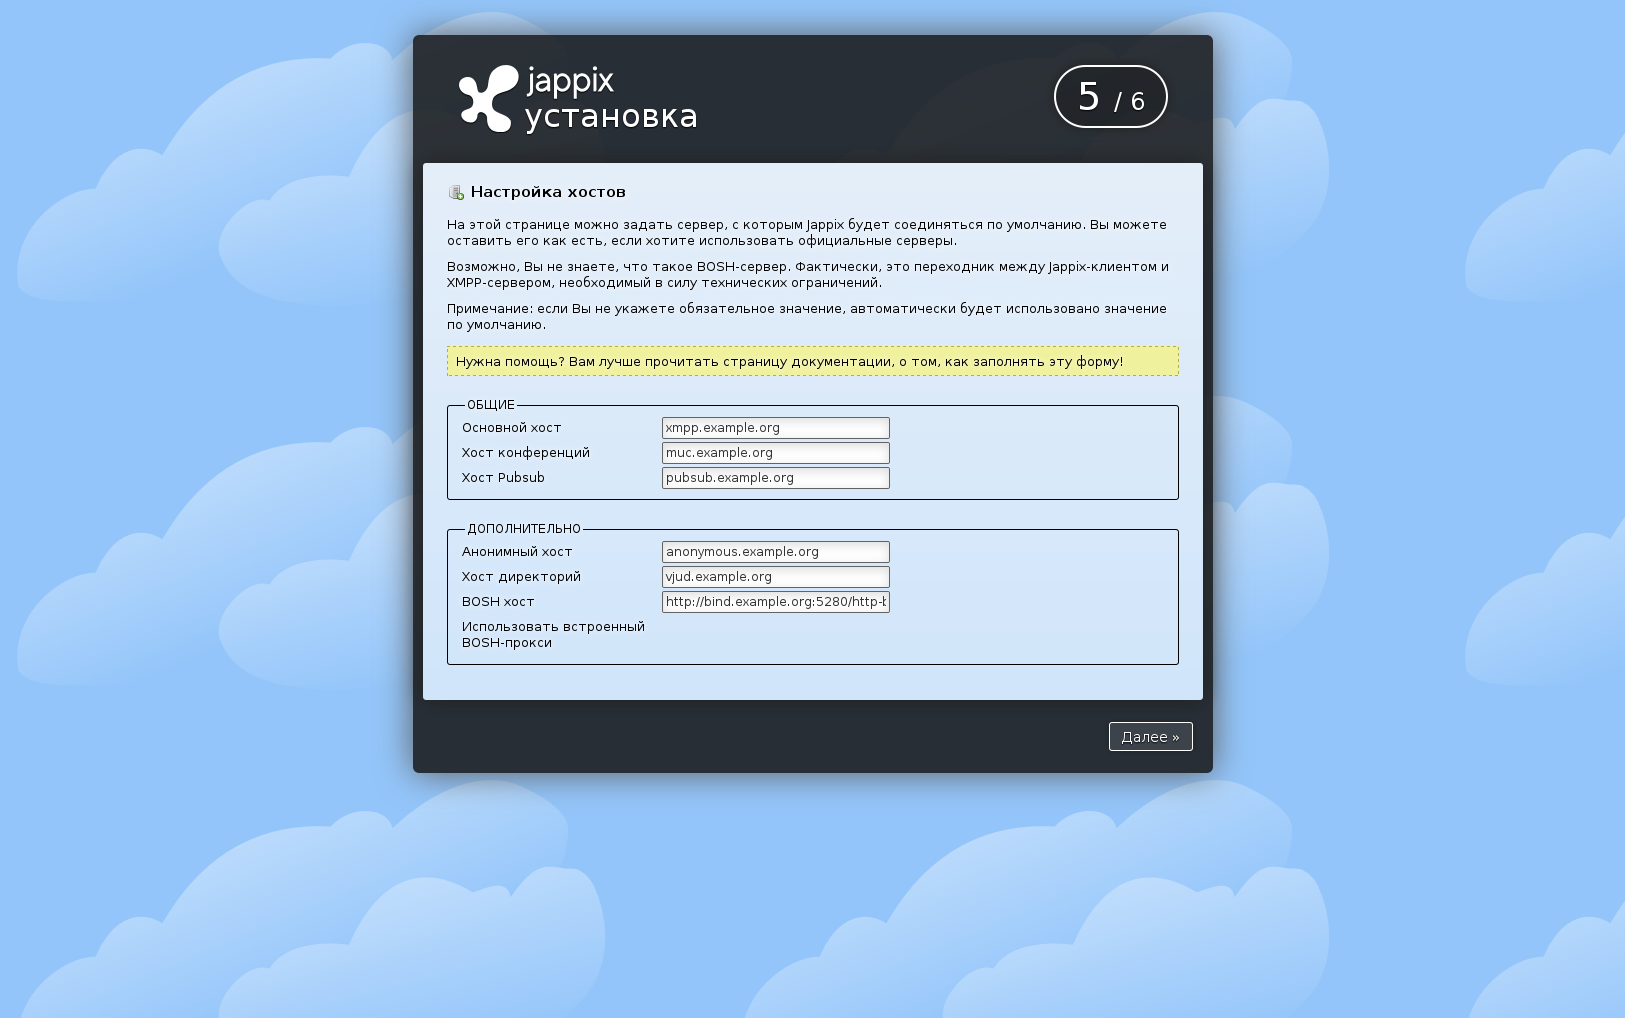
When the installation is complete, you will be transferred to the login window.
Hidden text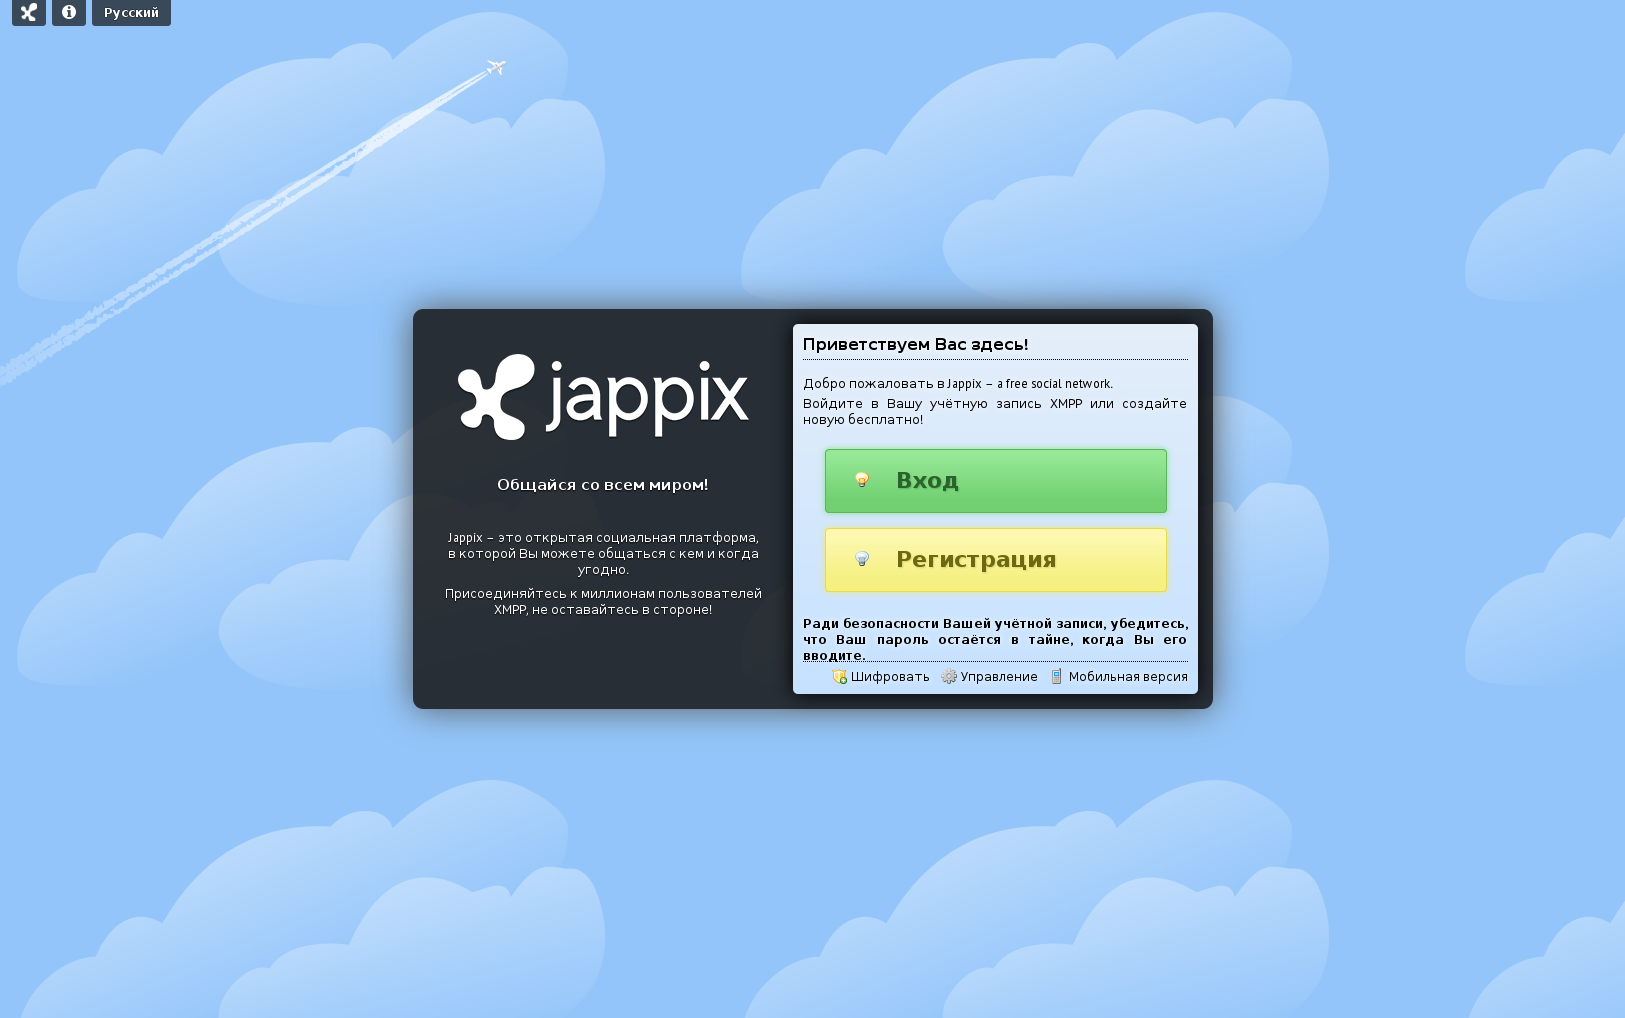
In the future, you can get into the admin area at the following link:
https://jappix.example.org/?m=manager Let's Encrypt
A couple of words about certificates.
Leaving a server with self-signed certificates is not good, you need to install at least free.
We have done quite a lot of subdomains, so one free certificate is not enough for everyone, and it will be quite expensive to get a separate one for each. There is a way out - this is Let's Encrypt.
On Habré MalcolmReynolds already described the procedure for obtaining certificates from Let's Encrypt.
There are also a couple of cool articles on DigitalOcean - nginx , apache
But, if you use Docker, then I suggest you try my image: kvaps / letsencrypt-webroot
Thank you for attention!
Source: https://habr.com/ru/post/270207/
All Articles