Run iOS applications from the console on the device and simulator
The article will briefly describe how to build an application with console commands and run on a real device and simulator without any need to open xcode for this.
In general, it is worth starting with the fact that in my company there is a development ios department consisting of> 10 people who work on a pack of applications. To automate routine work, we had to deploy a CI server (for the time being, samopisny, due to special historical reasons (well, like everyone else), migration to jenkins is planned). I refer to routine things as assembling projects, running tests (unless, of course, you write them), creating ipashki for testers and for laying out in the app store. In general, I wanted it all to start working by clicking a button or a hook in a gita. As long as everything works for us at the press of a button by the developer, about git so far only in the plans. In this article I will only touch on the topic of compiling the project and packing it into an ipa file. The functionality of launching projects on devices on the side of the CI server is still under development, but the packaging process itself has been in a “battle” for a long time, which can be useful.
What we plan:
')
We have:
For the frequency of the experiment, we will use a third-party application so that dear readers can repeat what is described in the article. We use the test application for the ResearchKit open-source Apple framework.
Before compiling the project, you must install the apple doc generator github.com/tomaz/appledoc (there is a description of how to install).
Go to the downloaded project. The root project is the ResearchKit framework itself, the test application itself is in a different place, we go there:
We try to compile the application. We are going to be a simulator, since for building a project for a simulator, no certificates / provisioning files are needed.
We get the error:

Build falls, because there is no ORKCatalog scheme. Since the scheme in the original project was not marked as shared, after the “drain” from the gita, xcode still does not know anything about this scheme, so that it bullies, you just need to open the project. Therefore, simply open the project:
And immediately close, after our scheme appears, you can check the schemes through xcodebuild -list . We try to collect again:
After seeing the long-awaited ** BUILD SUCCEEDED ** . Great, it works.
We compile under the simulator, architectures can be i386 / x86_64. Through SYMROOT we set the path to the result of the assembly:
(Thoughts out loud: when I wrote the article, the compilation in the Release mode worked, before publishing the article I checked all the steps again and the compilation in this mode stopped working, so we are going to Debug, some of the recent commits broke it.)
After a successful build, we received the ORKCatalog.app file in build / Debug-iphonesimulator / . It remains to run it on the simulator. For this we will use the ios-sim utility github.com/phonegap/ios-sim . To use it is quite simple.
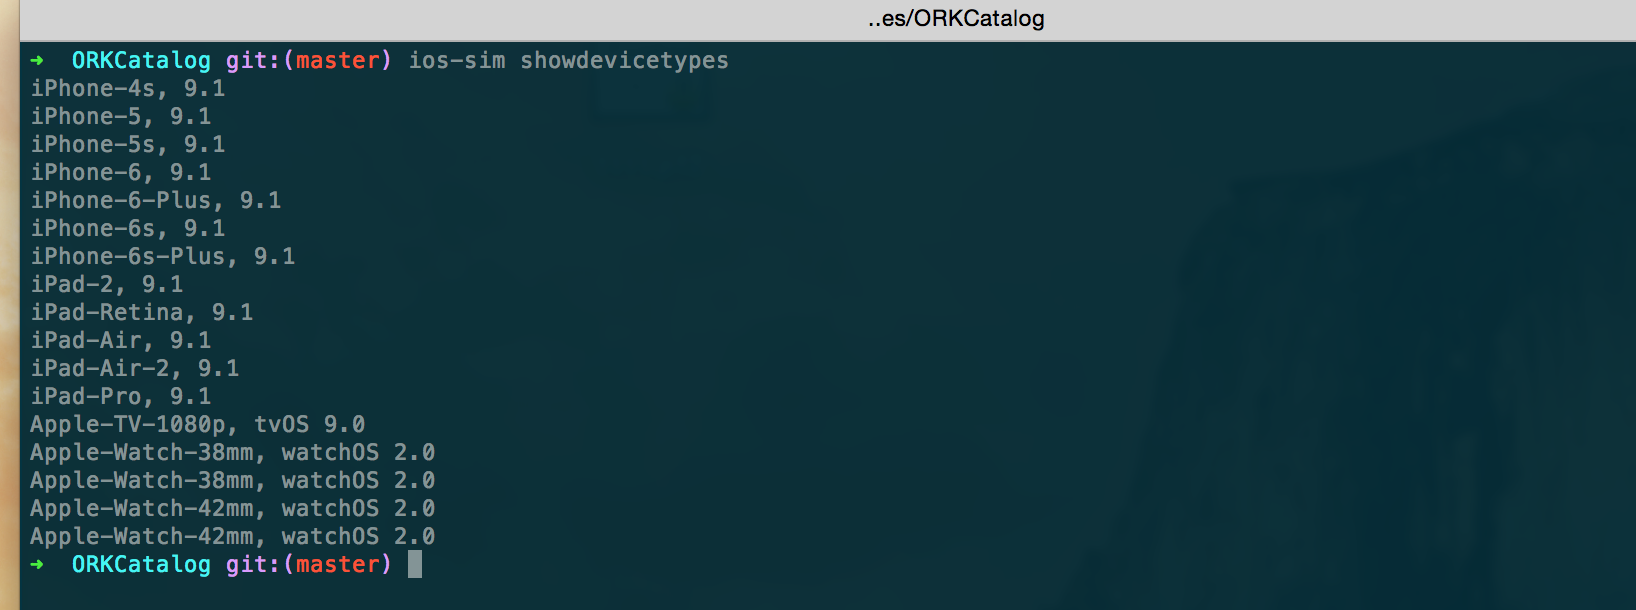
Get the list of available simulators:
From the list, I chose the 'iPhone-6-Plus'. Run the application on it:
If everything is done correctly, then the simulator with the application should start (to enter input mode in the console, use ctrl + C).

It's a bit more complicated here, we need a mobileprovision file for development (developer) and the presence of a certificate on the machine (p12 file), and you don't need an xcode account. When signing / packaging applications from the console, there is no need to add an account in xcode, it helps a lot, for example, you can keep only p12 files on a CI server.
We assume that your machine has the appropriate certificate. After we generate the developer mobileprovision through developer.apple.com in your account and download it to the machine (we give it the name test.mobileprovision, and the bundle id will be ru.habrahabr.test). After copying it to the directory where xcode can pick it up:
Putting the archive under the device (this is the architecture of arm64 / armv7):
The compilation will fall, since we have not yet registered our bundle id in the application and have not linked mobileprovision, the error will be the following:

We will transfer the bundle id from the console + you need to register it in the Info.plist file. Also, via the console, we will transmit a link to our mobileprovision. Plist file is found on the path ORKCatalog / Supporting Files / Info.plist, in which for the key CFBundleIdentifier set the value ru.habrahabr.test. Bundle id is passed through the key with the value of our id PRODUCT_BUNDLE_IDENTIFIER = ru.habrahabr.test. The link to the mobileprovision is transmitted via the PROVISIONIG_PROFILE key, with the UUID value, which is registered in the mobileprovision.
We get UUID:
The value will be similar to 87b0df89-793a-4a0f-92bf-c5f9c35f1405 . Again, collect:
As a result, we get the archive build / archive.xcarchive , which remains to be packaged in ipa. In xcode 7, a new packaging method has appeared, and we will use it. Before this we create a config file options.plist with the following content:
We try to collect ipa:
The assembly falls, according to the logs, you can understand that something with the entitlements:

By mistake, it is clear that the application is signing entitlements, the values in which do not correspond to the values in our mobileprovision, namely com.apple.developer.healthkit . We are looking for the cause. We look at how the entitlements are signed by the application:
We get:
We see that everything is OK, except for this:
We don’t have this option in mobileprovision, we need to figure out where it came from:
Search gave us ORKCatalog / Supporitng Files / ORKCatalog.entitlements . See what's inside:
There is only one value:
Logically, you need to reload mobileprovision, to which you need to add this value, but we are lazy and for the test it is not necessary, we just need to re-sign the application with entitlements without this value.
We have at least two options:
1. Simply edit the existing entitlements (ORKCatalog / Supporitng Files / ORKCatalog.entitlements) and reassemble again (via archive).
2. Without rebuilding, we rewrite ORKCatalog.app ourselves with the necessary entitlements.
Choose the first option as more simple. Therefore, from the ORKCatalog / Supporitng Files / ORKCatalog.entitlements file, simply delete the lines:
and rebuild the archive again:
After creating ipa:
We see the long-awaited message ** EXPORT SUCCEEDED ** . Under the build / dev-ipa / ipa file will appear, which we will install on the device. We will install on the device using ios-deploy github.com/phonegap/ios-deploy . We cling the device to the machine, we get the device id through:
Deploy to device:
Everything is the same as for the develop version, just change the link to the release mobileprovision, in the options.plist instead of development we put down the app-store (for other options you can add, see the xcodebuild -help help).
Without using xcode, I could collect ipa files for tests and for display in the app store. All this can be easily automated on the CI server to make life easier for developers.
PS: It is worth noting that for the process of compiling / signing applications with a complex structure, when several targets and each require their own separate mobileprovision file (applications with extension, clock, embedded framework), the above described process will not work without a file.
In general, it is worth starting with the fact that in my company there is a development ios department consisting of> 10 people who work on a pack of applications. To automate routine work, we had to deploy a CI server (for the time being, samopisny, due to special historical reasons (well, like everyone else), migration to jenkins is planned). I refer to routine things as assembling projects, running tests (unless, of course, you write them), creating ipashki for testers and for laying out in the app store. In general, I wanted it all to start working by clicking a button or a hook in a gita. As long as everything works for us at the press of a button by the developer, about git so far only in the plans. In this article I will only touch on the topic of compiling the project and packing it into an ipa file. The functionality of launching projects on devices on the side of the CI server is still under development, but the packaging process itself has been in a “battle” for a long time, which can be useful.
What we plan:
')
- build the application and run on the simulator
- let's collect ipa and run it on a real device
- let's collect ipa for the calculation on a market
- a little sub-build error
We have:
- OS X 10.10.5
- Xcode 7.1
For the frequency of the experiment, we will use a third-party application so that dear readers can repeat what is described in the article. We use the test application for the ResearchKit open-source Apple framework.
git clone https://github.com/ResearchKit/ResearchKit.git ~/Downloads/researchkit cd ~/Downloads/researchkit Before compiling the project, you must install the apple doc generator github.com/tomaz/appledoc (there is a description of how to install).
Go to the downloaded project. The root project is the ResearchKit framework itself, the test application itself is in a different place, we go there:
cd samples/ORKCatalog/ We try to compile the application. We are going to be a simulator, since for building a project for a simulator, no certificates / provisioning files are needed.
xcodebuild -project ORKCatalog.xcodeproj -scheme ORKCatalog -arch x86_64 VALID_ARCHS=x86_64 -sdk iphonesimulator We get the error:
Build falls, because there is no ORKCatalog scheme. Since the scheme in the original project was not marked as shared, after the “drain” from the gita, xcode still does not know anything about this scheme, so that it bullies, you just need to open the project. Therefore, simply open the project:
open ORKCatalog.xcodeproj And immediately close, after our scheme appears, you can check the schemes through xcodebuild -list . We try to collect again:
xcodebuild -project ORKCatalog.xcodeproj -scheme ORKCatalog -arch x86_64 VALID_ARCHS=x86_64 -sdk iphonesimulator After seeing the long-awaited ** BUILD SUCCEEDED ** . Great, it works.
Run the project on the simulator
We compile under the simulator, architectures can be i386 / x86_64. Through SYMROOT we set the path to the result of the assembly:
xcodebuild -project ORKCatalog.xcodeproj -scheme ORKCatalog ARCHS='x86_64 i386' VALID_ARCHS='x86_64 i386' -sdk iphonesimulator -configuration Debug SYMROOT=$(pwd)/build build (Thoughts out loud: when I wrote the article, the compilation in the Release mode worked, before publishing the article I checked all the steps again and the compilation in this mode stopped working, so we are going to Debug, some of the recent commits broke it.)
After a successful build, we received the ORKCatalog.app file in build / Debug-iphonesimulator / . It remains to run it on the simulator. For this we will use the ios-sim utility github.com/phonegap/ios-sim . To use it is quite simple.
Get the list of available simulators:
ios-sim showdevicetypes From the list, I chose the 'iPhone-6-Plus'. Run the application on it:
ios-sim --devicetypeid iPhone-6-Plus launch build/Debug-iphonesimulator/ORKCatalog.app If everything is done correctly, then the simulator with the application should start (to enter input mode in the console, use ctrl + C).
Creating an ipa file and running on a real device
It's a bit more complicated here, we need a mobileprovision file for development (developer) and the presence of a certificate on the machine (p12 file), and you don't need an xcode account. When signing / packaging applications from the console, there is no need to add an account in xcode, it helps a lot, for example, you can keep only p12 files on a CI server.
We assume that your machine has the appropriate certificate. After we generate the developer mobileprovision through developer.apple.com in your account and download it to the machine (we give it the name test.mobileprovision, and the bundle id will be ru.habrahabr.test). After copying it to the directory where xcode can pick it up:
cp test.mobileprovision ~/Library/MobileDevice/Provisioning Profiles/ Putting the archive under the device (this is the architecture of arm64 / armv7):
xcodebuild -project ORKCatalog.xcodeproj -scheme ORKCatalog ARCHS='arm64 armv7' VALID_ARCHS='arm64 armv7' -sdk iphoneos -configuration Debug archive -archivePath build/archive The compilation will fall, since we have not yet registered our bundle id in the application and have not linked mobileprovision, the error will be the following:
We will transfer the bundle id from the console + you need to register it in the Info.plist file. Also, via the console, we will transmit a link to our mobileprovision. Plist file is found on the path ORKCatalog / Supporting Files / Info.plist, in which for the key CFBundleIdentifier set the value ru.habrahabr.test. Bundle id is passed through the key with the value of our id PRODUCT_BUNDLE_IDENTIFIER = ru.habrahabr.test. The link to the mobileprovision is transmitted via the PROVISIONIG_PROFILE key, with the UUID value, which is registered in the mobileprovision.
We get UUID:
security cms -D -i test.mobileprovision | grep -o "\w\{8\}-\w\{4\}-\w\{4\}-\w\{4\}-\w\{12\}" The value will be similar to 87b0df89-793a-4a0f-92bf-c5f9c35f1405 . Again, collect:
xcodebuild -project ORKCatalog.xcodeproj -scheme ORKCatalog ARCHS='arm64 armv7' VALID_ARCHS='arm64 armv7' -sdk iphoneos -configuration Debug archive -archivePath build/archive PRODUCT_BUNDLE_IDENTIFIER=ru.habrahabr.test PROVISIONING_PROFILE=87b0df89-793a-4a0f-92bf-c5f9c35f1405 As a result, we get the archive build / archive.xcarchive , which remains to be packaged in ipa. In xcode 7, a new packaging method has appeared, and we will use it. Before this we create a config file options.plist with the following content:
<?xml version="1.0" encoding="UTF-8"?> <!DOCTYPE plist PUBLIC "-//Apple//DTD PLIST 1.0//EN" "http://www.apple.com/DTDs/PropertyList-1.0.dtd"> <plist version="1.0"> <dict> <key>method</key> <string>development</string> <key>uploadSymbols</key> <false/> </dict> </plist> We try to collect ipa:
xcodebuild -exportArchive -exportOptionsPlist options.plist -archivePath build/archive.xcarchive -exportPath build/dev-ipa/ The assembly falls, according to the logs, you can understand that something with the entitlements:
By mistake, it is clear that the application is signing entitlements, the values in which do not correspond to the values in our mobileprovision, namely com.apple.developer.healthkit . We are looking for the cause. We look at how the entitlements are signed by the application:
codesign -d --entitlements - build/archive.xcarchive/Products/Applications/ORKCatalog.app We get:
<dict> <key>application-identifier</key> <string>XXXXX.ru.habrahabr.test</string> <key>beta-reports-active</key> <true/> <key>com.apple.developer.healthkit</key> <true/> <key>com.apple.developer.team-identifier</key> <string>XXXXX</string> <key>get-task-allow</key> <false/> </dict> </plist> We see that everything is OK, except for this:
<key>com.apple.developer.healthkit</key> <true/> We don’t have this option in mobileprovision, we need to figure out where it came from:
find ORKCatalog/ -name "*.entitlements" -type f Search gave us ORKCatalog / Supporitng Files / ORKCatalog.entitlements . See what's inside:
cat ORKCatalog/Supporting Files/ORKCatalog.entitlements There is only one value:
<plist version="1.0"> <dict> <key>com.apple.developer.healthkit</key> <true/> </dict> </plist> Logically, you need to reload mobileprovision, to which you need to add this value, but we are lazy and for the test it is not necessary, we just need to re-sign the application with entitlements without this value.
We have at least two options:
1. Simply edit the existing entitlements (ORKCatalog / Supporitng Files / ORKCatalog.entitlements) and reassemble again (via archive).
2. Without rebuilding, we rewrite ORKCatalog.app ourselves with the necessary entitlements.
Choose the first option as more simple. Therefore, from the ORKCatalog / Supporitng Files / ORKCatalog.entitlements file, simply delete the lines:
<key>com.apple.developer.healthkit</key> <true/> and rebuild the archive again:
xcodebuild -project ORKCatalog.xcodeproj -scheme ORKCatalog ARCHS='arm64 armv7' VALID_ARCHS='arm64 armv7' -sdk iphoneos -configuration Debug archive -archivePath build/archive PRODUCT_BUNDLE_IDENTIFIER=ru.habrahabr.test PROVISIONING_PROFILE=87b0df89-793a-4a0f-92bf-c5f9c35f1405 After creating ipa:
xcodebuild -exportArchive -exportOptionsPlist options.plist -archivePath build/archive.xcarchive -exportPath build/dev-ipa/ We see the long-awaited message ** EXPORT SUCCEEDED ** . Under the build / dev-ipa / ipa file will appear, which we will install on the device. We will install on the device using ios-deploy github.com/phonegap/ios-deploy . We cling the device to the machine, we get the device id through:
ios-deploy -c Deploy to device:
ios-deploy -i <device id> -b build/dev-ipa/ORKCatalog.ipa We collect ipa file for the market
Everything is the same as for the develop version, just change the link to the release mobileprovision, in the options.plist instead of development we put down the app-store (for other options you can add, see the xcodebuild -help help).
Total
Without using xcode, I could collect ipa files for tests and for display in the app store. All this can be easily automated on the CI server to make life easier for developers.
PS: It is worth noting that for the process of compiling / signing applications with a complex structure, when several targets and each require their own separate mobileprovision file (applications with extension, clock, embedded framework), the above described process will not work without a file.
Source: https://habr.com/ru/post/270041/
All Articles