Creating Gesture Recognition Web Applications with the Intel RealSense SDK

In this article we will look at creating a web application that can recognize various types of gestures using the Intel RealSense SDK and a front view camera (F200). Thanks to gesture recognition, application users get a new convenient way to navigate and interact with the interface. To do this, basic knowledge of HTML, JavaScript, and jQuery is required.
equipment requirements
- 4th generation Intel CoreTM (or later) processor
- 150 MB of free hard disk space
- 4 GB RAM
- Intel RealSense Camera (F200)
- Available USB3 port for Intel RealSense camera (or dedicated connection for integrated camera)
Software Requirements
- Microsoft Windows * 8.1 (or later)
- Web browser, such as Microsoft Internet Explorer *, Mozilla Firefox *, or Google Chrome *
- Intel RealSense Depth Camera Manager (DCM) for the F200 camera, which includes the camera driver, service, and Intel RealSense SDK. Download components here .
- The runtime environment for the Intel RealSense SDK web application. Currently, the most convenient way to launch this environment is to run one of the sample JavaScript code in the SDK located in the SDK installation folder. The default location is C: \ Program Files (x86) \ Intel \ RSSDK \ framework \ JavaScript . The sample will find that the web application runtime is not installed and will offer to install it.
Installation
Before proceeding further, do the following:
- Connect the F200 camera to the USB3 port on the computer.
- Install DCM.
- Install the SDK.
- Install the web application runtime.
- After installing these components, go to the folder where the SDK is installed (we use the default path):
C: \ Program Files (x86) \ Intel \ RSSDK \ framework \ common \ JavaScript .
There should be a realsense.js file. Copy this file to a separate folder. We will use it in this guide. For more information about deploying JavaScript applications using the SDK, see here .
Code review
In this tutorial, we will use the sample code described below. This simple web application displays gesture names as they are detected by the camera. Copy all the code shown below into a new HTML file and save it in the same folder where the realsense.js file was copied. You can also download the entire web application by clicking the link to the sample code at the beginning of this article. We will take a closer look at the code in the next section.
The Intel RealSense SDK uses a Promise object. If you do not have experience with using Promise objects in JavaScript, read this documentation , it contains a brief overview and API reference.
')
For information about the SDK functions used in this sample code, see the Intel RealSense SDK documentation. SDK documentation is available on the Internet as well as in the doc subfolder inside the folder in which the SDK is installed.
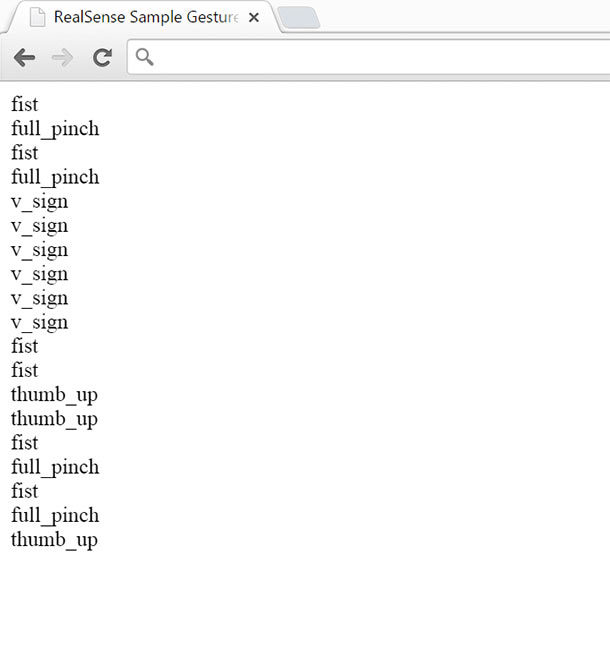
<html> <head> <title>RealSense Sample Gesture Detection App</title> <script type="text/javascript" src="https://ajax.googleapis.com/ajax/libs/jquery/1.7.2/jquery.min.js"></script> <script type="text/javascript" src="https://autobahn.s3.amazonaws.com/autobahnjs/latest/autobahn.min.jgz"></script> <script type="text/javascript" src="https://www.promisejs.org/polyfills/promise-6.1.0.js"></script> <script type="text/javascript" src="realsense.js"></script> <script> var sense, hand_module, hand_config var rs = intel.realsense function DetectPlatform() { rs.SenseManager.detectPlatform(['hand'], ['front']).then(function (info) { if (info.nextStep == 'ready') { Start() } else if (info.nextStep == 'unsupported') { $('#info-area').append('<b> Platform is not supported for Intel(R) RealSense(TM) SDK: </b>') $('#info-area').append('<b> either you are missing the required camera, or your OS and browser are not supported </b>') } else if (info.nextStep == 'driver') { $('#info-area').append('<b> Please update your camera driver from your computer manufacturer </b>') } else if (info.nextStep == 'runtime') { $('#info-area').append('<b> Please download the latest web runtime to run this app, located <a href="https://software.intel.com/en-us/realsense/webapp_setup_v6.exe">here</a> </b>') } }).catch(function (error) { $('#info-area').append('Error detected: ' + JSON.stringify(error)) }) } function Start() { rs.SenseManager.createInstance().then(function (instance) { sense = instance return rs.hand.HandModule.activate(sense) }).then(function (instance) { hand_module = instance hand_module.onFrameProcessed = onHandData return sense.init() }).then(function (result) { return hand_module.createActiveConfiguration() }).then(function (result) { hand_config = result hand_config.allAlerts = true hand_config.allGestures = true return hand_config.applyChanges() }).then(function (result) { return hand_config.release() }).then(function (result) { sense.captureManager.queryImageSize(rs.StreamType.STREAM_TYPE_DEPTH) return sense.streamFrames() }).catch(function (error) { console.log(error) }) } function onHandData(sender, data) { for (g = 0; g < data.firedGestureData.length; g++) { $('#gesture-area').append(data.firedGestureData[g].name + '<br />') } } $(document).ready(DetectPlatform) </script> </head> <body> <div id="info-area"></div> <div id="gesture-area"></div> </body> </html> The screen shot below shows how the application looks after launching it when displaying various gestures in front of the camera.
Detecting Intel RealSense camera in the system
Before using the camera for gesture recognition, make sure that the system is ready for shooting. For this purpose, we use the detectPlatform function. This function uses two parameters. The first is an array of runtimes that will be used by the application, the second is an array of cameras with which the application will work. We pass ['hand'] as the first argument, because we will work only with the hand module, and pass ['front'] as the second argument, since we will only use the F200 camera.
The function returns an info object with the nextStep property. Depending on the value obtained, we determine whether the camera is ready for use. If so, then we call the Start function to start recognizing gestures. Otherwise, we display the appropriate message depending on the string received from the platform.
If errors occur during this process, we display them on the screen.
rs.SenseManager.detectPlatform(['hand'], ['front']).then(function (info) { if (info.nextStep == 'ready') { Start() } else if (info.nextStep == 'unsupported') { $('#info-area').append('<b> Platform is not supported for Intel(R) RealSense(TM) SDK: </b>') $('#info-area').append('<b> either you are missing the required camera, or your OS and browser are not supported </b>') } else if (info.nextStep == 'driver') { $('#info-area').append('<b> Please update your camera driver from your computer manufacturer </b>') } else if (info.nextStep == 'runtime') { $('#info-area').append('<b> Please download the latest web runtime to run this app, located <a href="https://software.intel.com/en-us/realsense/webapp_setup_v6.exe">here</a> </b>') } }).catch(function (error) { $('#info-area').append('Error detected: ' + JSON.stringify(error)) }) Configure camera for gesture recognition
rs.SenseManager.createInstance().then(function (instance) { sense = instance return rs.hand.HandModule.activate(sense) }) To configure the camera for gesture recognition, you need to perform a series of actions. First create a new instance of SenseManager and turn on the camera to detect hand movements. SenseManager is used to control the camera conveyor.
To do this, we call the createInstance function. The callback returns the newly created instance, we save it in the sense variable for further use. Then we call the activate function to enable the hand module, which we need to recognize gestures.
.then(function (instance) { hand_module = instance hand_module.onFrameProcessed = onHandData return sense.init() }) After that, you need to save an instance of the hand tracking module, returned by the activate function, in the variable hand_module . We then assign the onFrameProcessed property to our own onHandData callback function each time a new frame data becomes available. Finally, we initialize the camera pipeline for processing by calling the Init function.
.then(function (result) { return hand_module.createActiveConfiguration() }) To configure the hand tracking module for gesture recognition, you need to create an instance of the active configuration. To do this, we call the createActiveConfiguration function.
.then(function (result) { hand_config = result hand_config.allAlerts = true hand_config.allGestures = true return hand_config.applyChanges() }) The CreateActiveConfiguration function returns a configuration instance stored in the hand_config variable. Then we set the value of allAlerts property to true to enable notification of all alerts. Alert notifications give us additional information: frame number, time stamp, and hand identifier that triggered the alert. We also set the allGestures property to true, which is required for detecting gestures. Finally, we call the applyChanges function to apply changes to all parameters to the hand tracking module. At the same time, the current configuration becomes active.
.then(function (result) { return hand_config.release() }) Then we call the release function to release the configuration.
.then(function (result) { sense.captureManager.queryImageSize(rs.StreamType.STREAM_TYPE_DEPTH) return sense.streamFrames() }).catch(function (error) { console.log(error) }) Finally, the following sequence of functions sets up the camera to start streaming frames. When data is available, the new frame will be called onHandData . If any errors are detected, we intercept them and output all errors to the console.
OnHandData function
function onHandData(sender, data) { for (g = 0; g < data.firedGestureData.length; g++) { $('#gesture-area').append(data.firedGestureData[g].name + '<br />') } } The onHandData callback is the main function in which we check if a gesture is detected. Remember that this function is called whenever new data is received from the hand module and some of this data may or may not be associated with gestures. This function takes two parameters, but we only use the data parameter. When the gesture data is available, we sequentially iterate over the firedGestureData array and get the gesture name from the name property. Finally, we print the name of the gesture in the gesture -area string, which displays the name of the gesture on the web page.
Please note that the camera remains on and continues to receive gesture data until the web page is closed.
Conclusion
In this tutorial, we used the Intel RealSense SDK to create a simple web application that uses the F200 camera for gesture recognition. We learned how to detect camera accessibility in the system and how to configure the camera for gesture recognition. You can modify this example by checking for certain gestures (for example, thumbsup or thumbsdown ) using if statements , and then writing code to handle this particular use case.
Source: https://habr.com/ru/post/270039/
All Articles