Intel RealSense R200 Camera - Code Samples

For programmers who have recently started working with Intel RealSense technology, we have prepared a post with three simple examples demonstrating the capabilities of the R200 camera. Examples include:
- Record and view raw streams
- Changing the depth focus
- Face tracking
Record and view the raw streams of the R200 camera
This downloadable code demonstrates the basics of capturing and viewing the raw streams of the R200 camera on C # / XAML using the Intel® RealSense ™ SDK for Windows * . The Visual Studio * solution consists of four simple projects (the size of each is no more than 200 lines of code).
- ColorStream - display the color stream from the RGB camera.
- DepthStream - display stream depth.
- IRStreams - display of the right and left streams of an infrared camera.
- AllStreams - display of all listed in one window (see fig. 1).
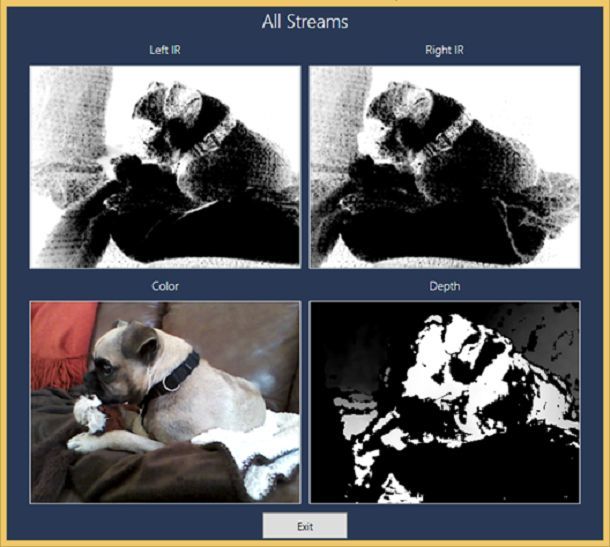
Figure 1. Sample code for all threads
Software development environment
This sample code was created in Windows® 10 RTM using Microsoft Visual Studio Community 2015. For this sample, we used the Visual C # project template - Windows - Classic Desktop .
The SDK and DCM versions used in this project.
- Intel® RealSense ™ SDK v6.0.21.6598
- Intel® RealSense ™ Depth Camera Manager R200 v2.0.3.39488
Equipment description
For this work, we used the Intel® RealSense ™ Developer Kit (R200) , which includes a camera, a USB3 cable and a magnetic mount for installing the camera on a laptop (Fig. 2).
')

Figure 2. Intel® RealSense ™ Developer Kit (R200)
For sample code R200, the following hardware requirements apply:
- 4th generation Intel® Core ™ processor (or later).
- 150 MB of free hard disk space.
- 4 GB RAM.
- Intel® RealSense ™ Camera (R200).
- Available USB3 port for the R200 camera (or a dedicated connection for the integrated camera).
Important! To support the data stream transmitted by the camera, a USB3 interface is required. This interface must be connected to a dedicated USB3 port on the client system (without using a splitter).
Code Description
The solution in Visual Studio consists of four WPF projects developed in C #. These projects use an explicit path to the libpxcclr.cs.dll (managed DLL):
C: \ Program Files (x86) \ Intel \ RSSDK \ bin \ x64
Remember to change this path if the SDK is installed in a different folder on your system.
Since we are launching the 64-bit version of the DLL, go to Project → Properties → Platform target and make sure that the value “x64” is selected.
To build and run a specific project, right-click the project name (for example, AllStreams) in Solution Explorer (Solution Explorer) and choose Set as StartUp Project from the menu.
All projects within the CameraStreams solution have a similar structure.
Configure the Session and SenseManager interface.
Start a workflow called Update , which processes the AcquireFrame - ReleaseFrame cycle .
In the AcquireFrame - ReleaseFrame loop , the following actions occur.
- Receive image data.
- Call the Render method to update the user interface.
- The release of resources.
- Frame release.
In the Render method, the following actions occur.
- Call the ConvertBitmap method to convert each raster frame to the BitmapImage type, which is required to display each frame in a WPF Image control.
- Updating the user interface by delegating work to the dispatcher associated with the user interface flow.
The ShutDown method is called whenever the Window_Closing or btnExit_Click events occur . In the ShutDown method, the following actions occur.
- Stop the Update method.
- Deleting objects.
Changing the depth focus
This C # / XAML code example demonstrates the basics of working with the Enhanced Photography (EP) module in the Intel® RealSense ™ SDK for Windows * to change the focus of an image after it is taken. This sample code performs the following actions.
- Displays the RGB color flow of the R200 camera in the Image control (left).
- Shooting a frame and displaying it in the second Image control (right).
- Change the focus and aperture with the slider.
- Save the modified image as a standard JPG file (Snapshot.jpg).

Figure 3. An example of changing the depth focusing (focusing on a flower)

Figure 4. Saved image file
As described in the SDK manual (in the file RSSDK_DIR \ doc \ PDF \ sdkmanuals.pdf ), the Enhanced Photography (EP) module extends traditional photo and video processing capabilities by using three-dimensional information (in particular, depth data) recorded with photos and videos. The function of changing the depth of field changes the focus and depth of field of the frame after shooting it. (Please note that this algorithm only works with the R200 camera.)
Equipment description
We used the Intel® RealSense ™ Developer Kit (R200) for this job. The camera was mounted on a laptop using the magnetic mount included in the kit (Fig. 5).

Figure 5. Camera attached to magnetic mount
Build Notes
This project uses the System.Drawing.Imaging namespace. The link to it is specified manually: in the new project, right-click on References in the Solution Explorer and select Add Reference ... to open the link manager window. Then select Assemblies, Framework , and find System.Drawing in the list. Check the box and click OK.
This project uses an explicit path to the libpxcclr.cs.dll (managed DLL): C: \ Program Files (x86) \ Intel \ RSSDK \ bin \ x64 . Remember to change this path if the SDK is installed in a different folder on your system.
Since the project refers to the 64-bit version of the DLL, make sure that the "x64" parameter is specified in Project → Properties → Platform target .
The project includes a post-build event command to ensure that the unmanaged DLL (libpxccpp2c.dll) is copied to the target output folder:
if "$(Platform)" == "x86" (copy /y "$(RSSDK_DIR)\bin\win32\libpxccpp2c.dll" "$(TargetDir)" ) else ( copy /y
"$(RSSDK_DIR)\bin\x64\libpxccpp2c.dll" "$(TargetDir)" )
Face tracking
This C # / XAML code example demonstrates the basics of working with the face tracking algorithm in the Intel® RealSense ™ SDK for Windows * to detect and track people's faces in real time using the R200 camera. This sample code performs the following actions.
- Displays the RGB color flow of the R200 camera in the Image control.
- Overlays a rectangular control that tracks the location of the user's face (depending on where the user is in the camera’s view).
- Displays the number of faces detected by the R200.
- Display the height and width of the tracked person.
- Displays the two-dimensional coordinates (X and Y) of the tracked person.
- Specify the depth of the face, that is, the distance from the R200 camera to the face.
- Support and display of tracking alerts, subscription to an event handler.

Figure 6. Sample face tracking code
Equipment description
We used the Intel® RealSense ™ Developer Kit (R200) for this job. The camera was mounted on a standard tripod using an optional magnetic mount ** (Fig. 7).
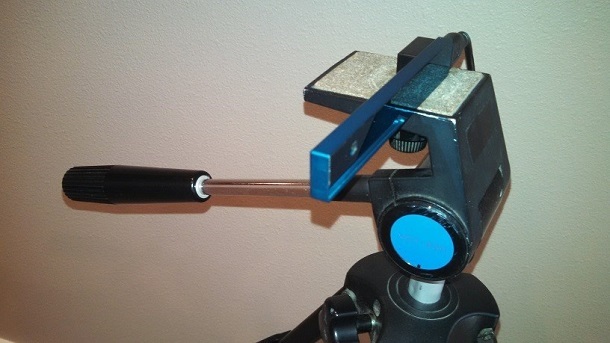
Figure 7. Camera attached to a magnetic mount (may not be available in all kits)
Build Notes
See the previous example.
Code Description
The sample code has the following structure.
Configure the Session and SenseManager interface, as well as the face recognition module.
Start a workflow called Update , which processes the AcquireFrame - ReleaseFrame cycle .
In the AcquireFrame - ReleaseFrame loop , the following actions occur.
- Receive image data.
- Data acquisition module face recognition.
- Call the Render method to update the user interface.
- The release of resources.
- Frame release.
In the Render method, the following actions occur.
- Call the ConvertBitmap method to convert each raster frame to the BitmapImage type, which is required to display each frame in a WPF Image control.
- Updating the user interface by delegating work to the dispatcher associated with the user interface flow.
The ShutDown method is called whenever the Window_Closing or btnExit_Click events occur . In the ShutDown method, the following actions occur.
- Stop the Update method.
- Deleting objects.
Source: https://habr.com/ru/post/269253/
All Articles