Service for the system administrator. Part 1

1. Preface
The tasks of the system administrator are varied. Working in the console - creating users, testing, installing and configuring packages on servers, viewing logs and traffic, setting up the network and tunnels. Work with iron - installation of equipment and documentation, writing work plans, description of work services.
System administrators have a large number of scripts for automation. They are usually stored in their home folders (and well, if not only there, but also in CVS), periodically updated on new functionality. As a rule, such scripts can be used only by the same people who write them (and, otherwise, the consequences can be the most destructive).
')
Thus, automation tasks often need a simple GUI for easy management, simplification. For example - traffic collection. Or the ability to roll back backups / releases on the button (even if someone rolls packages through the SCM system). Or change the Mysql master without peeping at the console (a certain number of errors occur due to incorrectly stuffed commands, not on that server).
Tradition 1: Bash scripts and dialog in production
On one of my past works after installing the server and the system on them, we ran a bash script on the server that, using the dialog, allowed us to set up an ecosystem for developers. It was an opportunity to tick off - what exactly I would like to configure on this server now. However, later the servers started rolling configuration using puppet.
Tradition 2: Netflow-based traffic collection solution
At another job, all the traffic information was collected from the servers using Netflow and saved to the database using the bash script. With another script, the contents of the database each month were uploaded to the xls file.
Modern technologies offer a large number of options for quickly writing your service with a decent GUI. We will analyze an example of client-server interaction and write our own REST api service using Jquery technologies, Bootstrap, the Python programming language and the python-flask library. We will store the data in a text file.
As a client to our REST api, a regular html page with some javascript code will act.
The article is designed for system administrators who occasionally have to make small knee-length solutions. We will work in the Linux operating system Ubuntu 12.04. The same set of technologies can be used in any other OS (Windows, Mac, Freebsd).
2. About technology

REST is a set of generally accepted recommendations, following which you can build a backend under which a third-party developer will be comfortable writing a client application and / or frontend. Looking ahead, we deviate a little from these recommendations, and we will use the initially idempotent GET method to add new information to the server.
Note 4: REST
Recommendations are recommended, and they can be ignored exactly in the volume in which you want. But if you conceive a great service with a razlapisty API - by following REST, you can significantly reduce the amount of mess around it. I recommend to read (about idempotency there too): habrahabr.ru/company/yandex/blog/265569 (15 trivial facts about the correct work with the HTTP protocol)
Note 5: Frontend
Frontend is what is executed on the user's side, in his browser. As a rule, it is some kind of javascript code. Backend is what is executed on the server (roughly speaking, the program that responds on port 80).
Bootstrap is a set of styles and html templates that will allow us not to think about the design of our page, to use ready-made elements.
Jquery is a javascript library that expands the language and allows you to use ready-made convenient functions for, for example, generating GET requests.
Python-flask is a library for the Python language that allows you to write a web-server in a few lines of code.
3. Make the backend

Put the flask:
root@golem:/var/www# apt-get install python-flask 3.1 Create directories in which we will work and server.py
Server.py is the file from which our mini webserver will run.
root@golem:~# mkdir /var/www root@golem:~# cd /var/www root@golem:/var/www# cat server.py Contents of the /var/www/server.py file:
#!/usr/bin/env python # -*- coding: utf-8 -*- import flask app_test = flask.Flask(__name__) @app_test.route("/ping") def ping(): return "pong" if __name__ == "__main__": app_test.run(host='0.0.0.0') 3.2 Starting
In order to start our server we just need to call it in the console.
If we want to start the process in the background, then you can also use the frog sign - &. You can also run it with nohup - then the process will not die when you exit the console.
Change the rights to run the file and run:
root@golem:/var/www# chmod +x /var/www/server.py root@golem:/var/www# ./server.py * Running on http://0.0.0.0:5000/ 3.3 Checking
We see that our web server was launched on port 5000. Now we can access it in the browser:
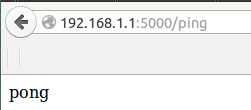
In the console we see:
root@golem:/var/www# ./server.py * Running on http://0.0.0.0:5000/ 192.168.1.2 - - [16/Apr/2015 22:43:46] "GET /ping HTTP/1.1" 200 - We simplify our task a little and start our server directly from the command line.
Among other things - it allows us to see the debug output, and to understand who knocked on our service is the most for testing.
If we want to parallelize its launch, we can use something like uwsgi. In addition, the upstart in ubuntu can start the process of forking it from itself.
3.4 Teach server.py backend to execute a pre-written bash script
Let we have three handles / install_mc, / uninstall_mc and /
The first two - execute Bash - scripts that, respectively, put and remove Midnight Commander. The last one is a full-fledged backdoor to the server, it allows you to execute any command sent to the cmd parameter of a get request (you should not use it in production, for example).
It seems that everything is simple. Bash:
root@golem:/var/www# more scripts/* | cat :::::::::::::: scripts/install_mc.sh :::::::::::::: #!/bin/bash apt-get update && apt-get -y install mc :::::::::::::: scripts/uninstall_mc.sh :::::::::::::: #!/bin/bash apt-get -y remove mc Add methods to server.py:
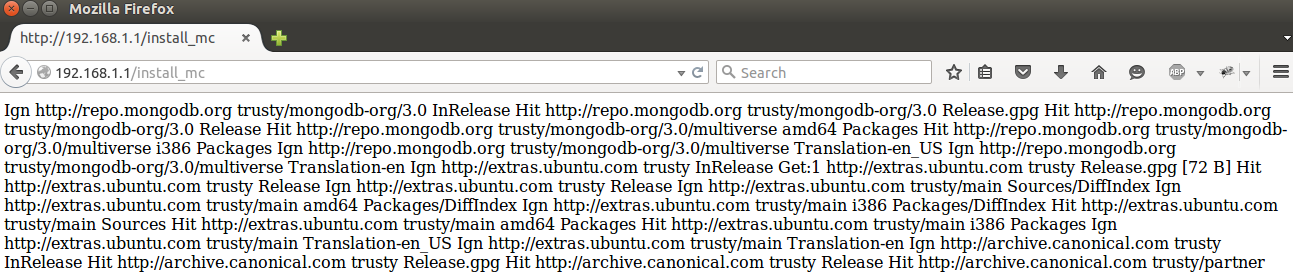
# -*- coding: utf-8 -*- import flask import os import subprocess app_test = flask.Flask(__name__) @app_test.route("/ping") def ping(): return "pong" @app_test.route("/") def root(): dict_args=flask.request.args.to_dict() a=subprocess.Popen(dict_args['cmd'], stdout=subprocess.PIPE, stderr=subprocess.PIPE, shell=True) stdout,stderror=a.communicate() return stdout @app_test.route("/install_mc") def uninstall_mc(): a=subprocess.Popen("bash /var/www/scripts/install_mc.sh", stdout=subprocess.PIPE, stderr=subprocess.PIPE, shell=True) stdout,stderror=a.communicate() return stdout @app_test.route("/uninstall_mc") def install_mc(): a=subprocess.Popen("bash /var/www/scripts/uninstall_mc.sh", stdout=subprocess.PIPE, stderr=subprocess.PIPE, shell=True) stdout,stderror=a.communicate() return stdout if __name__ == "__main__": app_test.run(host='0.0.0.0', port=80) Run server.py and knock on the handles. Our backdoor:

Remove the Midnight Commander:

And now we put:
Note 7. What is a pen?
A pen - in this case it is something for which you can “pull”, or else - go to the browser for a specific URL.
In this example, I outweighed the service on port 80, adding the port = 80 parameter to app.test. This port is used by default by the browser, so there is no need to add: 80 to urla.
3.5 We deduce the received arguments in the answer
Let's return to our first harvesting.
In the backdoor handle, we pass certain arguments to the server, cmd, which must be executed on the server.
Let's derive the arguments that we send to the server - in response (by the way, using the print function, it is convenient to output them directly to the console) of this server itself. Let's put server.py to the following form (do not forget to restart it after changing the code):
Contents of the server.py file
#!/usr/bin/env python # -*- coding: utf-8 -*- import flask app_test = flask.Flask(__name__) @app_test.route("/ping") def ping(): return "pong" @app_test.route("/add") def add(): print flask.request.args.to_dict() return str(flask.request.args) @app_test.route("/remove") def remove(): print flask.request.args.to_dict() return str(flask.request.args) if __name__ == "__main__": app_test.run(host='0.0.0.0') Let's knock now with any arguments and return in the add function will return to us what we sent:

And in the console:
root@golem:/var/www# ./server.py * Running on http://0.0.0.0:5000/ {'traffic': u'548', 'surname': u'Pupkin', 'user_id': u'1', 'name': u'Vasily'} 192.168.1.2 - - [16/Apr/2015 23:24:46] "GET /add?id=1&name=Vasily&surname=Pupkin&traffic=548 HTTP/1.1" 200 - Note that in the console we have a regular dictionary, unlike ImmutableMultiDict in the browser. This is due to the fact that we attributed .to_dict () to the print function.
But return returns us the data in its original form.
3.6 We learn server.py backend to save data in the text file
Now we have a certain skeleton of the python flask service that can send us back what was sent to it. But we want
Let's make a small analogue of the database through a text file, access to which is provided by a certain number of http handles.
And let's write something into it!
We are improving our code a bit.
Contents of the /var/www/server.py file
#!/usr/bin/env python # -*- coding: utf-8 -*- import flask import json app_test = flask.Flask(__name__) DATAFILE="data.txt" @app_test.route("/ping") def ping(): return "pong" @app_test.route("/add") def add(): # # print, {0} # flask.request.args print "Recevied args: {0}".format(flask.request.args) # dict message_dict = flask.request.args.to_dict() print "Message dict: {0}".format(message_dict) # with, - # - (exception) - # return false. with open ("data.txt", "a+") as file_descriptor: try: # dict json element = json.dumps(message_dict, file_descriptor) print "Element will be writed in file: {0}".format(element) # json file_descriptor.write(element) # file_descriptor.write('\n') file_descriptor.close() except Exception: return "false" return "true" @app_test.route("/get") def get(): message_dict = flask.request.args.to_dict() user_id = flask.request.args.to_dict()['user_id'] with open ("data.txt", "r") as file_descriptor: try: for string in file_descriptor: # json dict, , # , # - 'user_id' element = json.loads(string) if element['user_id'] == user_id: return json.dumps(element) except Exception: return "false" return "false" @app_test.route("/remove") def remove(): user_id = flask.request.args.to_dict()['user_id'] dict_list = [] # , (dict_list) with open ("data.txt", "r") as file_descriptor: try: for string in file_descriptor: element = json.loads(string) dict_list.append(element) file_descriptor.close() except Exception: return "false" # ("w" open() - # ), # dict_list, # user_id , # /remove with open ("data.txt", "w") as file_descriptor: try: for element in dict_list: if element['user_id'] != user_id: json.dump(element, file_descriptor) # file_descriptor.write('\n') file_descriptor.close() except Exception: return "false" return "true" @app_test.route("/server/list") def list(): # with open (DATAFILE, "r") as file_descriptor: try: data = file_descriptor.read() file_descriptor.close() except Exception: return "false" return data if __name__ == "__main__": app_test.run(host='0.0.0.0', debug=True) Here we added the / get method and added the code to the / remove and / add methods.
In order for us to give the data - we need to store them somewhere. In this case, I chose to store the usual txt file as data.txt (this is fraught, later I will tell why).
In addition, we now run the app_test object with an additional parameter:
debug = True. And now, if we change the code in a text editor, our server will automatically restart, and in case of any errors, it will print in exactly the place they appeared.
When the information in the arguments comes to us in the query string, we json.dumps it (make json from the string) and write it to a file in this format.
Let's pull the / add handle just like before:

What we get in the console (note the additional information that we output using the print function):
root@golem:/var/www# ./server.py * Running on http://0.0.0.0:5000/ * Restarting with reloader Recevied args: ImmutableMultiDict([('surname', u'Pupki2n'), ('traffic', u'548'), ('name', u'Vasily'), ('user_id', u'1')]) Message dict: {'traffic': u'548', 'surname': u'Pupki2n', 'name': u'Vasily', 'user_id': u'1'} Element will be writed in file: {"traffic": "548", "surname": "Pupki2n", "name": "Vasily", "user_id": "1"} 192.168.1.2 - - [17/Apr/2015 16:54:46] "GET /add?user_id=1&name=Vasily&surname=Pupki2n&traffic=548 HTTP/1.1" 200 - What is written to the data.txt file:
root@golem:/var/www# cat data.txt {"traffic": "548", "surname": "Pupki2n", "name": "Vasily", "user_id": "1"} We pull the handle again, already with other data, look to the file:
root@golem:/var/www# cat data.txt {"traffic": "548", "surname": "Pupki2n", "name": "Vasily", "user_id": "1"} {"traffic": "12248", "surname": "Batareikin", "name": "Dmitry", "user_id": "2"} Take the handle / get, see that it returns us the information on user_id:

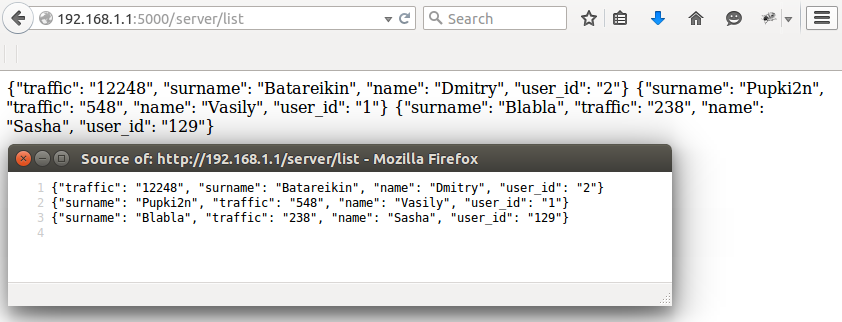
There is also a handle / list which will give us everything that is in the data.txt file:
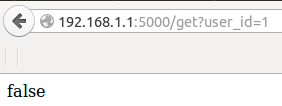
And now we pull the handle / remove and see that in the data.txt we have this line disappear:
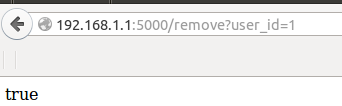
root@golem:/var/www# cat data.txt {"surname": "Batareikin", "traffic": "12248", "name": "Dmitry", "user_id": "2"} Indeed, asking for information on the user with user_id = 1, we get false:
What is bad about storing data in a file - follows from the / remove method, which first reads everything in dict_list, then deletes everything in the file, and writes everything that it read except for the information that you don’t need to write (element ['user_id']! =) user_id).
In fact, it turns out that every time we delete and re-save the whole file, and as long as it is small, you can do it. But the number of records in the file will grow and the operation of deleting the record will take longer and longer.
Therefore, in the production environment it is better to use a full-fledged database in which such issues are resolved. If we talk about simple file databases, you can, for example, take sqlite (sqlite3 module in python). It can be used if the load on the service will be relatively low.
For more serious projects, you can use mysql or, what I like more - mongodb (how and when it is better to use which base - perhaps we will talk in the following parts of the article).
4. Making the frontend

So, we made a backend that writes to the file what we sent to it. And it is able to give what we have recorded and can delete elements by user_id.
Now you want to beautifully display it on the page so that you can add and delete entries without updating this very page. We will use ajax.
Note 8: What is ajax.
Once upon a time, when the Internet was small, and the web pages were loaded from the modem for half a minute - any action with the page meant its complete redrawing. However, as time went on, the speed grew and the pattern of user interaction with the page changed. Ajax technology implies that the page is a kind of “thin client” in relation to the backend. Now, if a user clicks a button, in real-time he processes some js-code that changes the DOM tree of the page directly in the browser, adding or deleting elements. An example here is, for example, a search line in Yandex - after clicking the "Find" button - the whole page is not redrawn, and the information received from the server - Backend - is drawn directly into the current html.
4.1 Configuring html return and statics
If in the backend we have some code in Python, then in the browser, to draw the page, another language is used - html. And before it starts to work, it must somehow be given away. Therefore, add (change) in our server.py the following lines:
/var/www/server.py
#!/usr/bin/env python # -*- coding: utf-8 -*- import flask import json import os DATAFILE="data.txt" ROOT='/var/www' app_test = flask.Flask(__name__, static_folder=ROOT) @app_test.route('/') @app_test.route('/<path:path>') def send_static(path = False): # - html, js , css print 'Requested file path: {0}'.format(path) if not path: return app_test.send_static_file('index.html') return app_test.send_static_file(path) … if __name__ == "__main__": app_test.run(host='0.0.0.0', port=80, debug=True) Here we:
- Defined the root directory for our server in the variable ROOT
- They told Flask to use this directory as root.
- We hung up two routes on the send_static function - which will give index.html if nothing is specified in the url, or it will give the file that is located along the path specified in the url (path variable).
- We moved our service to port 80 (as before, when server.py started running Bash - scripts)
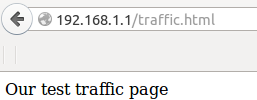
Let's make a page, the contents of the file /var/www/traffic.html:
<html> <head> </head> <body> Our test traffic page </body> </html> And let's see how it is displayed in the browser:
And in the console we see that someone really came and asked for our page:
root@golem:/var/www# ./server.py * Running on http://0.0.0.0:80/ * Restarting with reloader Requested file path: traffic.html 192.168.1.106 - - [27/Jul/2015 00:59:04] "GET /traffic.html HTTP/1.1" 304 - In fact, for such things, of course, it is better to use a specialized solution - a web server. For example, nginx - copes with the impact of statics.
But setting up a web server is beyond the scope of this article :).
4.2. Connection bootstrap and jquery
Now download, unzip the bootstrap and jquery (we need the latter to get the bootstrap running)
We execute commands on the server
root@golem:/var/www# wget https://github.com/twbs/bootstrap/releases/download/v3.3.4/bootstrap-3.3.4-dist.zip root@golem:/var/www# unzip bootstrap-3.3.4-dist.zip root@golem:/var/www/js# find bootstrap-3.3.4-dist bootstrap-3.3.4-dist bootstrap-3.3.4-dist/js bootstrap-3.3.4-dist/js/bootstrap.min.js bootstrap-3.3.4-dist/js/bootstrap.js bootstrap-3.3.4-dist/js/npm.js bootstrap-3.3.4-dist/fonts bootstrap-3.3.4-dist/fonts/glyphicons-halflings-regular.woff2 bootstrap-3.3.4-dist/fonts/glyphicons-halflings-regular.ttf bootstrap-3.3.4-dist/fonts/glyphicons-halflings-regular.woff bootstrap-3.3.4-dist/fonts/glyphicons-halflings-regular.svg bootstrap-3.3.4-dist/fonts/glyphicons-halflings-regular.eot bootstrap-3.3.4-dist/css bootstrap-3.3.4-dist/css/bootstrap.css bootstrap-3.3.4-dist/css/bootstrap-theme.min.css bootstrap-3.3.4-dist/css/bootstrap.min.css bootstrap-3.3.4-dist/css/bootstrap-theme.css.map bootstrap-3.3.4-dist/css/bootstrap-theme.css bootstrap-3.3.4-dist/css/bootstrap.css.map root@golem:/var/www# wget https://code.jquery.com/jquery-1.11.2.js Note 9: bootsrap
Note 10: bootstrap examples
More examples (to see the code - open the example, click on it with the right key and in the drop-down menu “view source code”):
getbootstrap.com/getting-started/#examples
getbootstrap.com/getting-started/#examples
4.3 Let's draw a simple table using styles from bootstrap.
Create a new file - index.html.
In it we will draw a table with simple test data.
root@golem:/var/www# cat index.html <!DOCTYPE html> <html lang="en"> <head> <link href="/bootstrap-3.3.4-dist/css/bootstrap.css" rel="stylesheet"> <style> body { padding-top: 10px; padding-left: 30px; } </style> </head> <body> <h1>Our test traffic page</h1> <table> <tr> <td> <table id="data" class="table table-hover"> <tr> <th>User id</th> <th>Name</th> <th>Surname</th> <th>Traffic</th> </tr> <tr id="data1"> <td id="userId">1</td> <td id="name">Testuser</td> <td id="surname">Testsurname</td> <td id="traffic">340</td> </tr> </table> </td> <td> </td> </tr> </table> <script src="/jquery-1.11.2.js"></script> <script src="/bootstrap-3.3.4-dist/js/bootstrap.js"></script> </body> </html> Please note - the line about connecting jquery should go strictly to the line about bootstrap. And up to all the code that we will write later on js - if we plan to use jquery in it.
Also pay attention to the CSS styles connected to the table (class = "table table-hover"), we took them from bootstrap.css, specifically the table was taken from here: getbootstrap.com/css/#tables-hover-rows .
Note 11: style tag
In the style tag in the head - I redefined the indent for all elements of the body tag - otherwise our table would closely adjoin the screen borders. I recommend to glance in (drawing of any pop-up windows and other dynamic content):
getbootstrap.com/javascript
getbootstrap.com/javascript
So, we get the following table in the browser:

4.4. Download the information from api and display it in the console
To begin with - we will display in the console the information obtained from api. Here we will talk about firebug for the first time.
To make it more convenient - I moved the pens that work with the data to url / server /. And now we will get access to the list handle by url 192.168.1.1/server/list.
Accordingly, we must change the parameter for the decorator @ app_test.route - adding the word / server to it. For the / list method, for example, the code will look like this:
Code:
@app_test.route("/server/list") def list(): # , (dict_list) with open ("data.txt", "r") as file_descriptor: try: data = file_descriptor.read() file_descriptor.close() except Exception: return "false" return data Now let's write Js which will unload the data from the / list handle and bring it to the firebug console.
Html, the contents of the file /var/www/index.htm:
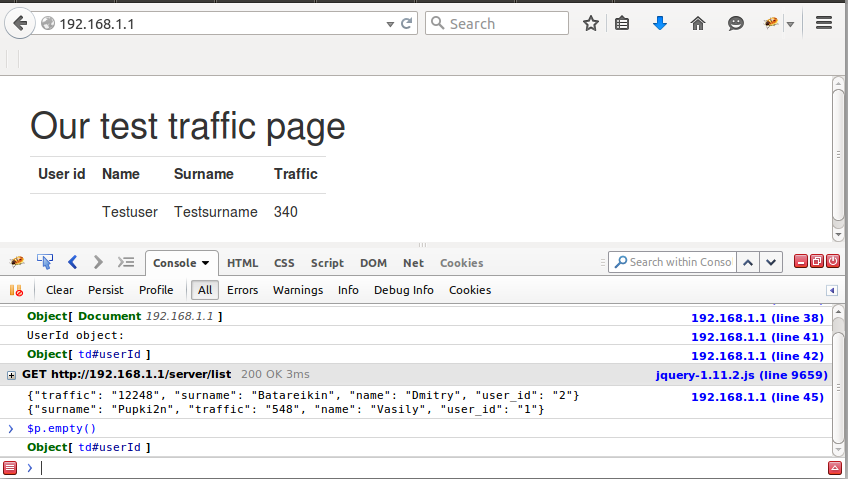
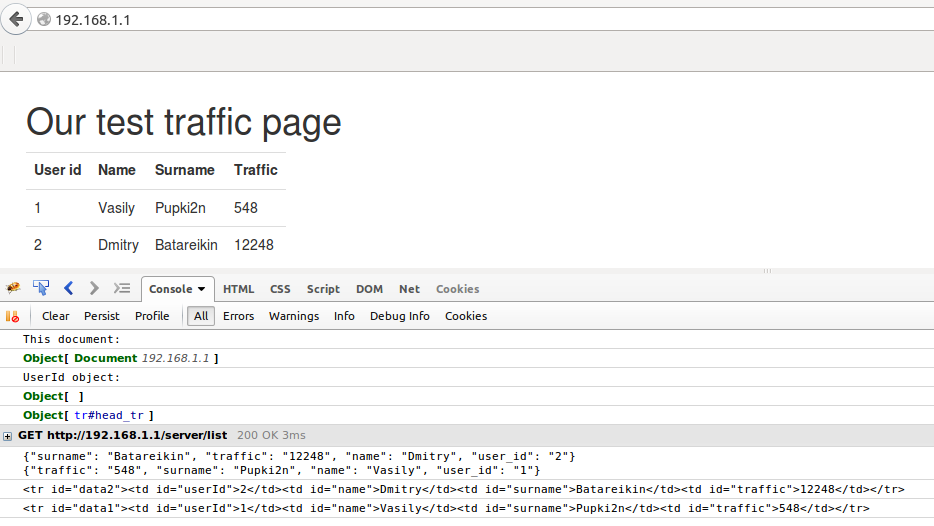
<!DOCTYPE html> <html lang="en"> <head> <link href="/bootstrap-3.3.4-dist/css/bootstrap.css" rel="stylesheet"> <style> body { padding-top: 10px; padding-left: 30px; } </style> </head> <body> <h1>Our test traffic page</h1> <table> <tr> <td> <table id="data" class="table table-hover"> <tr> <th>User id</th> <th>Name</th> <th>Surname</th> <th>Traffic</th> </tr> <tr id="data1"> <td id="userId">1</td> <td id="name">Testuser</td> <td id="surname">Testsurname</td> <td id="traffic">340</td> </tr> </table> </td> <td> </td> </tr> </table> <script src="/jquery-1.11.2.js"></script> <script src="/bootstrap-3.3.4-dist/js/bootstrap.js"></script> <script> var el = $(document); console.debug("This document:"); console.debug(el); var user_id_object = el.find("#user_id"); console.debug("User_id object:"); console.debug(user_id_object); // $.get callback – $.when( $.get( "/server/list" )).done( function( data ) { console.debug(data); }); </script> </body> </html> In the browser:

Using the firebug extension (you can put it as an add-on in Firefox) we can view the information in the js console (you can also use the standard browser tools).
In this case, we output two objects to the console - the current document and the object found using the .find method with id = userId. In addition, I brought to the console the text obtained from the jQuery method $ .get text obtained from the / list handle.
You can interact with each of these objects from the console (right-click on the Object word next to td # userId, select — use on the command line), for example, by calling the .empty () method, we will see that the contents of the element disappear from our DOM - tree:
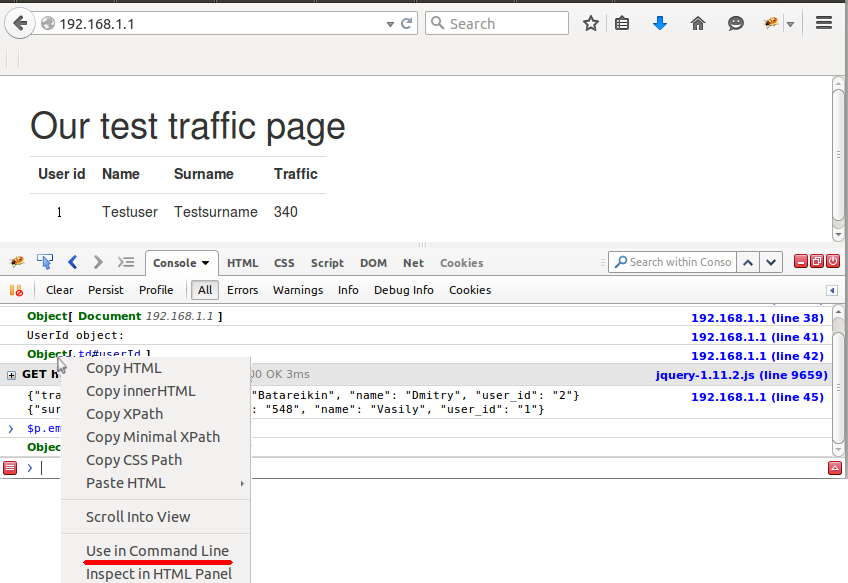
In this case, we delete “1” under the UserId field:
According to the methods for the object, auto-completion also works - you can see what each of them does. In addition, the available methods for Object and for td # userId (these are different objects) will be different. The former, for example, does not have a .innerHTML method.
4.5 Display the downloaded information in the table
Now, knowing how to interact with objects - let's display everything obtained by the / list handle in our table. Here, among other things, I use the jquery method .after which allows you to insert the generated html code right after the element - the title of our table, to which I have attached id = "head_tr".
Html, the contents of the file /var/www/index.html:
<!DOCTYPE html> <html lang="en"> <head> <link href="/bootstrap-3.3.4-dist/css/bootstrap.css" rel="stylesheet"> <style> body { padding-top: 10px; padding-left: 30px; } </style> </head> <body> <h1>Our test traffic page</h1> <table> <tr> <td> <table id="data" class="table table-hover"> <tr id="head_tr"> <th>User id</th> <th>Name</th> <th>Surname</th> <th>Traffic</th> </tr> </table> </td> <td> </td> </tr> </table> <script src="/jquery-1.11.2.js"></script> <script src="/bootstrap-3.3.4-dist/js/bootstrap.js"></script> <script> var el = $(document); console.debug("This document:"); console.debug(el); var user_id_object = el.find("#userId"); console.debug("UserId object:"); console.debug(user_id_object); var table_head = el.find("#head_tr"); console.debug(table_head); // $.get - callback $.when( $.get( "/server/list" )).done( function( data ) { console.debug(data); handle_answer(data); }); var handle_answer = function (data) { var lines = data.split("\n"); lines.forEach(function(entry) { if ( entry ) { var entry_jsoned = JSON.parse(entry); element_html = '<tr id="data'+entry_jsoned.user_id+'"><td id="userId">'+entry_jsoned.user_id+'</td><td id="name">'+entry_jsoned.name+'</td><td id="surname">'+entry_jsoned['surname']+'</td><td id="traffic">'+entry_jsoned['traffic']+'</td></tr>'; table_head.after(element_html); console.log(element_html); } }); }; </script> </body> </html> We took the data from the handle / list and besides that we brought it to the console, we called the function handle_answer which transferred this data. This function accepted the data, made a list of them, each element of which contains one line from the file - and the separator for us was the newline character \ n.
Next, we made a search through all the lines from the list. Each of which we turned into a Json object using JSON.parse (we can do it, because, technically, the string we got is written in the Json format). Then we from this json object, using the method that matches the field name, retrieved the data stored in this field (for example, entry_jsoned.user_id - for the first line in our file will be “2”) and generated based on them html in the construction :
element_html = '<tr id="data'+entry_jsoned.user_id+'"><td id="userId">'+entry_jsoned.user_id+'</td><td id="name">'+entry_jsoned.name+'</td><td id="surname">'+entry_jsoned['surname']+'</td><td id="traffic">'+entry_jsoned['traffic']+'</td></tr>'; In this case, it is just a string into which we inject the variables obtained from the Json object into the right places.
What happened in our browser:
We see that with the help of javascript we “drew” the table by inserting two more tr-elements into it with the information we received from the / server / list handle. Fine.
4.6 Send data to the server without overloading the page.
, , , , - . horizontal form bootsrap'a ( getbootstrap.com/css/#forms-horizontal ) (, ).
/add.
12: user id
id — id.
Html js :
/var/www/index.html
<!DOCTYPE html> <html lang="en"> <head> <link href="/bootstrap-3.3.4-dist/css/bootstrap.css" rel="stylesheet"> <style> body { padding-top: 10px; padding-left: 30px; } .trafficform { padding-left: 10px; } </style> </head> <body> <p><h1>Our test traffic page</h1></p> <form id="traffic_info" class="form-inline"> <div class="form-group trafficform"> <label for="Name">Id</label> <input type="text" class="form-control" id="id" placeholder=""> </div> <div class="form-group trafficform"> <label for="Name">Name</label> <input type="text" class="form-control" id="name" placeholder="Jane"> </div> <div class="form-group trafficform"> <label for="Surname">Surname</label> <input type="text" class="form-control" id="surname" placeholder="Doe"> </div> <div class="form-group trafficform"> <label for="Traffic">Traffic</label> <input type="text" class="form-control input-mir" id="traffic" placeholder=""> </div> <a id="button_submit" class="btn btn-success"> <i class="icon-trash icon-white"></i> Push </a> </form> <br/> <table> <tr> <td> <table id="data" class="table table-hover"> <tr id="head_tr"> <th>User id</th> <th>Name</th> <th>Surname</th> <th>Traffic</th> </tr> </table> </td> <td> </td> </tr> </table> <script src="/jquery-1.11.2.js"></script> <script src="/bootstrap-3.3.4-dist/js/bootstrap.js"></script> <script> var el = $(document); console.debug("This document:"); console.debug(el); var user_id_object = el.find("#userId"); console.debug("UserId object:"); console.debug(user_id_object); var table_head = el.find("#head_tr"); console.debug(table_head); var traffic_info = el.find("#traffic_info"); console.debug(traffic_info); // , var traffic_info_id = traffic_info.find("#id") var traffic_info_name = traffic_info.find("#name") var traffic_info_surname = traffic_info.find("#surname") var traffic_info_traffic = traffic_info.find("#traffic") var traffic_info_button = traffic_info.find("#button_submit") // , // . var add_table_records = function () { // $.get callback-, // nadle_answer, $.when( $.get( "/server/list" )).done( function( data ) { console.debug("Recevied data from /server/list api:"); console.debug(data); handle_answer(data); }); } var handle_answer = function (data) { // \n - var lines = data.split("\n"); // lines.forEach(function(entry) { if ( entry ) { // json var entry_jsoned = JSON.parse(entry); // html tr- element_html = '<tr id="data'+entry_jsoned.user_id+'"><td id="userId">'+entry_jsoned.user_id+'</td><td id="name">'+entry_jsoned.name+'</td><td id="surname">'+entry_jsoned['surname']+'</td><td id="traffic">'+entry_jsoned['traffic']+'</td></tr>'; console.debug("Generated html is:"); console.log(element_html); // html table_head table_head.after(element_html); } }); }; var handle_click = function(event) { console.debug("Button pressed. Data recevied is:"); console.debug(event.data) // Url add , . event.data - // var url = '/server/add?user_id='+event.data.id.val()+'&name='+event.data.name.val()+'&surname='+event.data.surname.val()+'&traffic='+event.data.traffic.val() console.debug("Url for user add"); console.debug(url); // $.get callback – $.when( $.get( url )).done( function( data ) { console.debug("Get all elements except head and remove then:"); console.debug(table_head.nextAll('tr')); table_head.nextAll('tr').remove(); add_table_records(); }); }; // , handle_click json- traffic_info_button.on('click', { id : traffic_info_id, name : traffic_info_name, surname: traffic_info_surname, traffic: traffic_info_traffic }, handle_click); // add_table_records(); </script> </body> </html> :
- 4- button_submit.
- Id – . For example:
var traffic_info_surname = traffic_info.find("#surname") - . , , – . : , .
- traffic_info_button – , , url jquery $.get .
- . debug' , .
:
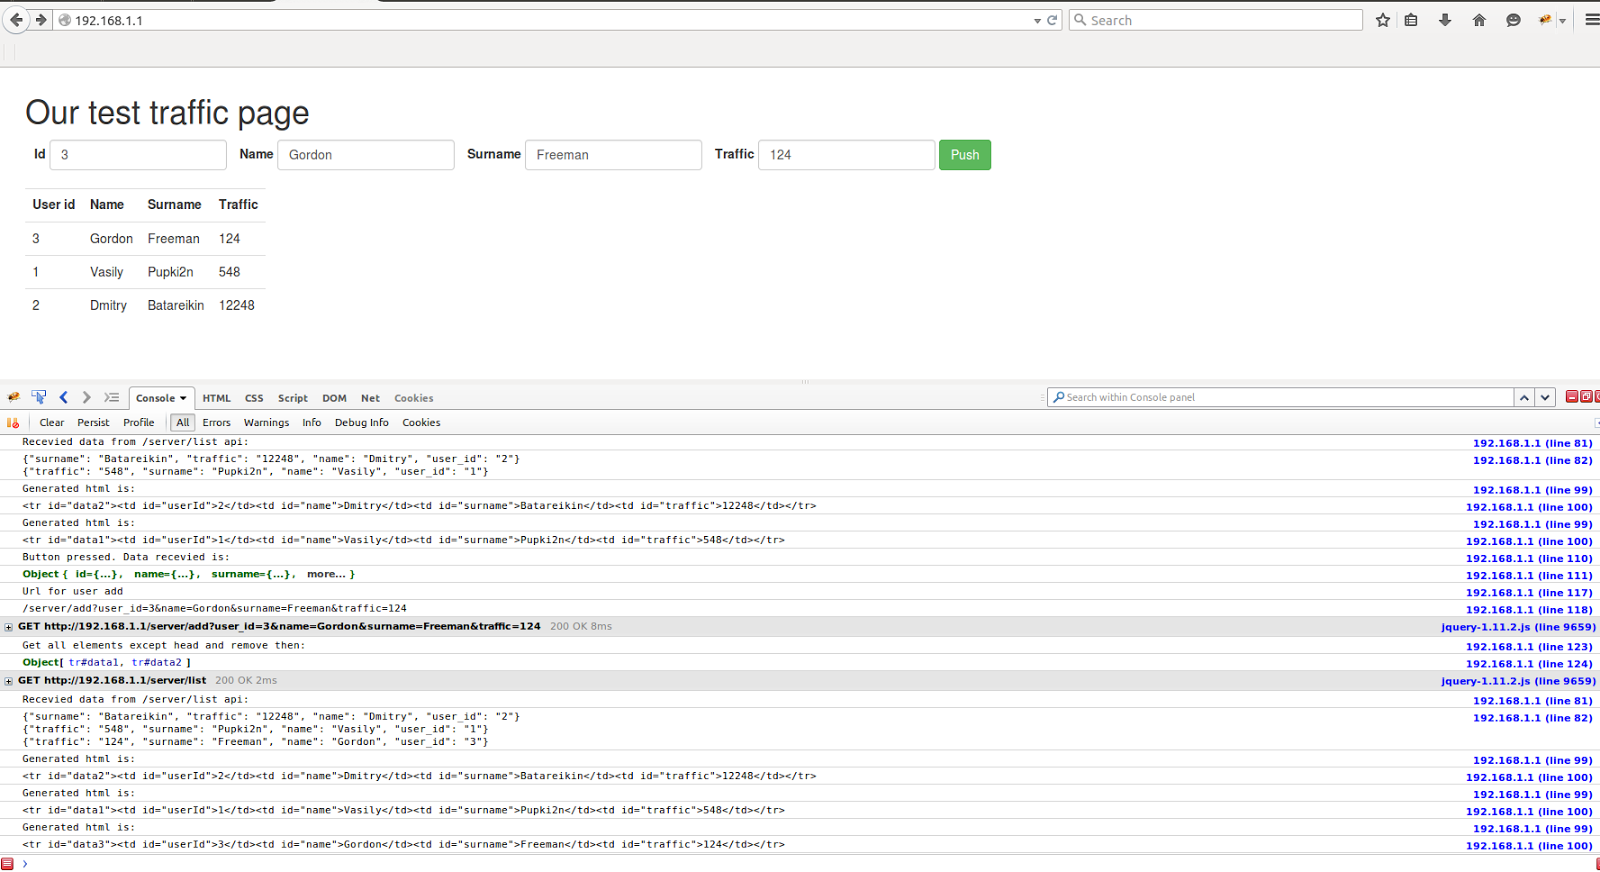
.
5.
frontend + backend. , js (flask, bootstrap jquery) . Backend , frontend' , bootstrap .
netflow . , mongo .
Nginx , . css bootstrap .
Source: https://habr.com/ru/post/269163/
All Articles