Visual Studio Code - the evolution of the cross-platform code editor on the example of the version for OS X
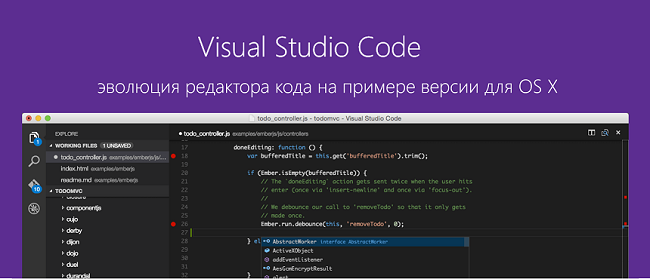
Visual Studio Code is a code editor with support for over 30 programming languages and file formats, as well as having a number of additional, useful features.
The tool was released this spring, and earlier we have already talked about the basic features of this cross-platform editor. Let me remind you that you can use VS Code on computers running Windows, OS X and Linux.
')
However, over the six months of its existence, the tool has been regularly updated and continues to be updated once a month, expanding its functionality, the list of supported languages, constantly improving existing capabilities, based on the feedback and wishes of users.
Today we will share an overview of the following Visual Studio Code features using OS X: integration with Unity3D, Visual Studio Online, GitHub, as well as detailed video materials on installing, configuring and comfortable working with VS Code on a Mac .
To install Visual Studio Code on your computer you need to download the distribution package on the official website code.visualstudio.com
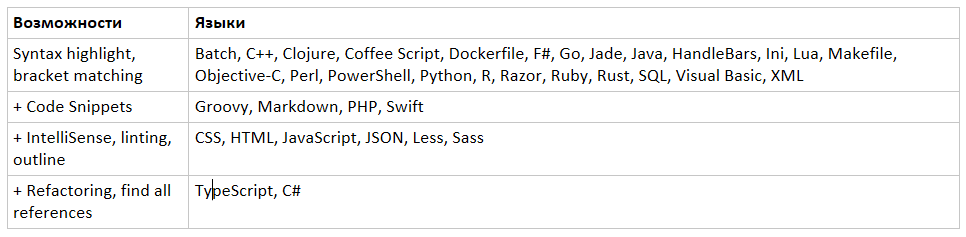
The full list of currently supported languages:
If you use Node.js to run JavaScript or TypeScript applications, then Visual Studio Code supports a debugger.
The debugger is also supported for applications that run on Mono, these are ASP.NET 5.0 and Unity3D applications. Thus, in VS Code, you can develop modern Web applications, having access to all features, ranging from IntelliSense support to debugging.
Version Control Systems
Git Integration
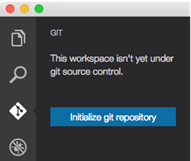
Visual Studio Code supports local and remote Git repositories. Once the Git utility is installed, the Visual Studio Code needs to restart and initialize Git for the current workspace:
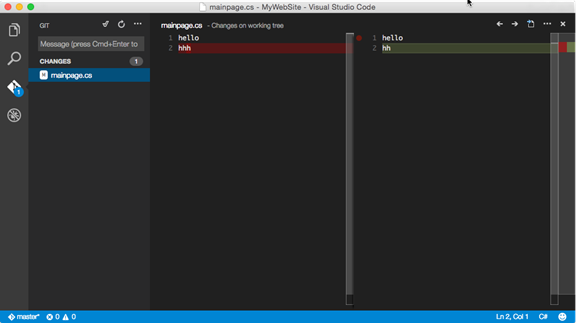
From this point on, you can work with Git locally. Switching to the Git window, you can see all the modified files and compare their contents with previous versions:
VS Code also allows you to work with different branches of the project:

Visual studio online
To fully utilize the Git platform, a third-party provider may be required. In this article, we will look at GitHub and Visual Studio Online. If you need to publish an open source project - use GitHub, but if the code should be closed from the outside world, then you will need to purchase a subscription.
Visual Studio Online does not support open source projects, but allows you to create closed projects and if your team consists of 5 or less developers, then using Visual Studio Online will be free. At the same time, it should be noted that the version control system is just one of the capabilities of Visual Studio Online, however, you can use many other features, such as planning utilities, Kanban board, virtual room for the team, etc. Thus, VS Code and VS Online can provide full support for the software development cycle.
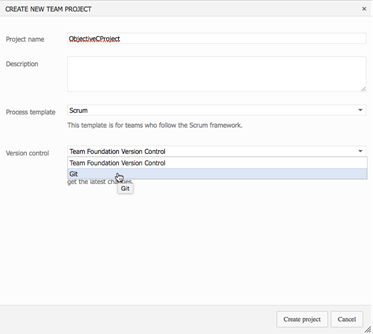
To start working with Visual Studio Online you need to register your account . Then you can start creating a new project. A project refers to the entire workspace that is created inside Visual Studio Online with the ability to store documents, the source code of all projects included in the solution, and so on.
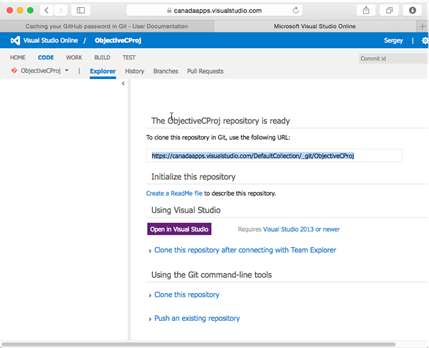
Once all the settings are complete, you need to get a link to the Git repository. To do this, go to the created project and open the Code tab, where you can copy the link.
If Git was installed as part of the Xcode command line utilities, then all the necessary files are already on the Mac and you just need to run the command: git config - global credential . helper osxkeychain
Github
Go to the main page of the project and copy the link that you want to use to clone the content. Use the terminal to perform the initialization process. This can be done from VS Code using the context menu or the Command Palette window:

As with Visual Studio Online, Git can be associated with the selected name: git config --global user.name xxxxx
And now the project can be cloned into the selected directory: git clone https: // github.com/xxxxx/testVSCode.git
The clone command will create a new directory on the disk with all the source files inside and, using VS Code, open the resulting directory.
Unity 3d
Unity3D is a popular game development environment, but on OS X, MonoDevelop is used as a tool for editing C # and JavaScript code. Let's demonstrate the process in a C # project.
Use Unity3D to create a new project or open an existing one containing a C # file. The first thing to do is change the default editor. To do this, in Unity -> Preferences on the External Tools tab, find the External Script Editor drop-down list that contains MonoDevelop by default and select Visual Studio Code in the Applications folder.
Right after that, you can open any C # file in Code. Note that only the file is open, and the Code still does not contain any information about the project, so many features are still disabled.
Open the project. Depending on the version of Unity, project files may not be created by default, so you can use the menu option Open C # Project. As a result of this command, in the project directory you can find the sln and csproj files:
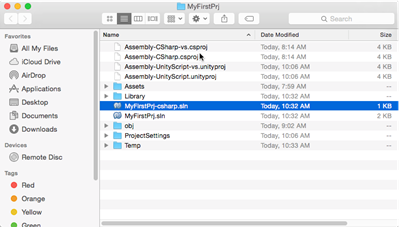
These formats are supported by Visual Studio Code, so you can open the directory.
Unity works with several projects that are used to build the game at various stages, but to open only one of them, use the status bar and press pick a project:

Visual Studio Code will display a pop-up window where you can select a project. In this case, you need a project with the csharp suffix:

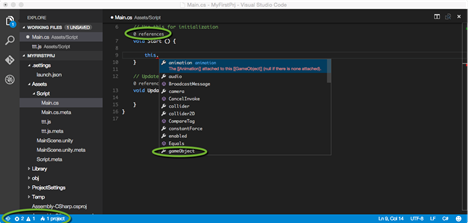
Visual Studio Code uses the OmniSharp compiler, which requires the latest version of mono, so to avoid errors, install the latest version of mono from mono-project.com. Once everything is set up, Visual Studio Code needs to be restarted and reopened the C # file.
Now IntelliSense system works correctly, and you can continue working in Code:
Debugging
Visual Studio Code supports debugging for node.js projects and for projects on mono. Let's demonstrate the debugger capabilities using the example of Unity and Visual Studio Code integration, since Unity uses Mono.
To activate debugging in Code, you must create a file launch.json and make debugger settings there. Go to the Debug window and click the Settings button to activate the creation of launch.json:

Remove from the created file all the code to work with node.js, and add the following:
{ "version":"0.1.0", "configurations":[ { "name":"Unity", "type":"mono", "address":"localhost", "port":56060 } ] } If the Unity plugin is used, then it is necessary to check that the option Write Launch File is set:

If the option is set, then you need to launch the application in the Unity player and launch.json will be created automatically.
To launch the debugger, go to the Debug window and click Start. Immediately after this, you can go to Unity and start the game in the player. If everything is good, then you can see the debugger:
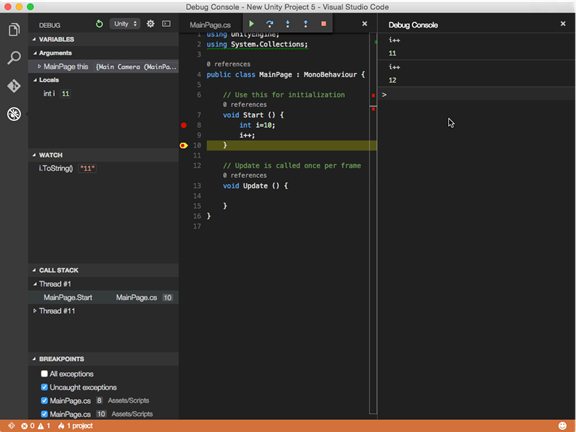
The debugger has all the necessary attributes that are characteristic of professional tools: Breakpoints, Call Stack, Watch, Variables, Debug Action Panel, Debug Console.
Tasks
In the context of Visual Studio Code, you can run any command line command and view the work directly from the development environment. Thus, you can use external compilers, debuggers, testing tools and so on.
By opening Command Palette and typing the Run Task, you can see that Code recognized all the tasks in the grunt configuration file and you can run them. As a result of the task, you can see the new JavaScript file with all the source code inside, converted by the algorithm. At the same time, the results of the work will be displayed in the Output window, which will allow detecting the problem in time.
Visual Studio Code supports special extensions that allow you to process data from the output window and convert it to formatted messages that appear in the error list.
Azure
Direct integration of Visual Studio Code with Azure is not provided. But there is a way that facilitates the process of deploying websites from Code to Azure.
To do this, you need to create an Azure account, open the control panel and create a new web application using the Web App template, thanks to which within a few seconds you can create a hosting space for the future site and place it there.
Once the infrastructure is created, you can go to the settings. In this scenario, Continuous deployment :
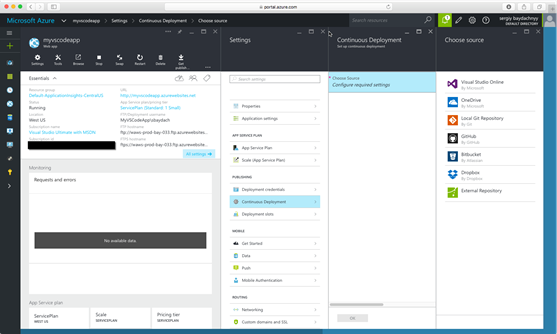
From here, it is clear that Azure supports the ability to deploy solutions from various types of storage. It is through integration with the GitHub and Visual Studio Online repositories, described earlier, that Code and Azure can be linked together. Thus, getting the opportunity to continue to perform remote code deployment directly from the interface of the Visual Studio Code editor.
Conclusion
Visual Studio Code allows you to implement various work scenarios and goes beyond the usual code editor. The described scenarios cover only part of the possible scenarios described in more detail on the official documentation page.
We are also happy to share video materials with you, including step-by-step instructions on installing, configuring and working with the Visual Studio Code tool on Mac:
A link to the full course, where a series of video instructions describes in detail each of the mentioned scenarios, including working with JavaScript, TypeScript and ASP.NET.
useful links
- Channel9 Portal: Visual Studio Code for Mac Developers
- Site Visual Studio Code http://code.visualstudio.com
- VS Code Developer Team Blog http://blogs.msdn.com/b/vscode/
- Twitter https://twitter.com/code
- Requests for VS Code features on the User Voice site https://visualstudio.uservoice.com/forums/293070-visual-studio-code
Source: https://habr.com/ru/post/268837/
All Articles