Preparing ASP.NET5, issue number 5 - Gulp and Bower rush to the rescue
We continue our column on the topic ASP.NET5 with a publication from Vyacheslav Bobik, a .NET developer from Radario. In this article, Vyacheslav is interested in the use of popular Gulp and Bower automation tools with ASP.NET5 with integration into Visual Studio. Previous articles from the column can always be read on the link #aspnetcolumn - Vladimir Yunev
Nowadays, client-side development is no less complicated than server-side development. A modern frontend developer has to solve many routine tasks, such as: preprocessing Lass / Scss / Stylus, writing vendor prefisks, post-processing css, sticking styles into one file and much more.
Also, if there is more than one frontend developer in a team, it would not be bad to use linters to validate js files before they get into production. If you perform all these tasks manually, then it will take the lion's share of working time, and nothing will be left to solve business problems.
Therefore, frontend developers have quite powerful tools that take on the implementation of many routine tasks, such as: gulp and bower, and in the new ASP.NET5 they come out of the box. Let's look at the example of an ASP.NET5 application, how we can use gulp and bower.
Gulp
Gulp is a utility for automating project builds and improving workflow. The main unit performing our task is called - task. Let's create an empty ASP.NET5 project.
')

Add the NPM Configuration file to the project root and name it package.json
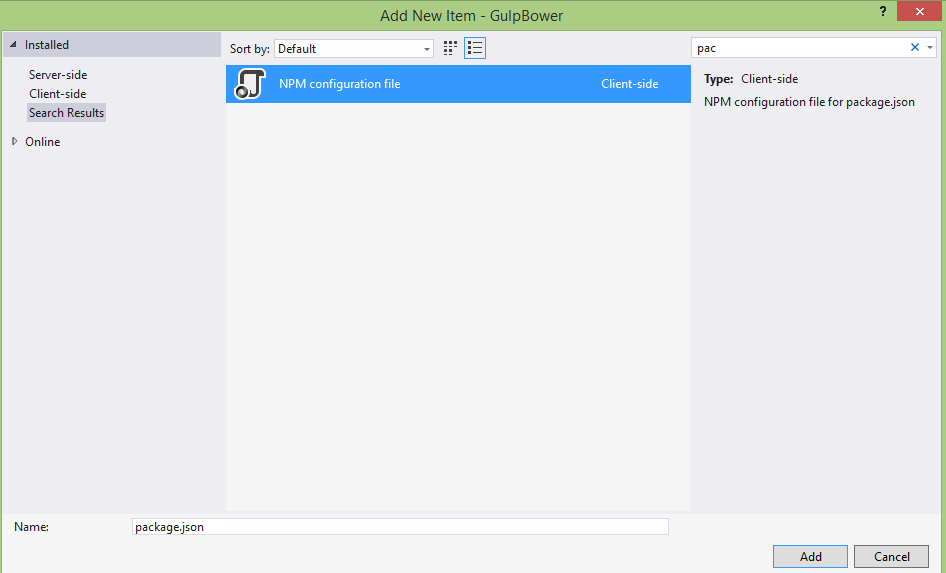
To use gulp in our project, you need to install it. To do this in the package.json file, in “devDependencies” we write "gulp": "3.9.0". All tasks for gulp are described in a special file for it - the Gulp configuration file, we add it.

After adding the file, it by default contains the gulp variable, and a task with the name default. If we write console.log ("Hello Gulp") inside the task; and execute it (to do this, right-click to click on gulp.js and click on Task Runner Explorer, then double click on the default task).

we will have the following window in which we will see the result of our task

After a little hello-world, let's write something more useful, for example, processing from less to css.
First you need to connect the gulp-less plugin, for this we open package.json again and in "devDependencies" you need to add "gulp-less": "3.0.3".
Create a simple main.less file with the following contents:
@base: #f938ab; .main { color: @base } As a result, our project should look something like this:
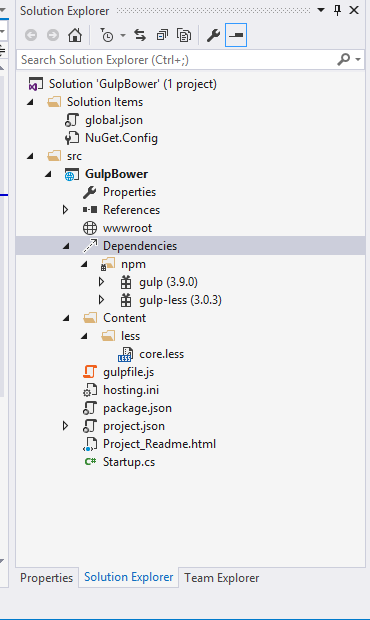
Now in gulp.js we will add initialization of the gulp-less plugin, as well as the task of processing from less to css.
var gulp = require('gulp'), less = require('gulp-less'); gulp.task('less', function () { gulp.src('./Content/less/**/*.less') .pipe(less()) .pipe(gulp.dest('./wwwroot/' + 'css')); }); gulp.task('default', function () { console.log("Hello Gulp"); }); What makes gulp a very elegant tool is the streaming technology for organizing the build process. Since all data is transferred directly to the buffer, there is no need to create temporary files. All work inside the task takes place in the form of a pipe. In the task 'less' we input our less files to the input, process them, and save them in the wwwroot / css directory. In the new ASP.NET5, the wwwroot directory is the home directory for the project, so all static files should be saved to it. After completing the task, our project will look like this:

The core.css file will contain:
body { color: #f938ab; } We have reviewed examples of simple examples of the hello-world level, but in real projects everything is usually somewhat more complicated, and by simply performing tasks you will not get off. What if before launching one task we need to perform some preparatory actions? For this gulp allows us to use dependent tasks, when the execution of one task depends on another.
Let's create a simple task that writes to the log:
gulp.task('dependent', function () { console.log('hello from dependent gulp task') }); less : gulp.task('less', ['dependent'], function () { gulp.src('./Content/less/**/*.less') .pipe(less()) .pipe(gulp.dest('./wwwroot/css')); }); Run the less task, and if everything worked out, then we will see the following:

As we can see, gulp quite easily and conveniently saves us from routine tasks.
Bower
In the world of server-side development, if we want to include a third-party library in the project, the first thing that comes to mind is to install it using a package manager, for example: nuget, gem or easyinstall. The idea of managing dependencies in a project using “packages” is very convenient and as old as our world, but for the client-side it was not until 2012, through the efforts of two Twitter developers, a start was made for bower. Bower is a package manager for web that rather quickly became the standard de facto in dependency management for front-end development.
ASP.NET5 is no exception, and the preferred way to install front-end libraries (jquery, bootstrap, etc) is just bower. Let's look at it in action.
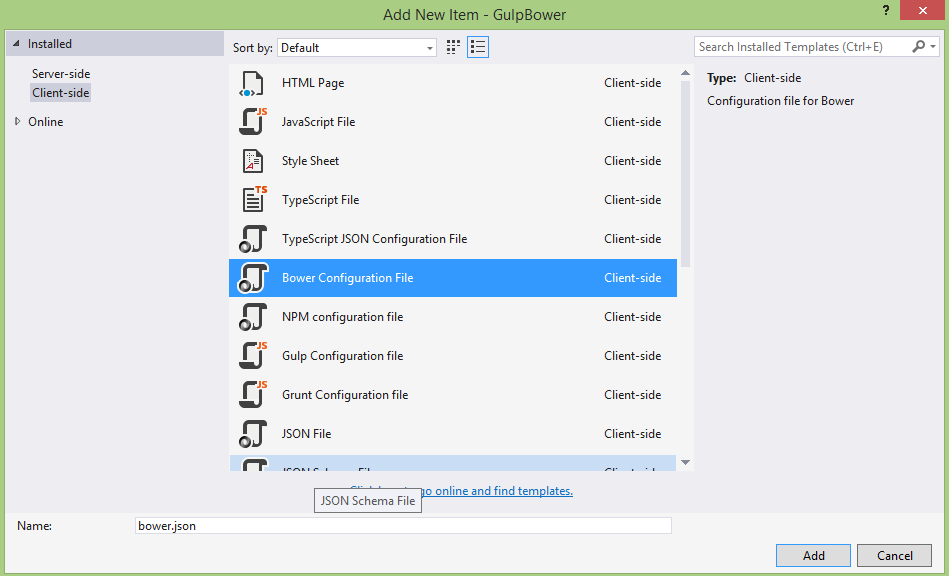
The Bower Configuration File is responsible for the description of all client-side dependencies in the project, we will add it to the project.
Now let's add to our jquery project. To do this, open bower.json and add "jquery" to "dependencies": "2.1.4", visual studio, using the autocomplete, will show us the latest stable version of the package.
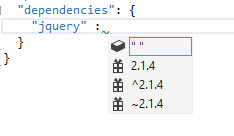
Please note that the version of the package is one, and bower offered us three options. The thing is that bower uses the semantic versioning for versioning packages. The tilde “~” means that bower will download version 2.1.4 and any patches to it. For example, if we decide to upgrade our packages via bower update and the next version of jquery 2.1.5, then bower will update it. If the next version of jquery 2.2.0 or 3.0, bower will ignore the update. The “^” symbol tells bower to load any versions of the library within> = 2.1.4 <2.0.0.
Naturally, if necessary, we can specify the version below, but for the sake of example we will use the latest one. Save the file (Ctrl + S), and visual studio will automatically download the jquery package and put it in wwroot / lib. The tree of our project now looks something like this:

As we see the package contains not only the jquery.js we need, but a lot more. In my opinion, this is a small minus of bower packages, which is solved quite simply: we can write a simple gulp task to remove all the excess from wwroot. To use jquery, it remains to insert a view link into the view (or layout).
<script src = "~ / lib / jquery / dist / jquery.js"> </ script>. If the path seems long and not very beautiful, then again, all this can be solved with the help of gulp.
So, using bower is very easy and simple to manage dependencies, and the most important thing in my opinion is that they are all described in one place. In addition to a convenient upgrade, this will minimize the risk of diverging versions of the same library within the project.
Conclusion
In this article, we learned about the basic tools of client-side development in ASP.NET 5. We tried simple and dependent tasks on gulp, stopped installing packages using bower, which allows us to avoid “dependency hell” in the project. It's great that the guys from Microsoft built these tools into ASP.NET 5, and there is no need to spend time setting up the infrastructure around the project or writing their own solutions.
To authors
Friends, if you are interested in supporting the column with your own material, please write to me at vyunev@microsoft.com to discuss all the details. We are looking for authors who can interestingly tell about ASP.NET and other topics.

about the author
Bobik Vyacheslav Borisovich,
.NET Developer at Radario
A young .Net programmer with 3 years of experience. ASP.NET MVC developer, author of Windows and Windows phone applications.
Source: https://habr.com/ru/post/268733/
All Articles