Motivation for programming, through 3D drawing (review of the BeetleBlocks project)
The topic of attracting students to programming is quite relevant. And not a few copies were broken on the habr fields when searching for the best language for beginners.
It seems to me that, apart from the technical component, the moment is not unimportant - for this system to arouse interest in further experiments and studies - programming for beginners should be interesting.
')
If you collect the system requirements for beginners, it is:
- quick start (without having to install the system)
- availability to get started from scratch
- at a minimum keyboard work
- visually significant work result, with little effort
- small iterations from the beginning of the work to the result
- basic programming concepts
- game moments.
This publication will provide an overview of the Beetle Blocks system, with which you can create programs that draw 3d objects, and which, in my opinion, satisfies most of these moments.
In some schools, a 3d printer appears in computer science classrooms , and therefore such a program plan may allow students to be interested not only as the basis of programming, but also for creating real 3D printed objects (the second part will be devoted to this example).
And now, a review of the Beetle Blocks system.
The Beetle Blocks system, made on the basis of the wonderful Snap! Project, about which we have recently been telling . Snap! in turn, is a web analog of Scratch visual programming language.
Fast start
To start, just go to the browser at: http://beetleblocks.com/run/
The following page will open:
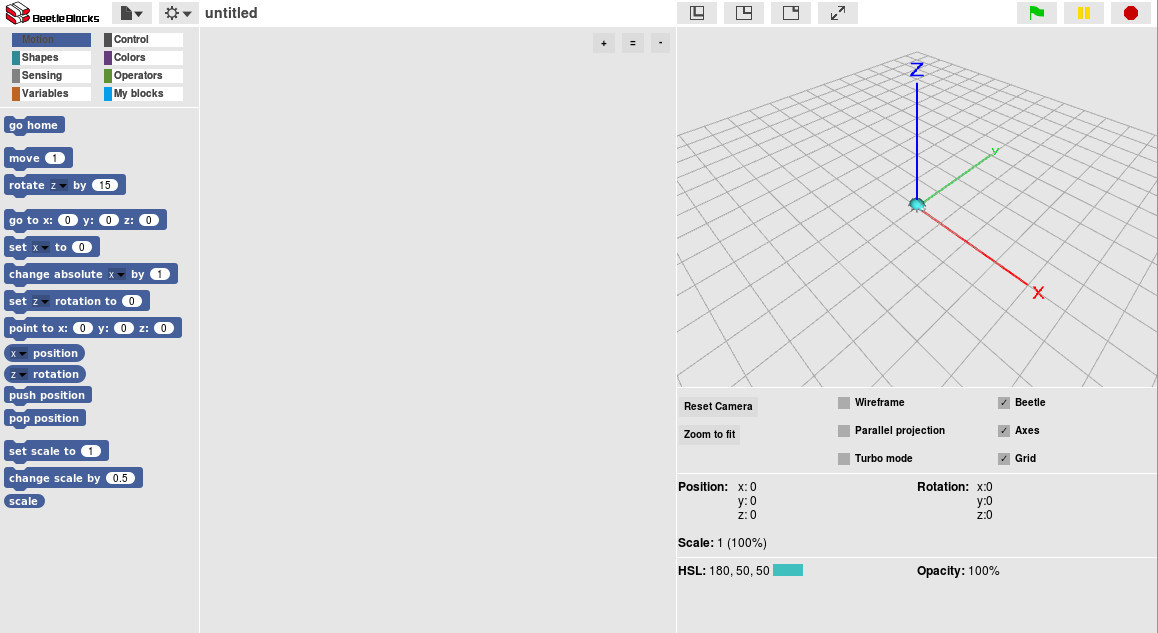
On the left are displayed groups of blocks, blocks. In the central area - the space for the program. On the right is the 3D world where the drawing of the object takes place. And controls the display / camera elements.
Accessibility to get started from scratch
The system is immediately ready for operation. The principle of operation is similar to the Scratch system - we “transfer” the blocks from the left side, launch the blocks for execution - and the “bug” is controlled, which executes commands.
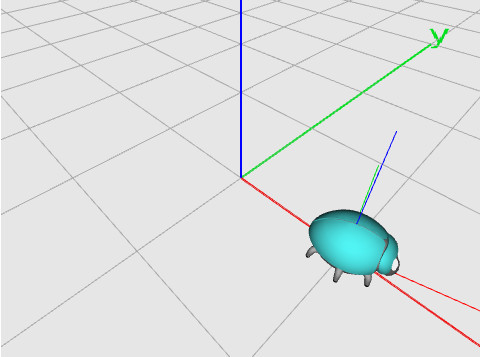
Here is the "bug":
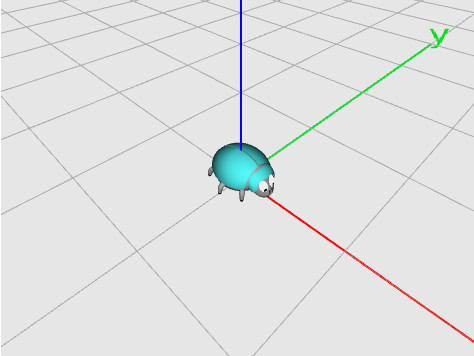
By the way the name "Beetle Blocks" - just mentions this bug (Beetle).
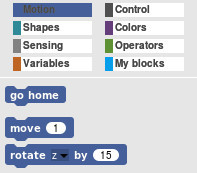
Here are the control blocks that we see on the left (fragment):
To perform an action, it is not necessary to “transfer” the block to the workspace; simply press on the block to perform its action.
In this example, we see that the group of blocks “Motion” is selected - they are responsible for the movement, and we see three blocks:
- go home - moves our bug to the starting position
- move [1] - moves the beetle one division forward
- rotate [z] by [15] - rotation of the bug at 15 degrees, around the Z axis, counterclockwise.
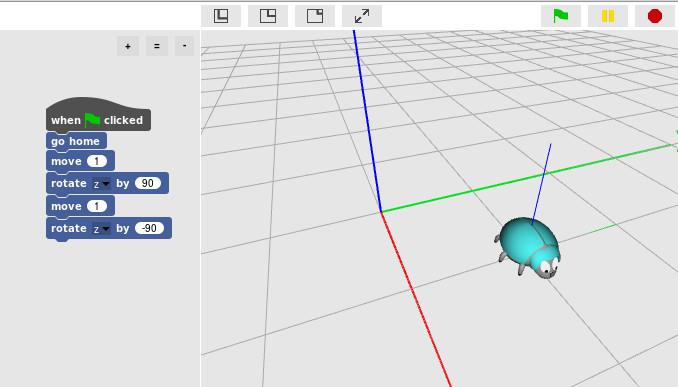
Now, just by clicking on move and rotate, we’ll get our bug moving around the 3D world:
And we can always get it back by clicking on " go home "
Minimize keyboard work
In the Scratch-like system, the creation of a program occurs without the help of a keyboard, and visually using the Drag & Drop method - that is, the block action that is of interest is transferred to the working area (central). A sequence of actions is determined by the clutch of two blocks (the same “snap”).
Thus, the first program, with the following commands for the "bug":
- move forward by 1 division
- turn left 90 degrees
- move forward by 1 division
- turn right 90 degrees
It will look like this:
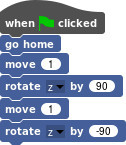
And accordingly, it looks like everything together:
Note that a control block has been added above: when [green flag] clicked . This block means that the execution of the “program” attached to it will begin by pressing the green flag (which is above right). Further, the go home block is specified in the program - this will allow starting from the same point each time, otherwise the bug will walk in 3D world, after each start.
Visually significant work result, with little effort
Of course, 2-dimensional movement is not so interesting.
Our "bug" can move up and also create 3D shapes (spheres, cubes): let's try to create a cube, move up, turn 15 degrees, and do it several times.
Here is what happened:
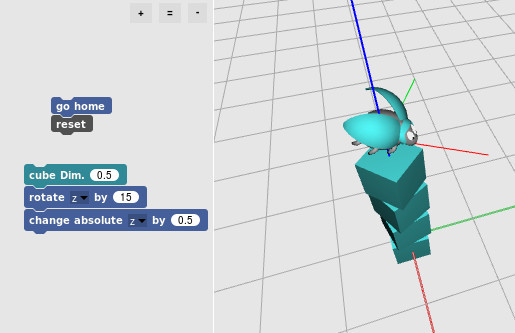
In this example, there is no when [green flag] clicked block, because clicking on any group of blocks in the workspace - leads to their execution. And it is also convenient to bring the 3D world to the initial state, for this there is a reset block (it is in the Control block group), and also to move our bug to the initial position and direction - the go home block already familiar to us. Respectively combining them together - I can easily bring the 3D world to the initial state - by simply clicking on them.
Added a few more blocks (commands), and our beetle begins to create spirals:
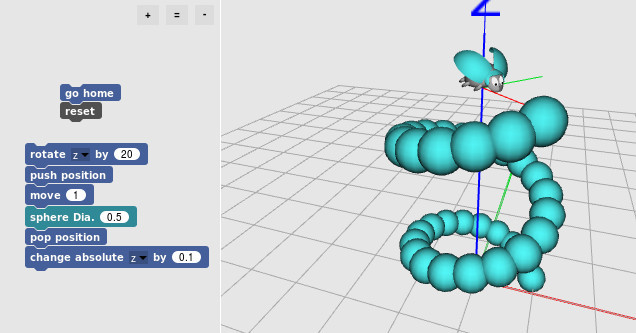
In this example, we applied the push position and pop position blocks, respectively, allowing us to memorize and restore the positions of the bug.
Small iterations from getting started to getting results
The work in Beetle Blocks occurs interactively, that is, each action is immediately displayed in the 3D world, you can “tune” the program, getting an interesting result, by changing only the input parameters.
For example, by changing only the parameters in the program above, we get this spiral:

Basic programming concepts
Just like Scratch, and accordingly Snap! - BeetleBlocks contains a complete set of blocks for writing a program:
- cycles (for example, forever, repeat [10], repeat until [])
- conditions (for example, if, if / else)
- mathematical operations (including sin / cos / tan, ln, random number generation, etc.)
- creating and working with variables
- work with arrays
- the ability to create and call functions
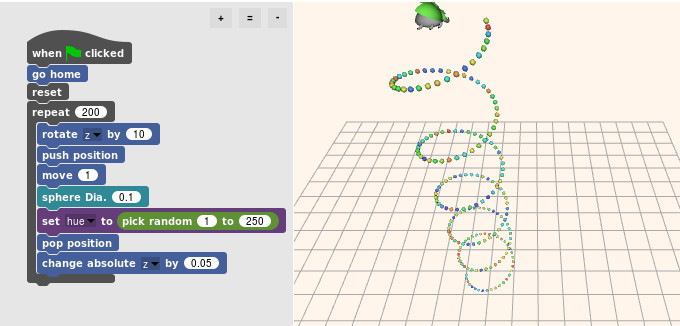
Modifies the previous program - add a loop, and a random change in the color of the sphere (which we draw), this is what happens:
Next, we can draw the drawing of our spiral into a “function”, to do this, click on the section “My blocks”, then “Make a block” (choose a name, for example “Spirale”) and transfer a fragment of our blocks (which draws 200 balls in a spiral) inside this function.
Further, this our “function” appears for selection as a normal block. Now we can draw as many spirals as desired at any point, for example, with a slight shift from each other, a “double helix” is obtained.
Here is an example with the result of the execution:
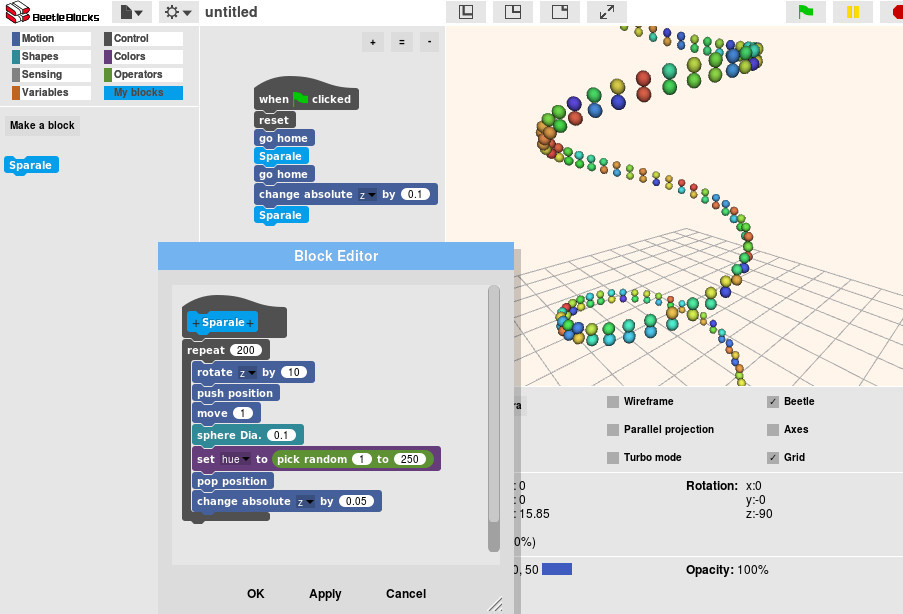
On the left, our created block / function “Spirale” is displayed, in the program there are two calls of this function, with a shift along the Z axis. The contents of the Spirale function / block are displayed, and on the right is the result of the program execution.
Other examples
There are many other examples in the BeetleBlock system. To do this, click on the “File” icon in the upper left, select “Open”, in the opened dialog choose Examples, and select the example “simple code examples”:
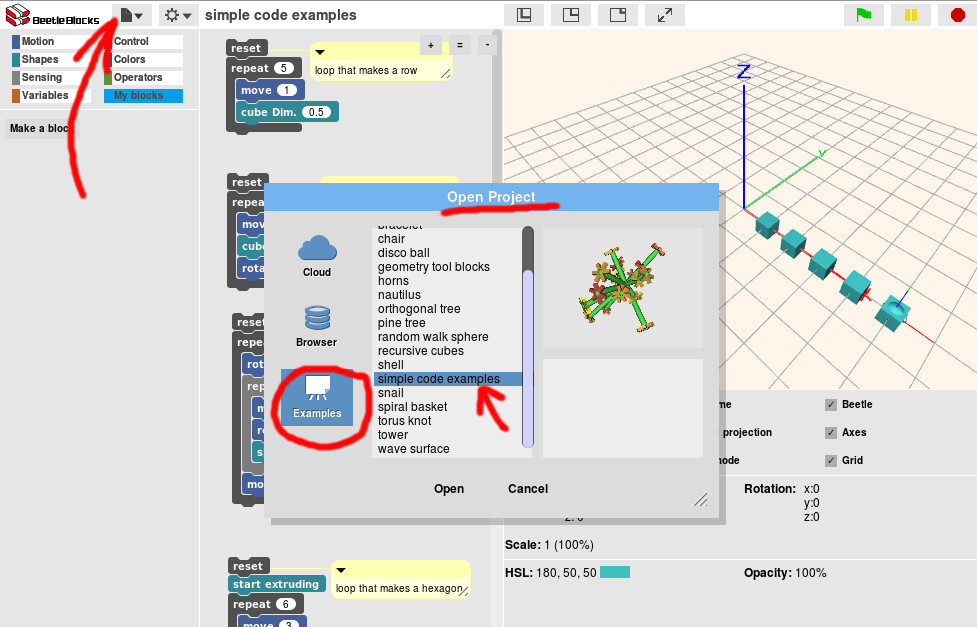
In this project, there are about 10 examples demonstrating the capabilities of the system (and by the way, when applying reset (cleaning the 3D world) - there is no need to specify go home ).
Links
The BeetleBlock system is based on html / css / js technologies, and fully open-source, can be found on github: github.com/ericrosenbaum/BeetleBlocks
This applies to Russification, changes in color, etc.
Snap User Guide ! (parent project for BeetleBlock) is available here (in English).
Application in schools
I think computer science lessons can be doubly useful if they are integrated with existing school subjects. And in the case of BeetleBlocks, it can be algebra / geometry — after all, it is much easier to illustrate the work of an algebraic function by creating its visual representation.
Or an example with a double helix - I think many people were reminded of DNA, and an informatics lesson on which the 3D model of the double helix of DNA is “programmed” would be quite interesting.
And of course - 3D printing - the models that are created in BeetleBlock can be printed on a 3D printer.
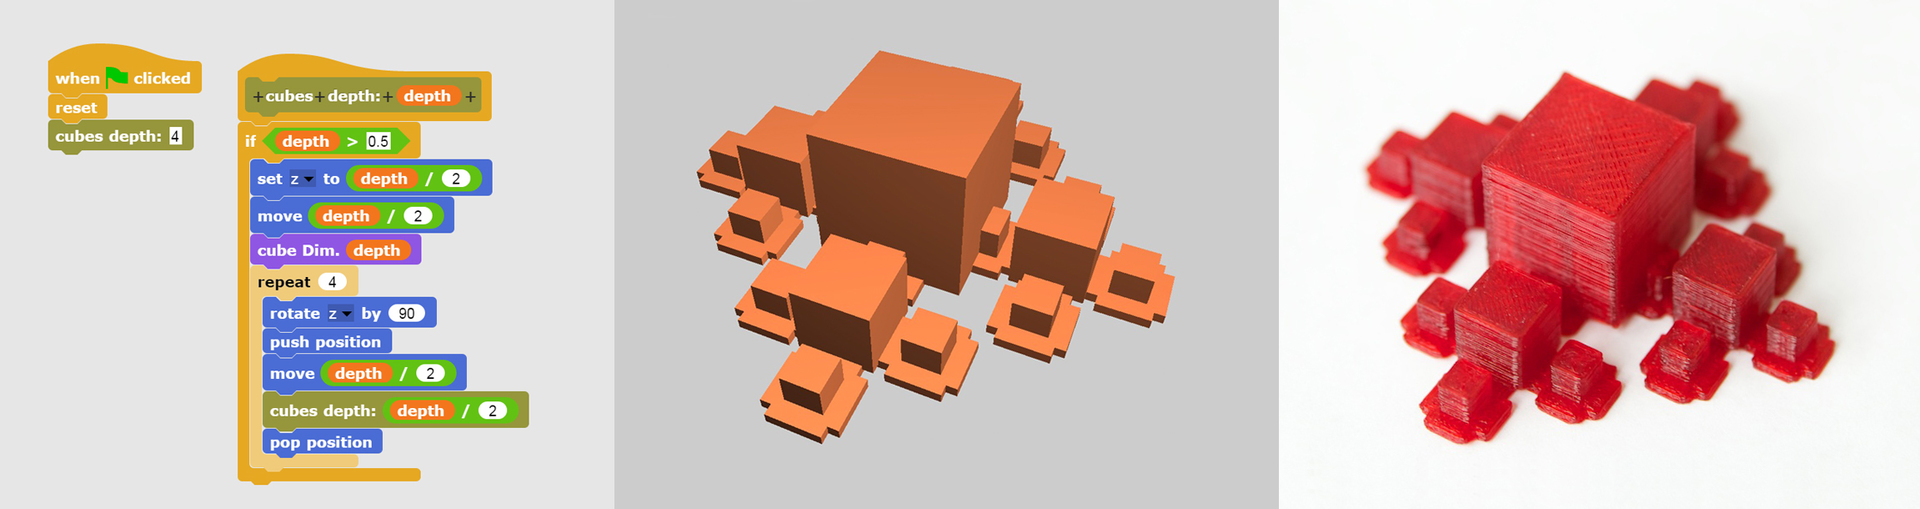
An example of a model created using BeetleBlocks and printed on a 3D printer ( source ):
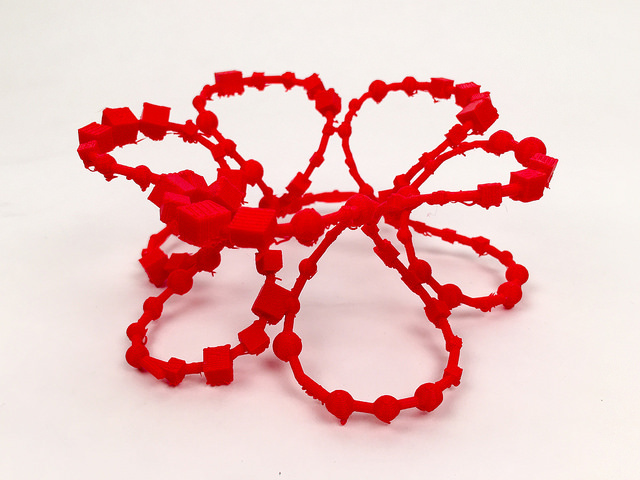
This increases interest in both the 3D printing itself (if there is a fairly simple tool for creating a 3D model) and the BeetleBlock program — when 3D printing of a “programmed” 3D figure is possible. And about such an example the next article will be.
Source: https://habr.com/ru/post/268639/
All Articles