Programming with YII2: get down to work
From the translator.
Life is such a thing, somehow I started a series of articles on Java Spring and the community reported that the choice fell not on the latest information. Now life has abandoned me in hardcore C ++ programming, and the soul still needs the web, so in my free time I decided to explore with you technologies that any hosting can consume and at the same time the complexity of the developed applications and OOP will not suffer much from PHP
The original text of the article in English can be found at http://code.tutsplus.com/tutorials/programming-with-yii2-getting-started--cms-22440
The translation does not pretend to be literal, but about gross errors, if any, please report in the comments.
If you ask “what is YII?”, Read the earlier lesson “Introduction to the YII Framework”, which describes the advantages of YII, and also addresses the issue of innovations of the second version of the framework of October 12, 2014.
This lesson is about installing YII2, setting up your environment, writing the classic “Hello world!” Application, setting up a remote environment for hosting and deploying with GitHub.
Installation YII2
Documentation
You can find detailed instructions here , but I'll go over the simple and typical Mac OS X installation and setup environment. The framework has detailed documentation and a description of the classes , which contains all the details about YII.
From the translator. I, in turn, do not have an apple device at hand and will be doing all the actions under Ubuntu (running under VMWare Player).
Composer installation
For comfortable use of the framework, it is recommended to use the popular PHP extension manager - Composer . If you haven't installed it yet, do the following:
curl -s http://getcomposer.org/installer | php mv composer.phar /usr/local/bin/composer Installation YII2
Now use Composer to install YII2. To install, you need an account on GitHub , if you do not have one, register.
Let's call our first project "hello":
cd ~/Sites composer global require "fxp/composer-asset-plugin:1.0.0-beta2" composer create-project --prefer-dist yiisoft/yii2-app-basic hello YII2 supports two types of development applications: simple and advanced. For this lesson we will use a simple application, it is installed by default. The advanced application template supports the front-end, back-end and console, as well as WordPress, this is the administrative panel and tasks for cron.
')
Installing and configuring a local development environment
I use open source MAMP for OS X software for development. Make sure that MAMP is running and its web server and database server are running. Then create a symbolic link to the site directory:
cd /Applications/MAMP/htdocs ln -s ~/Sites/hello/ /Applications/MAMP/htdocs/hello Now, if you have configured everything correctly, then opening localhost : 8888 / hello / web you will see a simple YII2 application template with Bootstrap 3.x.

This page will surprise developers who have previously developed on YII 1.1, where the latest version of Bootstrap was not pre-installed, which has firmly taken its place in the network.
YII application architecture
One of the key features of the framework is support for the MVC pattern . This allows you to create more structured code that is easier to understand, simplifies many things that are implemented with difficulty in PHP, such as security and automatic code generation. It also helps maintain and reuse the code.
In the YII application, all traffic is directed to one /web/index.php file. This file loads YII, dependencies, and then launches our application.
<?php // comment out the following two lines when deployed to production defined('YII_DEBUG') or define('YII_DEBUG', true); defined('YII_ENV') or define('YII_ENV', 'dev'); require(__DIR__ . '/../vendor/autoload.php'); require(__DIR__ . '/../vendor/yiisoft/yii2/Yii.php'); $config = require(__DIR__ . '/../config/web.php'); (new yii\web\Application($config))->run(); The default is the Index method in the file /controllers/SiteController.php
public function actionIndex() { return $this->render('index'); } As a rule, there are many methods in controllers, but with a minimal amount of code. Controllers control access, load models and views. The main semantic load should lie on the models, and the representations only display patterns.
By default, YII displays /views/layouts/main.php as the view for /views/site/index.php. main.php supports html and css page structure with toolbar and content. Inside main.php, content is invoked:
<div class="container"> <?= Breadcrumbs::widget([ 'links' => isset($this->params['breadcrumbs']) ? $this->params['breadcrumbs'] : [], ]) ?> <?= $content ?> </div> The $ content variable will be replaced with the code generated in /views/site/index.php, which represents a static html page.
We write the application "Hello world!"
We include beautiful URLs
First, let's turn on the beautiful addresses with mod_rewrite. If on the home page you click on the about button, you will see an address similar to this: localhost : 8888 / hello / web / index.php? R = site% 2Fabout. We now bring it to this type of localhost : 8888 / hello / web / site / about.
The config directory stores the settings for your entire environment: the settings for the web application, the console application, and the database settings. Modify the /config/web.php file as follows:
'components' => [ //... 'urlManager' => [ 'showScriptName' => false, 'enablePrettyUrl' => true ], //... 'request' => [ Then you need to create in the / web directory where our index.php file, .htaccsess, is stored, with the following contents:
RewriteEngine on # If a directory or a file exists, use it directly RewriteCond %{REQUEST_FILENAME} !-f RewriteCond %{REQUEST_FILENAME} !-d # Otherwise forward it to index.php RewriteRule . index.php Make sure that mod_rewrite is enabled in MAMP, if there are any problems see the thread stackflowflow branch.
In your browser, go to localhost : 8888 / hello / web / site / about, now you should see the About page of the simple YII application.
Create action
The next step is to create an action for the controller, calling Say, to repeat our message. In the file /controllers/SiteController.php add the following:
public function actionSay($target = 'World') { return $this->render('say', ['target' => $target]); } This function will search for the target parameter in the url address to display it. In the case of its absence, simply “World” will appear. In the YII framework, actions are implemented as methods with the action prefixEname of Action. In SiteController class, we used public function actionSay to create the Say action.
The standard behavior of the render method is to look for a file in views / ControllerID / ViewName.php, so let's create a say.php file in / views / site /:
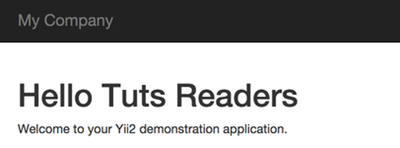
<?php use yii\helpers\Html; ?> <h1>Hello <?= Html::encode($target) ?></h1> <p>Welcome to your Yii2 demonstration application.</p> This template will print the string “Hello + $ (target)”, where $ (target) is the variable passed to the url. To ensure security, it does not go straight to the line, but at the beginning is checked for malicious code.
If you now visit localhost : 8888 / hello / web / site / say? Target = Tuts% 20Readers, you will see the following:
This is a simple example of the implementation of the MVC framework model. In more detail you can familiarize yourself with this example on the framework website in the official documentation .
And now let's flood our application on GitHub and launch it on the production server.
Setting up your remote environment
A simple YII application should run on the Apache and Nginx servers out of the box, I will give you instructions on running Apache, you can find about Nginx here .
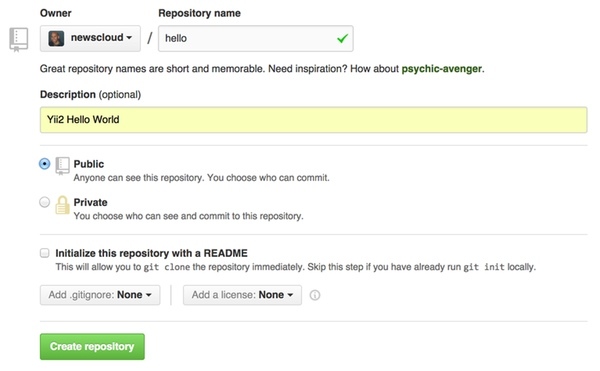
Create a repository on GitHub
As soon as I set the base template YII, I create a repository on GitHub :
Note: It is much easier to copy and paste YII .gitignore from GitHub (https://github.com/yiisoft/yii2/blob/master/.gitignore) to the local ~ / Sites / hello / .gitignore folder than to delete it manually. . Although both options are valid.
I use the GitHub Mac OS X application (https://mac.github.com/), although you can also use the command line to initialize the repository. Like this (replace “youraccount” with your name on GitHub:
cd ~/Sites/hello git init git commit -m "first commit of hello world for yii2" git remote add origin git@github.com:youraccount/hello.git git push -u origin master From the translator. I prefer to use Bitbucket as a repository, as it allows you to have private repositories for free.
Configuring Apache on the server
If you have not yet configured the server, I recommend looking at the instructions for configuring the server on Ubuntu (http://jeffreifman.com/digitalocean). If you have an IP address, configure your server's DNS:
yourdomain.com A 192.161.234.17 Now log in remotely via ssh to your server using IP or domain name
ssh root@yourserver.com Update the configuration, install Git, enable mod_rewrite for Apache and mcrypt for PHP.
sudo apt-get update sudo apt-get upgrade sudo a2enmod rewrite php5enmod mcrypt Setting up remote server access to github
Now we will set up pull requests with GitHub. First install git
sudo apt-get install git Now we will create a group for www, add data and GitHub users and configure their rights:
adduser github addgroup www adduser github www adduser www-data www chown -R :www /var/www chmod +s -R /var/www chmod -vR g+w /var/www/ Now create a key to synchronize with the repository:
su github ssh-keygen -t rsa -C "yourgithubaccount@youremail.com" exit cat /home/github/.ssh/id_rsa.pub You will see something similar to this, you need to copy and paste this key on GitHub
(if you have any problems, look here (https://help.github.com/articles/error-permission-denied-publickey/)):

Go to the repository settings section and add this key:

Then you will see something like this:

Finally, you can clone a branch to your server:
git clone git@github.com:youraccount/hello.git /var/www/hello If everything is properly configured then you will see:

As the amount of code increases, you can easily synchronize the code of the local machine and the production server through the repository. It is much easier than synchronizing with an archive or manually, you will see for yourself in the process of further learning.
Creating a site configuration for Apache
Create a configuration file:
nano /etc/apache2/sites-available/hello.conf Change the domain name to your:
<VirtualHost *:80> ServerName yourdomain.com # Set document root to be "basic/web" DocumentRoot "/var/www/hello/web" <Directory "/var/www/hello/web"> # use mod_rewrite for pretty URL support RewriteEngine on # If a directory or a file exists, use the request directly RewriteCond %{REQUEST_FILENAME} !-f RewriteCond %{REQUEST_FILENAME} !-d # Otherwise forward the request to index.php RewriteRule . index.php </Directory> </VirtualHost> Include your website:
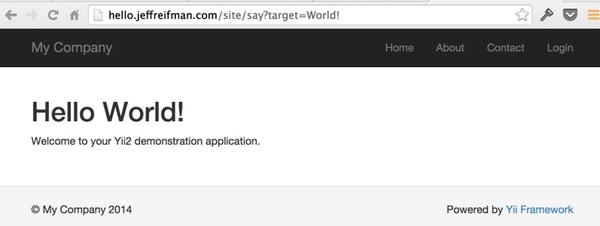
a2ensite hello.conf a2dissite 000-default.conf service apache2 reload Make sure your application works by following yourdomain.com/site/say?target=World link! (The framework debug toolbar at the bottom of the page will be disabled!)
Congratulations! Now we are ready to start exploring more complex features of the framework!
Source: https://habr.com/ru/post/268615/
All Articles