Office as Platform Issue 5 - Introducing the OneNote REST API
In the next article, Alexander Bogdanova talks about using the new OneNote REST API for applications of any type and using the example of universal Windows 10 applications. You can always find all articles in the “Office as Platform” column using the link #officeplatform - Vladimir Yunev.OneNote is one of the most popular applications for creating notes, lists, daily routines. In order to simplify the creation of diaries, Microsoft released the OneNote API. You can integrate OneNote to work with notes in your application. For developers, OneNote REST API is available , on the basis of which you can create an application for any platform.

On Habré, there was already a brief tutorial on using OneNote API, today I will talk about the capabilities of the OneNote REST API using the example of a Windows 10 application.
How does the OneNote API work?
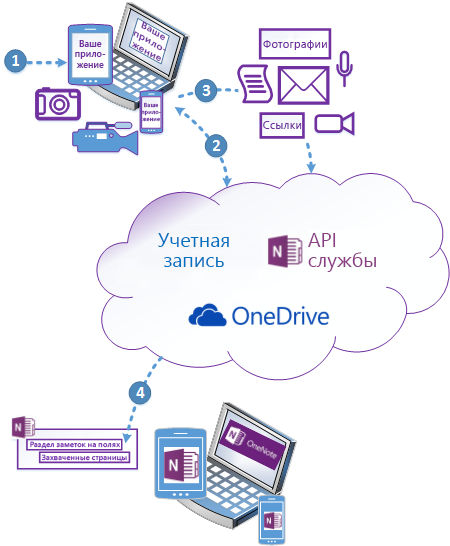
The Microsoft OneNote API runs in the globally accessible Microsoft cloud and sends data from your applications to the user's OneDrive client.
')
Working with the OneNote API in an application consists of three steps:
- Verify user login information and get the OAuth token for a Microsoft account in case a user wants to send data to OneNote.
- Sending information and token to the API.
- Add data to a notebook on the Internet. Data becomes available in other OneNote clients.
In order to start working with the OneNote API, you need to obtain a client identifier (clientID). Let's see how to do it.
Getting client ID (clientID)
Go to the Development Center for Microsoft Accounts website and sign in with your Microsoft account. A window opens in which the applications you created previously are displayed.
For those who do not have an account: Create a Microsoft account here .
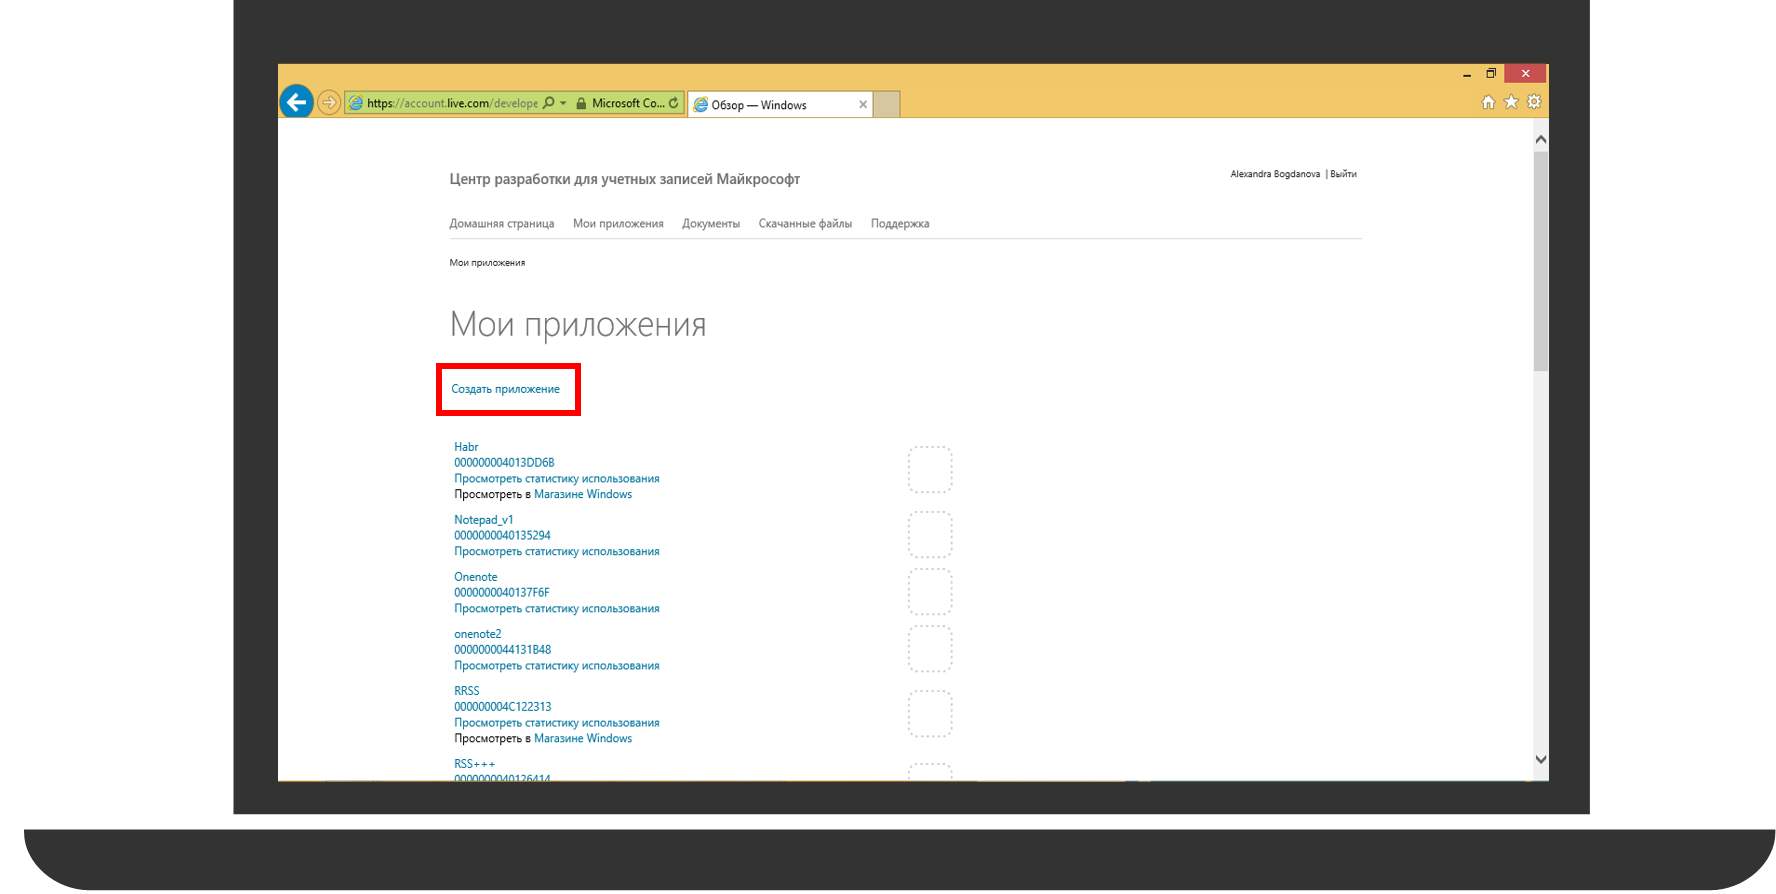
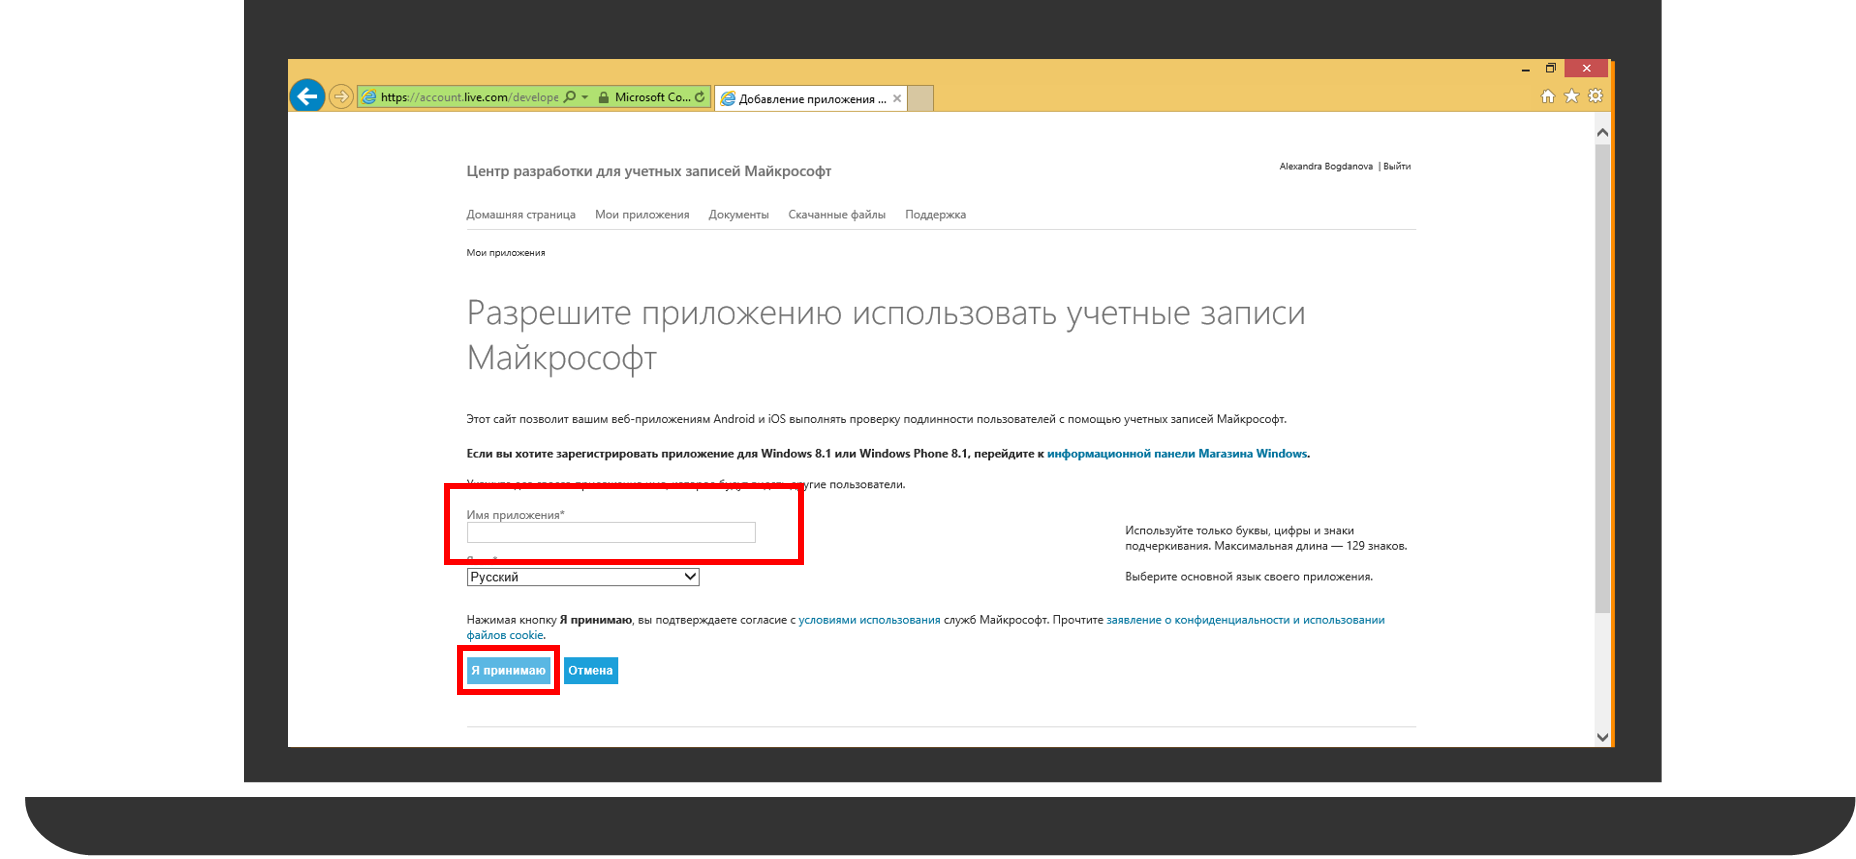
Click Create Application , enter the Application Name, and click I Accept.
On the left, select Application Settings , the client ID appears on the screen. That is what we need.

Next, to use the API in the application, you need to carry out the process of authorizing the user, check his credentials, get a token to perform requests.
User authentication
When using the OneNote API, an application must request certain permissions when verifying a Microsoft account. For the user, this process is standard - a login and password entry form appears, then it is asked to allow the application to perform any activity on its behalf (for example, to post entries or to be able to view friends from the social network).
The developer needs to conduct a user authentication process, get a token. We will use the OAuth 2.0 authorization process, for this we need a WebAuthenticationBroker .
At the beginning, the client executes a request for authorization at a specific address, therefore, first we need to generate this address. In general, it looks like this:
login.live.com/oauth20_authorize.srf?client_id=CLIENT_ID&scope=SCOPES&response_type=RESPONSE_TYPE&redirect_uri=REDIRECT_URL
Below is a table with query parameters:
| Parameter | Description | Value |
| CLIENT_ID | Customer ID | 00000000 *** |
| SCOPES | Corresponds to the scope parameter in the OAuth 2.0 specification. | wl.signin% 20wl.basic |
| response_type | Type of data returned in the authorization server response | token |
| REDIRECT_URI | URI to redirect the user after authentication | https% 3A% 2F% 2Fwww.tdgdgdgdd.com |
Authorization Request Code (for Windows):
function getToken() { // var startURI = Windows.Foundation.Uri("https://login.live.com/oauth20_authorize.srf?client_id=0000000040*****&scope=wl.signin%20wl.basic&response_type=token&redirect_uri=https%3A%2F%2Fwww.tdgdgdgdd.com"); // REDIRECT_URI var endURI = Windows.Foundation.Uri("https://www.tdgdgdgdd.com"); // return Windows.Security.Authentication.Web.WebAuthenticationBroker.authenticateAsync( Windows.Security.Authentication.Web.WebAuthenticationOptions.none, startURI, endURI).then( function onComplete(response) { return getTokenFromResponse(response.responseData); }, function onError(error) { // }); } In case of a successful request, you will receive a string in the following form:
https://login.live.com/oauth20_desktop.srf?lc=1033#access_token=******token_type=bearer&expires_in=3600&scope=wl.signin%20wl.basic&user_id=**********
For further requests, we need only what is between the access_ token and token_ type , cut off the list:
function getTokenFromResponse(response) { var startid = response.indexOf("access_token"); var endid = response.indexOf("&", startid + 13); var token = response.substring(startid + 13, endid); return token; } Note the difference in methods for Windows and Windows Phone. For Windows, the authenticateAsync method is used, and for Windows Phone, the authenticateAndContinue method is used. Also consider saving and restoring the application mode when the authorization window appears.

Fine! Token received and now you can make requests.
Sending POST and GET requests
Receiving and recording data occurs using POST and GET requests.
Currently, the OneNote API allows you to:
- View the list and add new notebooks (Notebooks)
- View the list and add new sections (Sections)
- View the list and add new pages (Pages).
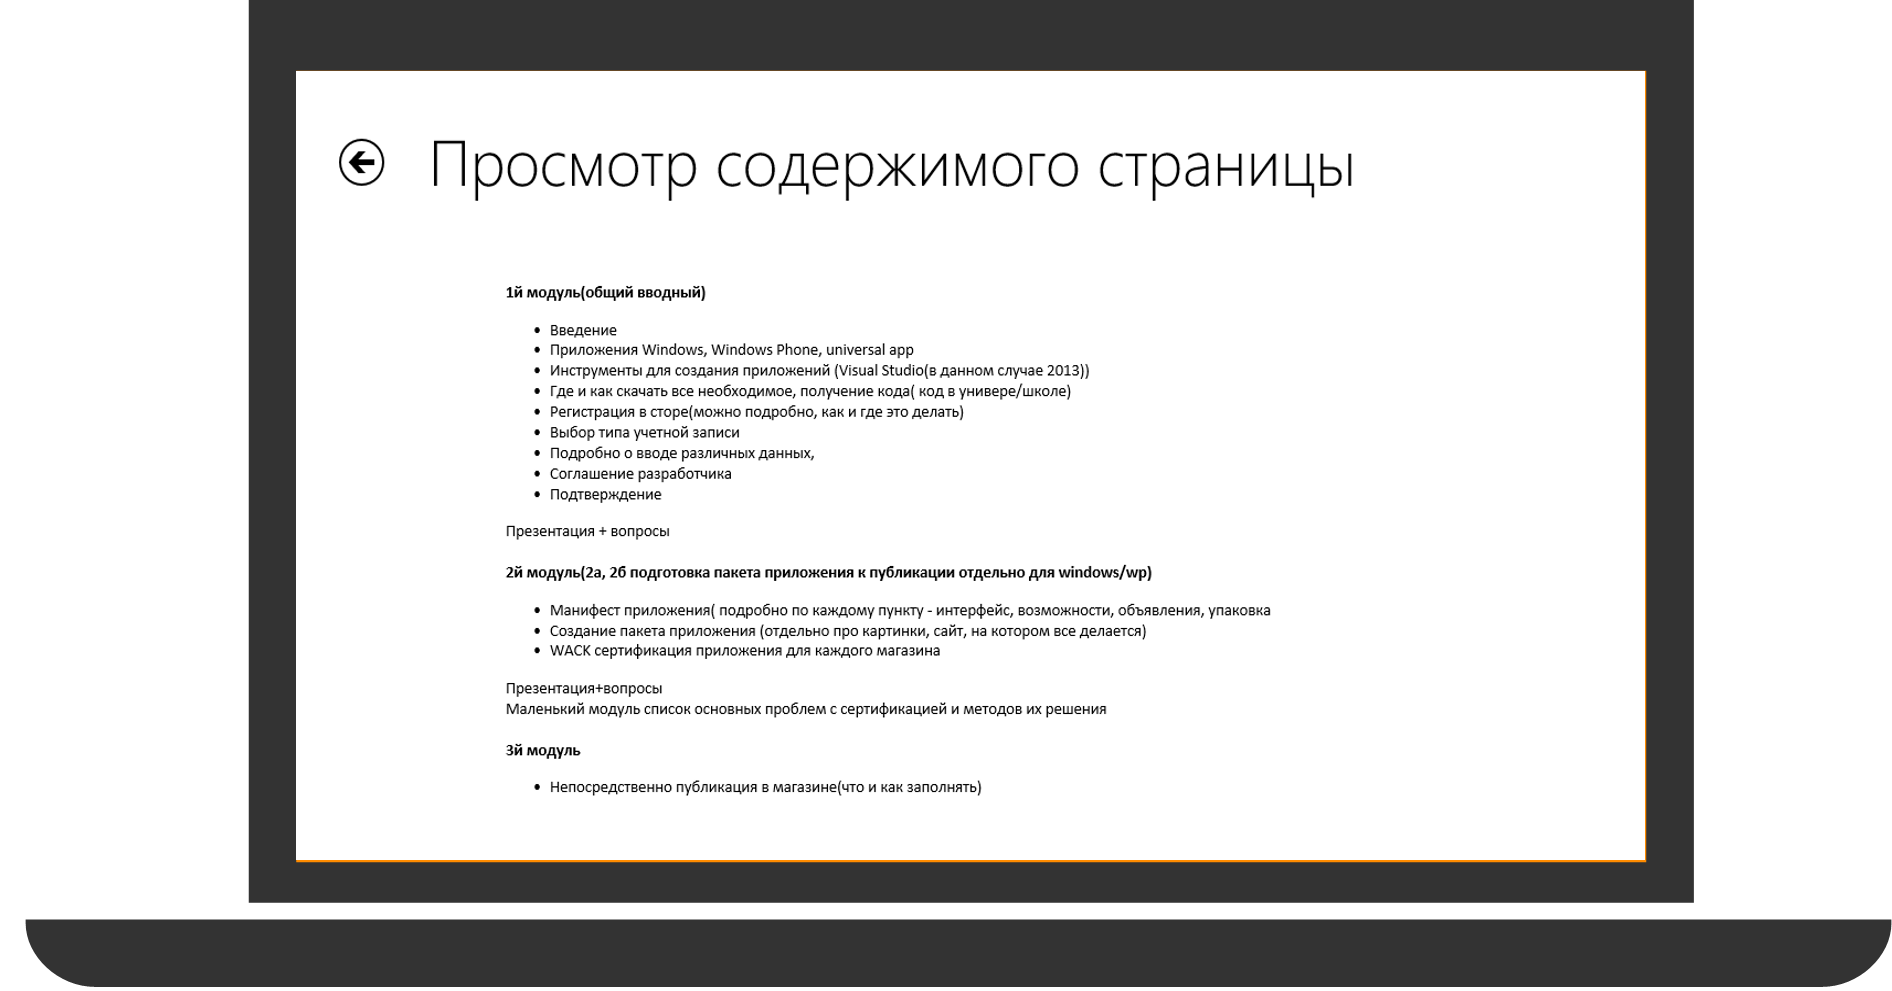
- View the contents of pages (Pages) (viewing the contents of pages while in Beta mode)
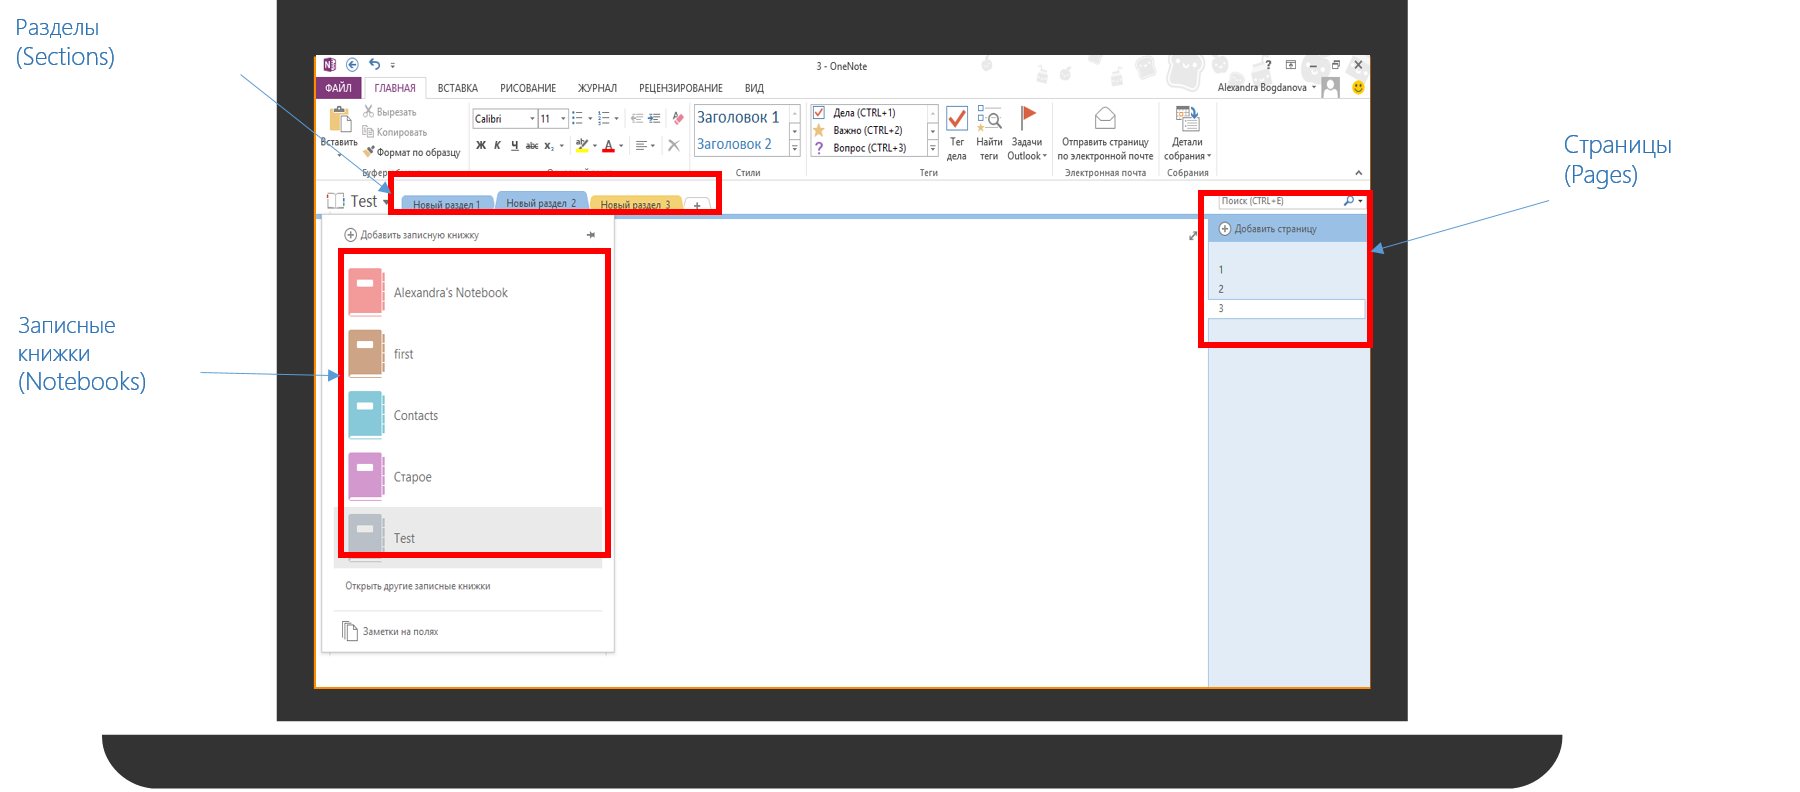
You can view the format and advanced request parameters on the OneNote Development Center website. Also on the site there is an opportunity to choose a language and see an example of a specific request code, as well as an answer option.
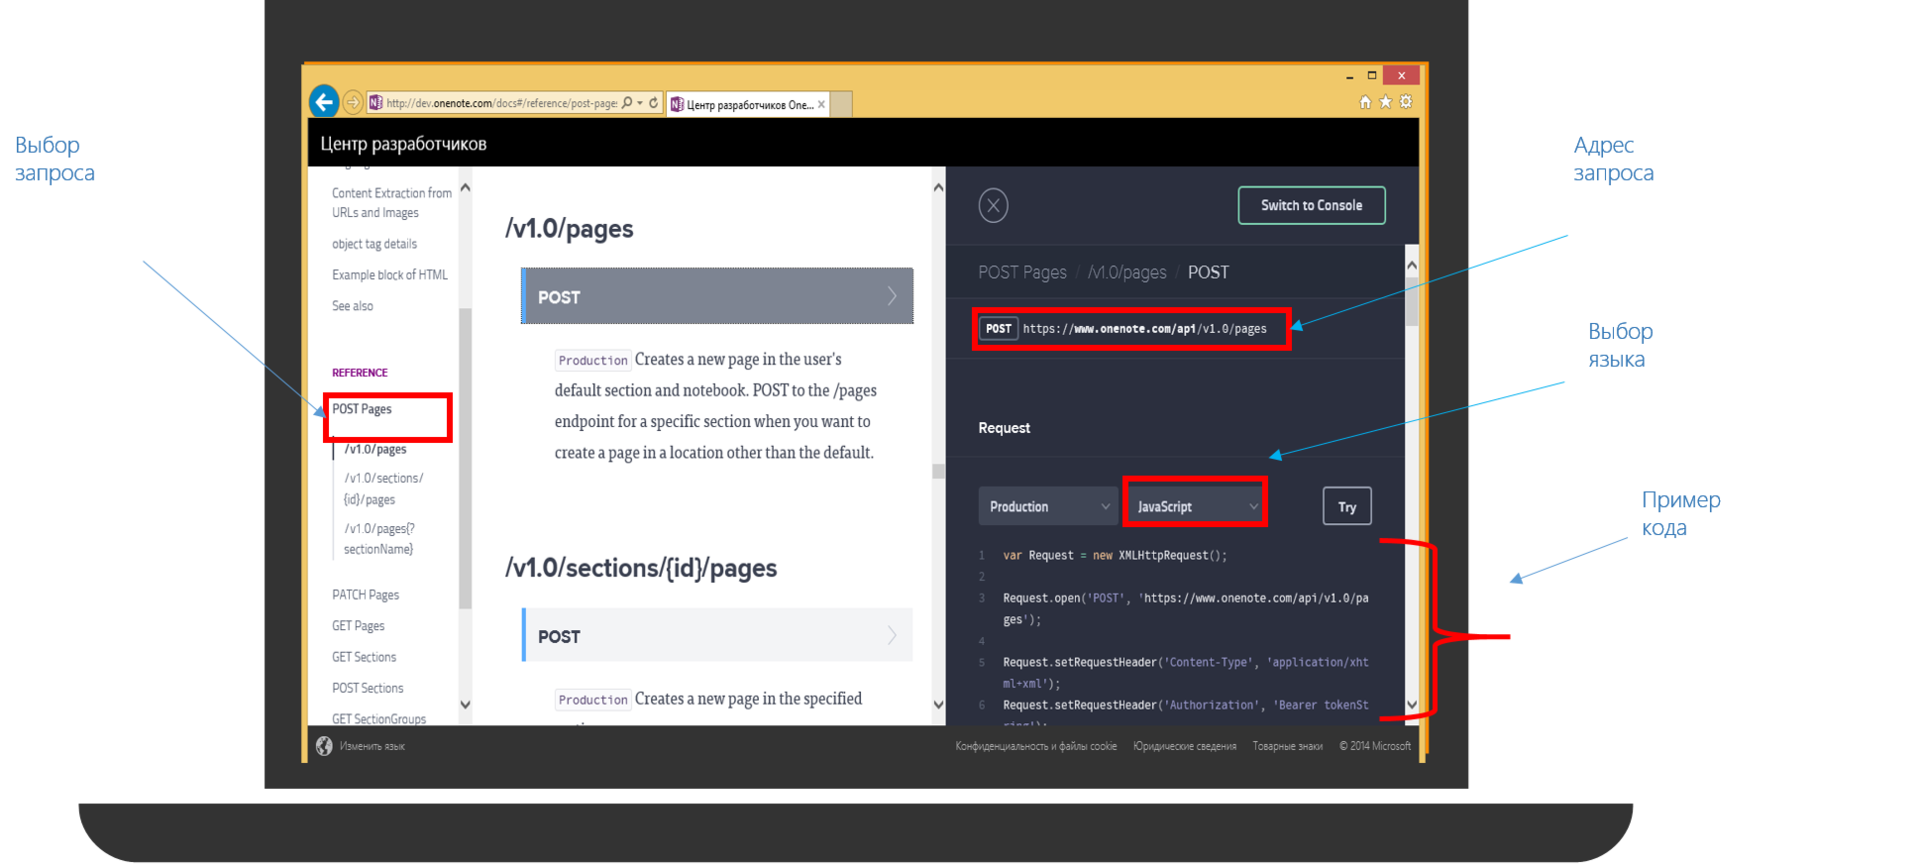
In addition to the OneNote Development Center , you can test your request in the apigee.com interactive console.
Work with the apigee interactive console
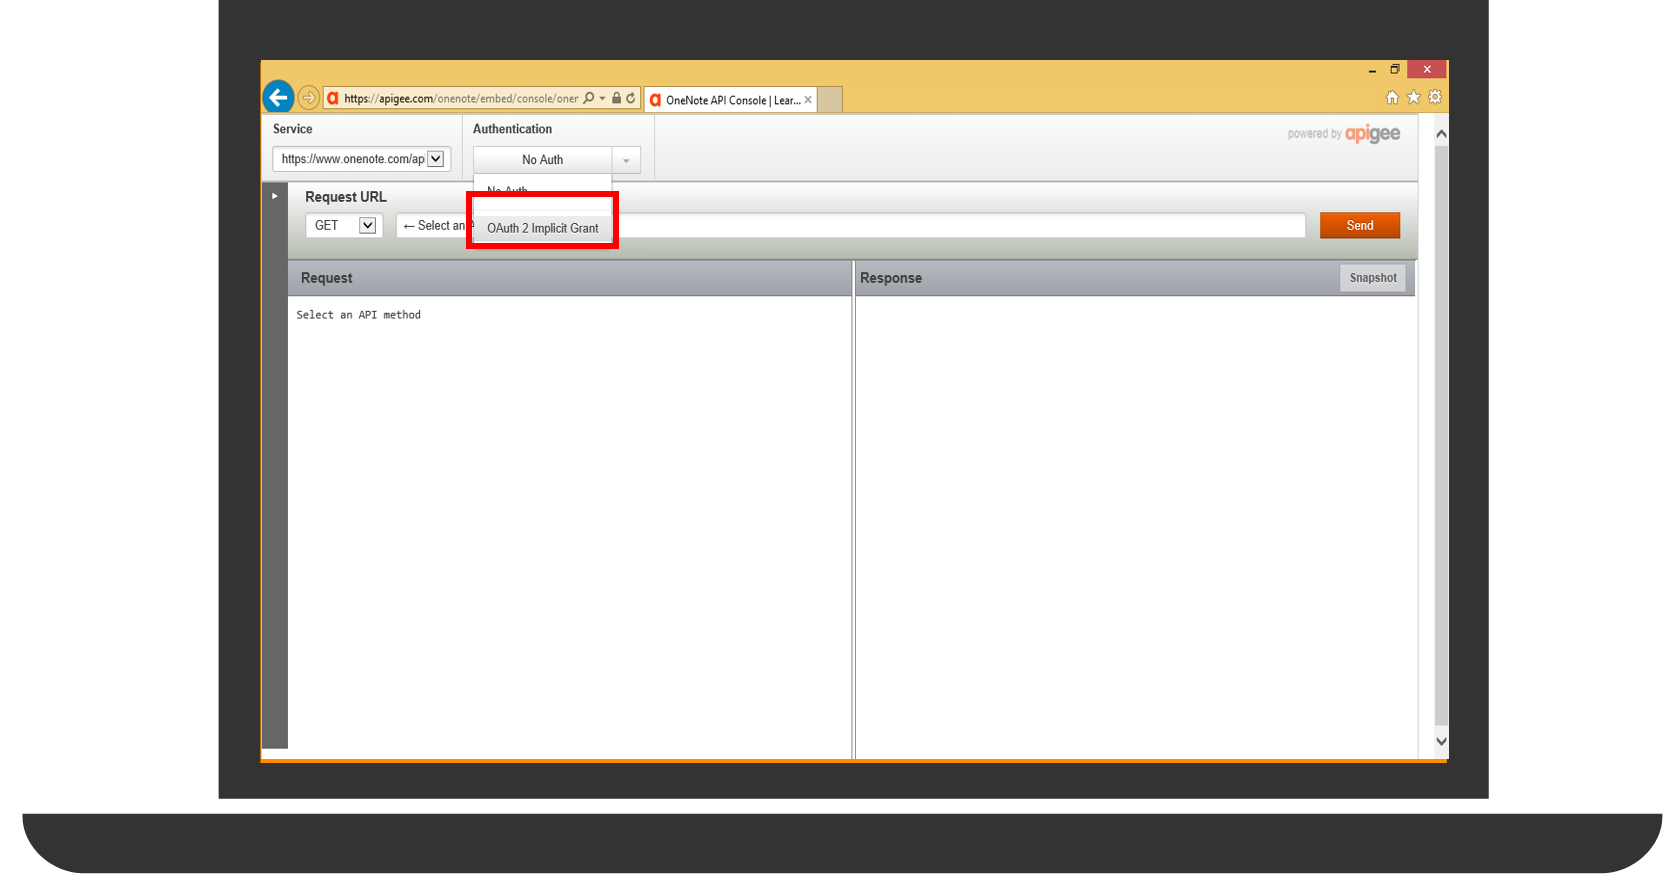
The console allows you to create a simple REST call to the OneNote API. To get started with the console, go to the site .
Click oAuth in the upper left corner and select OAuth 2 Implicit Grant .
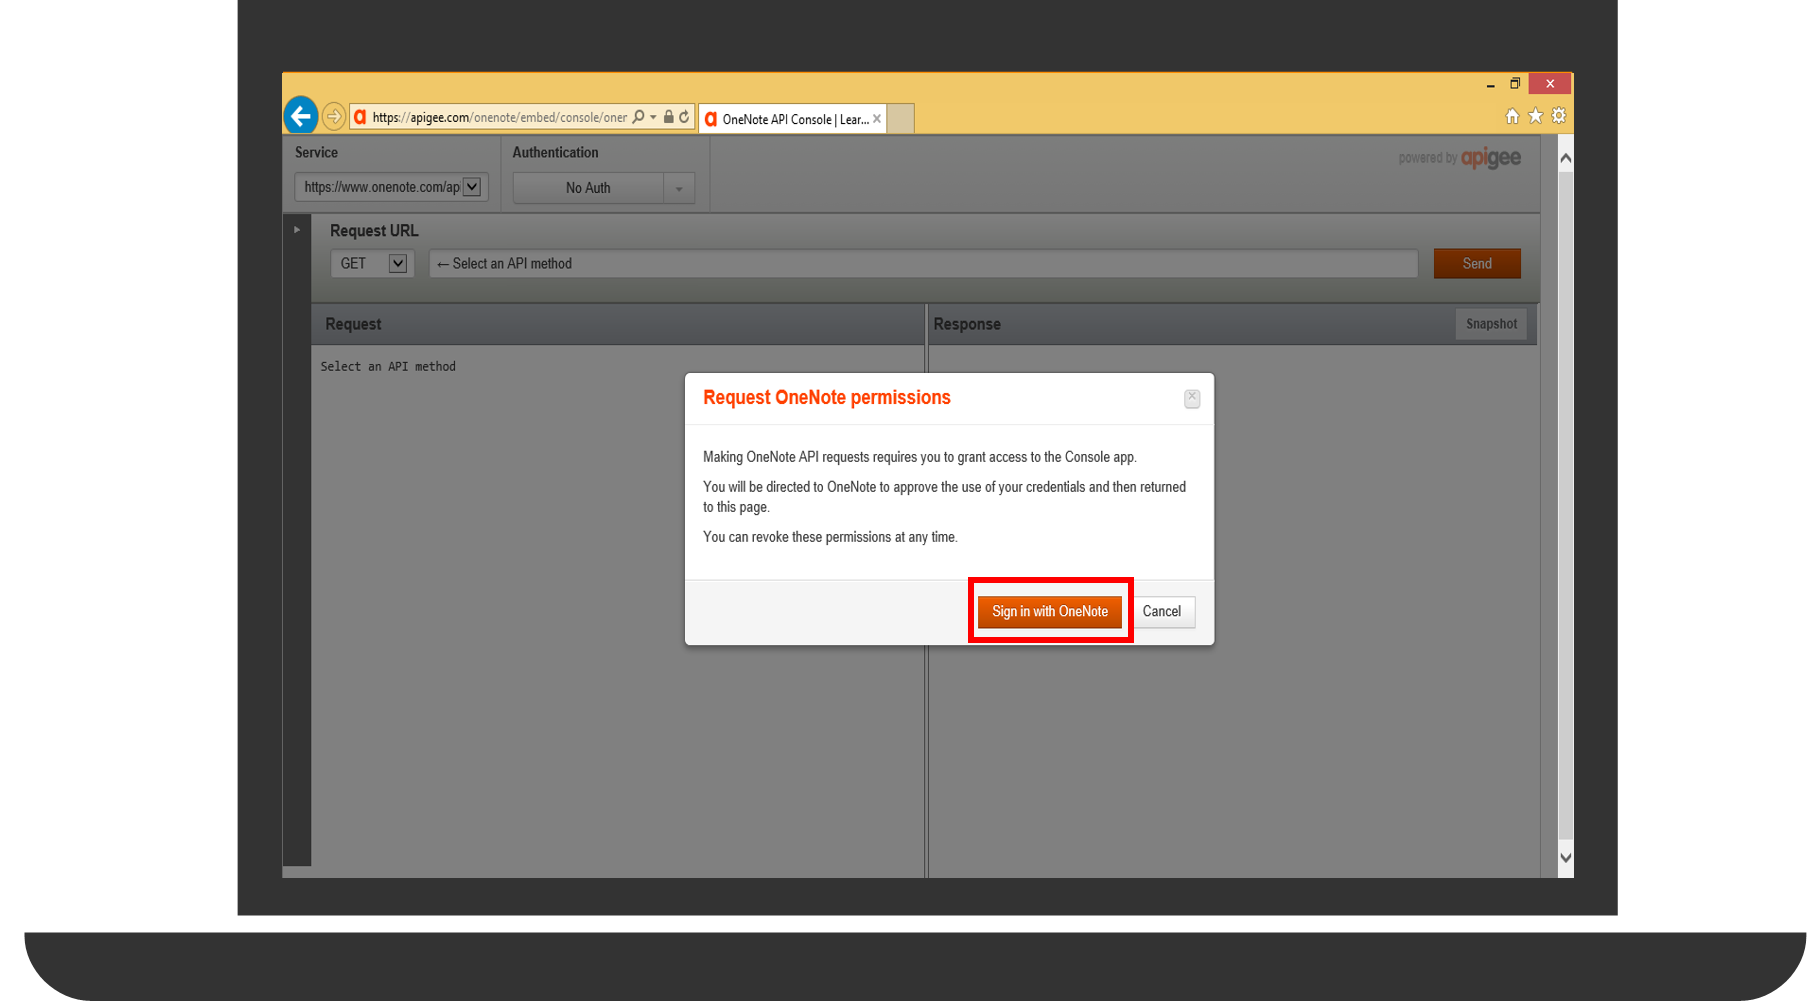
Click the Sign in with OneNote button, then enter your Microsoft credentials.
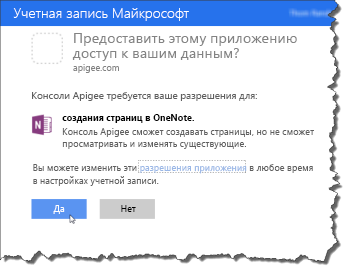
Confirm that you allow the OneNote API to create pages in OneNote. Click Yes .
Now you can send requests to the API and create pages in OneNote notebooks that are hosted on OneDrive.
Sending a request using the interactive console
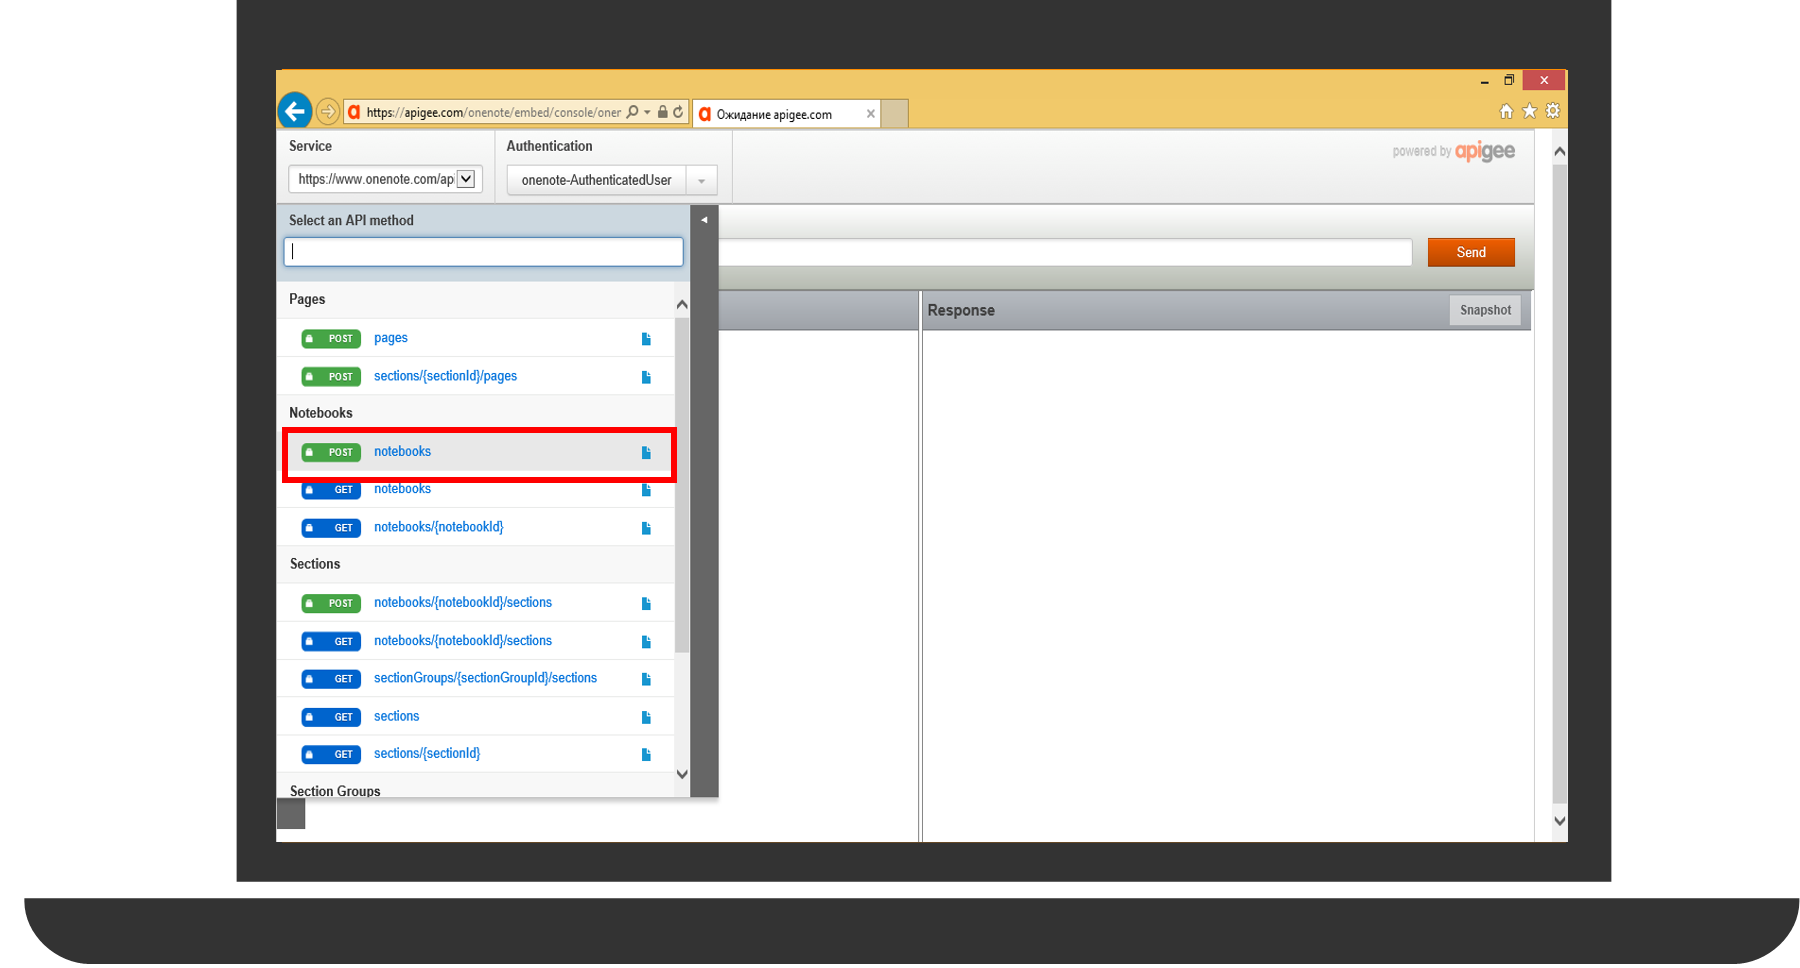
On the left is a gray arrow. Click on it to open a list of possible requests. Then select the query you want to make.
For example, add a new notebook. To do this, select the section Notebooks , POST notebooks .
A page will appear, at the top of which will be the address of the request, just below you can select the data of your request (name of the address book, the main text of the page, etc.).
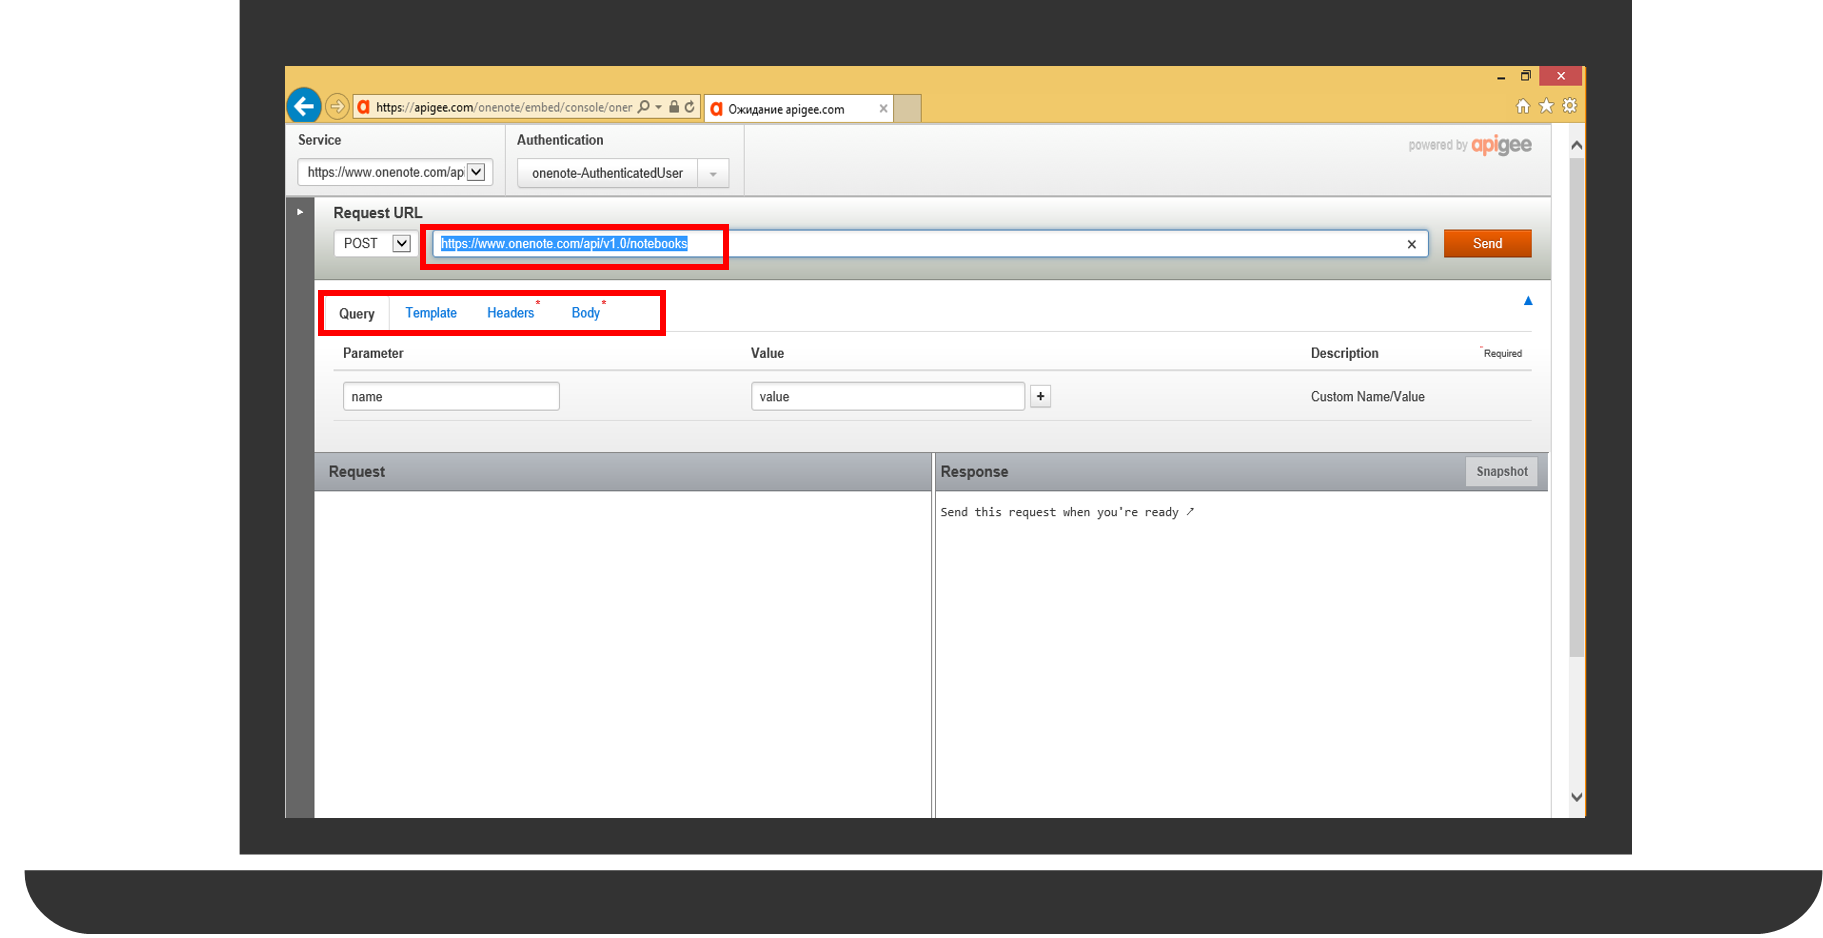
Click the Send button and the request will be sent.
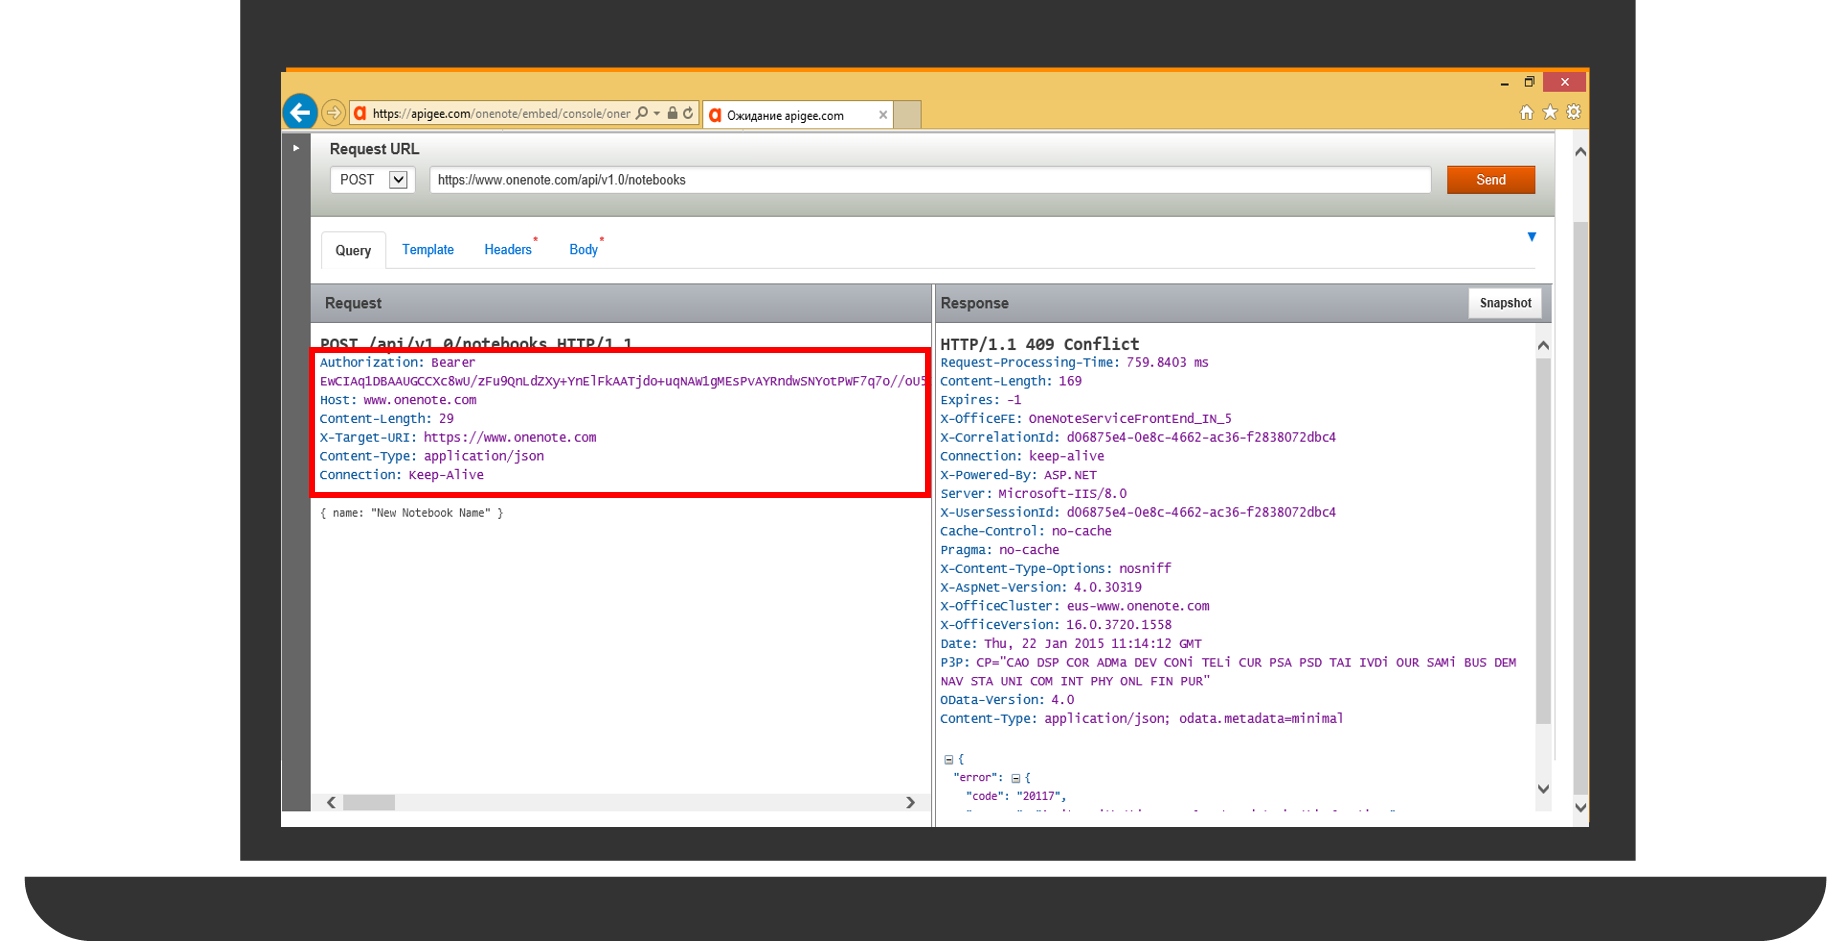
The request body will be displayed on the left side of the screen, and the response from the OneNote API will be displayed on the right. Note data such as Content-Type and Autorization . You will need them when you create a request in your application.
Using the OneNote API in a generic application
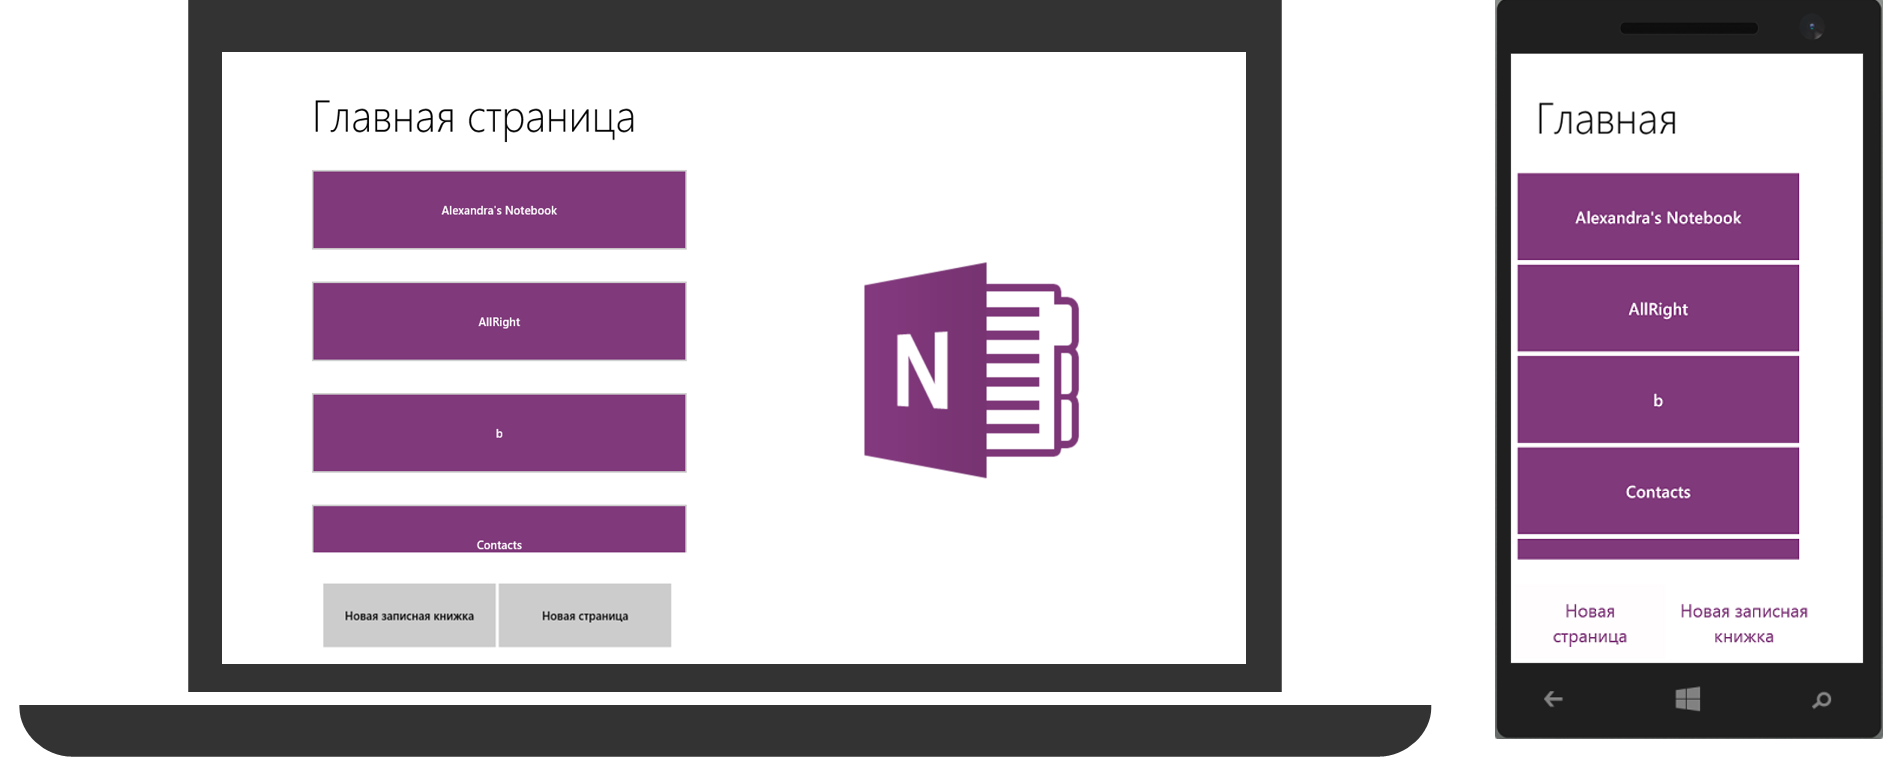
We got acquainted with the main stages of working with the OneNote REST API. Now let's take a look at the OneNote API features using the example of a universal HTML and JavaScript application.
The main application logic is as follows:
- When you start the application, an authorization window appears where the user needs to enter the login and password of his account.
- Further, in case of successful login, the page with the list of available for viewing notebooks (Notebooks) is loaded.
- Book lists are loaded as buttons; when you click on each, the corresponding section list is loaded. Also we come with a list of sections and pages.

Sending a GET request
To download the list, we use the XMLHttpRequest request.
In the open method we form a GET request. Link - the address to download available for viewing notebooks, https://www.onenote.com/api/v1.0/notebooks .
Further, in the parameters of the setRequestHeader method, we specify that authorization will occur using a token.
And finally, we process the answer. As a response, we receive a JSON file that needs to be “parsed” for further work. After that, based on the number of available notebooks (sections, pages), buttons are created, in whose properties we need to write a link to the section (page) to which they lead.
You can see an example of the request under the spoiler. An example of this request is presented.
function GetNotebookList(token) { // var request = new XMLHttpRequest; // open request.open("GET", "https://www.onenote.com/api/v1.0/notebooks", false); // setRequestHeader request.setRequestHeader("Authorization", "Bearer " + token); // request.onreadystatechange = function (response) { // var notes = JSON.parse(this.responseText); var length = notes.value.length; // var buttonList = document.createElement("div"); for (var i = 0; i < length; i++) { var NotebookName = notes.value[i].name; var sec = notes.value[i].self; var b = document.createElement("button"); b.innerText = NotebookName; b.id = notes.value[i].id; var link = notes.value[i].sectionsUrl; b.dataset.link = link; buttonList.appendChild(b); // – + // , b.addEventListener("click", function (e) { var link = this.dataset.link; WinJS.Navigation.navigate("/pages/notebook/viewnotebook.html",link); return null; }); } var buttonsDiv = document.getElementById("buttonsDiv"); buttonsDiv.appendChild(buttonList); } request.send(); return null; } Tip: x-ms-webview is a good choice for displaying page content.
Sending a POST request
In OneNote API POST request is used when creating new pages (notebooks, sections).
For example, if you want to add a new page, the request will be as follows.
function PostNewPage(token) { var body = document.getElementById("viewPage").innerHTML; // var request = new XMLHttpRequest; // open request.open("POST", https://www.onenote.com/api/v1.0/pages, false); // setRequestHeader request.setRequestHeader('Content-Type', 'application/xhtml+xml', false);v // setRequestHeader request.setRequestHeader("Authorization", "Bearer " + token); // request.onreadystatechange = function (response) { // } request.send(body.name); return null; } } Please note that in the POST request for adding a new page we use the setRequestHeader method twice - once we define the format of the data to be sent ( application / xhtml + xml ), then we set the authorization parameters.
The remaining requests are similar to those that we have already considered. Once again, I would like to draw your attention to the fact that you can test your request in the interactive console apigee.com or view the required request parameters on the OneNote Development Center website.
Working with OneNote API is very simple, I suggest you start right now!
Additional links
- OneNote Development Center
- Apigee.com Interactive Console for OneNote API
- View a course on publishing applications in the Windows Store
- Download free or trial Visual Studio
about the author

Alexandra Bogdanova, project manager, Customer and Partner Experience, Microsoft Russia. Participant of various conferences, meetings, hackathons, including Microsoft Developer Tour and Microsoft Developer Conference.
Source: https://habr.com/ru/post/268333/
All Articles