Recipes for Android: How to make a delicious LayoutManager
Hi habr!
We like to develop mobile applications that differ from their counterparts in both functions and user interface. Last time we talked about client-server interaction in one of our applications, and this time we will share the implementation of its UI features using the LayoutManager written from scratch. We think that the article will be useful not only for novice android developers, but also for more advanced specialists.

')
If you are an android developer, then you probably already used RecyclerView, a powerful and incredibly customizable replacement for ListView and GridView. One of the customization levels of RecyclerView is that it does not know anything about the location of the elements inside it. This job has been delegated to its LayoutManager. Google provided us with 3 standard managers: LinearLayoutManager for lists as in ListView, GridLayoutManager for tiles, grids or tables, and StaggeredGridLayoutManager for layout as in Google+. For our application, it was necessary to implement a layout that did not fit into the framework of available layout managers, so we decided to try to write our own. It turned out to create your LayoutManager like a drug. Having once tried, it is already difficult to stop - it turned out to be so useful in solving non-standard layout tasks.

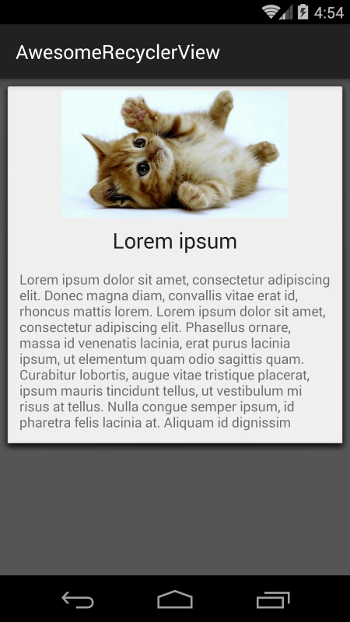
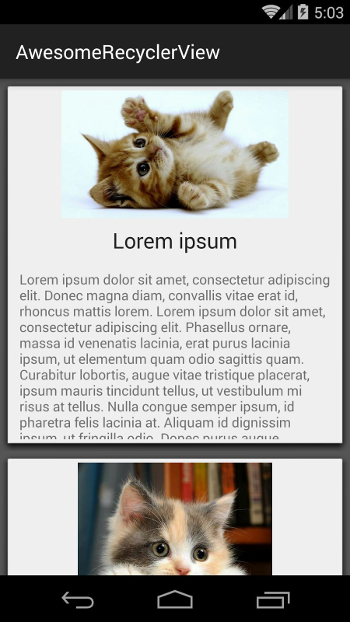
So, the task. In our educational application there will be articles of a very simple format: a picture, a title and a text. We want to have a vertical list of articles, each card in which will occupy 75% of the screen height. In addition to the vertical, there will be a horizontal list in which each article will be open to full screen. The transition from vertical to horizontal mode will be animated by clicking on a card and using the back button - back to vertical. And, for beauty, in the vertical mode, the lower card will scroll when scrolling with the zoom effect. By the way, you can see our training project here: https://github.com/forceLain/AwesomeRecyclerView , it already has a fake DataProvider, which returns 5 non-realistic articles, all layouts and, in fact, the LayoutManager itself :)
Imagine that an Activity with a RecyclerView in it, as well as a RecyclerView.Adapter that creates and populates article cards, we have already written (or copied from the training project) and it is time to create our own LayoutManager.
The first thing to do is to implement the generateDefaultLayoutParams () method, which will return the required LayoutParams for views whose LayoutParams do not suit us.
The main magic happens in the onLayoutChildren (...) method, which is the starting point for adding and positioning our views. To begin, learn to have at least one article.
In the first line, we ask recycler to give us a view for the first position. Then, Recycler itself determines whether to return it from the internal cache or create a new one. On the second line linger a little longer.
If you have already created your own views, you probably know how to add another child inside your view. To do this, add a child view to your layout (as in the second line), then measure it by calling its measure (...) method and, finally, place it in the right place by calling its layout (...) method with the right size. If you have never done anything like this before, now you can imagine how this happens :) As for the RecyclerView, here it takes a different turn. For almost all standard methods of the View class, related to dimensions and layout, RecyclerView has alternative ones that should be used. First of all, they are needed because RecyclerView has a class ItemDecoration, with which you can resize views, and these alternative methods take into account all installed decorators.
Here are some examples of alternative methods:
etc.
So, in the third line we allow the view to calculate its dimensions, and in the fourth line we place it in the layout from the upper left corner (0, 0) to the lower right corner (getWidth (), getHeight ()).
To measure the size of the view, we used the ready method measureChildWithMargins (...). In fact, it does not quite suit us, since it takes measurements, taking into account the width and height specified in the LayoutParams of the child view. And there can be anything: wrap_content, match_parent, or even specified in dp. But we then agreed that all the cards we will have a fixed size! So we have to write our measure, without forgetting about the existence of decorators:
Now our onLayoutChildren () looks like this:
With the help of MeasureSpec, we inform our view that its height and width should and will be equal to the height and width of the RecyclerView. Of course, to draw an article 75% high of the screen height, you need to pass this same height to layoutDecorated ():
Now, if we set our LayoutManager to RecyclerView and run the project, we’ll see one article on three quarters of the screen.
Now we will try to draw vyushki articles, starting with the first (zero) and placing them under each other, until the screen ends vertically or the elements in the adapter run out.
It looks ready, but so far we have not done one very important thing. Earlier we said that recycler itself determines whether to take caches from it or create new ones, but in fact, the cache is still empty from it, since we haven’t put anything in it yet. Add the detachAndScrapAttachedViews (recycler) call to onLayoutChildren () first in front of fillDown ().
This method removes all views from our layout and places them in its special scrap cache. If necessary, you can return the view using the method recycler.getViewForPosition (pos).
Now it would be good to teach our LayoutManager to scroll.
First, let's tell our LayoutManager that we want to scroll vertically:
Then we implement the vertical scroll itself.
At the input of this method, we get dy - the distance that needs to be scrolled. We must return the distance to which we actually rotated our views. This is necessary in order not to allow the content to go beyond the boundaries of the screen. Let's immediately write an algorithm that determines whether we can still scroll and how far:
Now we can scroll through our 2 added articles, but when scrolling new articles on the screen are not added. The algorithm for adding new views during scrolling may seem to be intricate, but this is only at first glance. We will first try to describe it with the words:
NOTE: implementation of a scroll and adding a view to the layout is an individual matter. With the same success it would be possible to take the uppermost one for the anchor view and fill the screen down from it. And if you wanted to make such a LayoutManager, which behaves like a ViewPager, you wouldn’t have to add views at all during scrolling, but only between the swaps.
Note that inside fillUp (), views are added using the addView (view, 0) method, not the addView (view), as before. This was done in order to preserve the order of the elements inside the layout - the higher the view, the smaller its sequence number should be.
At this point, we had a completely working LayoutManager, which behaves like a ListView. Now add to it the effect of scaling the bottom card. All you need is one method!
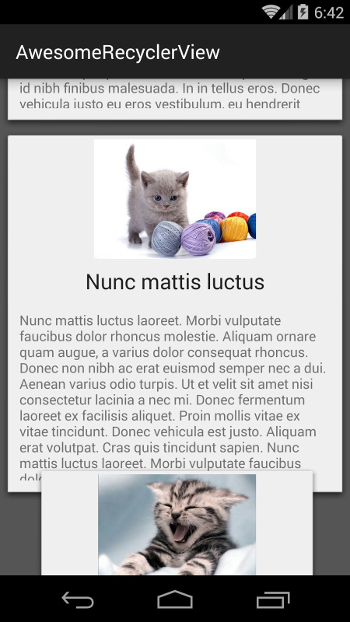
Put this method inside fill () last. It sets scale <1 for those views whose upper limit is below 2/3 of the screen. In this case, the scale is smaller, the lower this limit. Additionally, we shift the zoom focus (setPivotX and setPivotY) so that it becomes higher than the view itself. This allows you to create such an effect, as if the bottom card comes up from under the top
If we launch our project now, we will see that everything does not work exactly as expected: the bottom card is drawn on top of the top one, although the opposite was necessary.
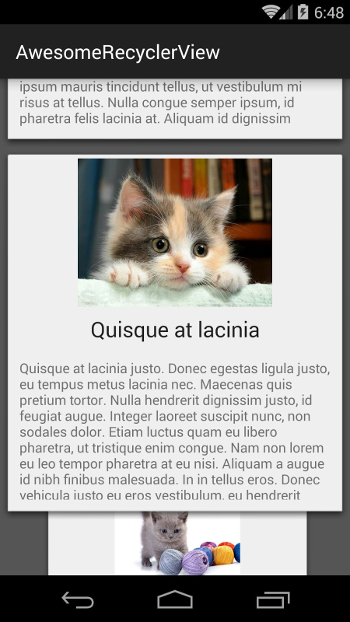
This is because the order of drawing views to Android is determined by the order in which they are added. Fortunately, invert the drawing order in RecyclerView is not at all difficult:
Well, now everything is in order.
Now that we know how to make a vertical LayoutManager, it’s easy for us to make a horizontal mode in its likeness. We need a class field where the current mode (orientation) will be stored, getter- and setter- for it. Also, you will need to implement similar methods fillLeft (), fillRight (), canScrollHorizontally (), scrollHorizontallyBy (), etc.
Implementations of the fillLeft (), fillRight () methods and the definition of scroll boundaries will not be given, because they are very similar to their “vertical” counterparts. Just change top to left and bottom to right and make a layout full screen :). You can see the code in our educational project on github, which we mentioned at the beginning of the article. Also, we draw your attention to the fact that the position mAnchorPos is defined and stored inside the setOrientation (), which is then used inside the fill * () - methods to restore the current article when the orientation changes.
Finally, you need to understand the animation of the transition from vertical to horizontal mode. We will respond to clicks on the card and open the one we clicked on. Since the left and right borders of the view in the vertical and horizontal modes always coincide, we will only have to animate its top and bottom. And the tops and bottoms of all its neighbors :)
Let's write a public method openView (int pos), the call of which will start the animation.
And the animation itself inside the private openView (View view):
Here's what happens inside openView: for each view on the screen, we remember its top and bottom, and we also count its top and bottom, to which this view should “leave.” Then we create and run ValueAnimator, which gives us a progress from 0 to 1, based on which we count the top and bottom for each view during the animation and perform layoutDecorated (...) with the necessary values in each animation cycle. At the moment when the animation ends, call setOrientation (Orientation.HORIZONTAL) for the final transition to horizontal mode. Smooth and discreet.
It is a pity that it will not be possible to place all the useful information about the LayoutManager in just one article. If necessary, you can see something in our training project (for example, the implementation of smoothScrollToPosition ()), and you have to search for something yourself.
In conclusion, I would like to say that LayoutManager is an extremely powerful and flexible tool. RecyclerView + CustomLayoutManager has repeatedly come to our aid in solving very unusual design problems. It opens up spaces for animating both the views themselves and the content in them. In addition, it greatly expands the possibilities of optimization. For example, if the user wants to perform smoothScroll () from the 1st element to the 100th, it is not necessary to honestly scroll through all 99 elements. You can cheat and add the 100th element to the layout before scrolling, and then scroll to it, saving a lot of resources!
However, LayoutManager is not so easy to learn from scratch. To effectively use it, you need to be well aware of how custom views are created, how measure / layout cycles work, how to use MeasureSpec, etc. in the same spirit.
Training project with an example of LayoutManager: https://github.com/forceLain/AwesomeRecyclerView
An article in 3 parts about creating your LayoutManager, similar to GridLayoutManager in English: http://wiresareobsolete.com/2014/09/building-a-recyclerview-layoutmanager-part-1/
We like to develop mobile applications that differ from their counterparts in both functions and user interface. Last time we talked about client-server interaction in one of our applications, and this time we will share the implementation of its UI features using the LayoutManager written from scratch. We think that the article will be useful not only for novice android developers, but also for more advanced specialists.
')
Let's start with
If you are an android developer, then you probably already used RecyclerView, a powerful and incredibly customizable replacement for ListView and GridView. One of the customization levels of RecyclerView is that it does not know anything about the location of the elements inside it. This job has been delegated to its LayoutManager. Google provided us with 3 standard managers: LinearLayoutManager for lists as in ListView, GridLayoutManager for tiles, grids or tables, and StaggeredGridLayoutManager for layout as in Google+. For our application, it was necessary to implement a layout that did not fit into the framework of available layout managers, so we decided to try to write our own. It turned out to create your LayoutManager like a drug. Having once tried, it is already difficult to stop - it turned out to be so useful in solving non-standard layout tasks.
So, the task. In our educational application there will be articles of a very simple format: a picture, a title and a text. We want to have a vertical list of articles, each card in which will occupy 75% of the screen height. In addition to the vertical, there will be a horizontal list in which each article will be open to full screen. The transition from vertical to horizontal mode will be animated by clicking on a card and using the back button - back to vertical. And, for beauty, in the vertical mode, the lower card will scroll when scrolling with the zoom effect. By the way, you can see our training project here: https://github.com/forceLain/AwesomeRecyclerView , it already has a fake DataProvider, which returns 5 non-realistic articles, all layouts and, in fact, the LayoutManager itself :)
Imagine that an Activity with a RecyclerView in it, as well as a RecyclerView.Adapter that creates and populates article cards, we have already written (or copied from the training project) and it is time to create our own LayoutManager.
We write the basis
The first thing to do is to implement the generateDefaultLayoutParams () method, which will return the required LayoutParams for views whose LayoutParams do not suit us.
public class AwesomeLayoutManager extends RecyclerView.LayoutManager { @Override public RecyclerView.LayoutParams generateDefaultLayoutParams() { return new RecyclerView.LayoutParams(RecyclerView.LayoutParams.MATCH_PARENT, RecyclerView.LayoutParams.MATCH_PARENT); } } The main magic happens in the onLayoutChildren (...) method, which is the starting point for adding and positioning our views. To begin, learn to have at least one article.
@Override public void onLayoutChildren(RecyclerView.Recycler recycler, RecyclerView.State state) { View view = recycler.getViewForPosition(0); addView(view); measureChildWithMargins(view, 0, 0); layoutDecorated(view, 0, 0, getWidth(), getHeight()); } In the first line, we ask recycler to give us a view for the first position. Then, Recycler itself determines whether to return it from the internal cache or create a new one. On the second line linger a little longer.
If you have already created your own views, you probably know how to add another child inside your view. To do this, add a child view to your layout (as in the second line), then measure it by calling its measure (...) method and, finally, place it in the right place by calling its layout (...) method with the right size. If you have never done anything like this before, now you can imagine how this happens :) As for the RecyclerView, here it takes a different turn. For almost all standard methods of the View class, related to dimensions and layout, RecyclerView has alternative ones that should be used. First of all, they are needed because RecyclerView has a class ItemDecoration, with which you can resize views, and these alternative methods take into account all installed decorators.
Here are some examples of alternative methods:
view.layout(left, top, right, bottom) -> layoutDecorated(view, left, top, right, bottom) view.getLeft() -> getDecoratedLeft(view) view.getWidth() -> getDecoratedWidth(view) etc.
So, in the third line we allow the view to calculate its dimensions, and in the fourth line we place it in the layout from the upper left corner (0, 0) to the lower right corner (getWidth (), getHeight ()).
To measure the size of the view, we used the ready method measureChildWithMargins (...). In fact, it does not quite suit us, since it takes measurements, taking into account the width and height specified in the LayoutParams of the child view. And there can be anything: wrap_content, match_parent, or even specified in dp. But we then agreed that all the cards we will have a fixed size! So we have to write our measure, without forgetting about the existence of decorators:
private void measureChildWithDecorationsAndMargin(View child, int widthSpec, int heightSpec) { Rect decorRect = new Rect(); calculateItemDecorationsForChild(child, decorRect); RecyclerView.LayoutParams lp = (RecyclerView.LayoutParams) child.getLayoutParams(); widthSpec = updateSpecWithExtra(widthSpec, lp.leftMargin + decorRect.left, lp.rightMargin + decorRect.right); heightSpec = updateSpecWithExtra(heightSpec, lp.topMargin + decorRect.top, lp.bottomMargin + decorRect.bottom); child.measure(widthSpec, heightSpec); } private int updateSpecWithExtra(int spec, int startInset, int endInset) { if (startInset == 0 && endInset == 0) { return spec; } final int mode = View.MeasureSpec.getMode(spec); if (mode == View.MeasureSpec.AT_MOST || mode == View.MeasureSpec.EXACTLY) { return View.MeasureSpec.makeMeasureSpec( View.MeasureSpec.getSize(spec) - startInset - endInset, mode); } return spec; } Now our onLayoutChildren () looks like this:
@Override public void onLayoutChildren(RecyclerView.Recycler recycler, RecyclerView.State state) { View view = recycler.getViewForPosition(0); addView(view); final int widthSpec = View.MeasureSpec.makeMeasureSpec(getWidth(), View.MeasureSpec.EXACTLY); final int heightSpec = View.MeasureSpec.makeMeasureSpec(getHeight(), View.MeasureSpec.EXACTLY); measureChildWithDecorationsAndMargin(view, widthSpec, heightSpec); layoutDecorated(view, 0, 0, getWidth(), getHeight()); } With the help of MeasureSpec, we inform our view that its height and width should and will be equal to the height and width of the RecyclerView. Of course, to draw an article 75% high of the screen height, you need to pass this same height to layoutDecorated ():
private static final float VIEW_HEIGHT_PERCENT = 0.75f; @Override public void onLayoutChildren(RecyclerView.Recycler recycler, RecyclerView.State state) { View view = recycler.getViewForPosition(0); addView(view); int viewHeight = (int) (getHeight() * VIEW_HEIGHT_PERCENT); final int widthSpec = View.MeasureSpec.makeMeasureSpec(getWidth(), View.MeasureSpec.EXACTLY); final int heightSpec = View.MeasureSpec.makeMeasureSpec(getHeight(), View.MeasureSpec.EXACTLY); measureChildWithDecorationsAndMargin(view, widthSpec, heightSpec); layoutDecorated(view, 0, 0, getWidth(), viewHeight); } Now, if we set our LayoutManager to RecyclerView and run the project, we’ll see one article on three quarters of the screen.
Now we will try to draw vyushki articles, starting with the first (zero) and placing them under each other, until the screen ends vertically or the elements in the adapter run out.
@Override public void onLayoutChildren(RecyclerView.Recycler recycler, RecyclerView.State state) { fillDown(recycler); } private void fillDown(RecyclerView.Recycler recycler) { int pos = 0; boolean fillDown = true; int height = getHeight(); int viewTop = 0; int itemCount = getItemCount(); int viewHeight = (int) (getHeight() * VIEW_HEIGHT_PERCENT); final int widthSpec = View.MeasureSpec.makeMeasureSpec(getWidth(), View.MeasureSpec.EXACTLY); final int heightSpec = View.MeasureSpec.makeMeasureSpec(getHeight(), View.MeasureSpec.EXACTLY); while (fillDown && pos < itemCount){ View view = recycler.getViewForPosition(pos); addView(view); measureChildWithDecorationsAndMargin(view, widthSpec, heightSpec); int decoratedMeasuredWidth = getDecoratedMeasuredWidth(view); layoutDecorated(view, 0, viewTop, decoratedMeasuredWidth, viewTop + viewHeight); viewTop = getDecoratedBottom(view); fillDown = viewTop <= height; pos++; } } It looks ready, but so far we have not done one very important thing. Earlier we said that recycler itself determines whether to take caches from it or create new ones, but in fact, the cache is still empty from it, since we haven’t put anything in it yet. Add the detachAndScrapAttachedViews (recycler) call to onLayoutChildren () first in front of fillDown ().
@Override public void onLayoutChildren(RecyclerView.Recycler recycler, RecyclerView.State state) { detachAndScrapAttachedViews(recycler); fillDown(recycler); } This method removes all views from our layout and places them in its special scrap cache. If necessary, you can return the view using the method recycler.getViewForPosition (pos).
They see me rollin '
Now it would be good to teach our LayoutManager to scroll.
First, let's tell our LayoutManager that we want to scroll vertically:
@Override public boolean canScrollVertically() { return true; } Then we implement the vertical scroll itself.
@Override public int scrollVerticallyBy(int dy, RecyclerView.Recycler recycler, RecyclerView.State state) { offsetChildrenVertical(-dy); return dy; } At the input of this method, we get dy - the distance that needs to be scrolled. We must return the distance to which we actually rotated our views. This is necessary in order not to allow the content to go beyond the boundaries of the screen. Let's immediately write an algorithm that determines whether we can still scroll and how far:
Scrolling
@Override public int scrollVerticallyBy(int dy, RecyclerView.Recycler recycler, RecyclerView.State state) { int delta = scrollVerticallyInternal(dy); offsetChildrenVertical(-delta); return delta; } private int scrollVerticallyInternal(int dy) { int childCount = getChildCount(); int itemCount = getItemCount(); if (childCount == 0){ return 0; } final View topView = getChildAt(0); final View bottomView = getChildAt(childCount - 1); //, int viewSpan = getDecoratedBottom(bottomView) - getDecoratedTop(topView); if (viewSpan <= getHeight()) { return 0; } int delta = 0; // if (dy < 0){ View firstView = getChildAt(0); int firstViewAdapterPos = getPosition(firstView); if (firstViewAdapterPos > 0){ // delta = dy; } else { // int viewTop = getDecoratedTop(firstView); delta = Math.max(viewTop, dy); } } else if (dy > 0){ // View lastView = getChildAt(childCount - 1); int lastViewAdapterPos = getPosition(lastView); if (lastViewAdapterPos < itemCount - 1){ // delta = dy; } else { // int viewBottom = getDecoratedBottom(lastView); int parentBottom = getHeight(); delta = Math.min(viewBottom - parentBottom, dy); } } return delta; } Now we can scroll through our 2 added articles, but when scrolling new articles on the screen are not added. The algorithm for adding new views during scrolling may seem to be intricate, but this is only at first glance. We will first try to describe it with the words:
- First we shift all available views to dy with offsetChildrenVertical (-dy)
- Select one of the views in the layout as anchor and memorize it and its position. In our case, we will choose the one that is fully visible on the screen as an anchor view. If this is not, then choose the one with the maximum visible area. This method of defining an anchor view will help us in the future, when implementing the change of orientation of our layout manager.
- We remove all the views in the layout, putting them in our own cache and remembering what positions they were in
- Add views to the layout above the position we took as an anchor. Then we add the anchor and everything that should be below it. First of all, we take the views from our cache and, if we don’t find them, ask recycler
NOTE: implementation of a scroll and adding a view to the layout is an individual matter. With the same success it would be possible to take the uppermost one for the anchor view and fill the screen down from it. And if you wanted to make such a LayoutManager, which behaves like a ViewPager, you wouldn’t have to add views at all during scrolling, but only between the swaps.
Scrolling + Recycling
private SparseArray<View> viewCache = new SparseArray<>(); @Override public void onLayoutChildren(RecyclerView.Recycler recycler, RecyclerView.State state) { detachAndScrapAttachedViews(recycler); fill(recycler); } private void fill(RecyclerView.Recycler recycler) { View anchorView = getAnchorView(); viewCache.clear(); // ... for (int i = 0, cnt = getChildCount(); i < cnt; i++) { View view = getChildAt(i); int pos = getPosition(view); viewCache.put(pos, view); } //... for (int i = 0; i < viewCache.size(); i++) { detachView(viewCache.valueAt(i)); } fillUp(anchorView, recycler); fillDown(anchorView, recycler); // , // , // for (int i=0; i < viewCache.size(); i++) { recycler.recycleView(viewCache.valueAt(i)); } } private void fillUp(@Nullable View anchorView, RecyclerView.Recycler recycler) { int anchorPos = 0; int anchorTop = 0; if (anchorView != null){ anchorPos = getPosition(anchorView); anchorTop = getDecoratedTop(anchorView); } boolean fillUp = true; int pos = anchorPos - 1; int viewBottom = anchorTop; // int viewHeight = (int) (getHeight() * VIEW_HEIGHT_PERCENT); final int widthSpec = View.MeasureSpec.makeMeasureSpec(getWidth(), View.MeasureSpec.EXACTLY); final int heightSpec = View.MeasureSpec.makeMeasureSpec(viewHeight, View.MeasureSpec.EXACTLY); while (fillUp && pos >= 0){ View view = viewCache.get(pos); // if (view == null){ // - recycler , view = recycler.getViewForPosition(pos); addView(view, 0); measureChildWithDecorationsAndMargin(view, widthSpec, heightSpec); int decoratedMeasuredWidth = getDecoratedMeasuredWidth(view); layoutDecorated(view, 0, viewBottom - viewHeight, decoratedMeasuredWidth, viewBottom); } else { // - // measure/layout . attachView(view); viewCache.remove(pos); } viewBottom = getDecoratedTop(view); fillUp = (viewBottom > 0); pos--; } } private void fillDown(@Nullable View anchorView, RecyclerView.Recycler recycler) { int anchorPos = 0; int anchorTop = 0; if (anchorView != null){ anchorPos = getPosition(anchorView); anchorTop = getDecoratedTop(anchorView); } int pos = anchorPos; boolean fillDown = true; int height = getHeight(); int viewTop = anchorTop; int itemCount = getItemCount(); int viewHeight = (int) (getHeight() * VIEW_HEIGHT_PERCENT); final int widthSpec = View.MeasureSpec.makeMeasureSpec(getWidth(), View.MeasureSpec.EXACTLY); final int heightSpec = View.MeasureSpec.makeMeasureSpec(viewHeight, View.MeasureSpec.EXACTLY); while (fillDown && pos < itemCount){ View view = viewCache.get(pos); if (view == null){ view = recycler.getViewForPosition(pos); addView(view); measureChildWithDecorationsAndMargin(view, widthSpec, heightSpec); int decoratedMeasuredWidth = getDecoratedMeasuredWidth(view); layoutDecorated(view, 0, viewTop, decoratedMeasuredWidth, viewTop + viewHeight); } else { attachView(view); viewCache.remove(pos); } viewTop = getDecoratedBottom(view); fillDown = viewTop <= height; pos++; } } // private View getAnchorView() { int childCount = getChildCount(); HashMap<Integer, View> viewsOnScreen = new HashMap<>(); Rect mainRect = new Rect(0, 0, getWidth(), getHeight()); for (int i = 0; i < childCount; i++) { View view = getChildAt(i); int top = getDecoratedTop(view); int bottom = getDecoratedBottom(view); int left = getDecoratedLeft(view); int right = getDecoratedRight(view); Rect viewRect = new Rect(left, top, right, bottom); boolean intersect = viewRect.intersect(mainRect); if (intersect){ int square = viewRect.width() * viewRect.height(); viewsOnScreen.put(square, view); } } if (viewsOnScreen.isEmpty()){ return null; } Integer maxSquare = null; for (Integer square : viewsOnScreen.keySet()) { if (maxSquare == null){ maxSquare = square; } else { maxSquare = Math.max(maxSquare, square); } } return viewsOnScreen.get(maxSquare); } @Override public int scrollVerticallyBy(int dy, RecyclerView.Recycler recycler, RecyclerView.State state) { int delta = scrollVerticallyInternal(dy); offsetChildrenVertical(-delta); fill(recycler); return delta; } Note that inside fillUp (), views are added using the addView (view, 0) method, not the addView (view), as before. This was done in order to preserve the order of the elements inside the layout - the higher the view, the smaller its sequence number should be.
Wow effect
At this point, we had a completely working LayoutManager, which behaves like a ListView. Now add to it the effect of scaling the bottom card. All you need is one method!
private void updateViewScale() { int childCount = getChildCount(); int height = getHeight(); int thresholdPx = (int) (height * SCALE_THRESHOLD_PERCENT); // SCALE_THRESHOLD_PERCENT = 0.66f or 2/3 for (int i = 0; i < childCount; i++) { float scale = 1f; View view = getChildAt(i); int viewTop = getDecoratedTop(view); if (viewTop >= thresholdPx){ int delta = viewTop - thresholdPx; scale = (height - delta) / (float)height; scale = Math.max(scale, 0); } view.setPivotX(view.getHeight()/2); view.setPivotY(view.getHeight() / -2); view.setScaleX(scale); view.setScaleY(scale); } } Put this method inside fill () last. It sets scale <1 for those views whose upper limit is below 2/3 of the screen. In this case, the scale is smaller, the lower this limit. Additionally, we shift the zoom focus (setPivotX and setPivotY) so that it becomes higher than the view itself. This allows you to create such an effect, as if the bottom card comes up from under the top
If we launch our project now, we will see that everything does not work exactly as expected: the bottom card is drawn on top of the top one, although the opposite was necessary.
This is because the order of drawing views to Android is determined by the order in which they are added. Fortunately, invert the drawing order in RecyclerView is not at all difficult:
recyclerView.setChildDrawingOrderCallback(new RecyclerView.ChildDrawingOrderCallback() { @Override public int onGetChildDrawingOrder(int childCount, int i) { return childCount - i - 1; } }); Well, now everything is in order.
The horizon is not overwhelmed!
Now that we know how to make a vertical LayoutManager, it’s easy for us to make a horizontal mode in its likeness. We need a class field where the current mode (orientation) will be stored, getter- and setter- for it. Also, you will need to implement similar methods fillLeft (), fillRight (), canScrollHorizontally (), scrollHorizontallyBy (), etc.
public enum Orientation {VERTICAL, HORIZONTAL} private Orientation orientation = Orientation.VERTICAL; private int mAnchorPos; public void setOrientation(Orientation orientation) { View anchorView = getAnchorView(); mAnchorPos = anchorView != null ? getPosition(anchorView) : 0; if (orientation != null){ this.orientation = orientation; } requestLayout(); } private void fill(RecyclerView.Recycler recycler) { View anchorView = getAnchorView(); viewCache.clear(); for (int i = 0, cnt = getChildCount(); i < cnt; i++) { View view = getChildAt(i); int pos = getPosition(view); viewCache.put(pos, view); } for (int i = 0; i < viewCache.size(); i++) { detachView(viewCache.valueAt(i)); } switch (orientation) { case VERTICAL: fillUp(anchorView, recycler); fillDown(anchorView, recycler); break; case HORIZONTAL: fillLeft(anchorView, recycler); fillRight(anchorView, recycler); break; } // , // , // for (int i=0; i < viewCache.size(); i++) { recycler.recycleView(viewCache.valueAt(i)); } updateViewScale(); } @Override public boolean canScrollVertically() { return orientation == Orientation.VERTICAL; } @Override public boolean canScrollHorizontally() { return orientation == Orientation.HORIZONTAL; } Implementations of the fillLeft (), fillRight () methods and the definition of scroll boundaries will not be given, because they are very similar to their “vertical” counterparts. Just change top to left and bottom to right and make a layout full screen :). You can see the code in our educational project on github, which we mentioned at the beginning of the article. Also, we draw your attention to the fact that the position mAnchorPos is defined and stored inside the setOrientation (), which is then used inside the fill * () - methods to restore the current article when the orientation changes.
Finally, you need to understand the animation of the transition from vertical to horizontal mode. We will respond to clicks on the card and open the one we clicked on. Since the left and right borders of the view in the vertical and horizontal modes always coincide, we will only have to animate its top and bottom. And the tops and bottoms of all its neighbors :)
Let's write a public method openView (int pos), the call of which will start the animation.
public void openItem(int pos) { if (orientation == Orientation.VERTICAL){ View viewToOpen = null; int childCount = getChildCount(); for (int i = 0; i < childCount; i++) { View view = getChildAt(i); int position = getPosition(view); if (position == pos){ viewToOpen = view; } } if (viewToOpen != null){ openView(viewToOpen); } } } And the animation itself inside the private openView (View view):
Animation
ViewAnimationInfo is just a class structure for convenient storage of different values:
private void openView(final View viewToAnimate) { final ArrayList<ViewAnimationInfo> animationInfos = new ArrayList<>(); int childCount = getChildCount(); int animatedPos = getPosition(viewToAnimate); for (int i = 0; i < childCount; i++) { View view = getChildAt(i); int pos = getPosition(view); int posDelta = pos - animatedPos; final ViewAnimationInfo viewAnimationInfo = new ViewAnimationInfo(); viewAnimationInfo.startTop = getDecoratedTop(view); viewAnimationInfo.startBottom = getDecoratedBottom(view); viewAnimationInfo.finishTop = getHeight() * posDelta; viewAnimationInfo.finishBottom = getHeight() * posDelta + getHeight(); viewAnimationInfo.view = view; animationInfos.add(viewAnimationInfo); } ValueAnimator animator = ValueAnimator.ofFloat(0, 1); animator.setDuration(TRANSITION_DURATION_MS); animator.addUpdateListener(new ValueAnimator.AnimatorUpdateListener() { @Override public void onAnimationUpdate(ValueAnimator animation) { float animationProgress = (float) animation.getAnimatedValue(); for (ViewAnimationInfo animationInfo : animationInfos) { int top = (int) (animationInfo.startTop + animationProgress * (animationInfo.finishTop - animationInfo.startTop)); int bottom = (int) (animationInfo.startBottom + animationProgress * (animationInfo.finishBottom - animationInfo.startBottom)); layoutDecorated(animationInfo.view, 0, top, getWidth(), bottom); } updateViewScale(); } }); animator.addListener(new Animator.AnimatorListener() { @Override public void onAnimationStart(Animator animation) {} @Override public void onAnimationEnd(Animator animation) { setOrientation(Orientation.HORIZONTAL); } @Override public void onAnimationCancel(Animator animation) {} @Override public void onAnimationRepeat(Animator animation) {} }); animator.start(); } ViewAnimationInfo is just a class structure for convenient storage of different values:
private static class ViewAnimationInfo { int startTop; int startBottom; int finishTop; int finishBottom; View view; } Here's what happens inside openView: for each view on the screen, we remember its top and bottom, and we also count its top and bottom, to which this view should “leave.” Then we create and run ValueAnimator, which gives us a progress from 0 to 1, based on which we count the top and bottom for each view during the animation and perform layoutDecorated (...) with the necessary values in each animation cycle. At the moment when the animation ends, call setOrientation (Orientation.HORIZONTAL) for the final transition to horizontal mode. Smooth and discreet.
Remove the sample
It is a pity that it will not be possible to place all the useful information about the LayoutManager in just one article. If necessary, you can see something in our training project (for example, the implementation of smoothScrollToPosition ()), and you have to search for something yourself.
In conclusion, I would like to say that LayoutManager is an extremely powerful and flexible tool. RecyclerView + CustomLayoutManager has repeatedly come to our aid in solving very unusual design problems. It opens up spaces for animating both the views themselves and the content in them. In addition, it greatly expands the possibilities of optimization. For example, if the user wants to perform smoothScroll () from the 1st element to the 100th, it is not necessary to honestly scroll through all 99 elements. You can cheat and add the 100th element to the layout before scrolling, and then scroll to it, saving a lot of resources!
However, LayoutManager is not so easy to learn from scratch. To effectively use it, you need to be well aware of how custom views are created, how measure / layout cycles work, how to use MeasureSpec, etc. in the same spirit.
Related Links:
Training project with an example of LayoutManager: https://github.com/forceLain/AwesomeRecyclerView
An article in 3 parts about creating your LayoutManager, similar to GridLayoutManager in English: http://wiresareobsolete.com/2014/09/building-a-recyclerview-layoutmanager-part-1/
Source: https://habr.com/ru/post/267497/
All Articles